Starfield: How to build ships?
In Starfield, you can build your own ship from scratch, but the process is not easy, as the game does not explain it thoroughly. Our guide explains how to build ships.
Last update:
From this guide page, you will learn how to build your own ships in Starfield. We explain what is needed for the ship to operate, which parts are necessary, and which are optional.
- Where can you build ships?
- Essential skills
- Navigation in Shipbuilder
- Unresolved errors and warnings
- Connecting parts
- Painting the ship
- Cockpits
- Reactors
- Landing Bays
- Gravity drives
- Landing gear
- Engines
- Dockers
- Fuel tanks
- Habs
- Cargo Holds
- Shields
- Weapons
- Components
Where can you build ships?
There are two ways to build your own ship in Starfield.
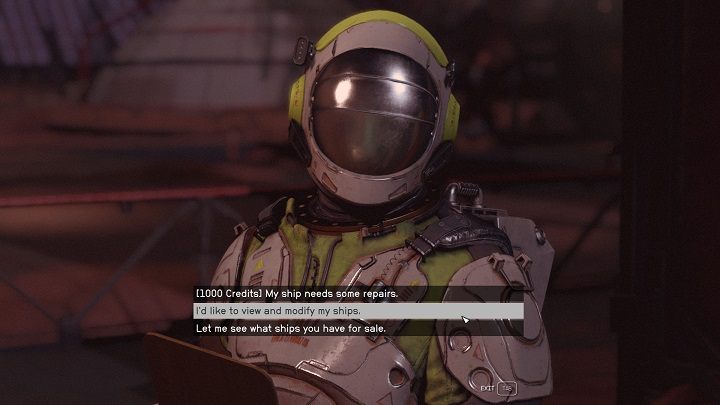
The simplest option is to go to the Ship Services Technician. Such NPCs can be found in space ports in larger locations such as Cydonia, Akila, or New Atlantis.
- Interacting with a technician, choose the option "I'd like to view and modify my ships".
- Choose one of your ships, then select the "Shipbuilder" option.
- You can modify your ship or remove all its parts and build a new machine completely from scratch.
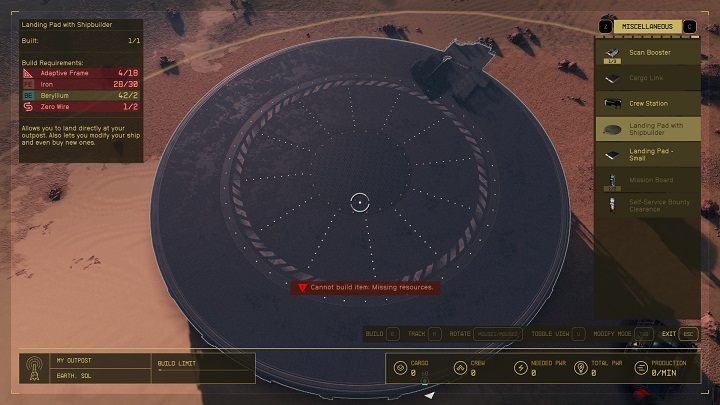
Ships can also be built in your own outposts. This option is more convenient than constantly flying to different technicians, but it is not as simple.
- If you are at the outpost, go into Build Mode (turn on the scanner, then click "R" on the keyboard/"X" on the controller).
- In the "Miscellaneous" tab , select and build a Landing Pad with Shipbuilder.
- For the construction, you will need iron, several zero wires, adaptive frames, and beryllium.
- Iron and beryllium can be found during exploration or purchased from particular traders, such as the one in the Mining League in Neon City.
- Zero wires and adaptive frames are created using an Industrial Workbench - you can build it your home or outpost or search for it in the game world (one is in the Neon Mining League).
After building the Landing Pad, go up the stairs. Using the Shipbuilder console, you can modify your ships and create and purchase new ones.
We recommend building ships at the Landing Pad in your Outpost. The creator's console provides access to many parts used to build your ship. You will find fewer parts at the technicians, but it's still worth visiting them - some have premium parts for sale, which are not available in the creator console.
Essential skills
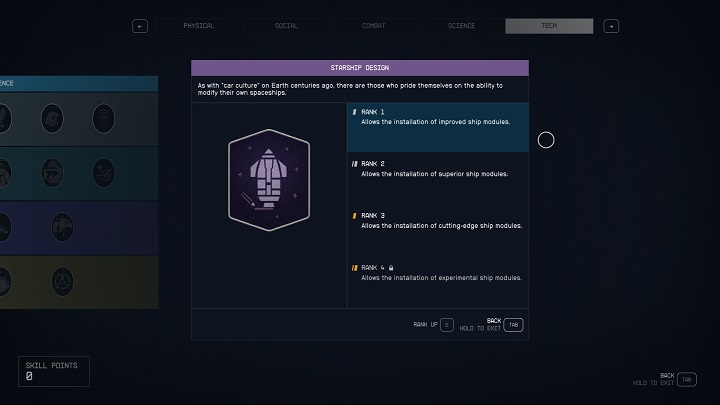
When starting the construction of your own ship, it's worth investing in two skills:
- Ship Design - thanks to this you will be able to install better modules, from higher ranks.
- Piloting - if you build a ship with a high rank (B or C), you must have the appropriate piloting rank to be able to control it.
Navigation in Shipbuilder
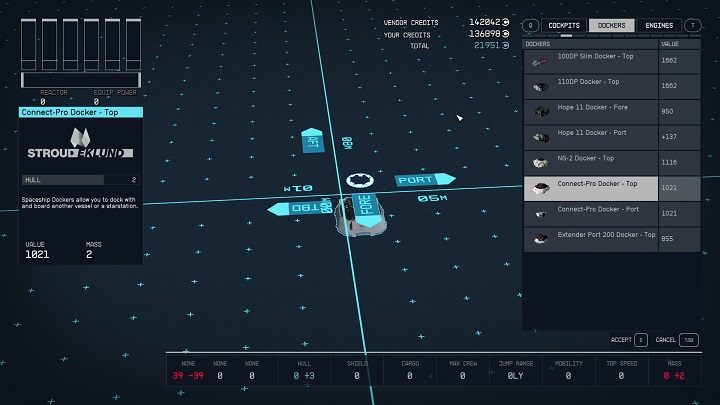
Building anything in the Shipbuilder can be a difficult job at first, mainly due to the unintuitive navigation. Below we have detailed the most basic information related to this issue.
1. Double-clicking the left mouse button or single-pressing "LB" on the controller will select the entire ship. That way you can easily remove it by using the "Delete" key or the "X" button on the controller. Thanks to this, you will be able to start building a new ship.
- Parts can be built on top of each other, so the ship consist of floors. To place an item higher or lower, you need to change the floor ("R" and "F" keys on the keyboard/"d-pad" on the controller .
- By pressing the "G" key/the "A" button on the controller, you will add new parts.
- By hovering over the part of the ship that you have already placed and then clicking "G" on the keyboard/"A" on the controller, you will only see a list of things that can be connected to the selected part. This significantly simplifies building the ship.
- Holding the left mouse button on a part or clicking "A" on the controller allows you to move it.
- Holding the left control and clicking "Z" or "Y" will undo or redo the last action . On the controller you do it with the "d-pad".
- Individual parts of the ship can be duplicated. Using the keyboard, hold down the left control, hover the cursor over the selected part, and press "G." On the controller, just hover the cursor over the part and press "Y."
- After pressing the "C" key/menu button on the controller, a screen with all errors will show. You can also add weapons here.
- The camera is rotated by holding down the right mouse button or using the right stick on the controller.
- Some parts can be rotated. After selecting the part, press the "Z" key / the "Y" button on the controller.
Unresolved errors and warnings
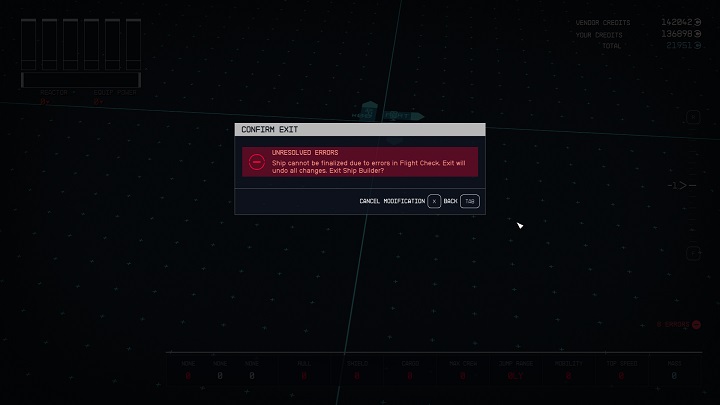
If you want to finish building the ship and exit the creator, it may happen that the message "Unresolved errors" appears on your screen. This means that you did not build the ship correctly and you will not be able to save it. You will find out what you did wrong by pressing the "C" key/menu button on the controller.
Below, we have listed the errors that appear the most frequently.
- The ship has Unattached modules.
- Too many cockpits or no cockpits - the ship must have exactly one.
- Too many reactors or none - the ship must have exactly one.
- Too many graviton drives or none - the ship must have exactly one.
- Too many landing bays or none - the ship must have exactly one.
- Too many docks or none - the ship must have exactly one.
- No landing gear - the heavier and larger the ship, the more of them it needs.
- No engine - you need at least one.
- No fuel tanks - you need at least one.
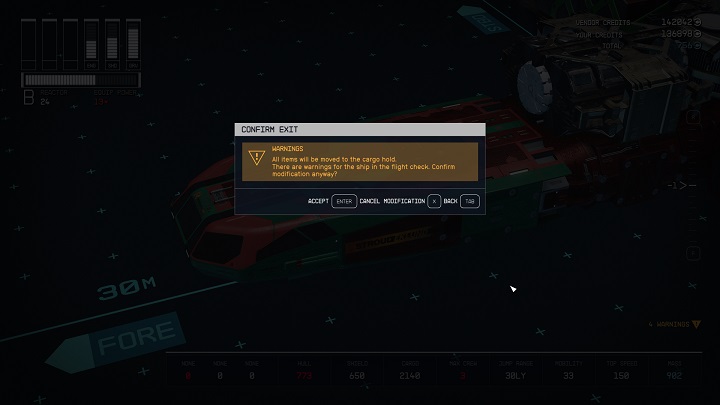
The warnings indicate that the ship is missing something or is too heavy, causing it to lose mobility. It's worth considering the warnings and fixing some issues with the ship, but it's not required. You can finish building the ship despite the displayed warnings.
Connecting parts
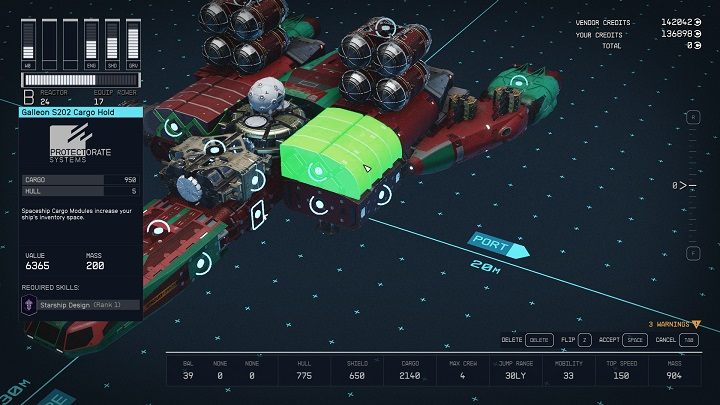
Building a ship in Starfield is like connecting blocks - the parts must be attached in the right place.
- The individual parts can be connected in the places where you can see the blue circles.
- On the other hand, blue triangles indicate that you can enter a certain part of the ship. Connecting them can therefore create corridors.
Painting the ship
You can paint specific parts of the ship as you want - it does not involve an additional cost.
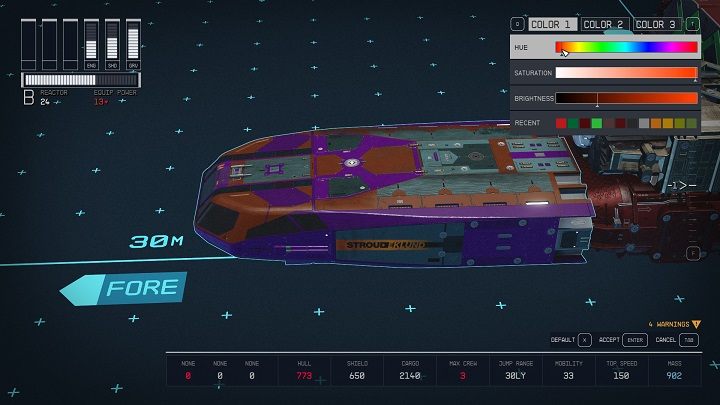
- To paint a part of the ship, hover over it and press the "J" key/"LS" button on the controller.
- Each part can have a maximum of 3 different colors . You can adjust their tone, saturation and brightness.
- The colors you've recently used are displayed below. Thanks to this, you can paint the entire ship in the same colors.
Below, we have described the individual parts of the ship so that you will better understand the process of building it.
Cockpits
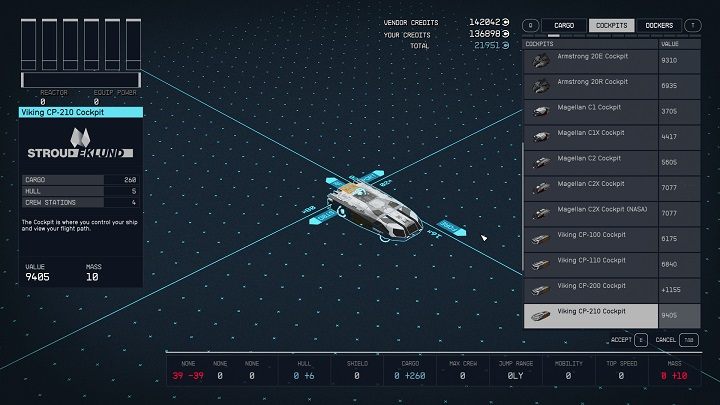
- If you are building a new ship completely from scratch, we recommend starting with the cockpit.
- The ship must have one cockpit in the front.
- The design of cockpits makes it impossible to connect them with many other parts.
- Each cockpit increases a cargo capacity.
Reactors
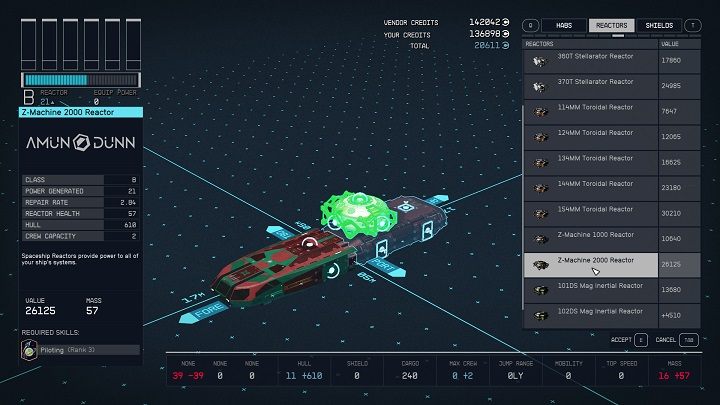
- Each ship must have one reactor. In our guide you will find a page with tips on choosing the best reactor.
- The reactor provides power to all systems - the reactor's power is symbolized as lines under the information about individual systems (in the upper left corner of the screen).
- The class of the reactor must match the class of the rest of the ship's parts. However, you can install weaker components than the reactor. For example: with a class B reactor, you can install parts of class A and B, and by choosing a class C reactor, you can have components from all classes.
Landing Bays
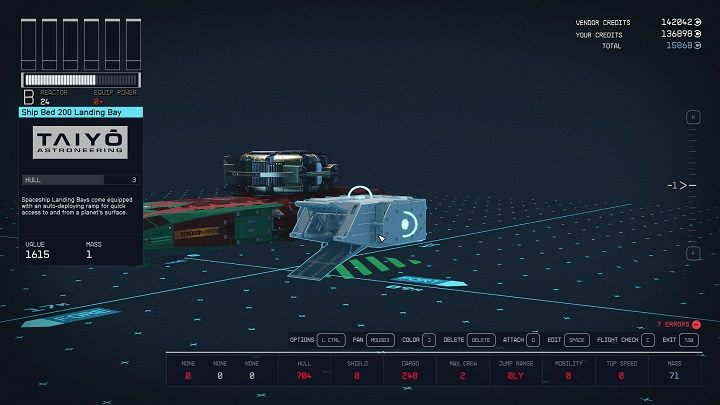
- Your ship must have one landing bay.
- We recommend installing the bay at the front of the ship - this way, you don't have to go around the entire machine every time you want to get into the ship and fly off the planet.
Gravity drives
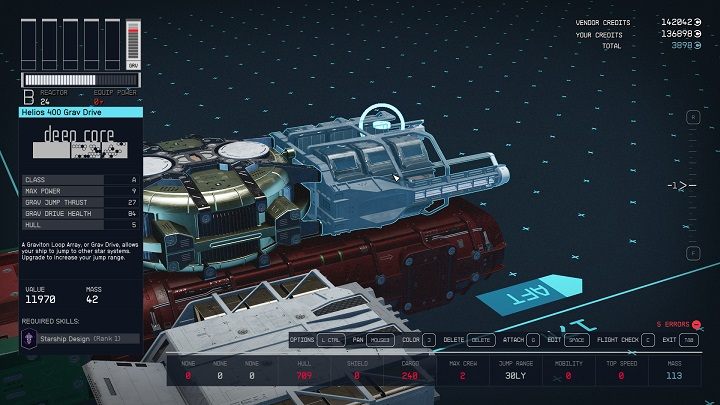
- The ship must have one drive.
- It allows you to jump between systems (in light years).
Landing gear
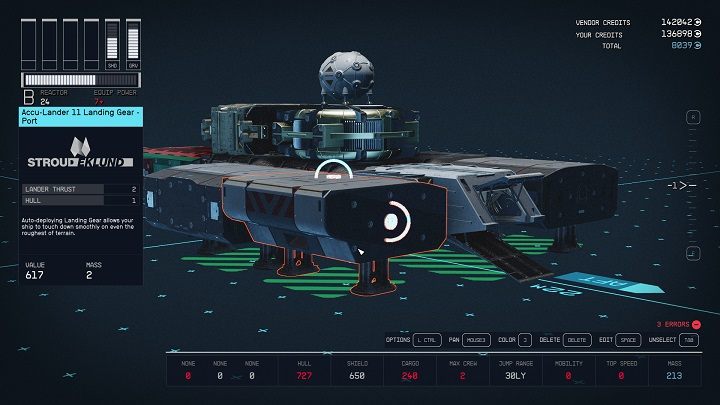
- The landing gear supports the ship.
- The heavier and larger the ship , the more of them you need.
- You can't build a ship without at least one landing gear.
Engines
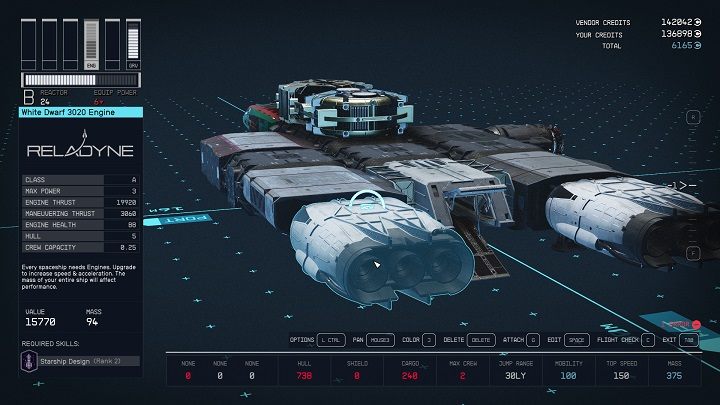
- A ship needs at least one engine.
- The engines increase the mobility, and thus the ship's maneuverability in space. The more good quality engines you install, the better.
Dockers
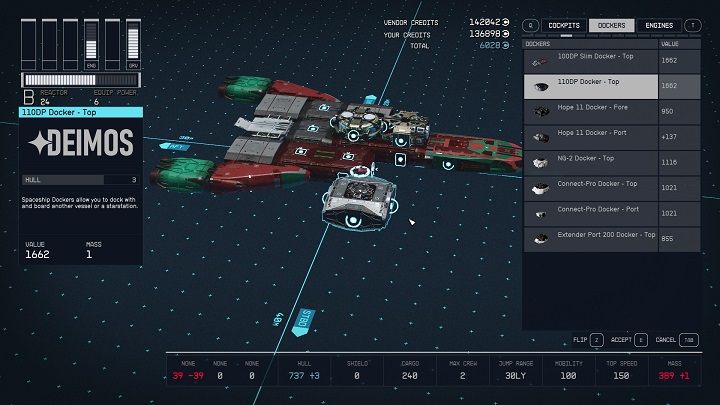
- Your ship needs one docker.
- The docker must be installed on the edge of the ship.
Fuel tanks
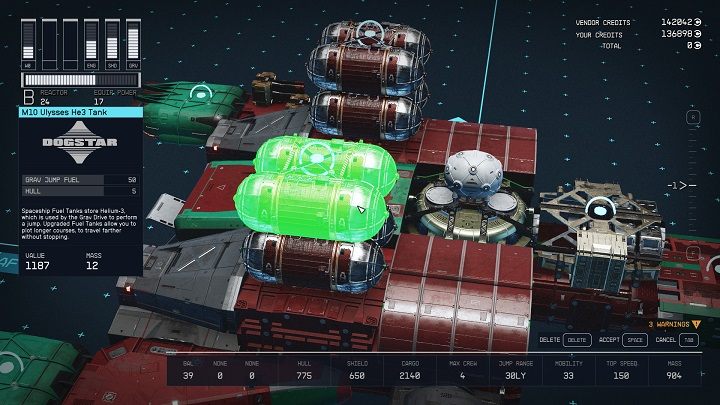
- The ship needs at least one fuel tanks.
- Fuel tanks increase fuel capacity, so if you install multiple tanks, you won't need to take breaks when traveling to distant systems. You can read more about this in our guide on the page How to increase ship fuel capacity?.
Habs
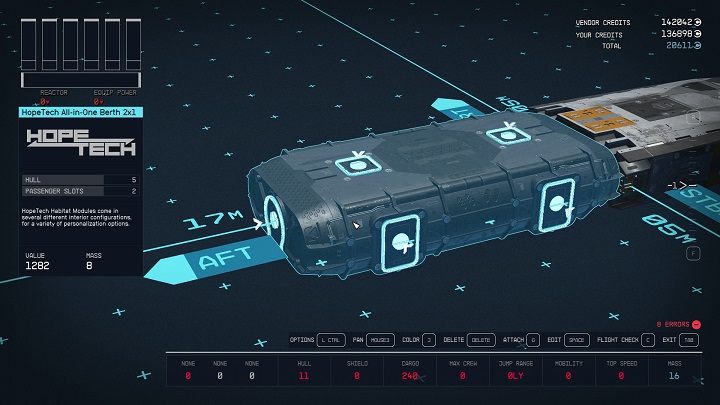
- Habs are parts of the ship you can move on while on board.
- They are not necessary for the ship to operate, but they make it easier to attach other parts to each other.
- To be able to move from one hab to another after completing your ship, you must connect them in the creator using blue rectangles.
Cargo Holds
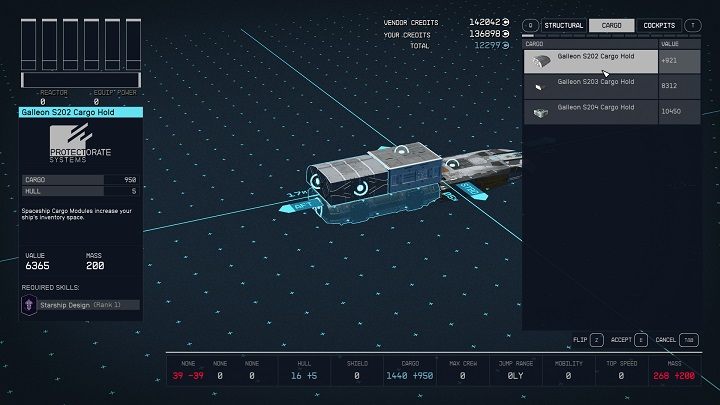
- A cargo hold is not required to build a functional ship, but it is worth having at least one, as it lets you store more items. You will find more on this topic on the page How to increase cargo capacity?.
Shields
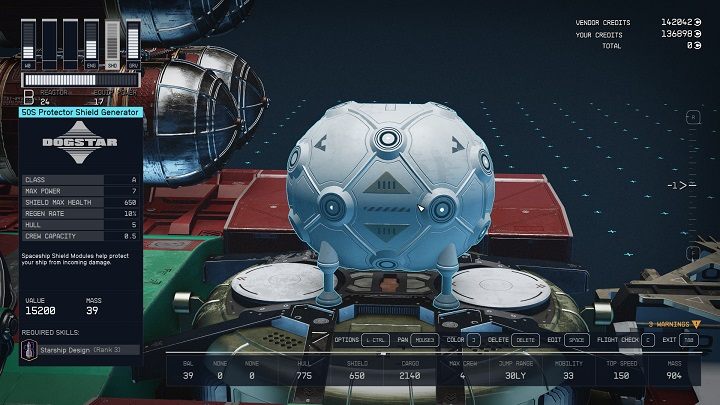
- You can build a shield on your ship, but it is not required.
- Thanks to it, you will have extra protection during battles in space.
Weapons
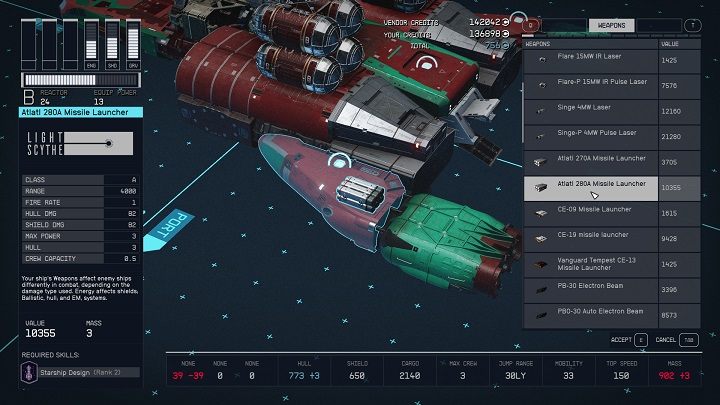
- You can build a ship without any weapons, but then you will not be able to defend yourself.
- The weapons are installed on appropriate slots, which can be found in the "components" section.
- You have to assign a weapon for it to work. For this purpose, while in the shipbuilder, press the "C" key/menu button on the controller, select "weapons", then a specific weapon, and assign it to the slots.
- You can have a maximum of 3 weapons on your ship.
Components
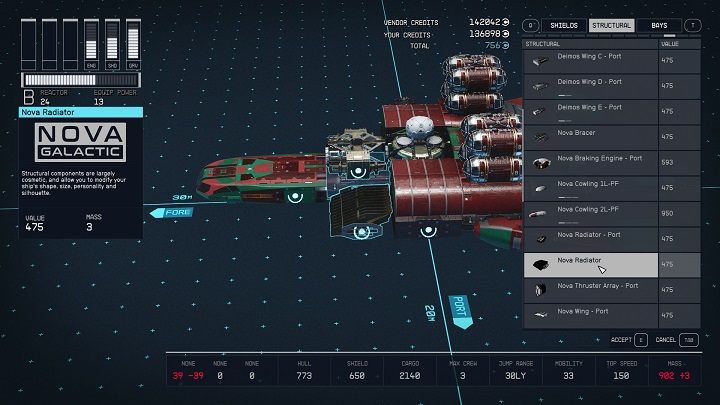
- The components are mostly cosmetic items.
- Weapons can be installed on some components (cowling, weapon mounts).
- Starfield Guide
- Starfield: Game Guide
- Starfield: FAQ
- Starfield: Ship
- Starfield: How to build ships?
- Starfield: How to repair a spaceship?
- Starfield: How to perform a Grav Jump?
- Starfield: How to hide contraband on a spaceship from the scanner?
- Starfield: Where is the ship's cargo hold?
- Starfield: How to increase the ship's cargo hold capacity?
- Starfield: How to get a free ship?
- Starfield: How to increase ship fuel capacity?
- Starfield: How to redirect power to the different systems of the ship?
- Starfield: How many spacecraft can you own?
- Starfield: How to loot destroyed ships?
- Starfield: How to rename a ship?
- Starfield: Can you climb ladders?
- Starfield: Ship
- Starfield: FAQ
- Starfield: Game Guide
You are not permitted to copy any image, text or info from this page. This site is not associated with and/or endorsed by the developers and the publishers. All logos and images are copyrighted by their respective owners.
Copyright © 2000 - 2025 Webedia Polska SA for gamepressure.com, unofficial game guides, walkthroughs, secrets, game tips, maps & strategies for top games.
