Baldurs Gate 3: Grymforge in BG3 - walkthrough
Are you lost in Grymforge in BG3? Our guide will help you get to the Adamantine Forge - freeing True Soul Nere, saving gnomes, Grym, cursed Monk, and Mithral ore.
Last update:
In this BG3 guide, you will learn how to get through Grymforge and complete act 1. We explain how to free True Soul Nere and how to remove the rubble. We describe the quest to save the gnomes in the forge, the path to the Adamantine Forge and where to find Mithral ore. At the end of the page, you will find tips on how to defeat Grym and how to help the Cursed Monk.
- Grymforge
- Free True Soul Nere
- Save the Grymforge Gnomes
- Deliver Nere's Head
- Get Past the Rubble
- How to deal with a trap with a burning gargoyle?
- How to get to the Adamantine Forge?
- How to defeat Grym?
- How to use the Adamantine Forge?
- Help the Cursed Monk
Grymforge
You will get to Grymforge using the boat moored on the beach in Underdark. If you want to use the boat, you will first have to complete Find the Missing Boots quest. Alternatively, you can fight the Duergars and take over their ship.


In the forge, you will find an elevator leading to the exit from the Underdark to the Shadow Cursed Lands, the location that starts act 2. If you want to quickly finish act 1, after entering the forge, head east to the elevator where a few Duergars are standing.

Grymforge is divided into several regions, including 2 Waypoints.
- Grymforge - this is the place where you will start exploring the forge. In this region you will unlock the quest Free True Soul Nere and complete the quest Save the Grymforge Gnomes.
- Ancient Forge - here you will find the passage to the Adamantine Forge and the items needed to forge adamantine armor and weapons.
- Adamantine Forge - here you will face a strong boss, Grym, and you will be able to forge adamantine armor and weapons. In this place, you will also find a mysterious necklace related to the quest Help the Cursed Monk.
After you leave the ship, Morghal will approach you, demanding payment for passage. Choose the second dialogue option if you want to go to the forge without paying. You are now able to freely explore this area.
Free True Soul Nere
After arriving at the forge, you will be send to Thrinn. If you have the boots that were stolen from her, you can return them now. During the conversation, you will find out that Nere was imprisoned by rubble in a poisonous room. If he is not released soon, he will die. Agree to help in removing the stones.
If you want to free Nere, you need to hurry up. Exploring the forge for too long or traveling to the camp too often will advance time significantly, and Nere will die from the poisonous gases. So you should complete this quest first and make sure you have enough health, as this quest involves an avoidable fight after removing the rubble. When the rubble is removed, you will be able to choose who to defeat - ally with Nere and defeat the rebellious dwarves or kill Nere and his brethren.

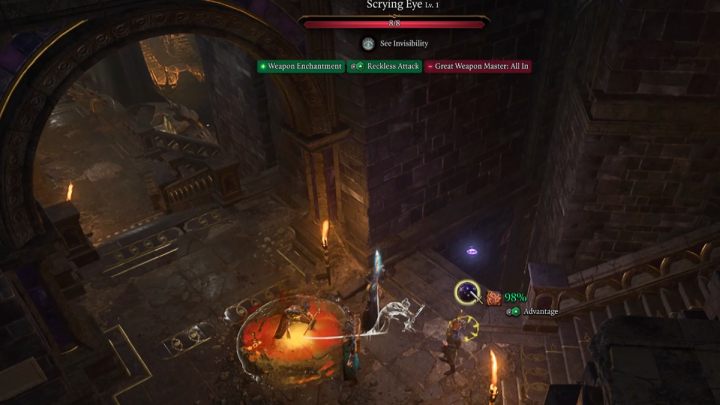
If you want to free the gnomes and choose the good side, you must kill Nere. At the stairs, you will meet Brithvar. Talk to him and tell the man that you also want to get rid of Nere. The dwarf will help you in the fight if you first eliminate the levitating sphere patrolling the area. However, you must do this quietly and without witnesses, otherwise you will be attacked or put in prison. When you get caught, you can also try to bribe the guard.
Approach the orb. Once the orb starts following you, lure it to a secluded spot and attack. One accurate shot or a strong spell should kill it instantly. Tell Brithvir that the task is complete. Now you can take care of removing the rubble.

To destroy it, you will need something stronger than regular explosives. Interact with the gnomes and pass the skill check to eavesdrop on their conversation. Tell them that Tulla sent you and offer your help. In return , you will receive the location of Philomeen's hideout.
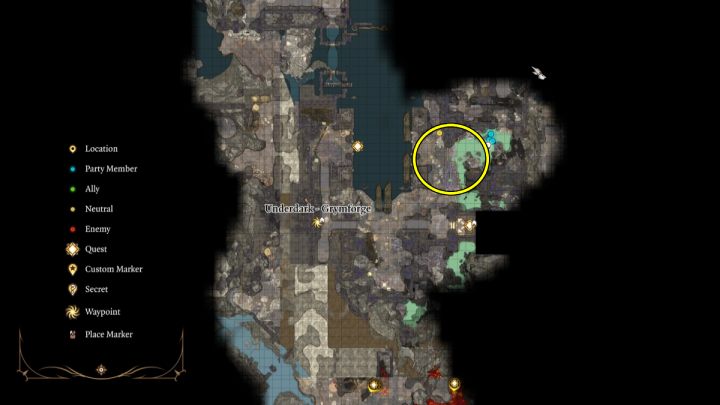

Open the small metal door in the eastern part of the forge's lowest floor.

Go to the end of the room and press the button on the wall on the right side. In the secret chamber you will find some explosives.


Go now to the big doors near the bodies of dead gnomes. Enter inside and take all the valuable items from the tables - you can sell the silverware at any merchant. On the left side of the chamber you will find a button that opens a secret passage. Follow the corridor until you find the large doors. Keep moving through the rubble until you reach the stairs where a group of enemies will attack you.
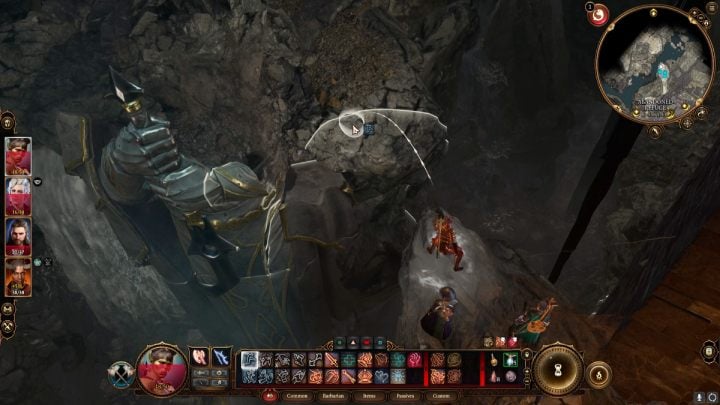
Go up the stairs and keep going forward. Jump over the chasm and enter the hideout through the door or go around the wall and find a hole in it.

During a conversation with the gnome, you will be able to do a skill check to persuade her to give you the Runpowder vial. You can now return to the rubble and free Nere.

Return to the rubble and place Philomeen's vial next to it. You can also place other explosive materials. Once you do this, the gnomes will back off to a safe distance. Do the same and hit the vial with a fireball or another fiery projectile.

Approach the explosion site and wait for the cut-scene. Choose which side to take:
- If you choose Brithvara and the gnomes, you will fight with Nere and his minions. As a reward, you will receive all of Nere's equipment and you will be able to cut off his head to deliver it to the Mykonid colony in the Underdark.
- If you choose Nere, you will have to defeat the rebellious dwarves. And as a reward, he will give you a tadpole. This scenario will not help the gnomes.
Before you start the fight with Nere, equip one party member with the Ring of Mind-Shielding, provided you got it after completing the Help Omeluum investigate the Parasite quest in the Underdark.

In the fight with Nere, you will have to defeat him and 6 Duergars. If you've previously agreed with Brithvar, you will receive 6 allies for this battle. Focus on defeating the main opponent and the mages, who will often cast mind control spells.
After winning the fight, release the gnomes during the conversation with Brithvar. On Nere's body, you'll find a Broken Moonlandern, a tadpole in a jar, Disintegrating Night Walkers, a dagger and a Sword of Screams that deals extra acid and psychic damage.
Save the Grymforge Gnomes
If you saved Tulla, the gnome you met in the Underdark, she gave you a quest to save the gnomes in the forge.

Talk to Beldron after killing Nere and defend the gnomes from Brithvar. You will receive a small payment and learn that one of the gnomes, Wulbren, has been taken to the Moonrise Towers. You can offer them help and meet them later in act 3.
Deliver Nere's Head
If you completed the Defeat the Duergar Intruders quest in the Underdark, after defeating Nere, cut off his head and deliver it to the Mykonid colony. As a reward, you will receive the Envoy's Amulet.
Get Past the Rubble

You will encounter several Duergars and oxen near the rubble. Cast a talk animal spell on yourself or drink a potion and talk to the oxen. Convince them to attack the Duergars. After the battle is won, speak again with the oxen and ask them to remove the rubble.
How to deal with a trap with a burning gargoyle?
In the northern part of the forge, on its upper floor, you will find a trap with a fire-breathing gargoyle standing behind a closed grate. The best way to deal with this trap is to send a person there who possesses the Mage Hand spell.


You do not have to deactivate all the traps. After passing perception check, you will discover traps and will be able to simply avoid or jump over them.

When you get to the gargoyle, conjure a hand behind the bars and use it to pull the lever. This deactivates the gargoyle and opens the gate.
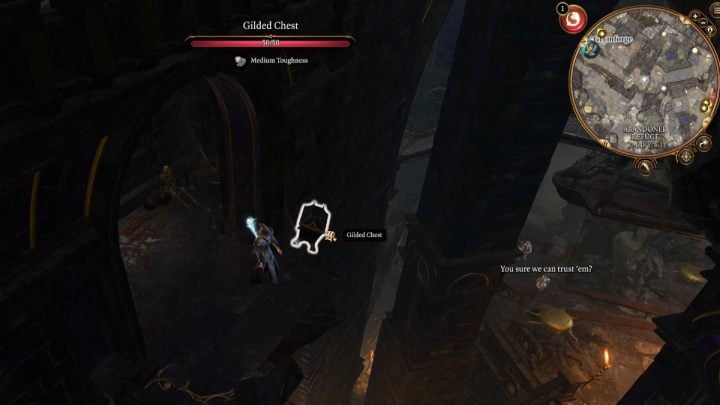
By the gargoyle you will find an Idol of Shar which you can give to Shadowheart and a chest with some potions and The Protecty Sparkswall clothing.
How to get to the Adamantine Forge?


There is a ladder next to the traps and the fire-breathing gargoyle. Go down and stand by the levers.

Pull the levers and wait until a platform appears, make one person from your party jump onto it. Pull both levers again. Jump off the platform and head to the end of the corridor.

Jump over the abyss and keep going until you reach the stairs and the next levers. On the way, examine the skeletons lying on the ground and take the Steel Moulds - these items will come in handy in the Adamantine Forge.

Send the next person from your party to the metal bridge. Make this person reach its end.


Return to the first party member and pull both levers. Wait until the platform reaches the second party member. Send them to the other side of the forge. You will find there another Waypoint - the Ancient Forge. You can now teleport the rest of the party there.
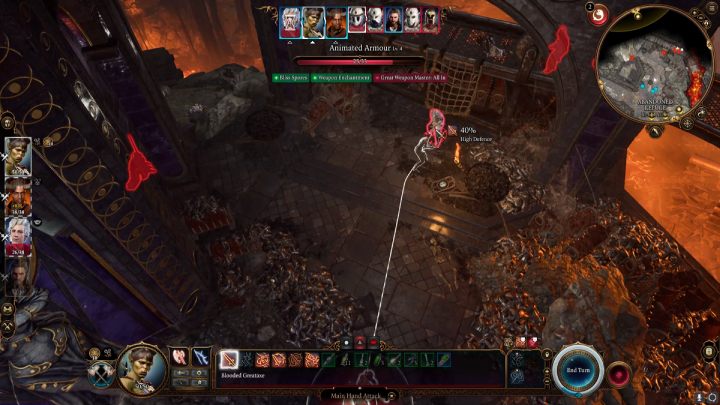
Going further, you will encounter 4 opponents. Defeat them and go down the stairs.


Jump down and pull the lever on one of the wheels to activate the anvil and descend.
How to defeat Grym?
Grym is an optional boss from the Adamantine Forge. You will get there by going through the Underdark, heading to Grymforge.

When you go down to the Adamantine Forge, turn the Lava Valve. Grym will appear after the cut-scene.
When you open the valve, the room will flood with lava. First, set all party members on round platforms so they don't receive fire damage.

Grym is a very strong level 8 opponent. However, there are a few ways to easily deal with him.
First, in order to damage a Grym, he must be standing in lava. Otherwise, Grym's armor hardens, giving him protection from every attack. Have one party member always stand close to the lava valve. Every now and then the lava will cool down - you will have to turn the valve again.
Grym will not attack you for the first 2 turns. Then use your strongest attacks, while making sure that your characters don't step into the lava.
Grym has increased resistance to almost every type of damage, his only weakness being bludgeoning.

Grym can perform several actions during his turn. However, there is a way to avoid his attacks. Every time someone hits Grym, they receive Prime Target status. You can use this to your advantage. Always attack last with the person who is furthest away from the opponent. In this way, when Grym starts his turn, he will not be able to reach that person.
Another method to quickly defeat Grym is to lure him to the center of the platform and drop a huge anvil on him.
For defeating Grym, you will receive the Grymskull Helm.
How to use the Adamantine Forge?
When you get to the forge and defeat Grym, you will be able to create armor or weapons.

To forge new equipment, you will need Mithral ore and Steel Moulds. You can easily find moulds in various parts of Grymforge. There are many moulds lying near the entrance to the Adamantine Forge.

You can find Mithral ore in 2 places. One of them is south of the Ancient Forge Waypoint. Try to hit it with any weapon, or use a spell to crush the stone and pick up the ore. The second ore is north of the Adamantine Forge.


Put the Mithral ore into the anvil, and the mould into the casting. Pull the lever to lower the anvil and take the newly created piece of equipment.
Depending on the mould you used, you can make:
- Adamantine Split Armor
- Adamantine Scale Mail
- Adamantine Shield
- Adamantine Scimitar
- Adamantine Mace
- Adamantine Longsword
Think carefully about what you want to create. You will only have 2 Mithral ores at your disposal.
Help the Cursed Monk
In Grymforge, you may come across the Dark Justiciar's Journal. After reading it, you will unlock the Help the Cursed Monk quest.


You will find the journal next to the skeleton, not far from the boat you used to get to the forge. If Shadowheart is in your party, examining the body will unlock a new dialogue with the Cleric.


To find the Monk, you must go to the Adamantine Forge. Jump to the western part of the area and go down the rocks by the lava. Send one party member there, preferably someone with a lot of Dexterity and a bonus to Sleight of Hand.
Keep jumping over the rocks until you reach the stairs. Go up and open the chest. Watch out for burning surfaces and erupting magma.
A Lava Elemental will be patrolling the area near the chest - it should not attack you, we also do not advise getting into a fight with it. This is a very strong opponent at a much higher level than your party.
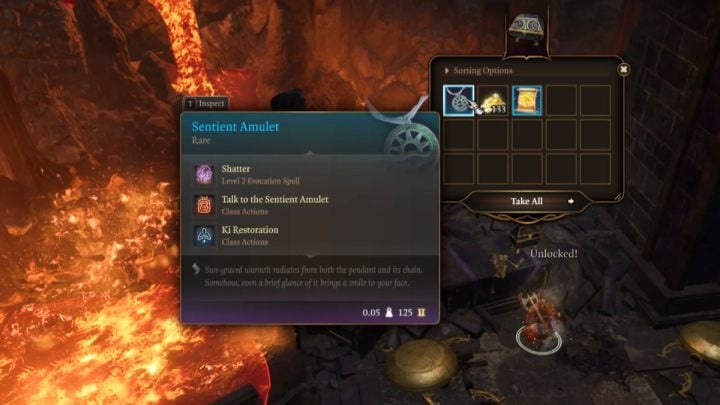
To open the chest you have to roll at least a 20 on the dice. When you take the Sentient Amulet, a cut-scene will play. Pas the Wisdom skill check and ask the spirit for task details. The monk will ask you to give the amulet to his daughter - you will meet her in act 3.
- Baldurs Gate 3 Guide, Walkthrough
- Baldur's Gate 3: Walkthrough
- Baldur's Gate 3: Act 1
- Baldurs Gate 3: Removing the Parasite walkthrough
- Baldurs Gate 3: Explore the ruins walkthrough
- Baldurs Gate 3: Free Lae'zel walkthrough
- Baldurs Gate 3: Child's trial walkthrough
- Baldurs Gate 3: Get help from Healer Nettie walkthrough
- Baldurs Gate 3: Save the Goblin Sazza walkthrough
- Baldurs Gate 3: Hunt the Devil walkthrough
- Baldurs Gate 3: Rescue the Trapped Man walkthrough
- Baldurs Gate 3: Rescue the gnome walkthrough
- Baldurs Gate 3: Search the Cellar walkthrough
- Baldurs Gate 3: Find the Missing Shipment walkthrough
- Baldurs Gate 3: Ask the Goblin Priestess for Help walkthrough
- Baldur's Gate 3: Save the First Druid - walkthrough
- Baldurs Gate 3: Deal With Auntie Ethel walkthrough
- Baldurs Gate 3: Teahouse in BG3 - walkthrough
- Baldur's Gate 3: Underdark in BG3 - walkthrough
- Baldurs Gate 3: Grymforge in BG3 - walkthrough
- Baldur's Gate 3: Mountain Pass
- Baldur's Gate 3: Find the Githyanki Creche - walkthrough
- Baldur's Gate 3: Act 1
- Baldur's Gate 3: Walkthrough
You are not permitted to copy any image, text or info from this page. This site is not associated with and/or endorsed by the developers and the publishers. All logos and images are copyrighted by their respective owners.
Copyright © 2000 - 2025 Webedia Polska SA for gamepressure.com, unofficial game guides, walkthroughs, secrets, game tips, maps & strategies for top games.
