Act 1 Baldur's Gate 3 Map
Baldur's Gate 3: Interactive Map Prologue, Act 1
Our interactive map for BG3 is about the locations from the prologue (Nautiloid) and Act 1. The guide shows all the places and secrets from the regions of Overgrown Ruins, Adventurous Cliffs, Druid Grove, Path of the Awakened, Abandoned Village, Goblin Camp, Destroyed Sanctuary and Tea House by the River, among others.
Last update:
On this page of our Baldurs Gate 3 guide, you can find interactive maps of the locations from Prologue and Act 1 of the campaign. Among the locations, we have Nautiloid, Overgrown Ruins, Druid Grove, The Risen Road, Underdark, Waukeen's Rest, Blighted Village, Riverside Teahouse, Goblin Camp, and Shattered Sanctum. On individual maps, among other things, we've marked meeting places of companions, important locations, unique NPCs, secrets and treasures, closed passages and containers, merchants, traps or bosses.
- Nautiloid - Prologue
- Overgrown Ruins
- Roadside Cliffs
- Druid Grove
- The Risen Road
- Waukeen's Rest
- Blighted Village
- Goblin Camp
- Shattered Sanctum
- Riverside Teahouse
Nautiloid - Prologue

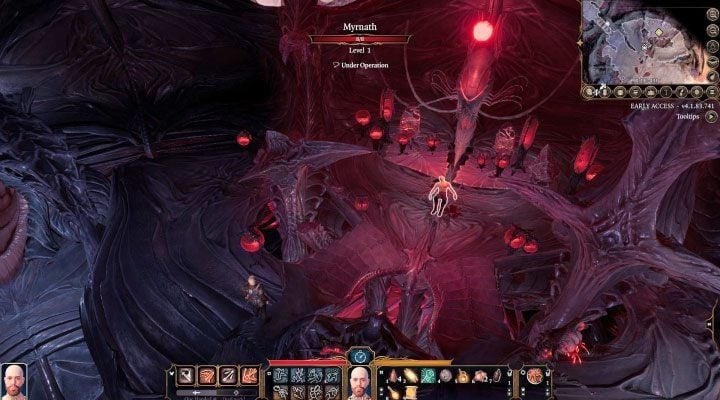
- The airship Nautiloid is a part of Mind Flayers' fleet and on board it the Prologue takes place. The whole segment takes around 1 hour to complete. The events on the ship lead to its crash and you won't be able to explore it anymore, but in the Roadside Cliffs area you can find its wreck, where you can search for loot and any possible survivors.
- During the section on the ship, you'll be able to recruit your first potential companions. In case of Laezel, there aren't any prerequisities, while Shadowheart has to be freed from her capsule first. Additionally, you'll have a chance of recruiting a temporary companion My - a talking brain that has to be extracted from character Myrthal first.
- On the ship, you'll mainly face imps, and these battles are mandatory. They will be standing between you and the captain's bridge which you need to reach in order to activate the transponder. Interacting with this device concludes the Prologue.
Overgrown Ruins

- The Ruins are the first location visited in Act 1, as the beach is where you'll wake up after surviving the crash.
- The crypt north from the beach is the first dungeon of the game. There are a few possible ways of accessing it. You can, for example, attempt to open the southern door, find the northern hatch, or reach the northern chapel. The path through the chapel involves a fight against looters and there are some vines there to climb.
- During the exploration of the crypt, you'll need to avoid traps and survive encounters with monsters (among others, skeletons). There are also some secret pathways here, and additionally you can collect loot from sarcophaguses and other containers. Moreover, you can encounter Hooded Skeleton here and find unique Amulet of Lost Voices.
- In the vicinity of the crypt entrance, you can encounter Shadowheart and recruit her into the party as a companion. She will appear at crypt entrance only if you haven't freed her during the Prologue.
- In the ruins area, you'll also find your first Ancient Rune Circle. They serve as fast travel destinations, but to be able to teleport to location of need, you need to discover a circle in that area first.
Roadside Cliffs

- This region is north-west from Act 1 starting location. Most of the area is taken by the wreck of Nautiloid - the airship from the Prologue. While searching the wreck, a confrontation with Mind Flayers may occur, and you may also encounter Intellect Devourers.
- There is a choice of recruitable companions in this region. Astarion will join willingly once you find him southwest of the wreck, same as Gale who can be encountered at an Ancient Rune Circle north from the wreck.
- Recruiting Laezel, who is imprisoned in a cage north of the wreck is more problematic. Tieflings can be dealt with through diplomacy or combat, and then you need to open the cage where githyanki is held.
Druid Grove

- Druid Grove is the largest friendly location from Act 1. Upon arriving at the grove for the first time, it is necessary to first help defeat a group of goblins, who have set up at the southern entrance. Only after winning this battle will you be allowed inside. Alternatively, you can also help the goblins attack the grove and for that, you need to meet with their leaders in the goblin camp. Teaming with the goblins will make peaceful interactions with the grove impossible.
- In the grove area there is a potential companion, Wyll, whom you can recruit to the team. If you helped the goblins attack the grove, then the chance to recruit Minthara will also appear.
- In the grove you can meet many traders. Among them Arron (potions, scrolls, clothing, melee weapons, lockpicks), Dammon (melee and ranged weapons, armor, arrows), Auntie Ethel (potions, alchemy ingredients) and Mattis (Thieves Tools, rings).
- From the grove, you can enter the Emerald Grove sublocation. A visit here will be required in the course of the main story. In Emerald Grove, you can find Archdruid Kagha and Nettie, who will offer help in removing the parasite. Another location adjacent the Grove is Underground Passage dungeon, filled with traps and optional combat.
The Risen Road

- In The Risen Road, you can encounter Karlach and even recruit her, but only after you help the tiefling in solving the problem of the paladins that hunt her. Alternatively, you can side with paladins to hunt and kill the tiefling woman. Among the paladins is Cyrel, a merchant offering potions, scrolls, arrows, and thieves tools.
- The area is filled with gnolls and other monsters. Nevertheless, most fights can be avoided by choosing different roads or by sneaking. You also have to watch out for traps.
- In the cave to the north, a group of survivors from an attack on a caravan are hiding. You can help them defend against a massive gnoll attack or let them be massacred.
Waukeen's Rest

- The most important area of this region is the burning Waukeen's Rest inn, and you can take action by extinguishing the flames and saving the prince who is in the burning buildings.
- In the western part of the region, you can encounter a Githyanki patrol led by Kithrak who has a dragon mount. Fighting them is not an easy task. In the same place you will also find an exit to the world map.
Blighted Village

- The village is guarded by goblins, and they will stop the party when attempting to enter it from east or south. You can defeat them by force or try to convince them, or simply sneak through.
- The most important areas of Blighted Village are the necromancer's house (there is a secret pathway leading to the large cellar on the ground floor), the building with ogres (possible approaches - combat, completing a check, or collapsing a part of the building), and windmill (you can help the gnome who is harassed by goblins). There are also several entrances to Whispering Depths dungeon here (well, cellar of the north building).
- Northeast of the village you can find an Owlbear nest. Either defeat this strong monsters (preferably with a Cleric in your party) or complete a skill check and avoid combat. Both variants allow careful searching of the nest.
Goblin Camp

- There are several entrances to the western goblin camp, and the main entrances are guarded by the camp guards. To get past them you can attack, lead the conversation skillfully or find one of the secret pathways (e.g. fallen tree, climbing), that allow easy access to the guarded location. At the south-western end of the camp there is a world map entrance.
- In the camp, there is a merchant named Grat (melee weapons, torches, potions). You will also encounter sleeping goblins (sneaking, combat, Ilithid powers) and Crusher (various reactions to his demand of kissing the foot).
- Entrance to Shattered Sanctum is also found here. To access this location, you can either open a heavy oaken door on the lower level or destroy a cracked wall in the northern part of the camp - the second variant allows for stealth approach.
Shattered Sanctum

- The sanctum is a large underground location in the goblin camp. You can enter through the main door or a secret upper entrance. The second way allows avoiding goblin guards and opens a possibility of a stealthy approach to the sanctum.
- There are 3 goblin leaders in the Sanctum - Gut, Dror Razglin, and Minthara. Depending on the choices made in the story, you'll either try to eliminate all the leaders, or ally with the goblins to attack Druid Grove. Additionally, Minthara is a potential companion, but you need to choose to help the goblins.
- There is a merchant in the Sanctum, Roah Moonglow (sells weapons, armor, potions, scrolls, arrows). You will also meet a few prisoners being tortured by the goblins - these are Liam, Abdirak, and Volo.
- One of the pathways lead to Worg Pens and there you'll meet a bear that is a shapeshifted druid Halsin. You can help Halsin in getting rid of the goblins, and then make efforts to add him as your companion.
- A separate location here is the Defiled Temple. Major areas here are a prison (you'll find yourself here after drinking the potion from Gut) and a room with moon puzzle. Additionally, in the temple you can find an entrance to Underdark (a new major underground location).
Riverside Teahouse

- The Teahouse, along with connected Fetid Bog is located in the south-western part of Act 1 map, south from Blighted Village and Goblin Camp.
- In the northern part of the Bog, you can find Johl and Demir - you can be a witness to their argument with Auntie Ethel about the kidnapped Mayrina. You can either ally with the witch and kill the men or promise to help find Mayrina.
- The titular Tea House is located in the south-western part of the region and is a home to Auntie Ethel. The meeting with the witch has several possible outcomes and may involve wanting to free Mayrina or get rid of the parasite. If you anger Ethel, she will teleport to her hideout and an opportunity will arise to explore a new underground location with an entrance hidden behind a chimney.
- There are some smaller encounters in the bog, e.g. with Frog (Speak with Animals spell will be useful) or a vampire hunter Gandrel (there is a unique interaction if Astarion is with the active party). Aside from the above, you'll encounter monsters and numerous traps, especially in the eastern part of the bog.
- Baldurs Gate 3 Guide, Walkthrough
- Baldur's Gate 3: Game guide
- Baldur's Gate 3: World Atlas
- Baldurs Gate 3: World map
- Baldur's Gate 3: Interactive Map Prologue, Act 1
- Baldurs Gate 3: Nautiloid map
- Baldurs Gate 3: Overgrown Ruins / Roadside Cliffs map
- Baldurs Gate 3: Druid Grove / Silvanus Grove map
- Baldurs Gate 3: The Risen Road / Waukeen's Rest - map
- Baldurs Gate 3: Blighted Village - map
- Baldurs Gate 3: Goblin Camp - map
- Baldurs Gate 3: Riverside Teahouse - map
- Baldurs Gate 3: Shattered Sanctum / Defiled Temple map
- Baldur's Gate 3: World Atlas
- Baldur's Gate 3: Game guide
You are not permitted to copy any image, text or info from this page. This site is not associated with and/or endorsed by the developers and the publishers. All logos and images are copyrighted by their respective owners.
Copyright © 2000 - 2026 Webedia Polska SA for gamepressure.com, unofficial game guides, walkthroughs, secrets, game tips, maps & strategies for top games.
