Yokohama, Edo, Kyoto Rise of the Ronin Map
Rise of the Ronin: How to use the camera and take photos?
How to take photos and pass photo challenges in Rise of the Ronin? From this guide page you will learn how to unlock the camera, how to take correct photos and whether the game has a built-in photo mode.
Optional activities and secrets of Rise of the Ronin include, among others, photography and related challenges. This page of the guide explains how to obtain a camera required for these activities. We also suggest how to take photos correctly and what rewards you can expect. You will also learn how to use the photo mode to capture screenshots with the interface turned off.
- Unlocking the camera
- How to take photos?
- Photographic studio and photography challenges
- Is there a photo mode?
Unlocking the camera
- The camera is not automatically available from the start. Therefore, there'll be no photography-related activities for you at the beginning.
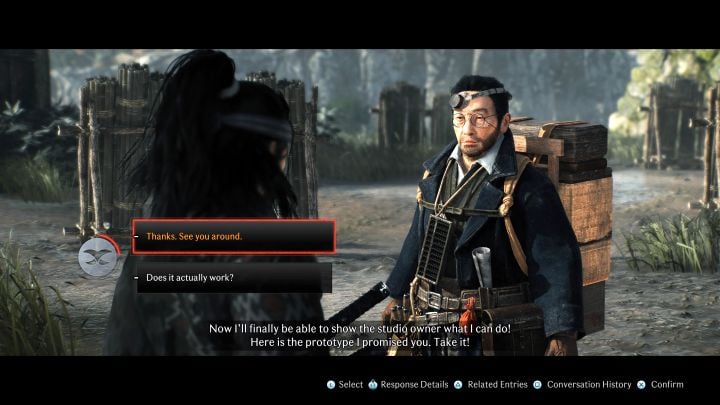
- Acquiring a camera is part of the main story. In Chapter 1, in Yokohama, you will start the main mission Locating the Camera, which is given by the inventor Igashichi Iizuka.
- As part of the mentioned mission, you must steal camera plans from the enemy camp. This involves defeating a group of bandits and the miniboss Mochisuke Kira. After locating and delivering the plans, you will receive a prototype of the camera and immediately test it.
How to take photos?
- For convenience, it is worth placing the camera in one of the 4 item slots - this will allow you to select this gadget with a single press of the button on the controller's D-pad.
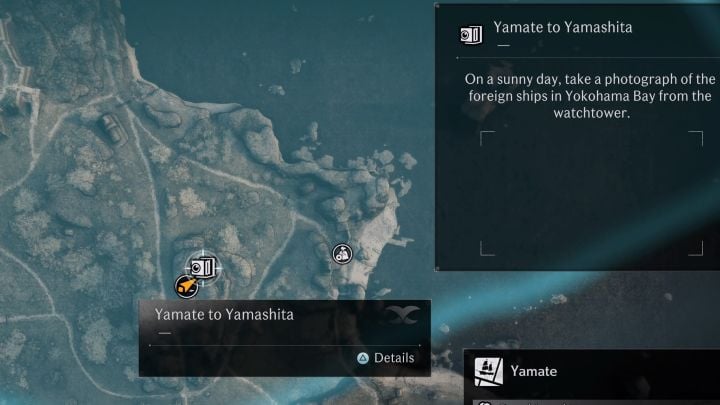
- Theoretically, you can take photos everywhere, but the most important thing to keep in mind are the new collectibles marked on the map with a camera icon. They will also appear in the areas already visited.
- Browse the descriptions of photos from the map (triangle after hovering over the icon), because they may have additional requirements regarding the time of day or weather conditions (e.g. taking a picture on a sunny day. If necessary, you can speed up the passage of time. We have described this on the page How to change the time of day?.
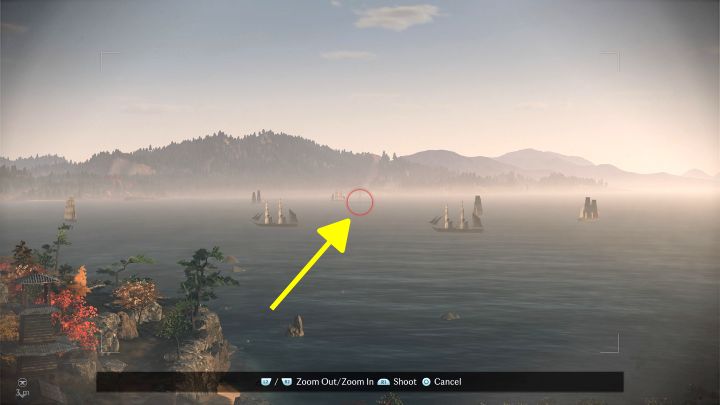
- Upon arriving at the location, take out your camera and make sure that the object, building, or landscape from the secret description is in the frame. A red circle must appear (example in the screenshot); take the photo once you see it and the activity will be considered completed.
Photographic studio and photography challenges
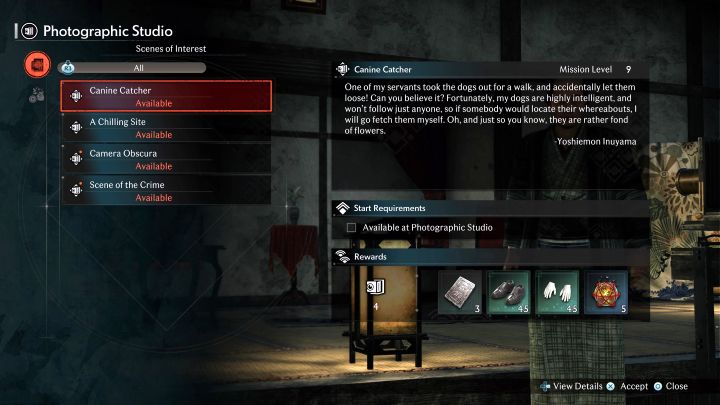
Once you get the camera, you can visit the photo studio - the first such building is located in Yokohama. There are 2 main activities related to taking photos:
- Starting photo challenges - each challenge you accept will be added to your journal. You need to reach the location associated with the quest at a particular time of day (yellow circle on the world map) and take one or more photos from the challenge description (e.g. locating and snapping photos of 4 dogs). Rewards for completing challenges can include equipment items, silver coins, decorations for the longhouse or bond jewels.
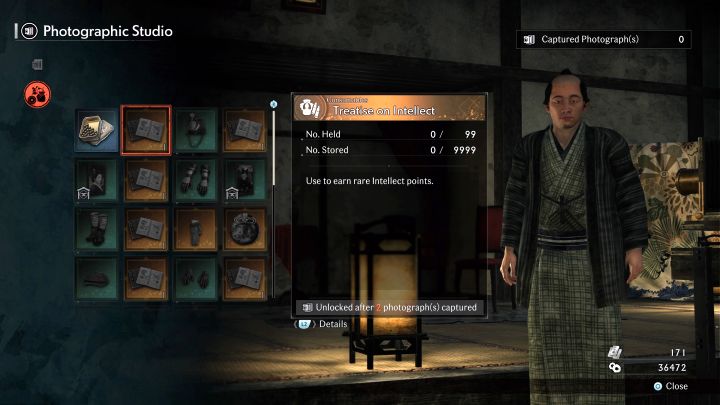
- Receiving rewards for photo collectibles - silver coins are also required for purchases. You will unlock the next items from the list as you expand your collection of photo collectibles. We primarily recommend buying consumable items to increase the hero's statistics.
Is there a photo mode?
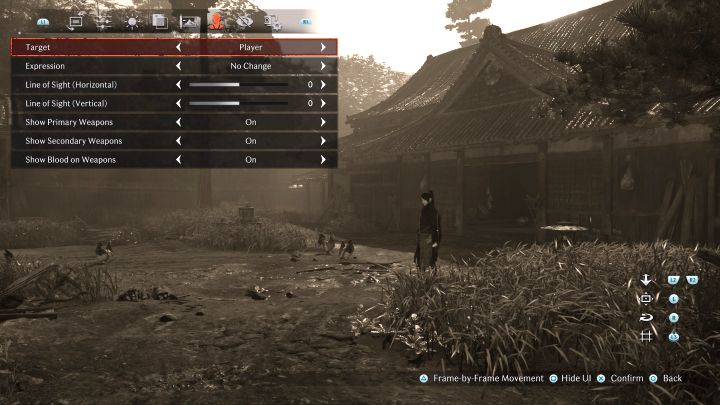
- The photo mode for taking your own photos is completely camera-independent and available from the beginning of the game. You will find it in the System menu.
- The photo mode features typical settings characteristic for these kinds of games - for example, you can set a precise camera position, change the depth of field, apply various filters to the screen or turn off the characters display or other game elements.
- After preparing the perfect shot, you can hide the user interface (square) and press the SHARE button to save a screenshot to the console's disk (it will be available to view outside the game).
- Rise of the Ronin Guide
- Rise of the Ronin: Game Guide
- Rise of the Ronin: FAQ
- Rise of the Ronin: Is there an open world?
- Rise of the Ronin: What are the consequences of death?
- Rise of the Ronin: How to unlock the first mount and how to buy horses?
- Rise of the Ronin: How to unlock the glider?
- Rise of the Ronin: How to use fast travel?
- Rise of the Ronin: How to change the time of day?
- Rise of the Ronin: Can you pet dogs and cats? All cats map
- Rise of the Ronin: How to open the gate to Yokohama?
- Rise of the Ronin: Where is the Storage?
- Rise of the Ronin: How to unlock pickpocketing?
- Rise of the Ronin: How to open locked doors and are there lockpicks?
- Rise of the Ronin: How to photograph the rooms in the Pleasure District?
- Rise of the Ronin: How to return to Yokohama?
- Rise of the Ronin: How to unlock free roam in Edo region?
- Rise of the Ronin: How to perform a Bond Transfer? Transfer of Power trophy
- Rise of the Ronin: How to get a firearm and a bow?
- Rise of the Ronin: How to save the game?
- Rise of the Ronin: How to complete a No-Kill mission?? Life Saver trophy
- Rise of the Ronin: How to use the camera and take photos?
- Rise of the Ronin: What are titles and how to change them?
- Rise of the Ronin: How to heal yourself and your allies?
- Rise of the Ronin: How to reset skills (respec)?
- Rise of the Ronin: FAQ
- Rise of the Ronin: Game Guide
You are not permitted to copy any image, text or info from this page. This site is not associated with and/or endorsed by the developers and the publishers. All logos and images are copyrighted by their respective owners.
Copyright © 2000 - 2025 Webedia Polska SA for gamepressure.com, unofficial game guides, walkthroughs, secrets, game tips, maps & strategies for top games.
