Pillars Of Eternity 2: Hasongo - Map
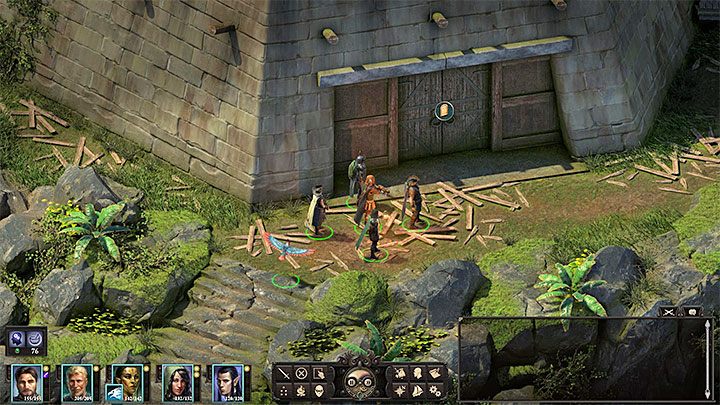
The map above depicts Hasongo. This is one of the more important locations that you can visit in Pillars of Eternity 2 Deadfire. One of the main quests require you to explore the port town located on this island. Majority of your stay on Hasongo will consist of exploration and fights. However, certain battles can be avoided by using alternate passages or abilities during conversations. You can also get a lot of treasures that can be used immediately (e.g. potions or grappling hooks) or that can be sold.
- Important places in Hasongo
- Quests that can be unlocked in Hasongo
- Quests that can be continued in Hasongo
- Important NPCs in Hasongo
- Types of enemies and monsters found in Hasongo
- How to quickly and easily reach the lighthouse on Hasongo?
- Other information related to Hasongo
Important places in Hasongo
1. Starting point. You begin exploring Hasongo here. You can also return to the ship if you want to leave the port (you can't move freely around the island in order to explore other locations). You will meet your first enemies nearby - coral naga warriors.
2. Storage tower. Survivors from Hasongo are hiding here - you can talk to Zuhira and find out about the lighthouse (M26,15) (reaching that place is the most important part of your visit on this island) and the working cannon (M26,4).
3. Cannon rampart. Naga archers are stationed above the door. Attack them from a distance, sneak past them or destroy the barrels to get to them.
Inside the ramparts you can find a lot of weapons, pieces of armor and an Artillerist's Manual which can be helpful in aiming the bombard (M26,4). Watch out for exploding barrels! One of the crates (at the very end of the corridor) has a trap.
The Naga Soul is in the separate area - you can get there from the kitchen (M26,7). Speak with the soul before you move along - thanks to that you can avoid a battle that takes place after you reach the lighthouse (M26,15).
4. Bombard. Inspecting the working bombard activates a scripted interaction. You can turn the bombard and load it in order to fire at the coral nagas who have prepared an ambush (M26,5).
Turning the bombard requires a lot of Might points - choose the strongest character for the test (try to have 18 points or more). Alternatively you can use the cooking fat from the kitchen (M26,7) and apply it to the bombard to turn it without the Might test.
Aiming the bombard requires to pass a Mechanics test. You can make it easier by finding the Artillerist's Manual located inside the cannon rampart (M26,3).
You must load the bombard with an explosive shell - talk to Zuhira (M26,2), collect a key from her and go to the Engineering workshop (M26,12). The shell is inside of the locked room with z Aimuro.
5. Coral naga ambush. A large group of warriors and archers is stationed here. You can fire at them from the eastern bombard (M26,4), begin a traditional battle with them or avoid them by going through the northern part of the map (M26,7 or 9).
7. Kitchen. A cooking fat which can be used to oil the bombard (M26,4) is here.
You can use the ladder to reach the roof or head into the flooded hallway. The left hallway leads to the cannon rampant (M26,3) where the Naga Soul can be found - use a prybar or pass the Might test. The right hallway leads to the dining hall (M26,10) - all party members must pass the Athletics test to avoid injuries.
9. Water crossing. Coral nagas are here and they're led by a shaman - he can use a totem to summon additional creatures (e.g. Blights) which makes this battle more difficult to win. Also, remember that being in water slows down your characters.
11. Climbing spot. You can risk a climb using Athletics skill (avoid receiving an injury) or rely on rope and grappling hook (noise will cause coral nagas to appear). You will get to the roof. The northern path allows you to reach the lighthouse easily (M26,15).
12. Engineering workshop. Stairs near the workshop allow to reach the path leading to the Fleet Master's Office (M26,14).
Inside the building defeat 2 coral naga warriors. The door to the workshop is closed - use a key from Zuhira (M26,2).
Talk to Aimuro and find the container with the explosive shell for the bombard (M26,4).
14. Fleet Master's Office. Archers are stationed on the building's balcony. Go through the building to descend from the upper path to the lower one (or the other way around). Inside the building you'll also find a letter from Laetharn.
15. Entrance to the lighthouse. You can reach the lighthouse from the northern building's side (M26,11) or from the fleet master's office side (M26,14).
There's an adra column inside the lighthouse (A Distant Light main quest) and you'll also encounter Sugaan and other coral nagas. You can fight them or avoid combat (meet with the Naga Soul in (M26,3) before entering the lighthouse).
17. Eothas' footprint. After completing A Distant Light main quest (interacting with the adra column inside the lighthouse - (M26,15))) town people will show up here. Bearn is tied to Eder's personal quest - The Lighted Path.
Quests that can be unlocked in Hasongo
[The Hunt for Eothas] He Waits in Fire - Automatically after completing A Distant Light main quest in the lighthouse (M26,15).
[Missions] From the Wreckage - You can receive this quest by being stopped by Royal Trade Company fleet right after leaving Hasongo and completing A Distant Light main quest.
Quests that can be continued in Hasongo
[The Hunt for Eothas] A Distant Light (M25) - Reach the adra column in the lighthouse (M26,15).
[Missions] The Lighted Path - Your party can meet with Bearn (M26,17), Eder's son (he must be in your party). However, this can happen only after you examine the luminous adra column in the lighthouse.
Important NPCs in Hasongo
Zuhira (M26,2) - She can tell you about ways of reaching the lighthouse, and she can give you a key to the workshop.
Bearn (M26,17) - Eder's son, connected with The Lighted Path quest. You can meet him after finishing your business in the lighthouse.
Types of enemies and monsters found in Hasongo
Coral Naga Warrior - Coral Nagas are serpent-like creatures but they are also sentient beings. Warriors can fight really great at a close distance and they can also poison enemies with venom. They are also invulnerable to Dexterity-based abilities. Note - Coral Naga can hide under water and appear suddenly when you get closer to a water body.
Coral Naga Archer - On Hasongo, they are located in places that are difficult to reach. Avoid them (preferably by using stealth) and then reach them from a side where they are easy to get attacked with melee weapons.
Coral Naga Shaman - The biggest challenge because they can use magic. Focus your attacks on this enemy.
Totem - They won't attack your party by themselves but they can be used in summoning Blights and other non-material creatures. Destroy these objects as soon as you see them.
Looter - Looters appear only in the docks (exploring them is optional). They are rather powerful so be careful when you attack them with a weaker party.
Sugaan - This is the most Coral Naga that you can meet on Hasongo. Concentrate attacks on this enemy if you have provoked him to a fight. Also, you should stay away from his weaker companions. However, you don't have to fight with him - the meeting that takes place in the lighthouse can end peacefully.
How to quickly and easily reach the lighthouse on Hasongo?

Your main goal of the visit on Hasongo island is to reach the lighthouse (M26,15). Complete the steps below if you don't care about exploring the island (although this is highly recommended):
- Your party starts in (M26,1). Move north-west and watch out for archers (M26,3) (you can either escape them or use stealth).
- Kill the Shaman and other Coral Nagas in (M26,9) or enter the kitchen (M26,7), explore the flooded hallway and choose the right corridor to reach the dining room (M26,10) (you will have to complete Athletics skill test).
- Examine the climbing wall (M26,11) and use either Athletics or a grapple hook (using this option is connected to a short battle).
- On the rooftop, you have to follow the northern path that leads west. Then, you have to turn south-west.
Other information related to Hasongo
This map rewards careful exploration - you can come across numerous items and avoid more difficult fights. It is important to check the bombard (M26,4) - with its help you can eliminate a large group of enemies. Sadly, you have to rotate it before it can be used (Might or cooking fat). You also have to aim it (Mechanics) and load ammo (explosive shell). Don't forget to examine corpses of defeated Coral Naga. Majority of them use high-quality weapons - you can sell them for a lot of gold.
Meet with Naga Soul (M26,3) before you go to the lighthouse. This allows you to avoid the largest battle which takes place right after entering the building. Use this option if your party isn't that powerful.
You are not permitted to copy any image, text or info from this page. This site is not associated with and/or endorsed by the developers and the publishers. All logos and images are copyrighted by their respective owners.
Copyright © 2000 - 2026 Webedia Polska SA for gamepressure.com, unofficial game guides, walkthroughs, secrets, game tips, maps & strategies for top games.
