Pillars Of Eternity 2: Ashen Maw - Map
The above map presents the location called Ashen Maw. You will explore this location as a part of He Waits in Fire main quest, which focuses around catching Eothas and meeting with the man. The described location is divided into several medium-sized areas. During the exploration, the party can take part in battles, but proper selection of dialogue options will allow you to avoid some of the more difficult ones. There are treasures awaiting for the party here, all marked on our map.
- Important places in Ashen Maw
- Quests continued in Ashen Maw
- Important NPCs in Ashen Maw
- Types of enemies and monsters in Ashen Maw
- Other information related to Ashen Maw
Important places in Ashen Maw
1. Rathun Harbor. You start the exploration of Ashem Maw here. To the north of the starting location you can find a small troll pet, Grog (+1 to Resolve; the team cannot initiate encounters and is invulnerable to initiation from enemies; every member of the party dies upon losing consciousness).
4. Room with a hole in the wall. In the chest with a level 6 lock you will find high quality gloves, a potion and gold. Additionally, Ashen Key can be found at the crushed corpse - it is used to open the doors in (M40,3).
5. Guard Tower. Rathun can be found here. You can either defeat them in combat or convince them to step aside with the use of Metaphysics 5 / Religion 5 / Insight 5 / Magrana's priest dialogue option.
Heavy plate armor and war axe stands.
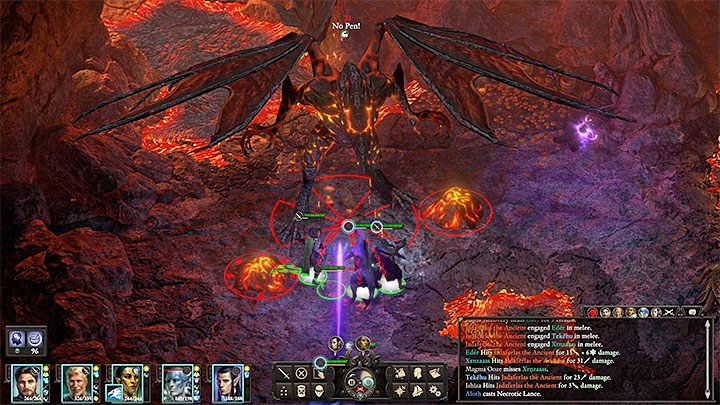
10. Lake of magma. After approaching the lake, Jadaferlas the Ancient will appear. You can either take her on (the encounter is difficult - this is a boss) or lead a conversation in such a way to avoid the confrontation (passing one or more skill tests is necessary - Resolve / Bluff, Diplomacy, Intimidation, Survival, Religion, History, Magrana's Priest).
11. Second soul. You can read her after killing / speaking with the dragon. You will acquire an important quest item - Torch of Bithakten. You can use the item on the Magrana's Priest in The Jagged Keep (M40,18).
There are three treasure containers here. The most valuable treasures are Adris Blade of Captain Crow and Ajanut's Stalking Cloak (+1 to Perception, 2+ to Stealth, bonus to attacks from stealth).
13. Entrance to the stronghold. After entering the room, a conversation with a Rathun Raider will initiate. You can force an encounter, but then you have to fight with all of the remaining characters in the stronghold. Alternatively, you can avoid combat by showing the Torch of Bithatken you acquired in the dragon lair (M40,11).
14. Rathun hall of warriors. Rathun Warriors can be found here and depending on the reaction in (M40,13) they can either be neutral or hostile towards the team.
Containers with bombs and potions. Ornate Ashen Key can be found lying on the large table - it opens all of the closed doors in the stronghold.
15. Side corridors. Using them will allow you to reach the blacksmith (M40,17) via a different route. It is advised to have Ornate Ashen Key from (M40,14). Once you reach the large stone doors, look for the secret switch on the wall.
In the northern corridor you will find traps, one of which is installed on a chest with level 9 lock - inside of it you will find potions and unique gloves (+2 to Dexterity and Explosives, +1 to Arcana; a bonus to Evocation).
17. Rathun Blacksmith. You can reach it from the stronghold (M40,16) or from the side corridors (M40,15), after opening the doors with level 10 lock (you can use Ashen Key found in (M40,14) for the task).
Here you can find a high quality warhammer and a shield, as well as Knapped Scoria Figurine (allowing you to summon magma slimes).
18. Magrana's Shrine. Bathor Erkon secures the entrance to the shrine. If you attack him, a difficult encounter with Rathun warriors await you. You can avoid combat by using Diplomacy 5 / Intellect 15 and mentioning your discoveries from the dragon's lair. (M40,10).
You can speak with Magrana and place the Torch of Bitkatken, found in (M40,11), on the altar. You will be transported to Foundations of the Ashen Maw (M40,19).
20. Eothas meeting place. Conversation with Eothas ends the visit in Ashen Maw. Afterwards, a paragraph scene will initiate and you will be transported back to Kahanga Palace (M25,1).
Quests continued in Ashen Maw
[Hunt for Eothas] He Waits in Fire (M25) - You must reach Foundations of the Ashen Maw and speak with Eothas (M40,20).
Important NPCs in Ashen Maw
Jadaferlas the Ancient (M40,10) - initially, the dragoness is not hostile towards the party. You can cause an encounter with her by choosing the incorrect dialogue options during the conversation. Taking her out is difficult (she is a boss).
Bathor Erkon (M40,18) - he guards the entrance to Magrana's Shrine. If you provoke him, a difficult battle with him and nearby rathun warriors will initiate.
Eothas (M40,20) - you must reach him as part of He Waits in Fire quest.
Types of enemies and monsters in Ashen Maw

Jadaferlas the Ancient - a powerful dragoness that can be described as a boss, as she is extremely durable and deals considerable amount of damage (mainly in melee combat and by using fire). If you caused an encounter, keep weaker members of the party away from her. The dragoness is resistant to Might, Resolve and Dexterity status effects and invulnerable to Intellect-based ones. Additionally, she can "summon" Magna Oozes. Ignore the additional monsters, unless they are a direct threat to your mages, rogues and other weaker characters.
Rathun Warriors - fighting with them becomes a necessity only if you provoke them during a conversation. There are several types of those giants, but you must always keep in mind that they are resistant to Constitution-based statuses and their attacks are mostly fire-based. On the other hand, they are vulnerable Frost-based attacks and Dexterity status effect.
Bathor Erkon - the most powerful Rathun warrior from the described location. You can avoid the encounter with the man. If you lead to it, defeating him will be difficult. You should focus your attention to the other enemies accompanying the main foe.
Flame Bat - they are immune to fire, diseases and dexterity-based statuses, resistant to Perception-based statues and vulnerable to frost.
Young Drake - they are resistant to dexterity-based statuses and can cause high fire damage with their breath attacks.
Magma Ooze - they are immune to fire and intellect-based status effects. Frost is their weakness.
Flame Blight
Other information related to Ashen Maw
You should think about visiting Ashen Maw and taking on He Waits in Fire quest once your entire party has advanced to at least level 12-13. Theoretically, you can complete this quest without having to fight with the more powerful enemies and monsters you stumble upon, but even then you need to have properly developed skills to use during dialogues. You can have difficulties winning some of the battles if your party is not strong enough.
A vast majority of enemies and monsters in Ashen Maw use fire-based attacks and abilities to deal damage and are resistant to that element. On the other hand, they are vulnerable to frost-based attacks. Due to those facts, you should prepare accordingly before venturing here - potions and spells increasing resistance to fire and allowing you to launch effective frost-based attacks.
During the exploration of Ashen Maw, you can again stumble upon incinerated bodies. Do not forget to click on them, as it will allow you to acquire resources and other loot.
Try to thoroughly explore all of the locations before you speak with Eothas - once the conversation with the man is over, the team automatically leaves Ashen Maw and is transported to Kahanga Palace in Neketace. The dragoness' lair is of the highest importance, as there are, above all else, two unique and very valuable items hidden there.
You are not permitted to copy any image, text or info from this page. This site is not associated with and/or endorsed by the developers and the publishers. All logos and images are copyrighted by their respective owners.
Copyright © 2000 - 2026 Webedia Polska SA for gamepressure.com, unofficial game guides, walkthroughs, secrets, game tips, maps & strategies for top games.
