Avowed: All totem fragments maps
Totem Fragments are important secrets in Avowed. From this guide page you will learn where to find the 6 parts of the totem and the totem core, how to build a totem in the team's camp, and what stats bonuses the Scales of the Oathbinder totem guarantees.
Where are the Totem Fragments hidden? This Avowed guide page will help you find the missing secrets. We have compiled Totem Cores and Totem Fragments available in all 4 regions. Additionally, we explain how to construct totems in the party camp and what stat bonuses you can get from them.
- Map of all Totem Fragments in Dawnshore
- Broken Crown Jewel - Dawnshore
- Golden Plaque of Promises - Dawnshore
- Golden Scale of Justice - Dawnshore
- Golden Scale of Order - Dawnshore
- Golden Flames - Dawnshore
- Golden Plaque of Oaths - Dawnshore
- Scales of the Oathbinder - Dawnshore
- Totem stat bonuses - Dawnshore
- Map of all Totem Fragments in Emerald Stair
- Obsidian Prayer Beads - Emerald Stair
- Idol of Covert Plots - Emerald Stair
- Sacrificial Dagger - Emerald Stair
- Idol of Violent Rebellion - Emerald Stair
- Effigy Necklace - Emerald Stair
- Idol of Secret Hatred - Emerald Stair
- The Schemer's Offering - Emerald Stair
- Totem stat bonuses - Emerald Stair
- All totem fragments in Shatterscarp
- Topaz Eye - Shatterscarp
- Amethyst Eye - Shatterscarp
- Ruby Eye - Shatterscarp
- Emerald Eye - Shatterscarp
- Agate Eye - Shatterscarp
- Sapphire Eye - Shatterscarp
- Eyes of the Obscured - Shatterscarp
- Stat bonuses from the totem - Shatterscarp
- All totem fragments in Galawain's Tusks
- Hunter's Arrow of Slaying - Galawain's Tusks
- Antler of the Persevering Stag - Galawain's Tusks
- Hunter's Arrow of Seeking - Galawain's Tusks
- Wolf's Pelt Trophy - Galawain's Tusks
- Antler of the Pursued Stag - Galawain's Tusks
- Hunter's Arrows of Surviving - Galawain's Tusks
- Huntmaster's Spoils - Galawain's Tusks
- Stat bonuses from totem - Galawain's Tusks
- How to activate a totem in the party camp?
Map of all Totem Fragments in Dawnshore
Broken Crown Jewel - Dawnshore
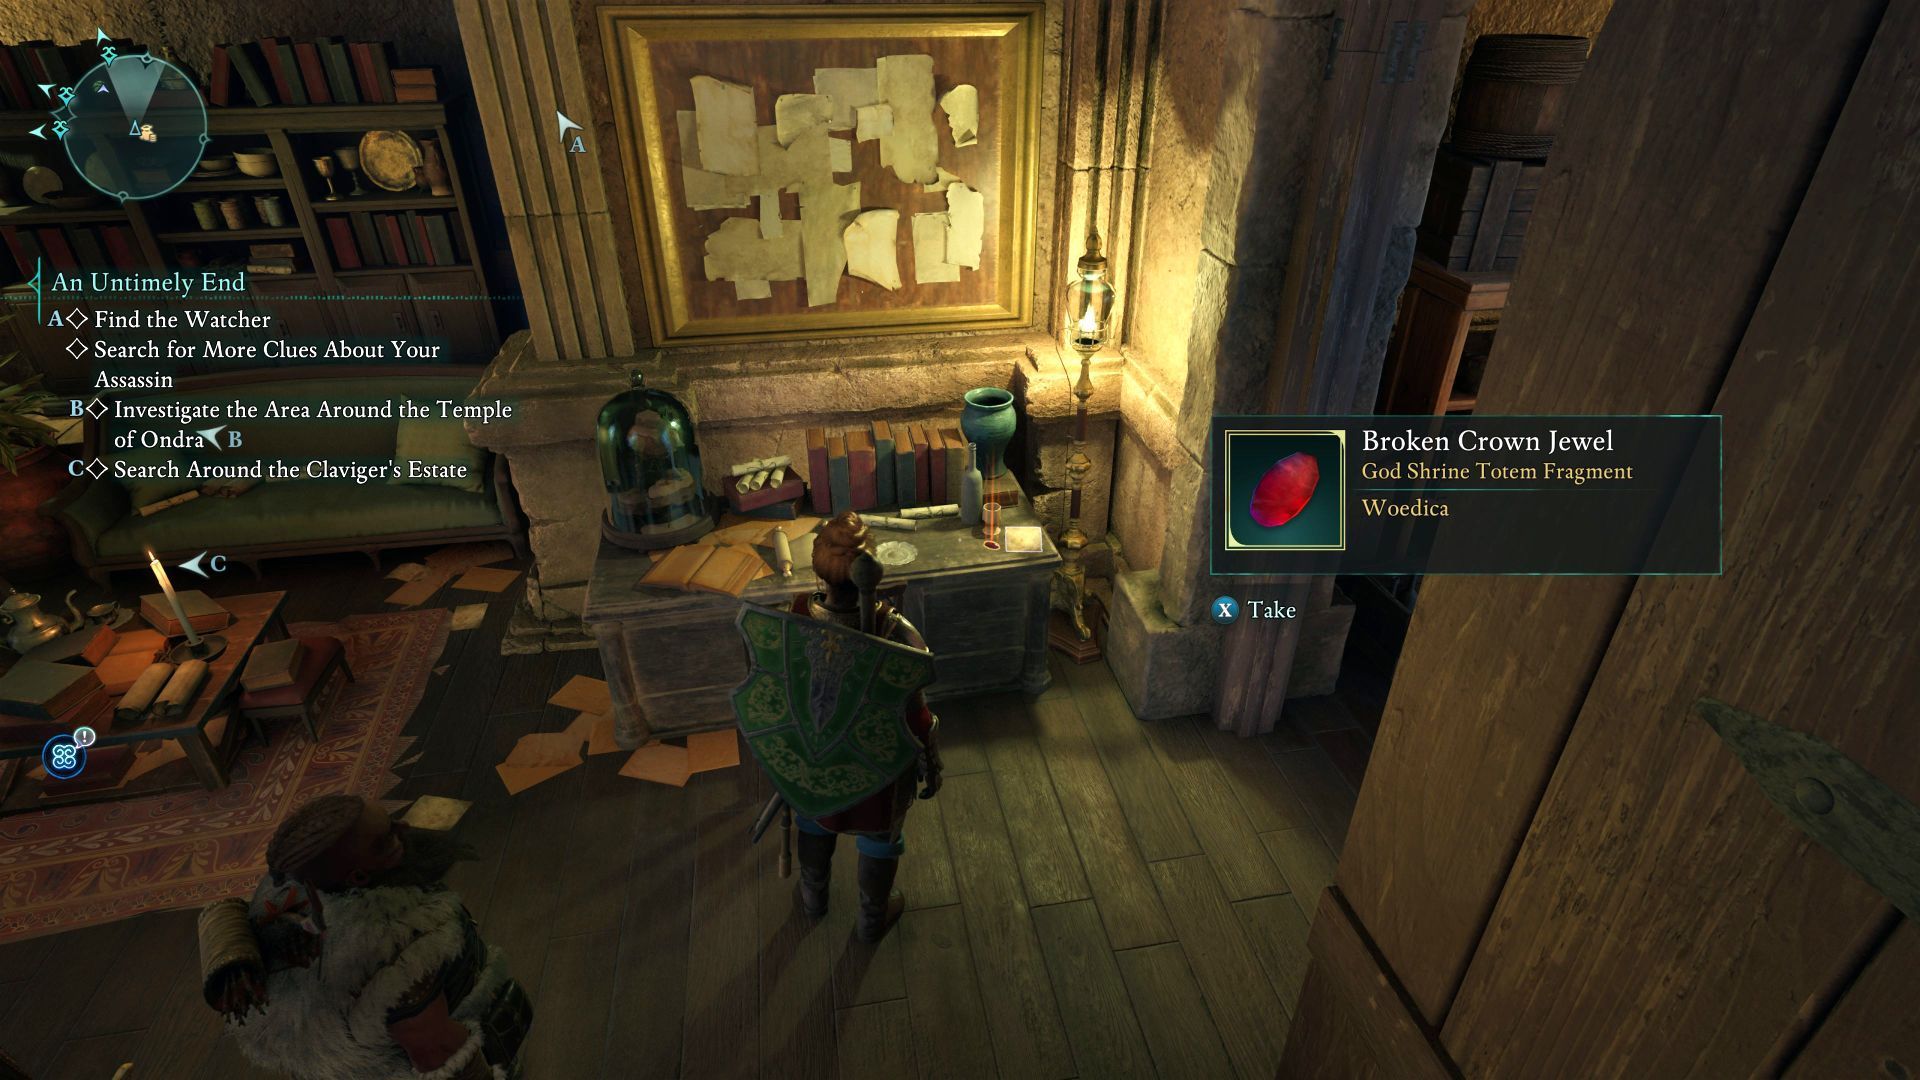
This totem fragment is in Sanza's shop in the Hightown in Paradis, which is located in the northern part of the city. You must enter Sanza's private chambers - the merchant will not be able to stop you.

You can also optionally purchase a document with hints about the totem fragments from Sanza. It costs 500 coins and unfortunately does not offer their exact locations, only containing riddles with hints on where to look for them. However, you can find everything by following our guide.
Golden Plaque of Promises - Dawnshore
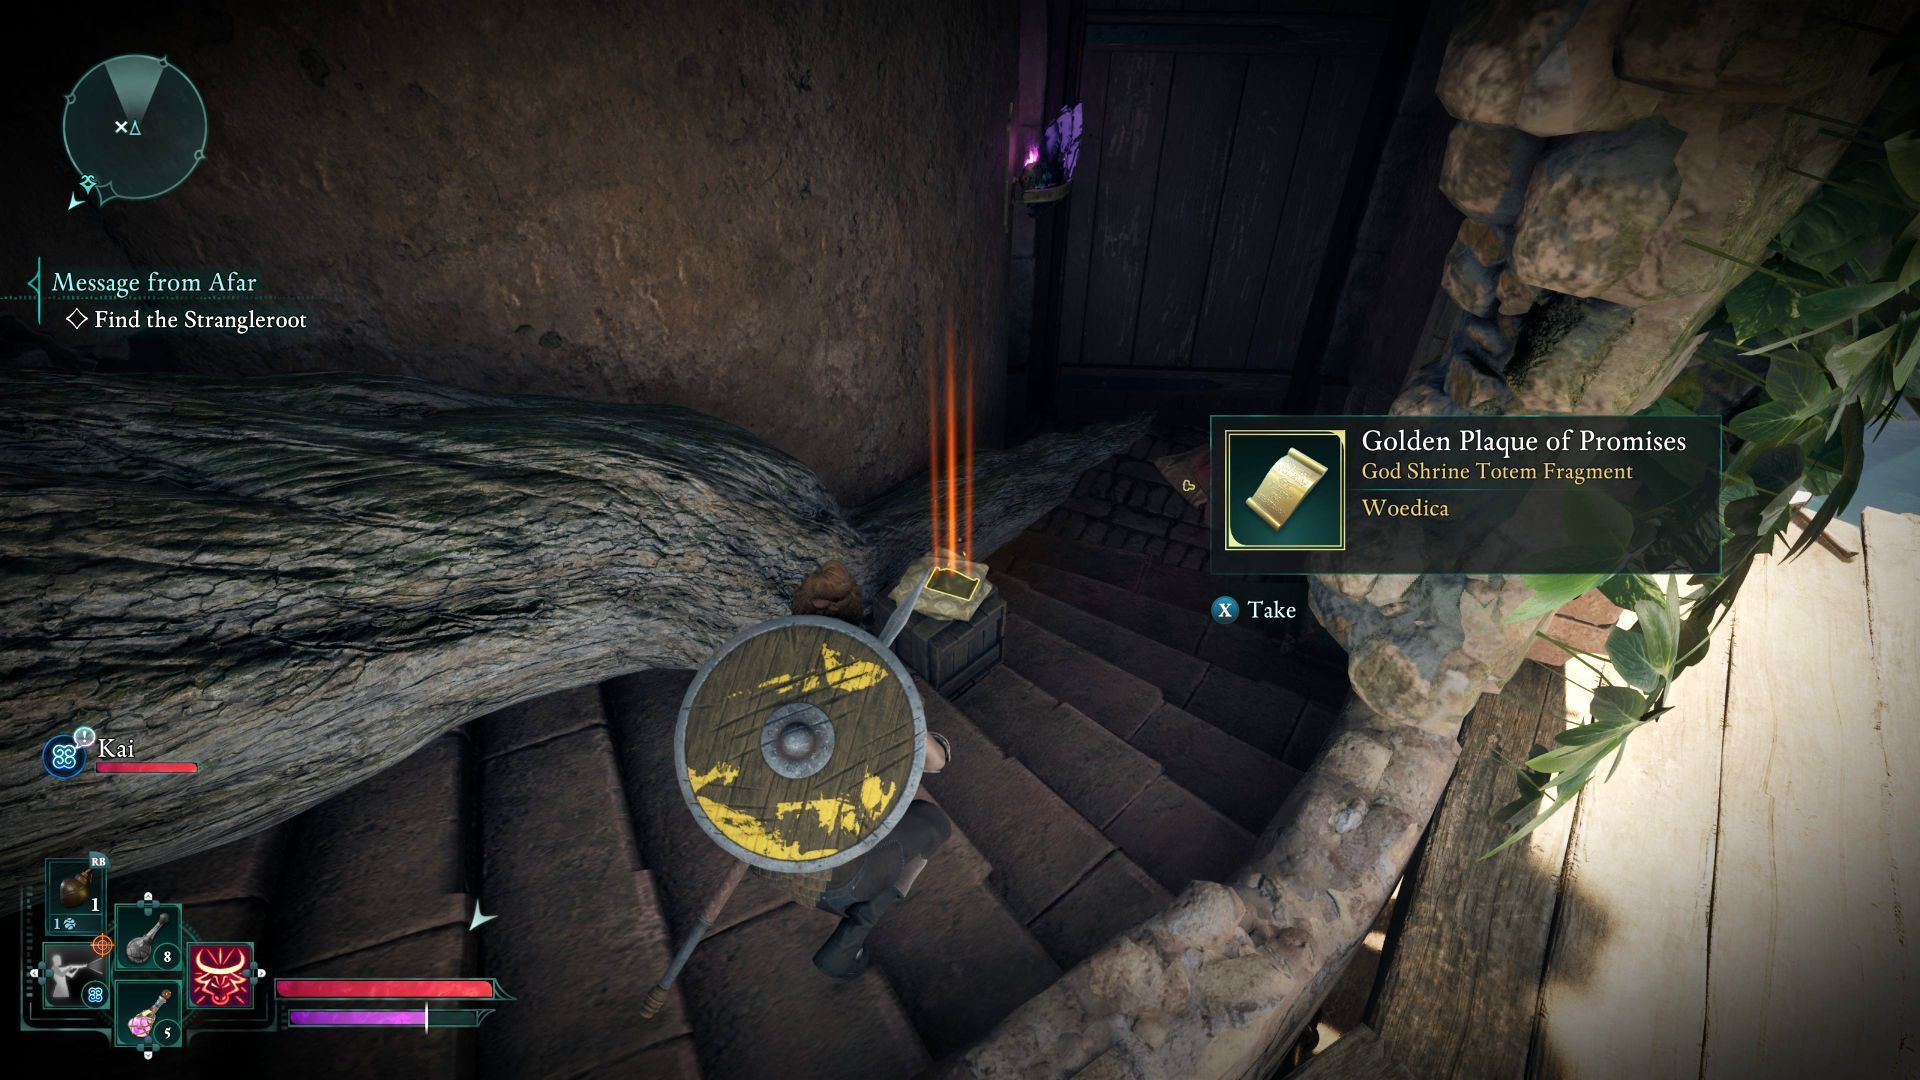
This totem fragment is inside the lighthouse which is located west of Claviger's Landing.
You must begin a long climb, using the lighthouse's outer ledges and balconies. Eventually, you will get to its destroyed interior and find the secret. This is before you even reach the top of the lighthouse.
Golden Scale of Justice - Dawnshore
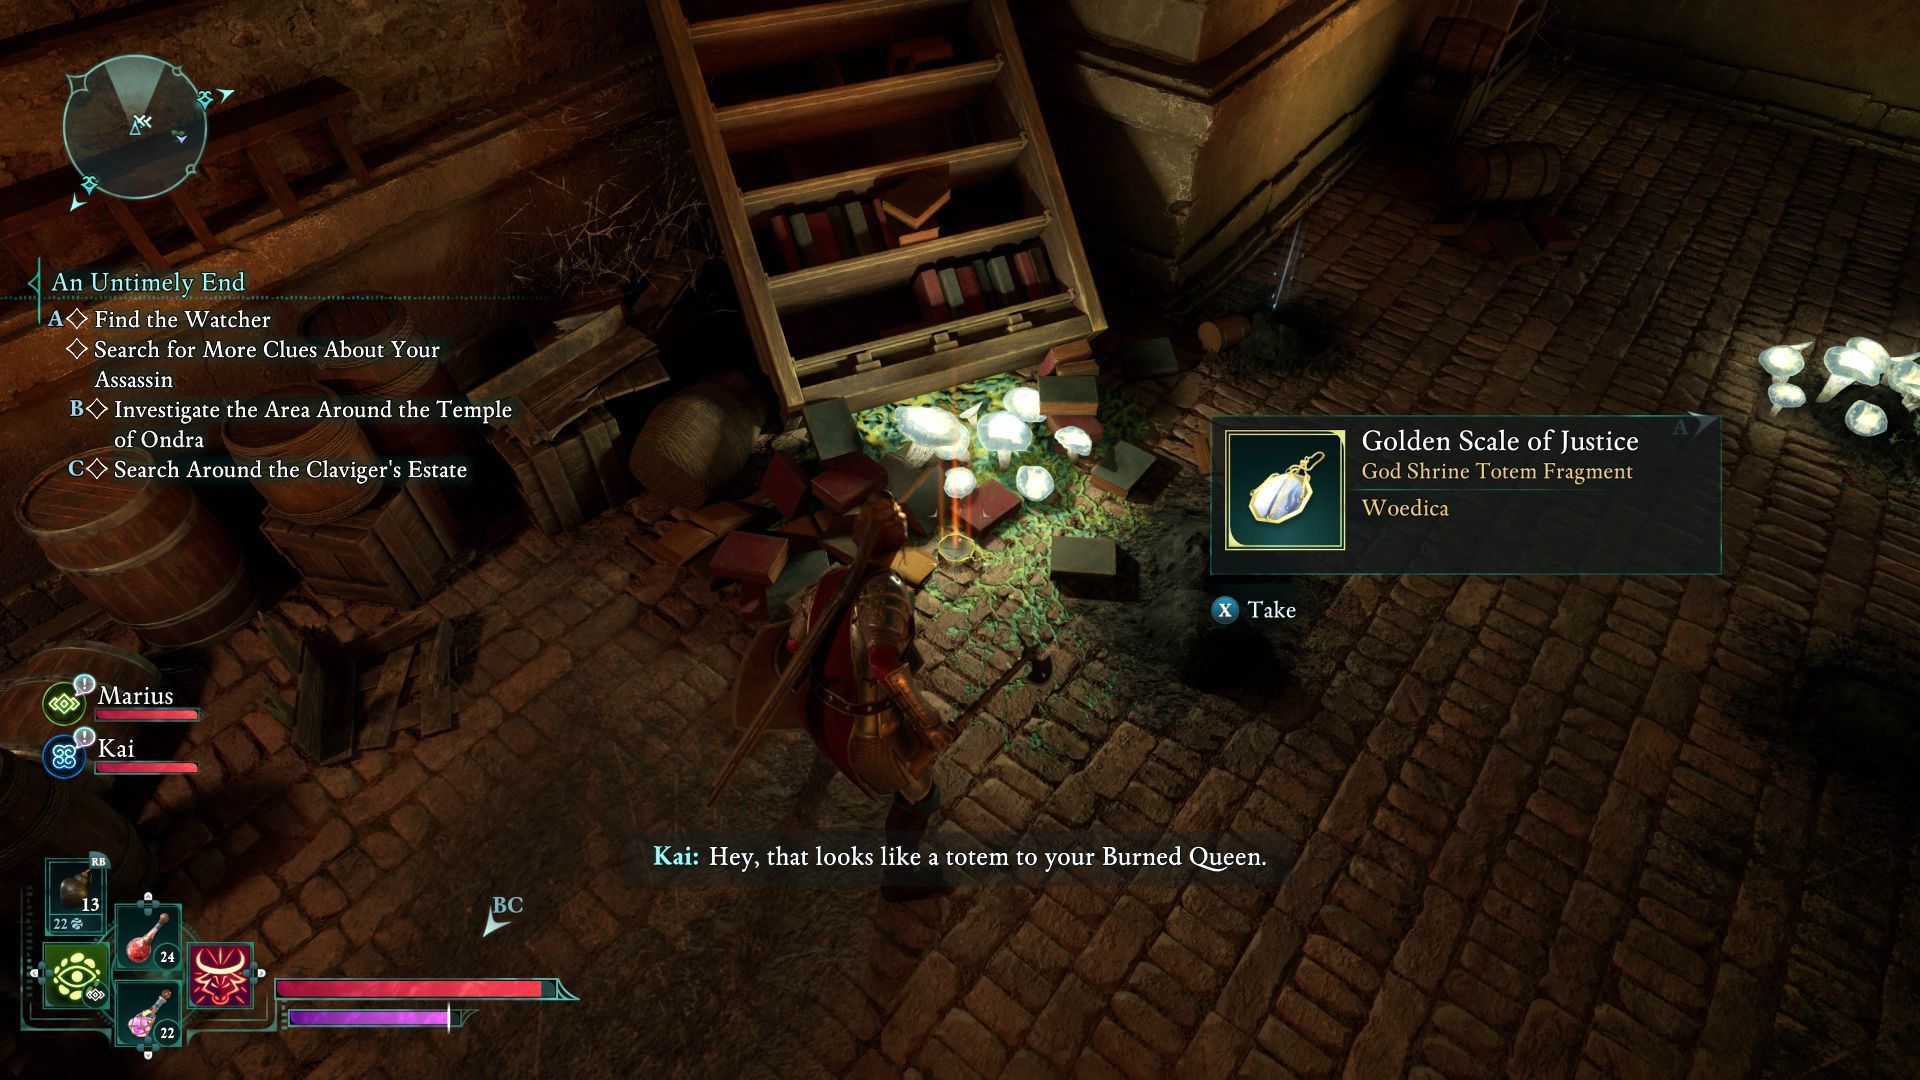
This totem fragment is in the southern part of Paradis. Start near the pharmacy and head west from there.

Along the way, you'll need to set the spiderwebs on fire - you can use one of your fire attacks or use the skills of your companion Kai. Go down the ladder and defeat the phantoms, then search for the collectible.
Golden Scale of Order - Dawnshore

This totem fragment is in the Pargrun Cache location - it is located in the northern part of the Dawnshore map.
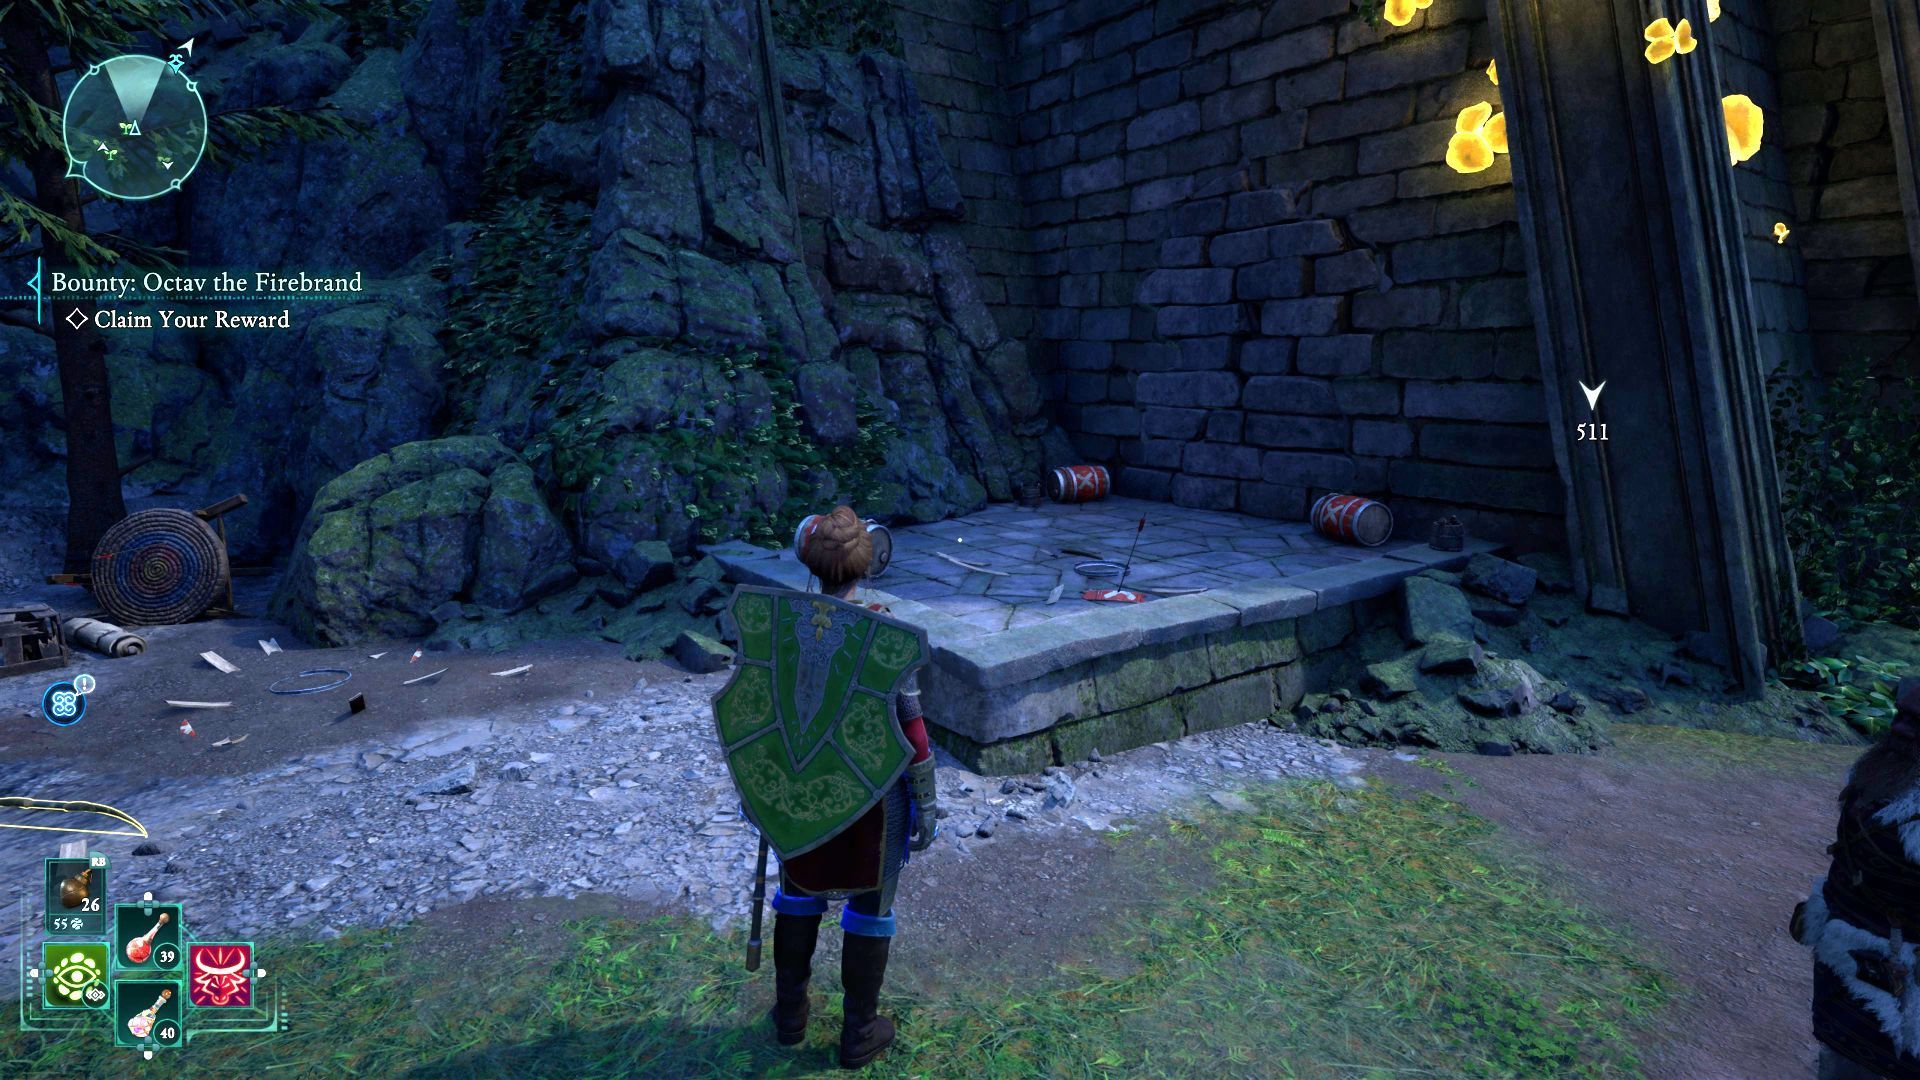
The Pargrun Cache is unavailable by default. Explore its western end to find the explosive red barrels shown in the picture. Attack them from a distance to cause an explosion that destroys part of the wall.
You can now go through the Pargrun Cache and reach the adjacent rock ledge with the collectible.
Golden Flames - Dawnshore
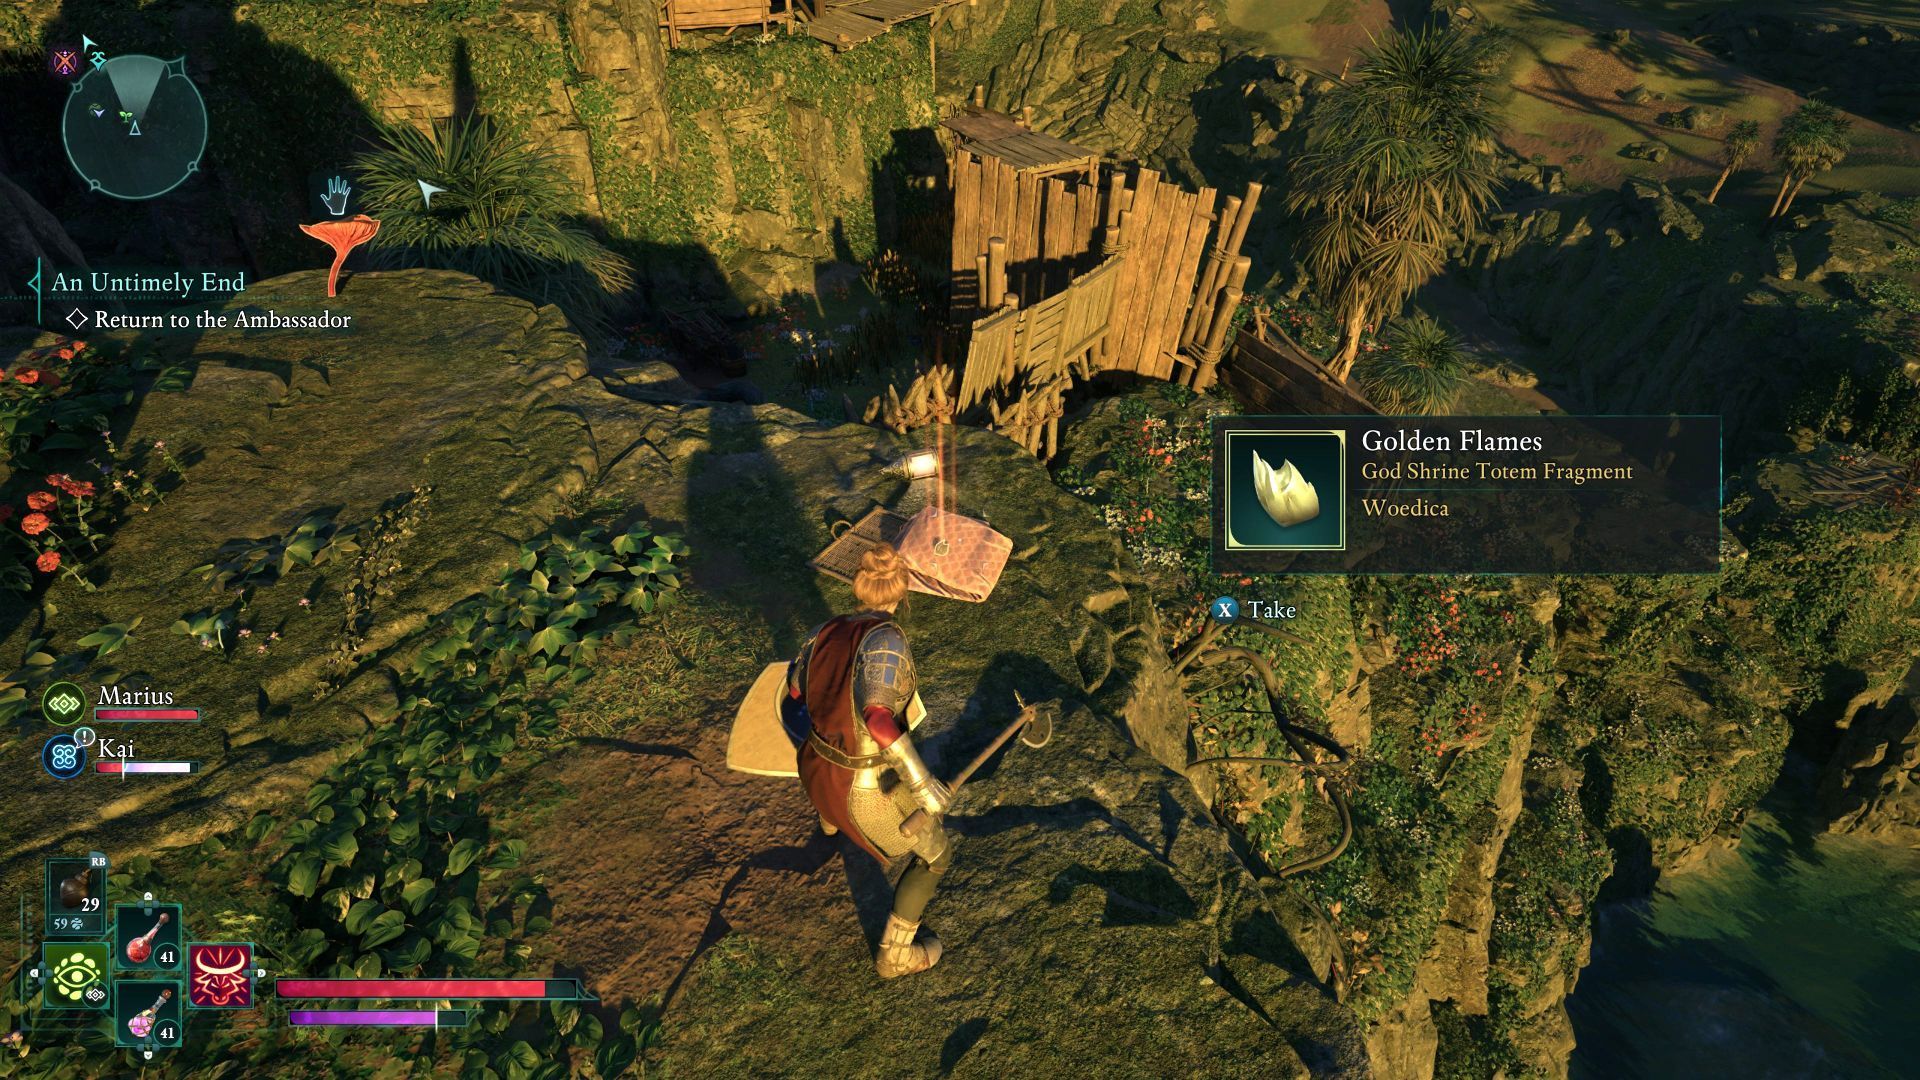
This fragment is on the large southern island called Castol's Folly. Explore the eastern part of the island to find this secret.
Golden Plaque of Oaths - Dawnshore
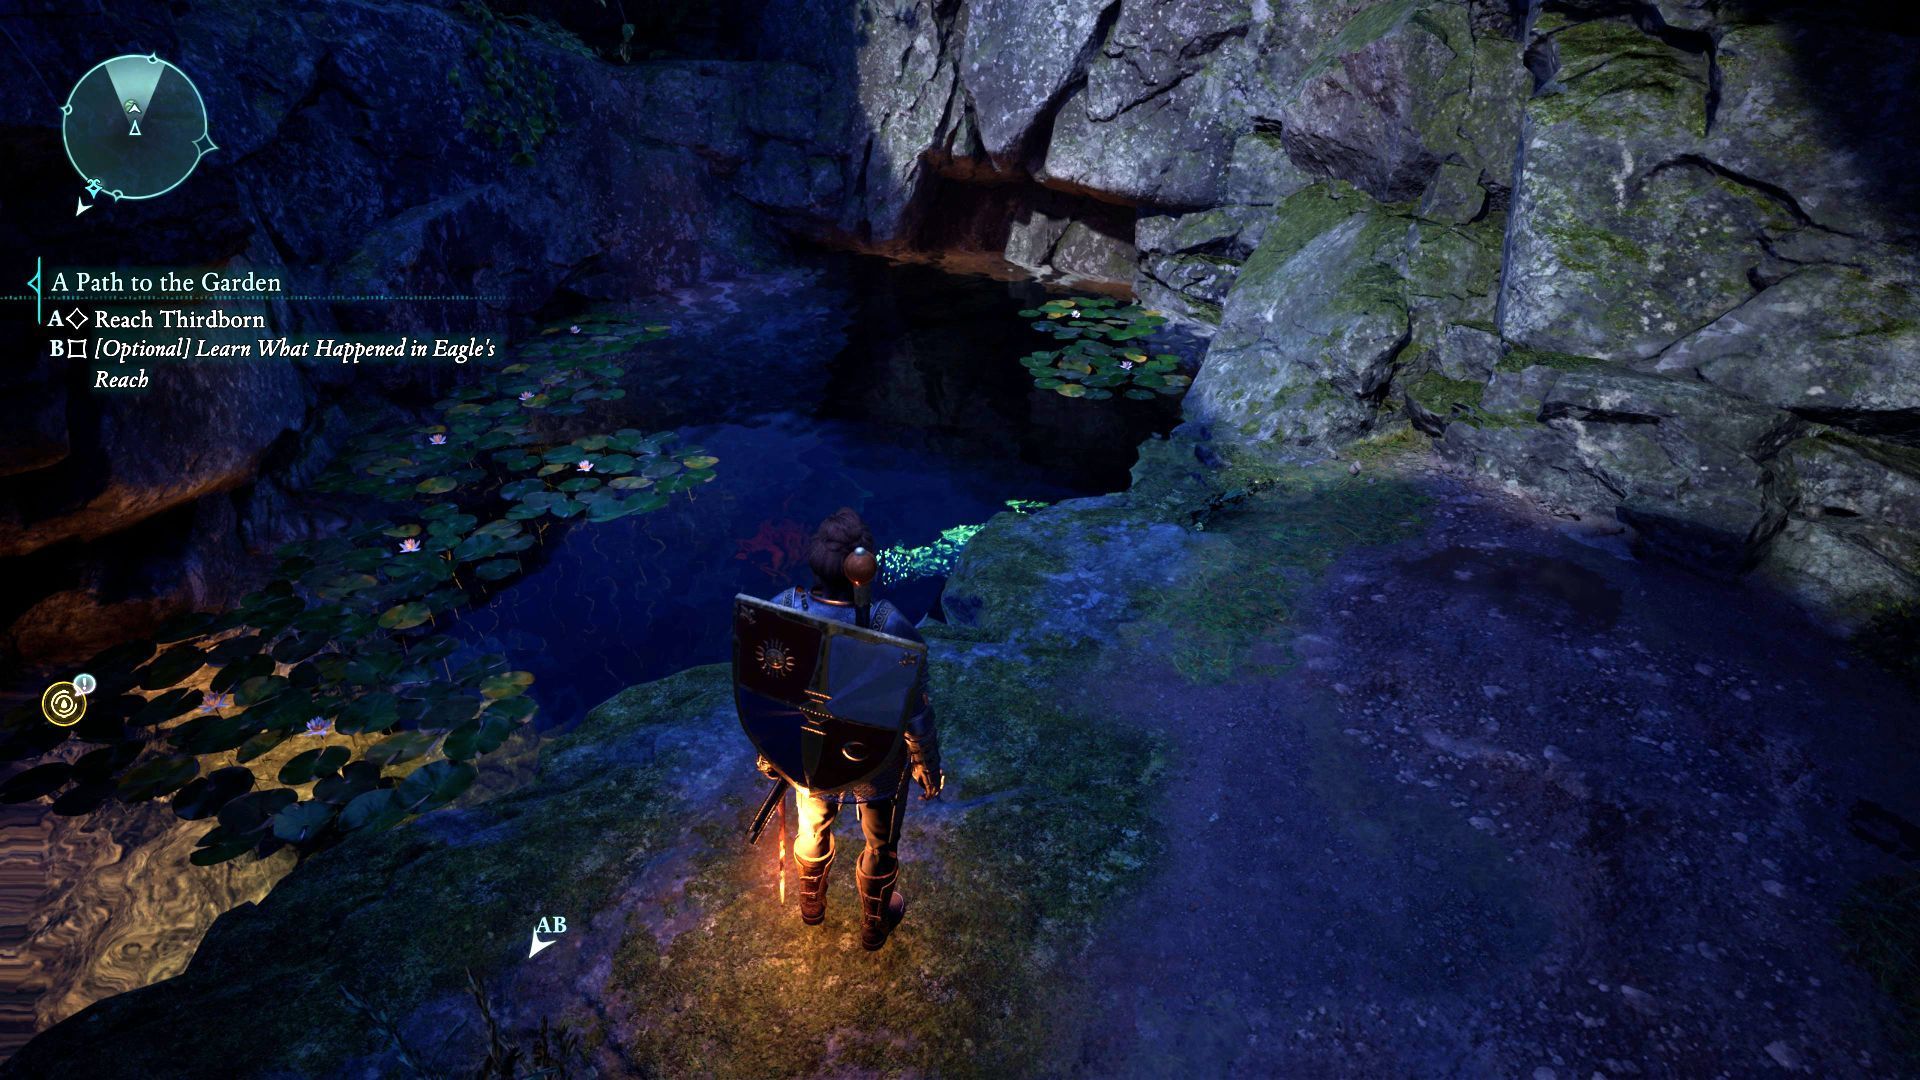
This fragment is in a cave beneath the Usher's Hand, located to the east of the city.
You need to reach the water reservoir from the above image, dive in and swim through the underwater tunnel.
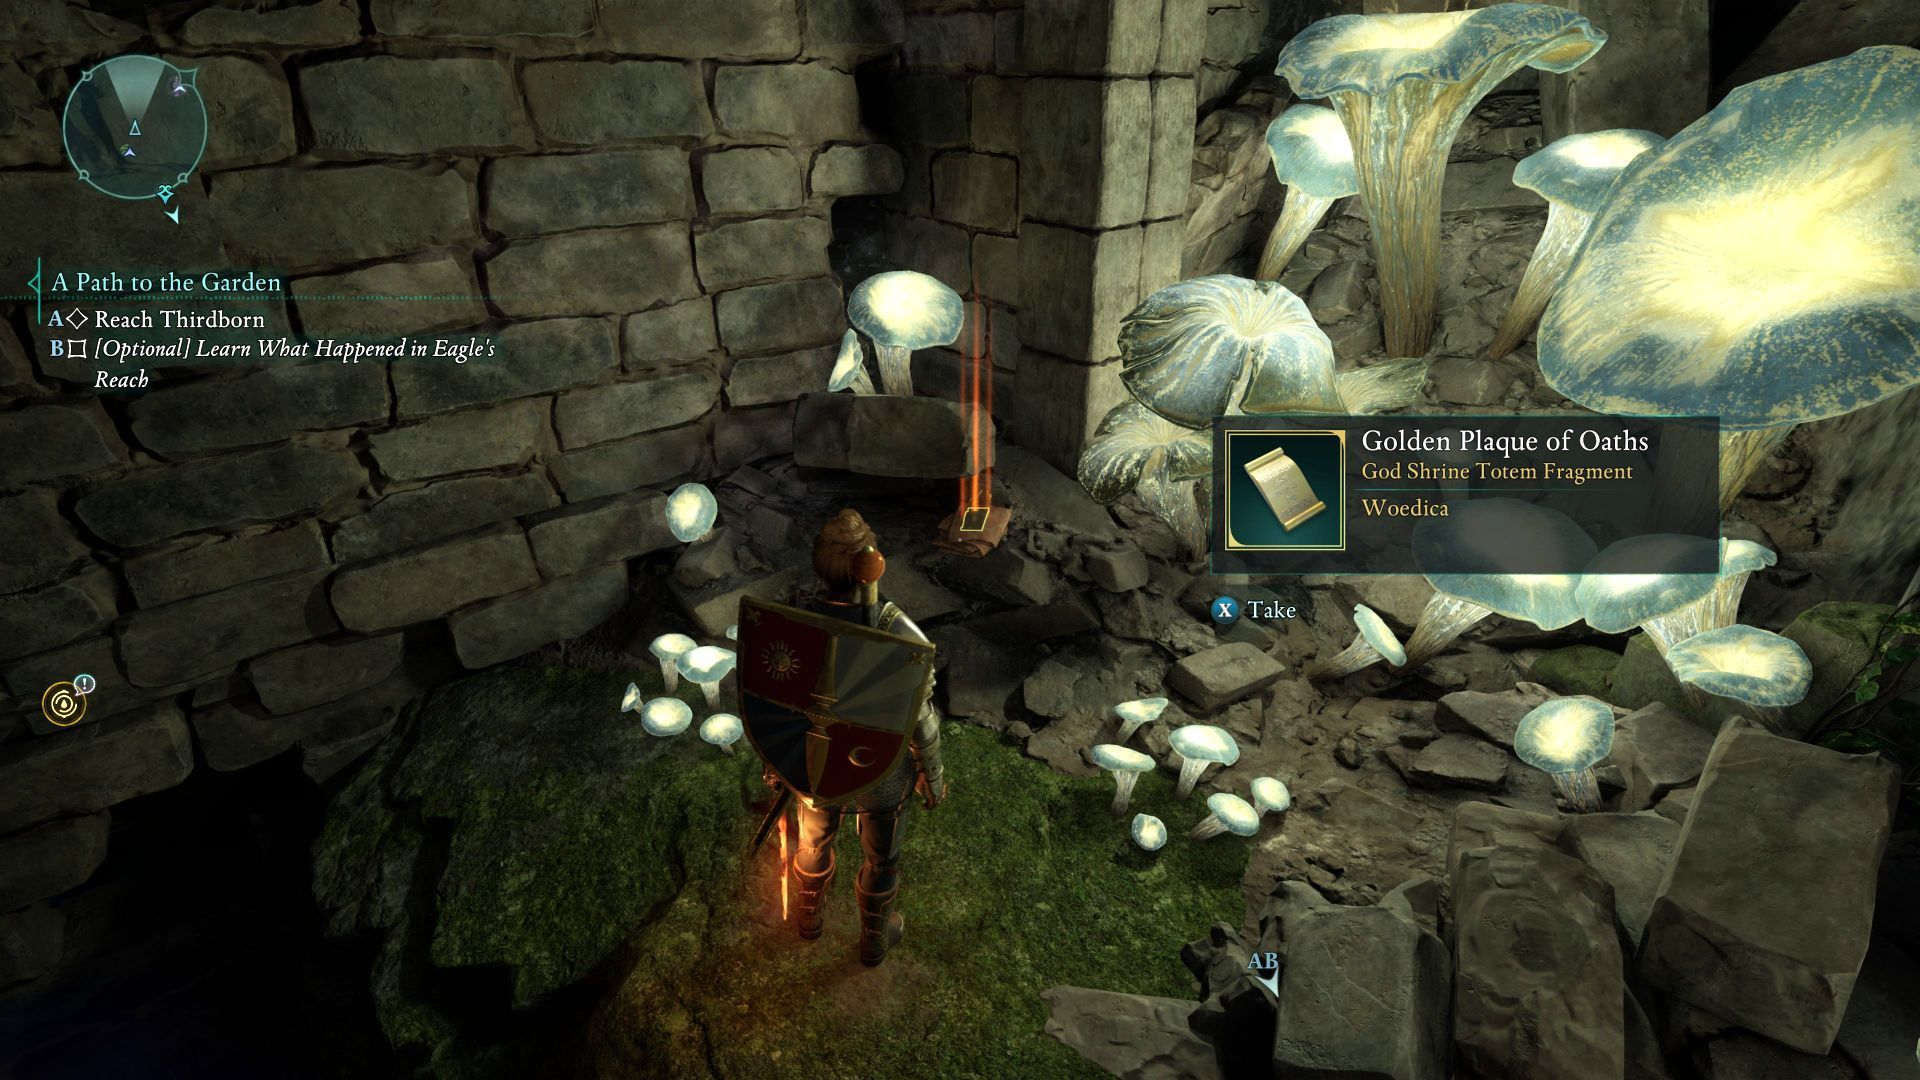
You will reach a secret area with the final piece of the totem.
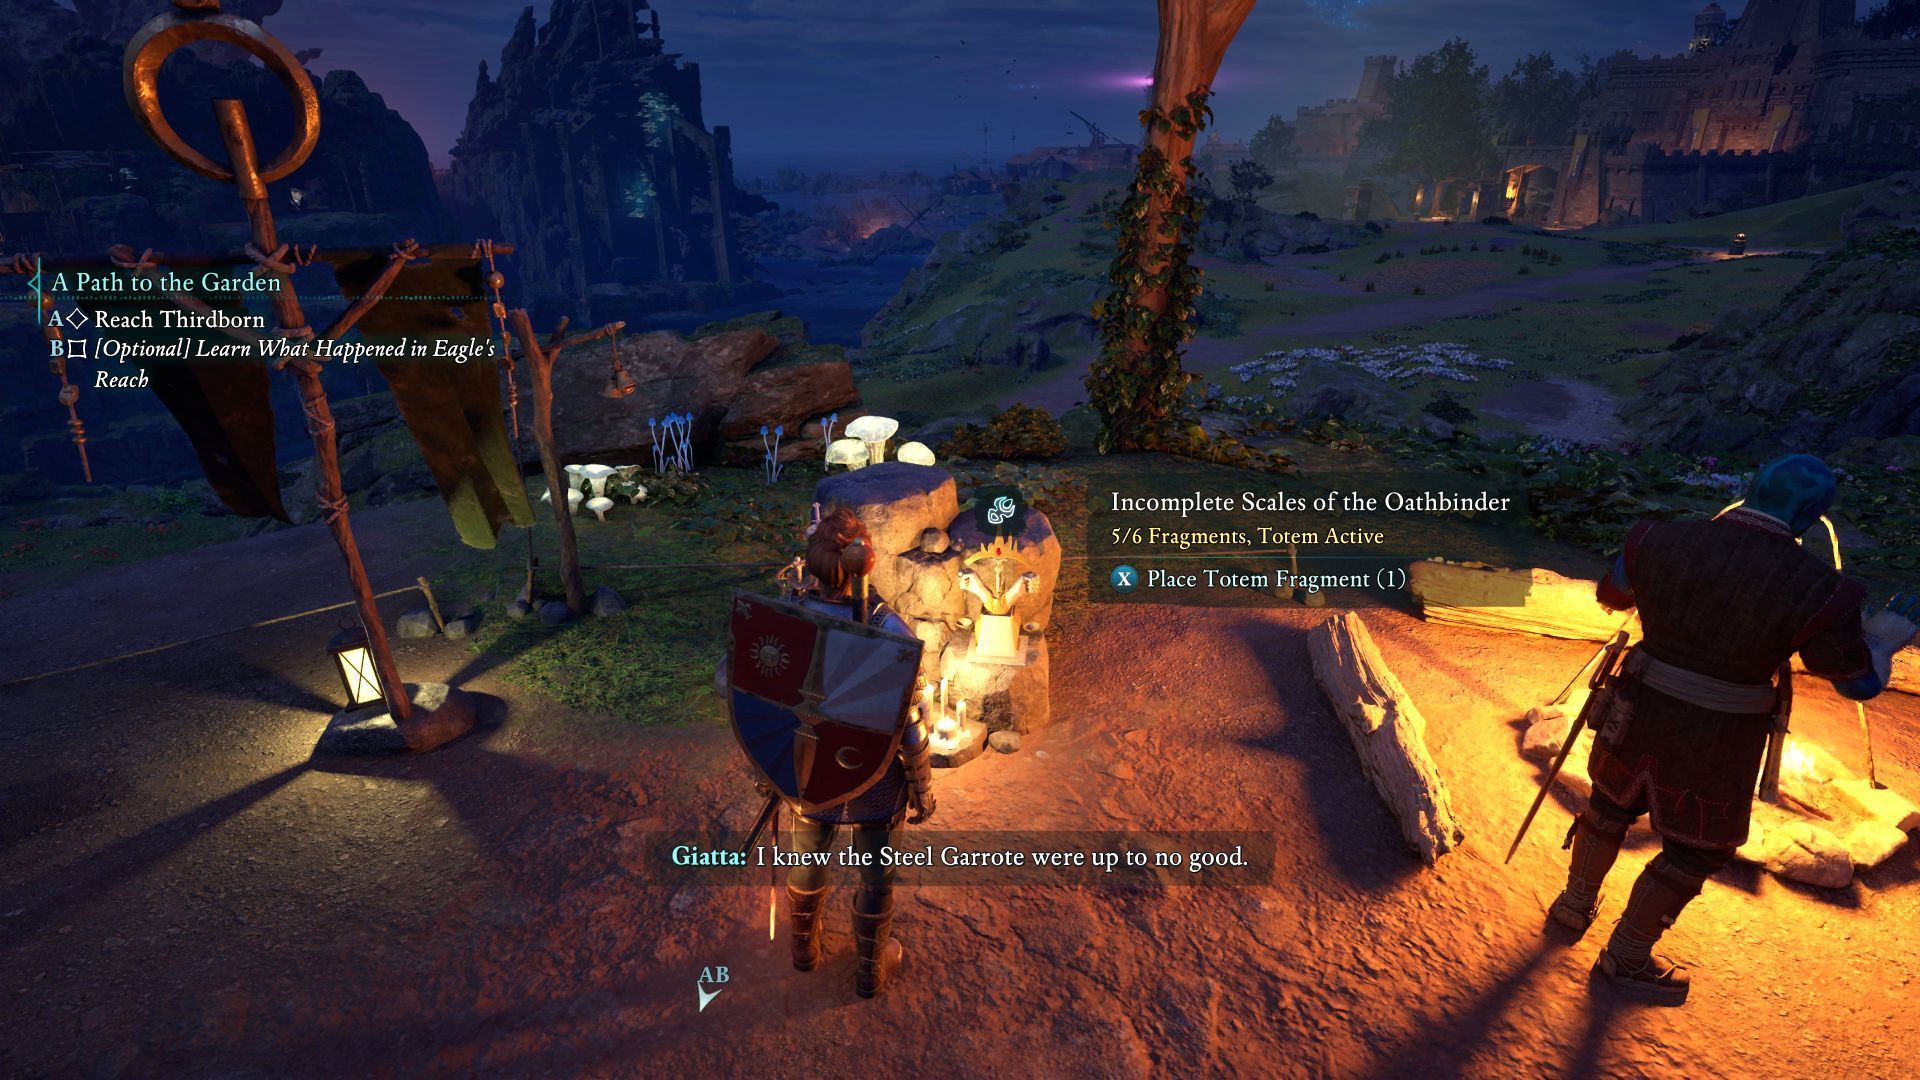
Scales of the Oathbinder - Dawnshore
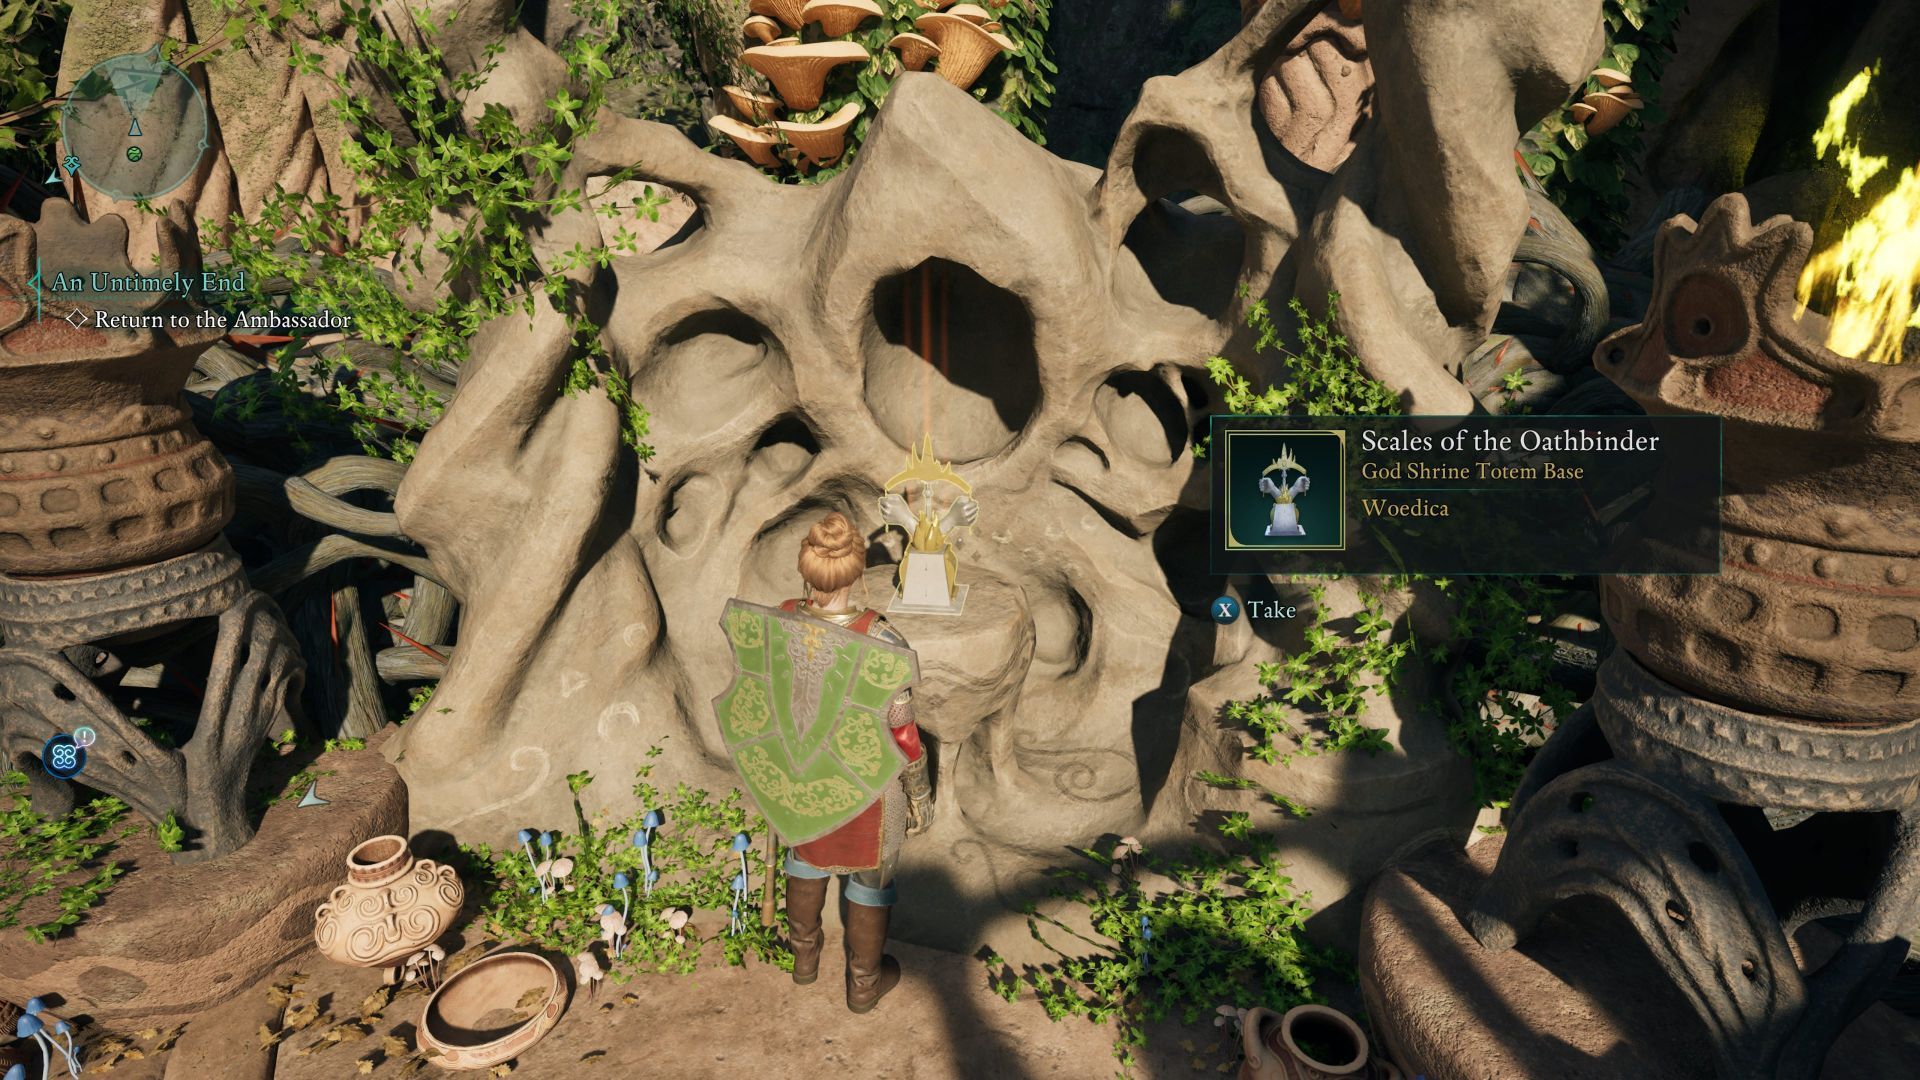
This is a totem core, and collecting it is required to place all of the fragments you have.
You must visit the Shrine to Woedica location, which is located to the north-east of the city. The secret is placed on the altar.
Totem stat bonuses - Dawnshore
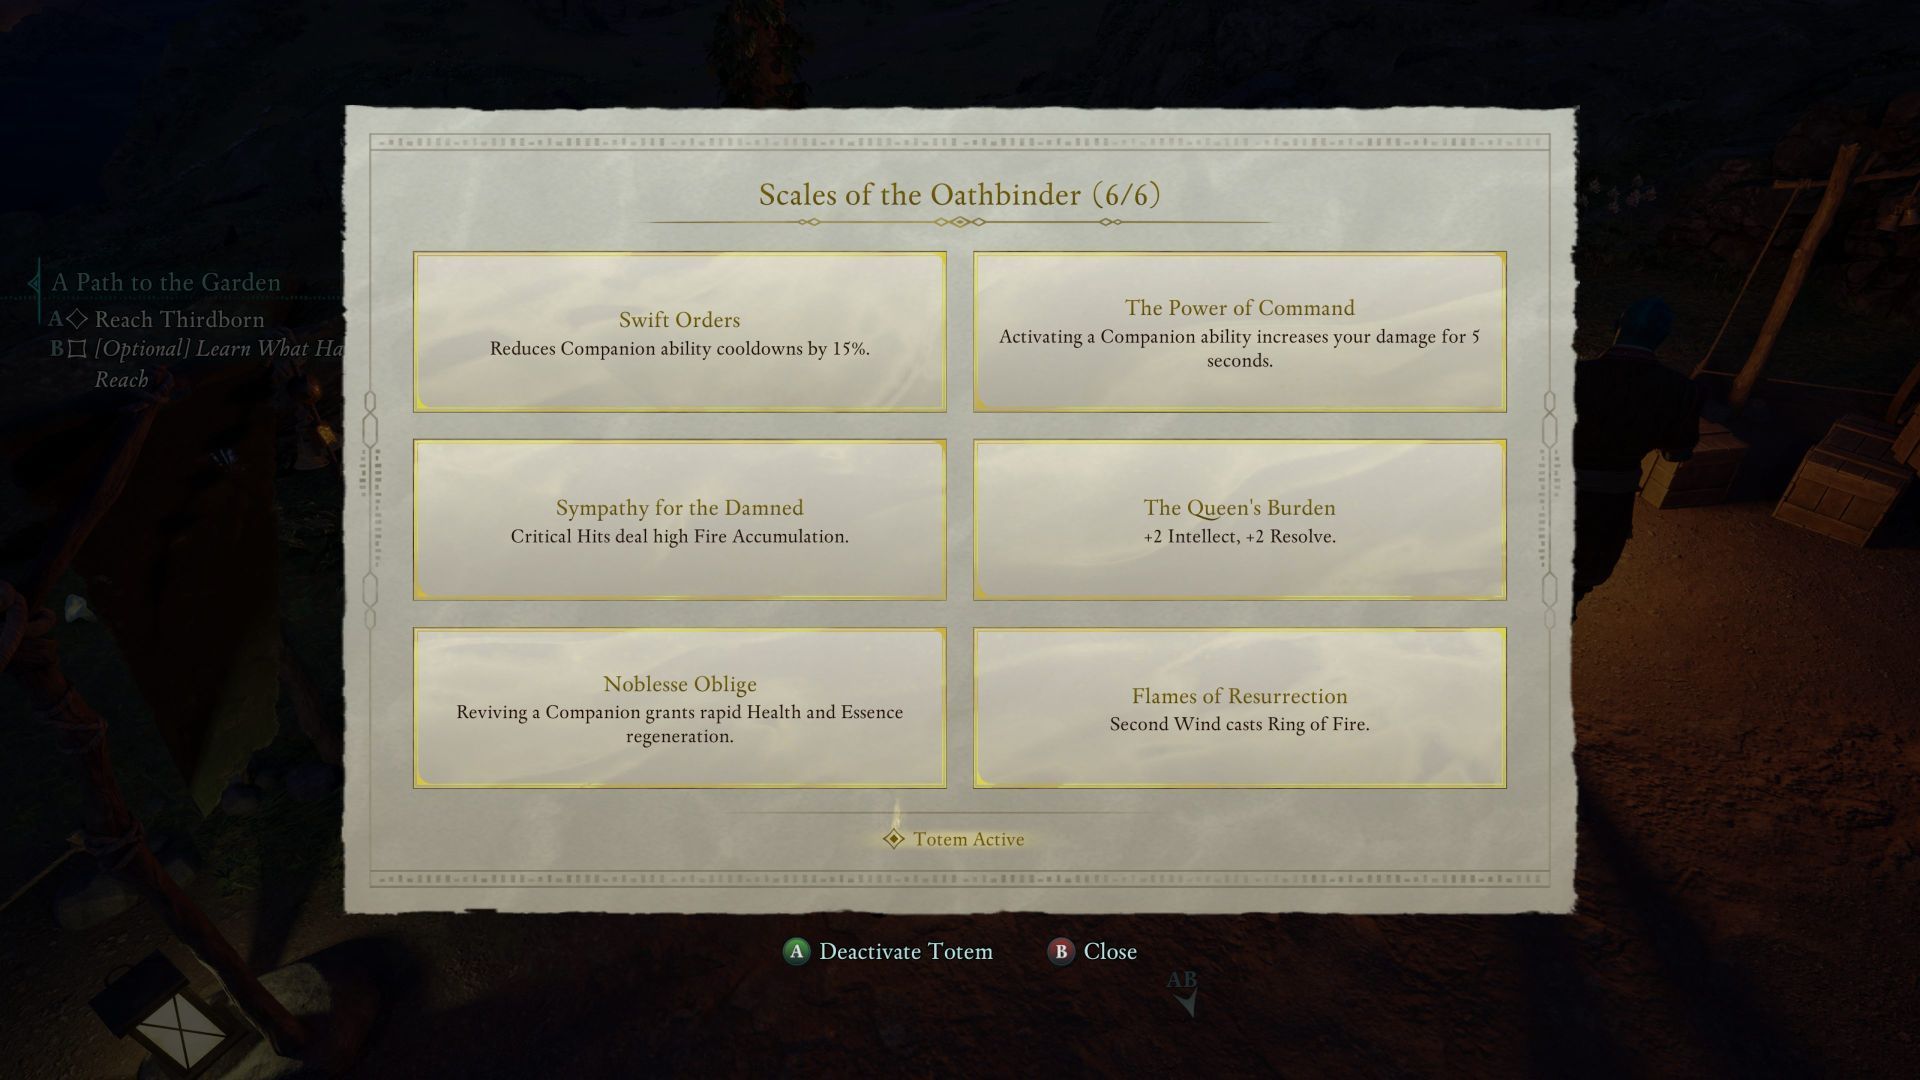
Below is a list of stat bonuses that the collected fragments provide:
- Swift Orders - Reduced Companion Abilities cooldown by 15%.
- The Power of Command - Activating a companion ability increases the protagonist's damage for 5 seconds.
- Sympathy for the Damned - Critical hits generate fire.
- The Queen's Burden - Increases Intellect and Resolve attributes by 2 points.
- Noblesse Oblige - Reviving a companion quickly regenerates health and essence.
- Flames of Resurrection - Using Second Wind activates a circle of fire.
Map of all Totem Fragments in Emerald Stair
Obsidian Prayer Beads - Emerald Stair
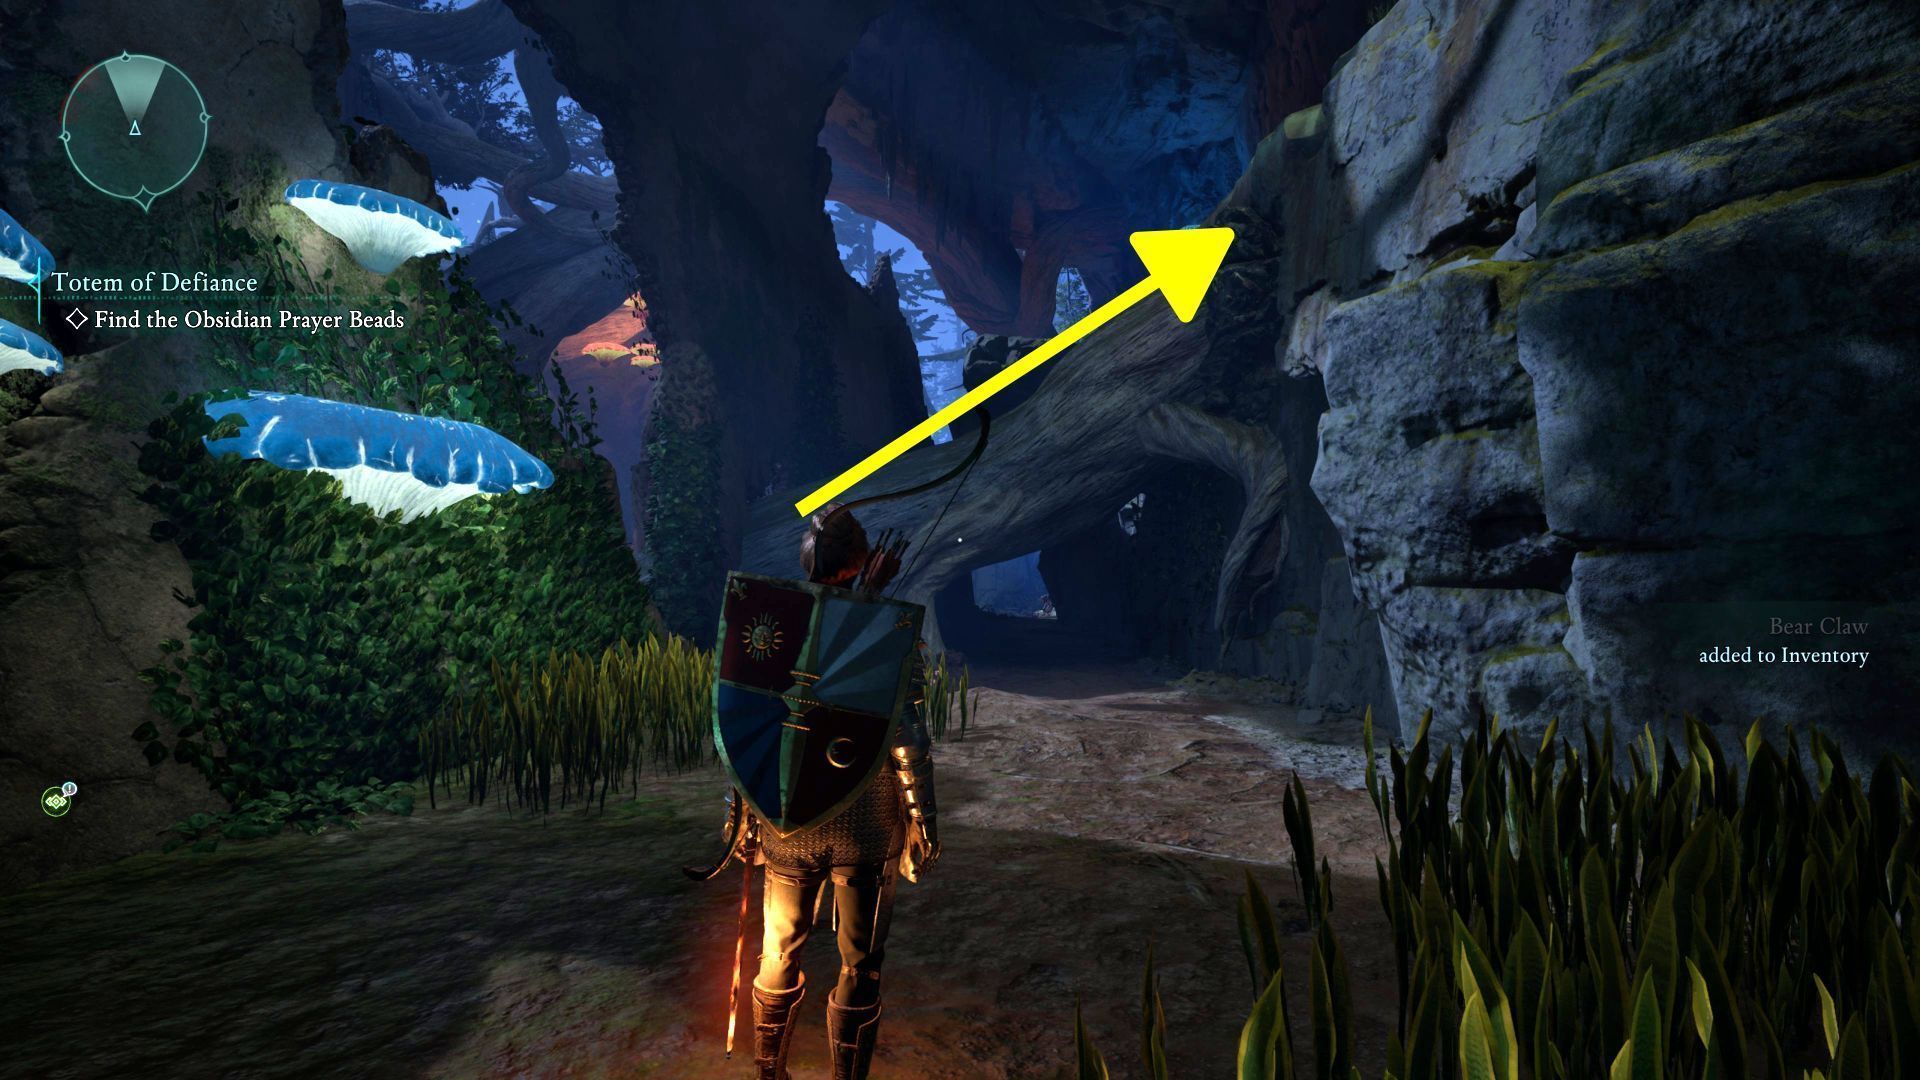
This fragment is hidden at the western end of the region - a location called Delemgan Glade. Look for the place shown in the picture where you can climb the large root. This may take several tries.

Make your way to the higher rocky ledge where, in addition to the skeleton, there is the totem fragment you are looking for.
Idol of Covert Plots - Emerald Stair

This totem fragment is in the Grim Wetlands area in the northwestern part of the region. You need to get into a locked building. Start west of it (image above) and jump inside using the missing piece of roof.

The collectible lies in the building in front of the altar.
Sacrificial Dagger - Emerald Stair
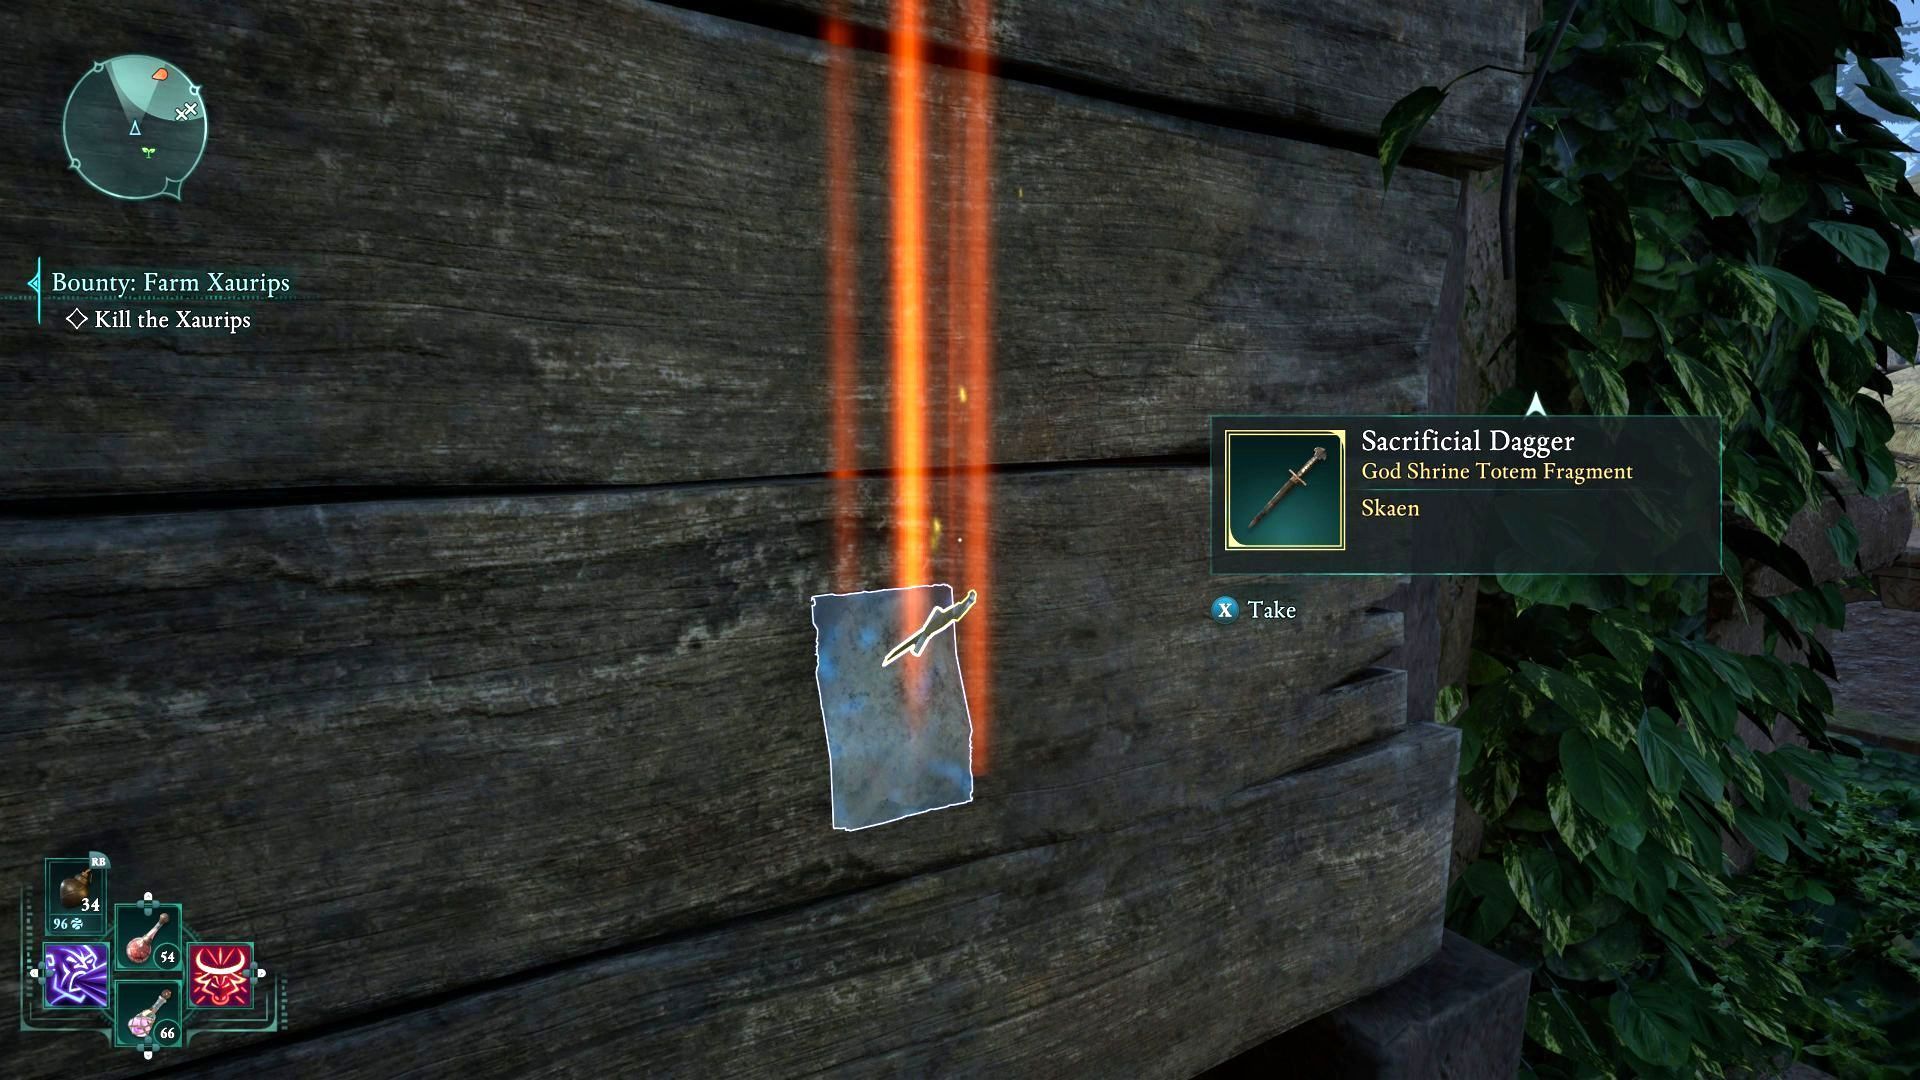
This totem fragment is located in the Abandoned Farms area in the northeastern part of the region. Explore the warehouse. The dagger that is the collectible is stuck in the wall and along with it you will also find a note.
Idol of Violent Rebellion - Emerald Stair
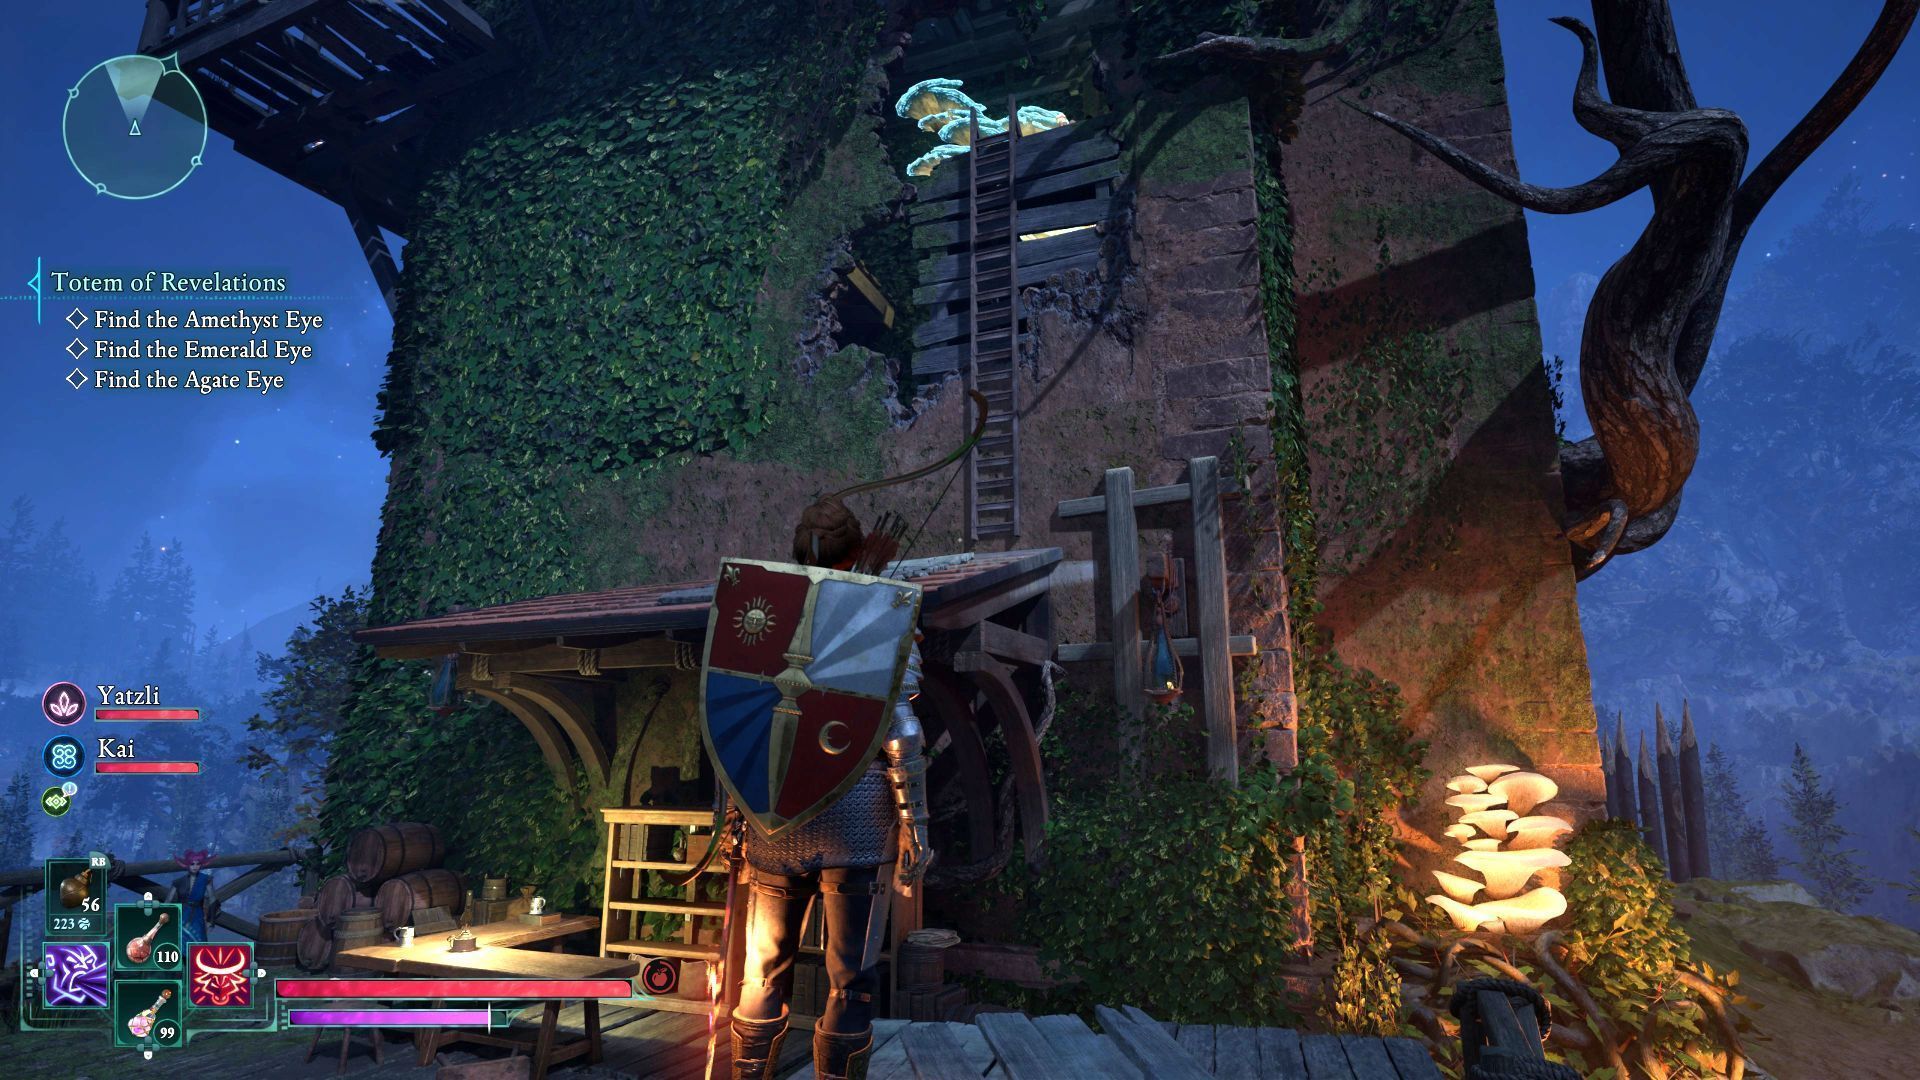
This totem fragment is at the top of the tower of the Ranger Headquarters - it is located in the eastern part of the region. Climbing can be problematic - you have to start it in the place shown in the picture, jumping onto the small roof and then using the first ladder.
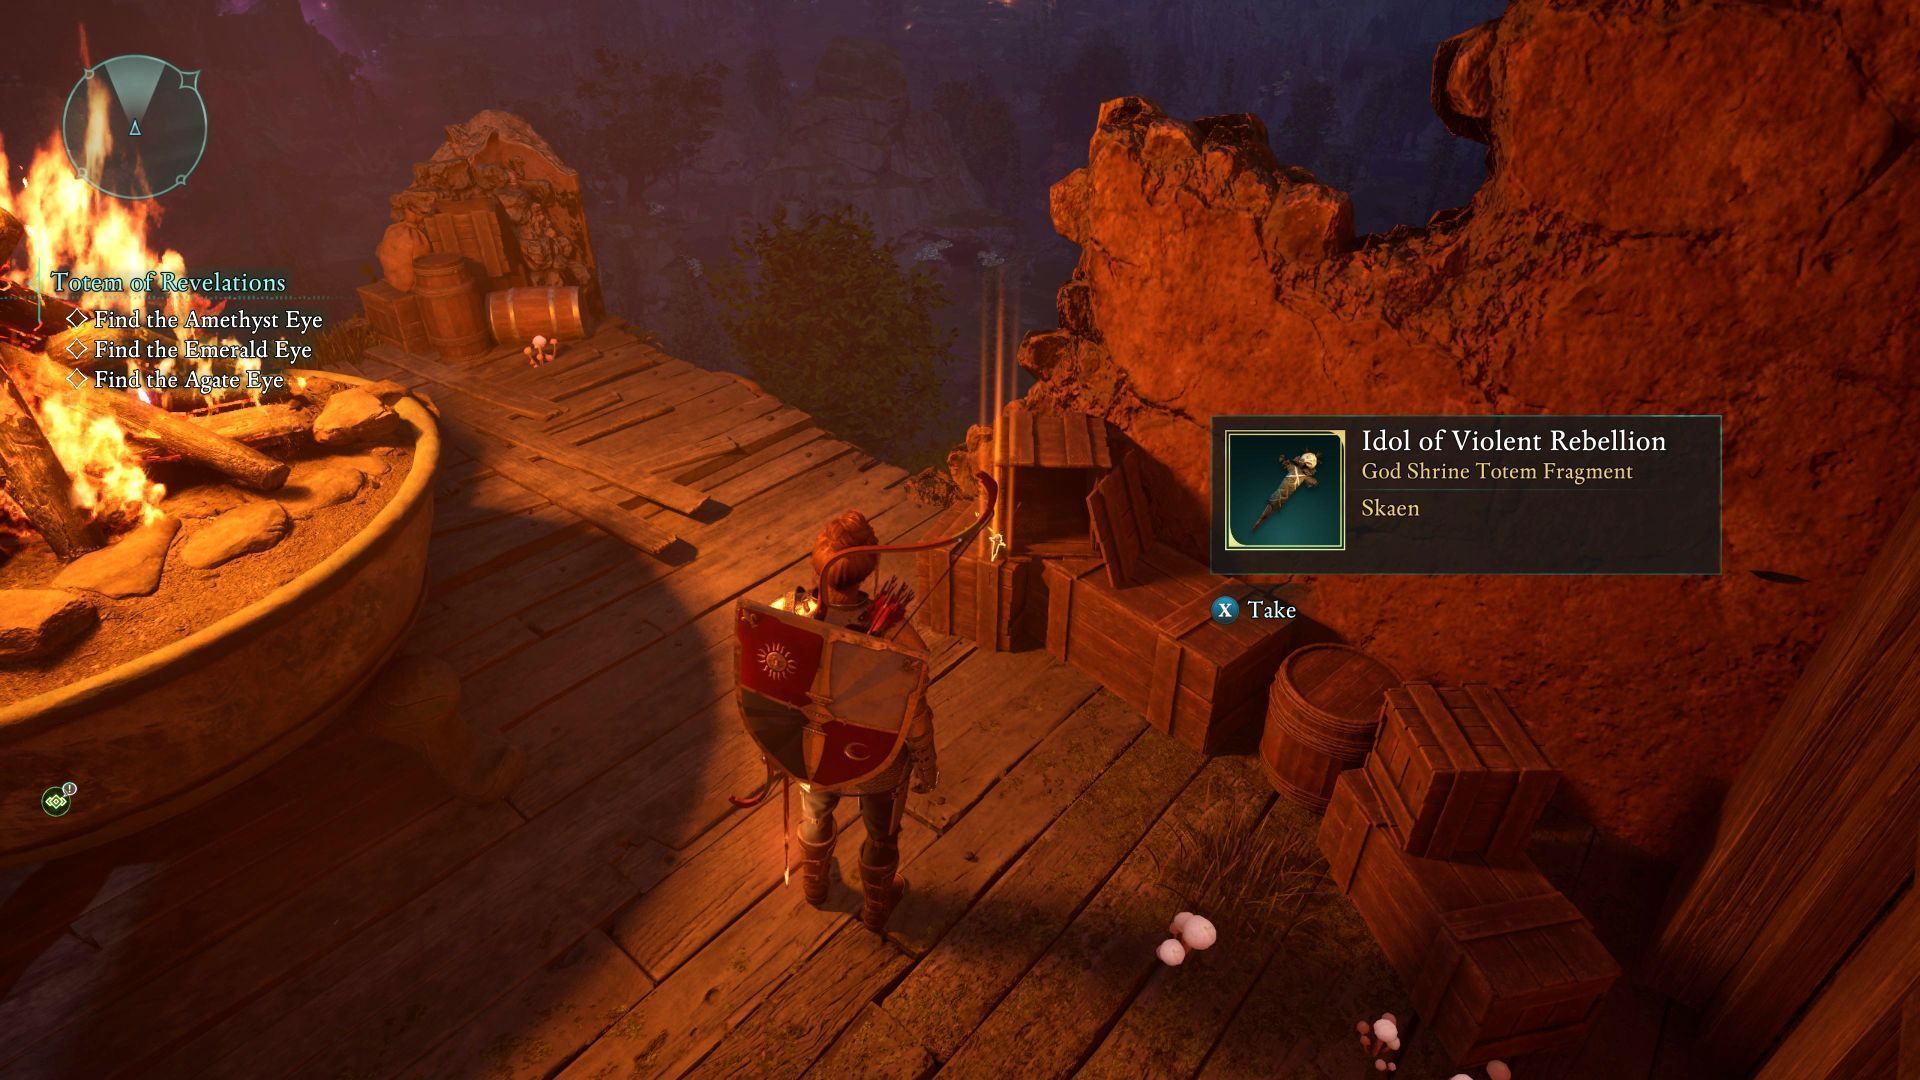
Make your way to the top, i.e. to the place where the fire is burning. The collectible is on the crates nearby.
Effigy Necklace - Emerald Stair
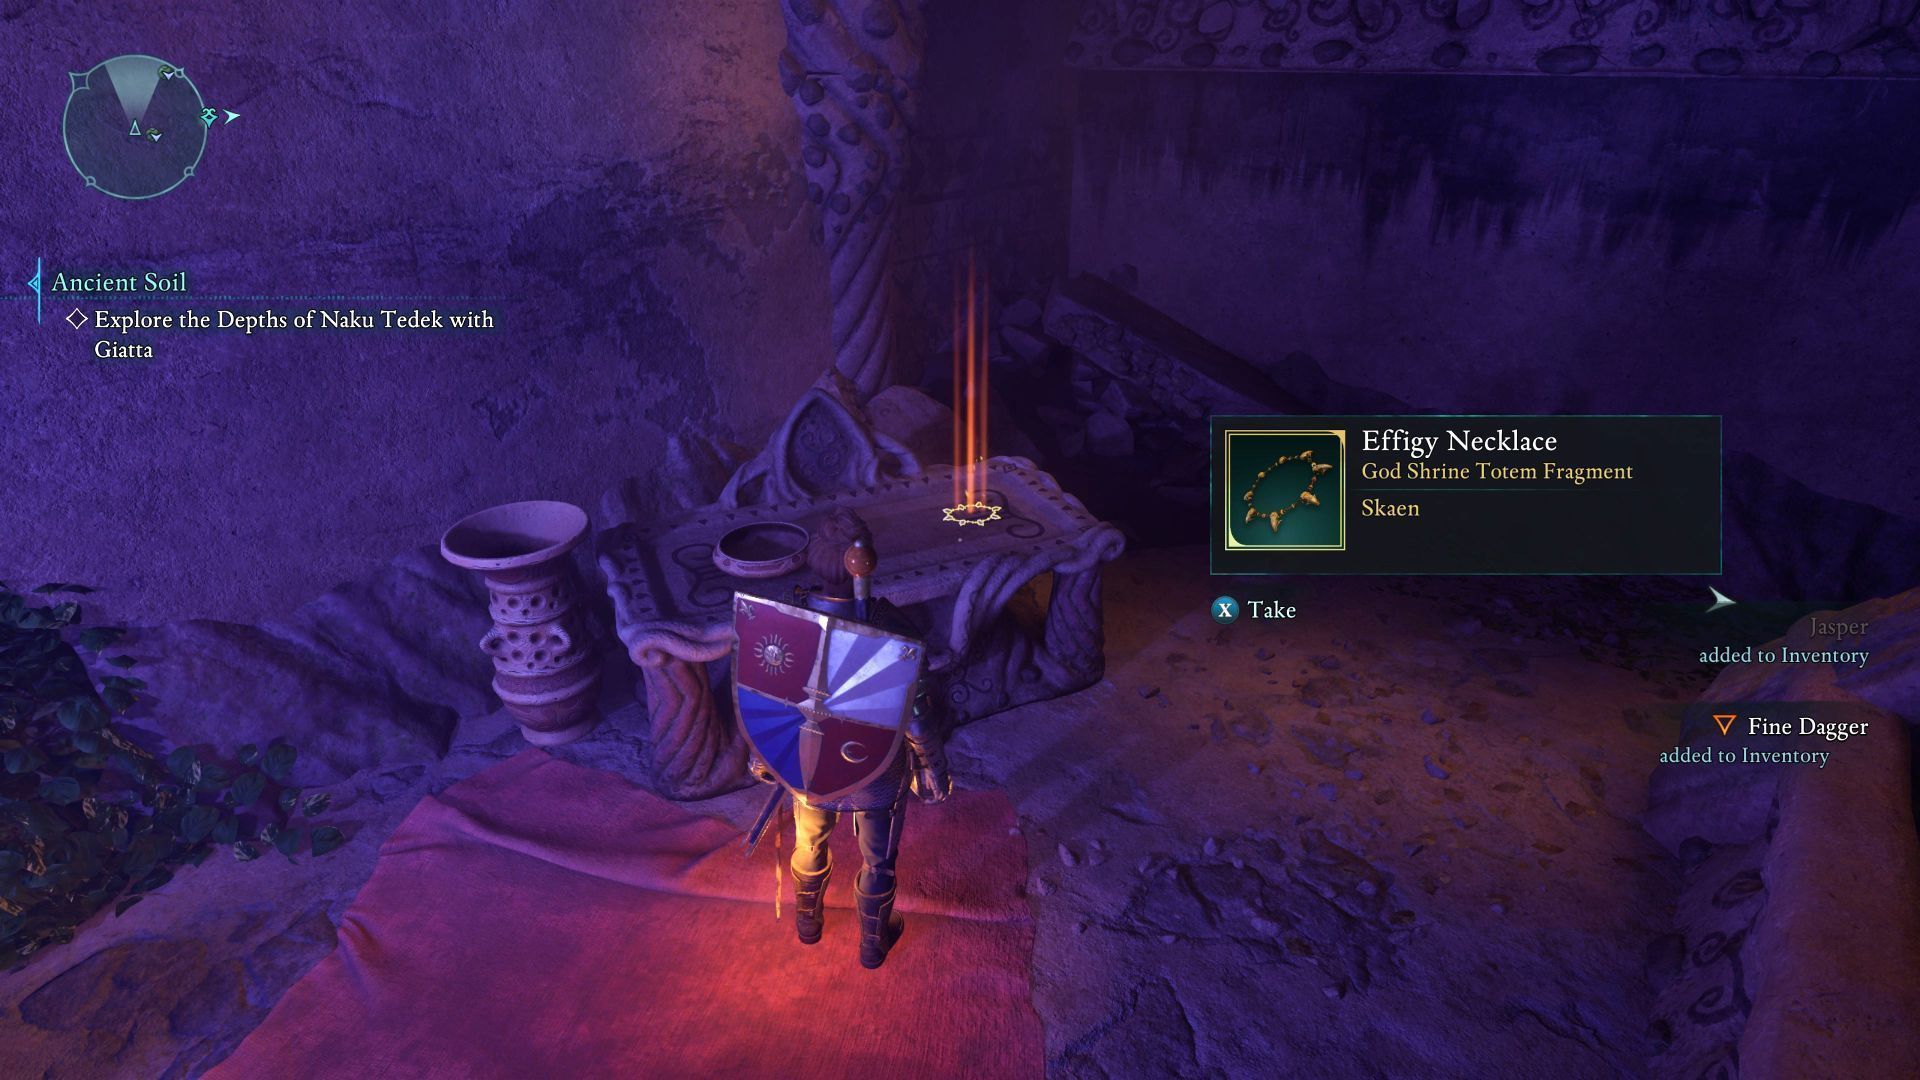
This totem fragment is inside the Naku Tedek location. It is located in the southwestern part of the region and is visited, among others, in the main storyline (you can also return there freely). Be careful when exploring this separate location. The collectible lies on the altar.
Idol of Secret Hatred - Emerald Stair
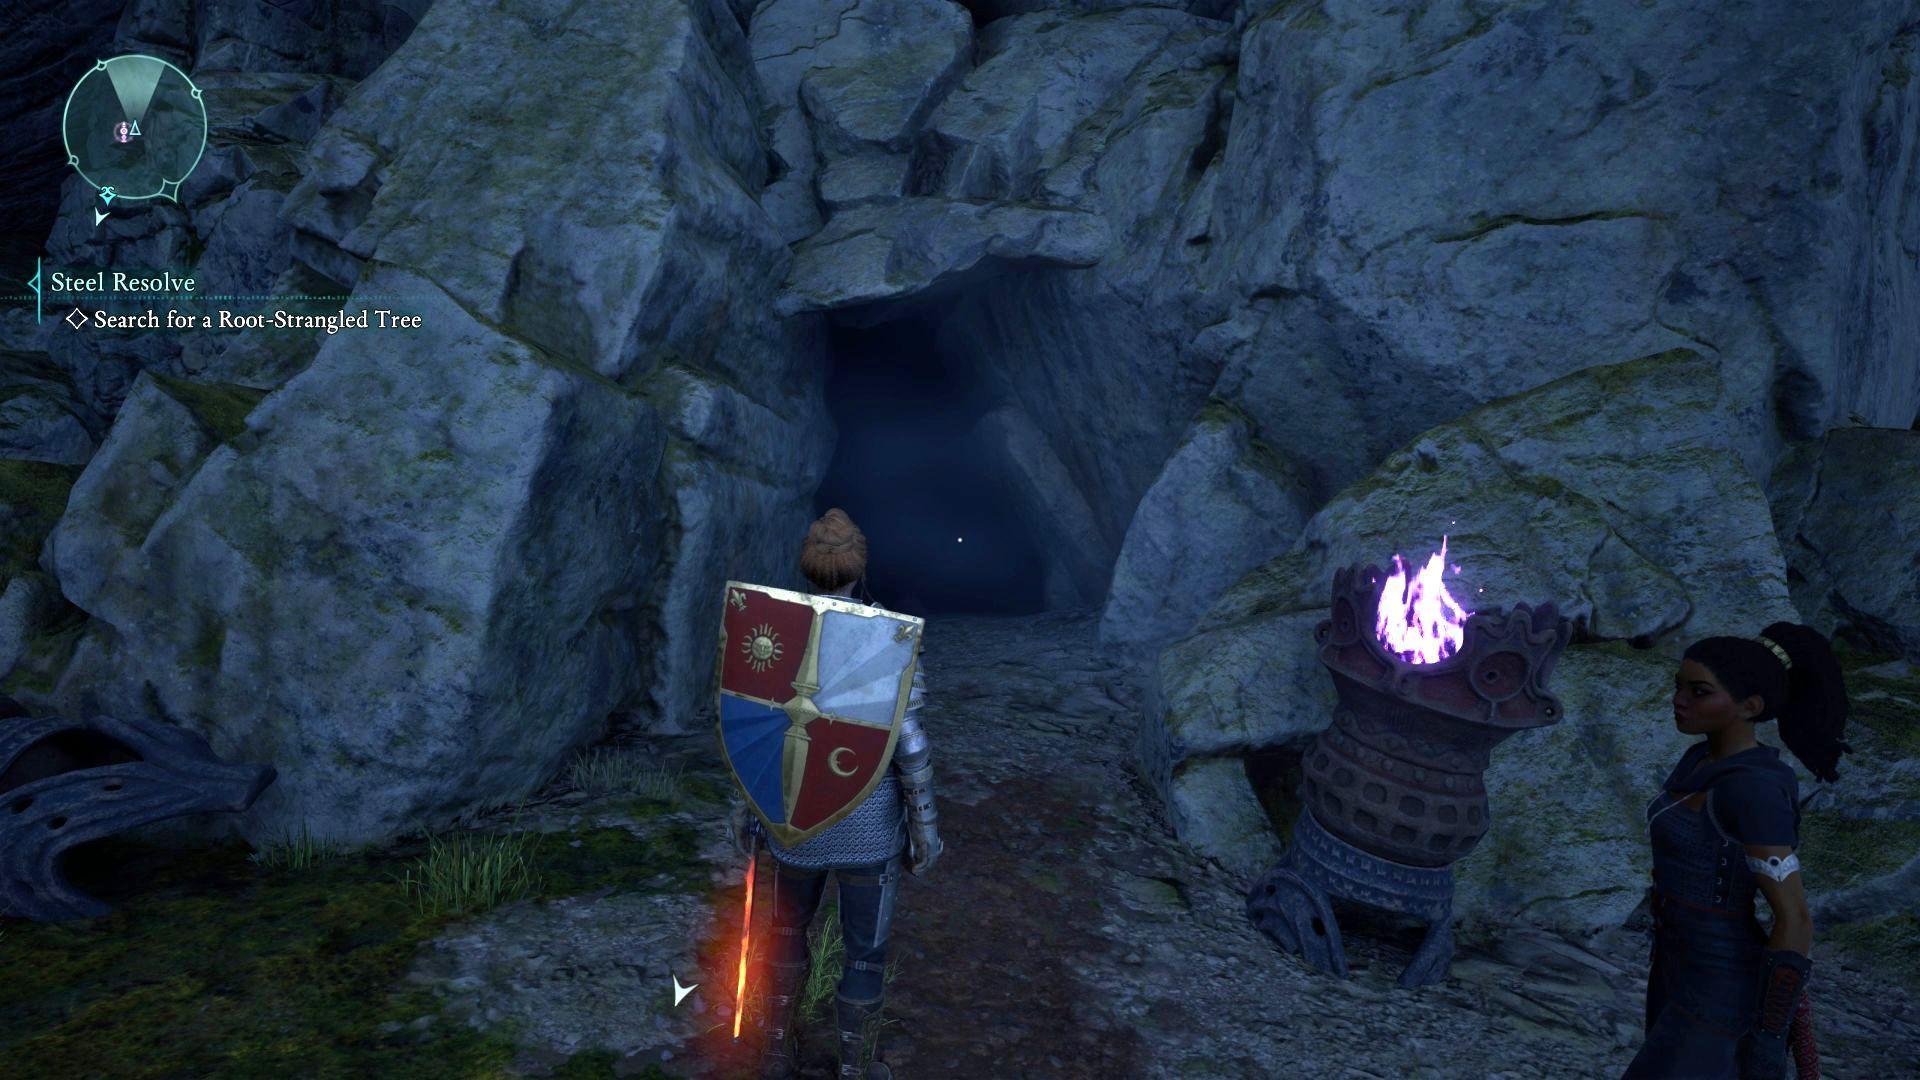
This fragment is inside the Ancient Grotto dungeon, which is located to the northwest of Naku Tedek. Find the fairly large cave entrance (image above).
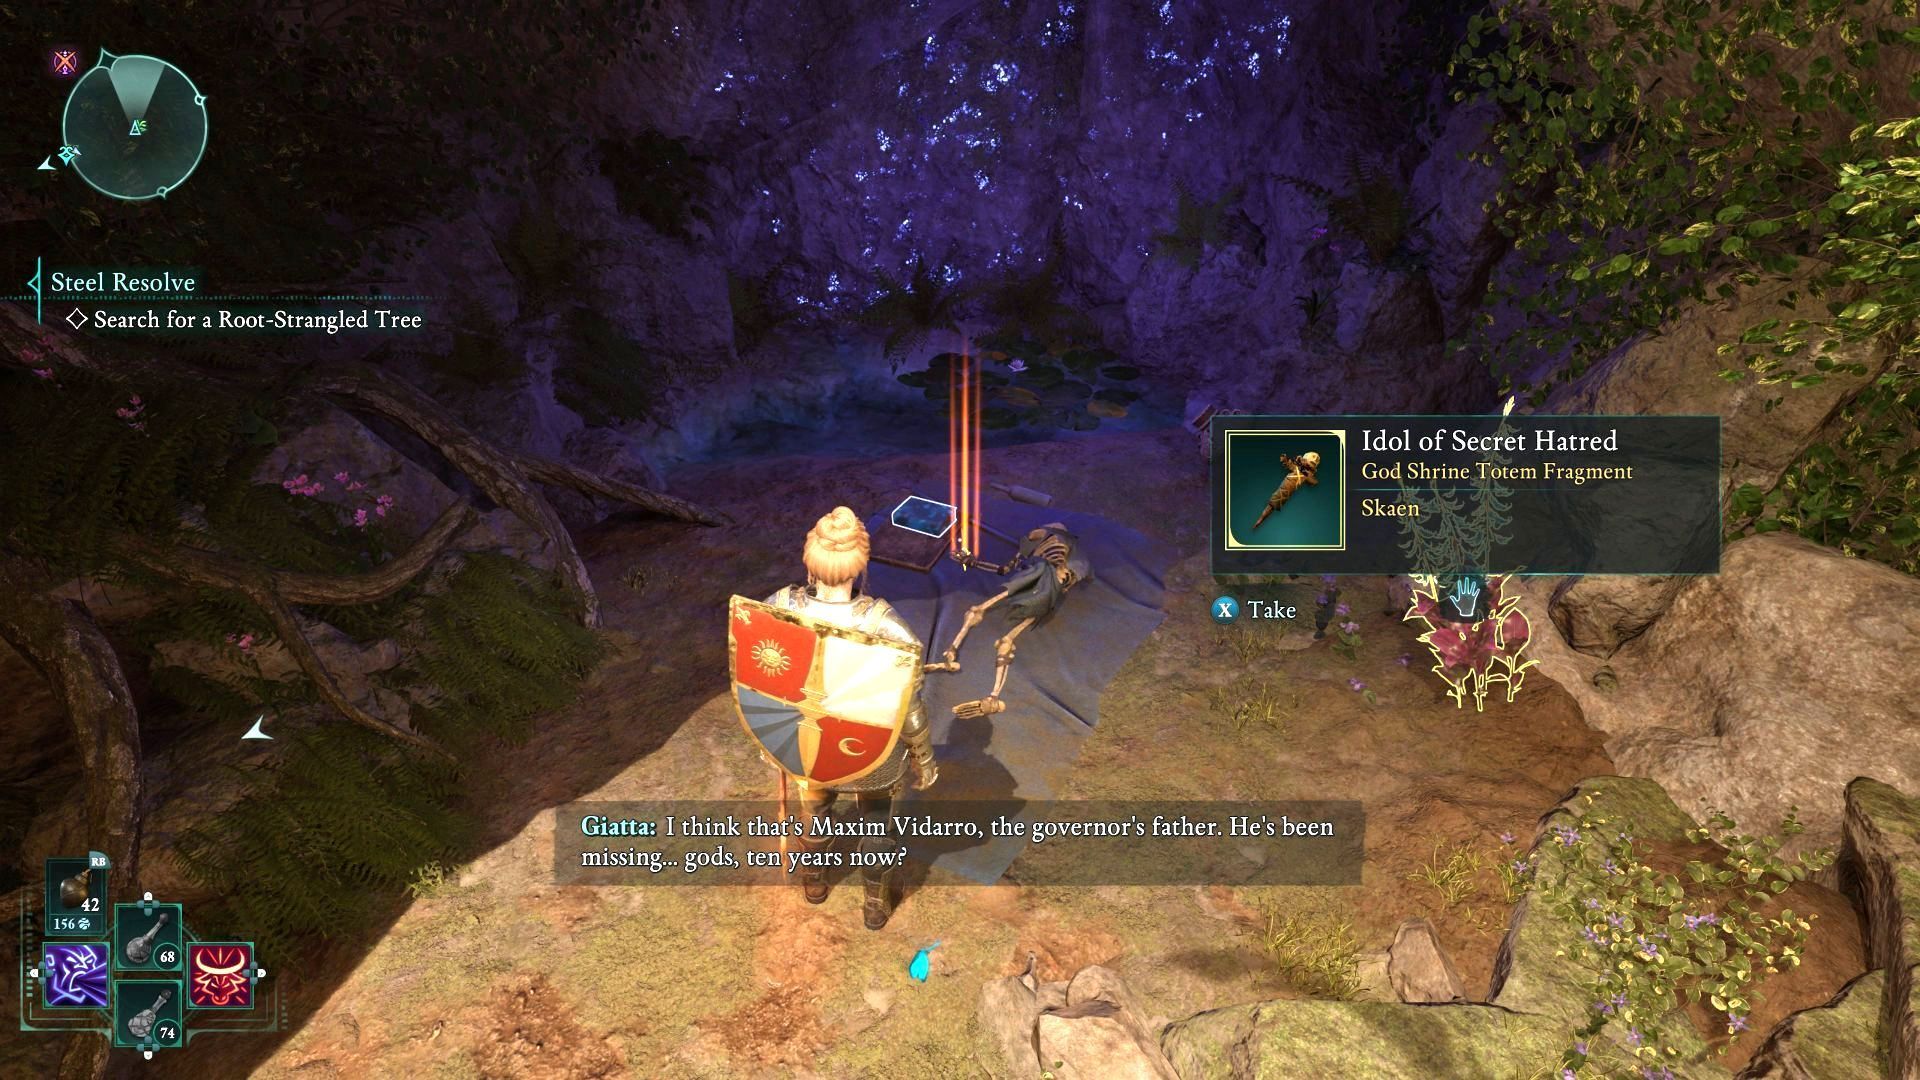
As you explore the cave, look out for brambles you can set on fire. By destroying the barricade you will reach the area with the skeleton and the collectible you are looking for.
The Schemer's Offering - Emerald Stair
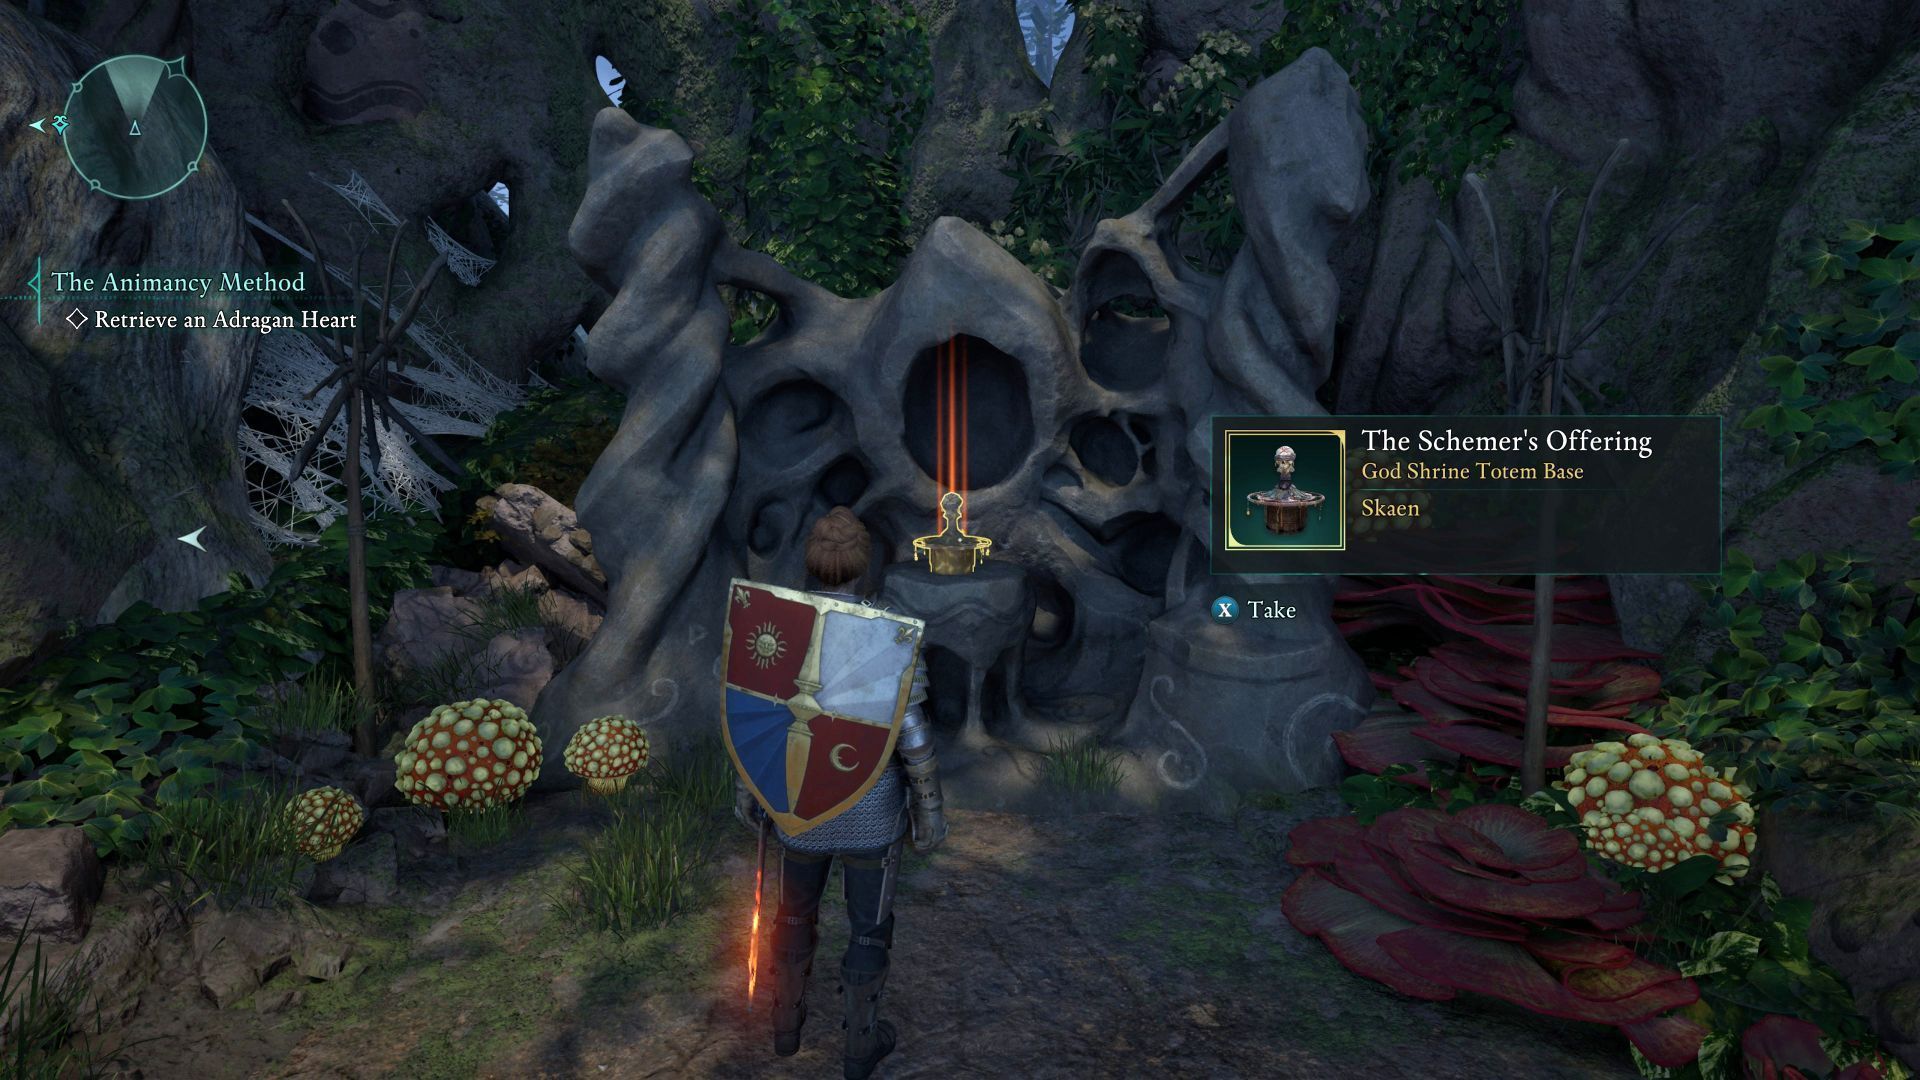
This is a totem core, and collecting it is required to place all of the fragments you have. You must visit the Shrine to Skaen location in the northwestern part of the region. The collectible lies on the altar.
Totem stat bonuses - Emerald Stair
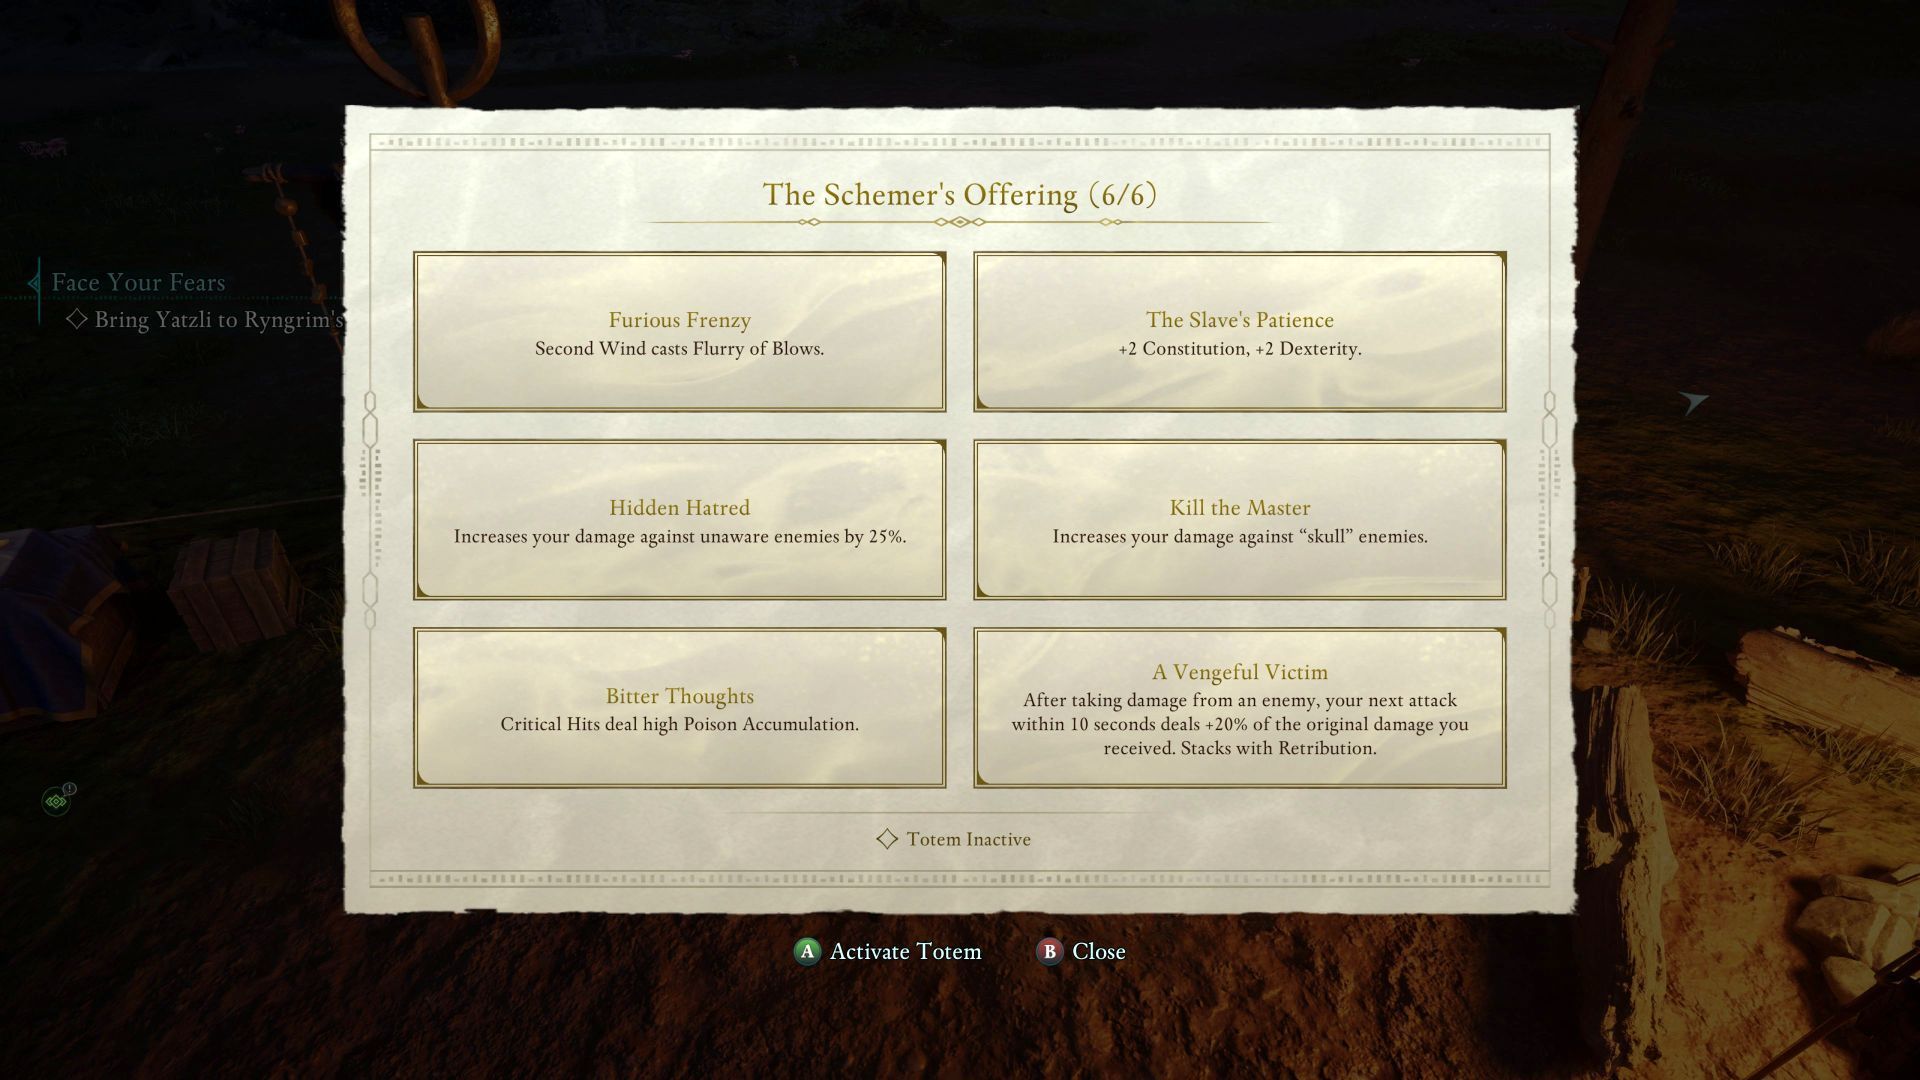
Below is a list of stat bonuses that the collected fragments provide:
- Furious Frenzy - Second Wind activates a flurry of attacks.
- The Slave's Patience - Constitution and Dexterity increases by 2 points.
- Hidden Hatred - Increases damage dealt to unaware enemies by 25%.
- Kill the Master - Increases damage to enemies marked with a skull.
- Bitter Thoughts - Critical Hits cause a significant poison buildup.
- A Vengeful Victim - After taking damage from an enemy, the hero's next attack deals 20% of the damage taken.
Just like in the first region, you can buy a note with hints about totem fragments - it is sold by Lluisa at the Farmers' Market and costs 500 coins. However, it is better to save the gold and complete the set yourself.
All totem fragments in Shatterscarp
Topaz Eye - Shatterscarp
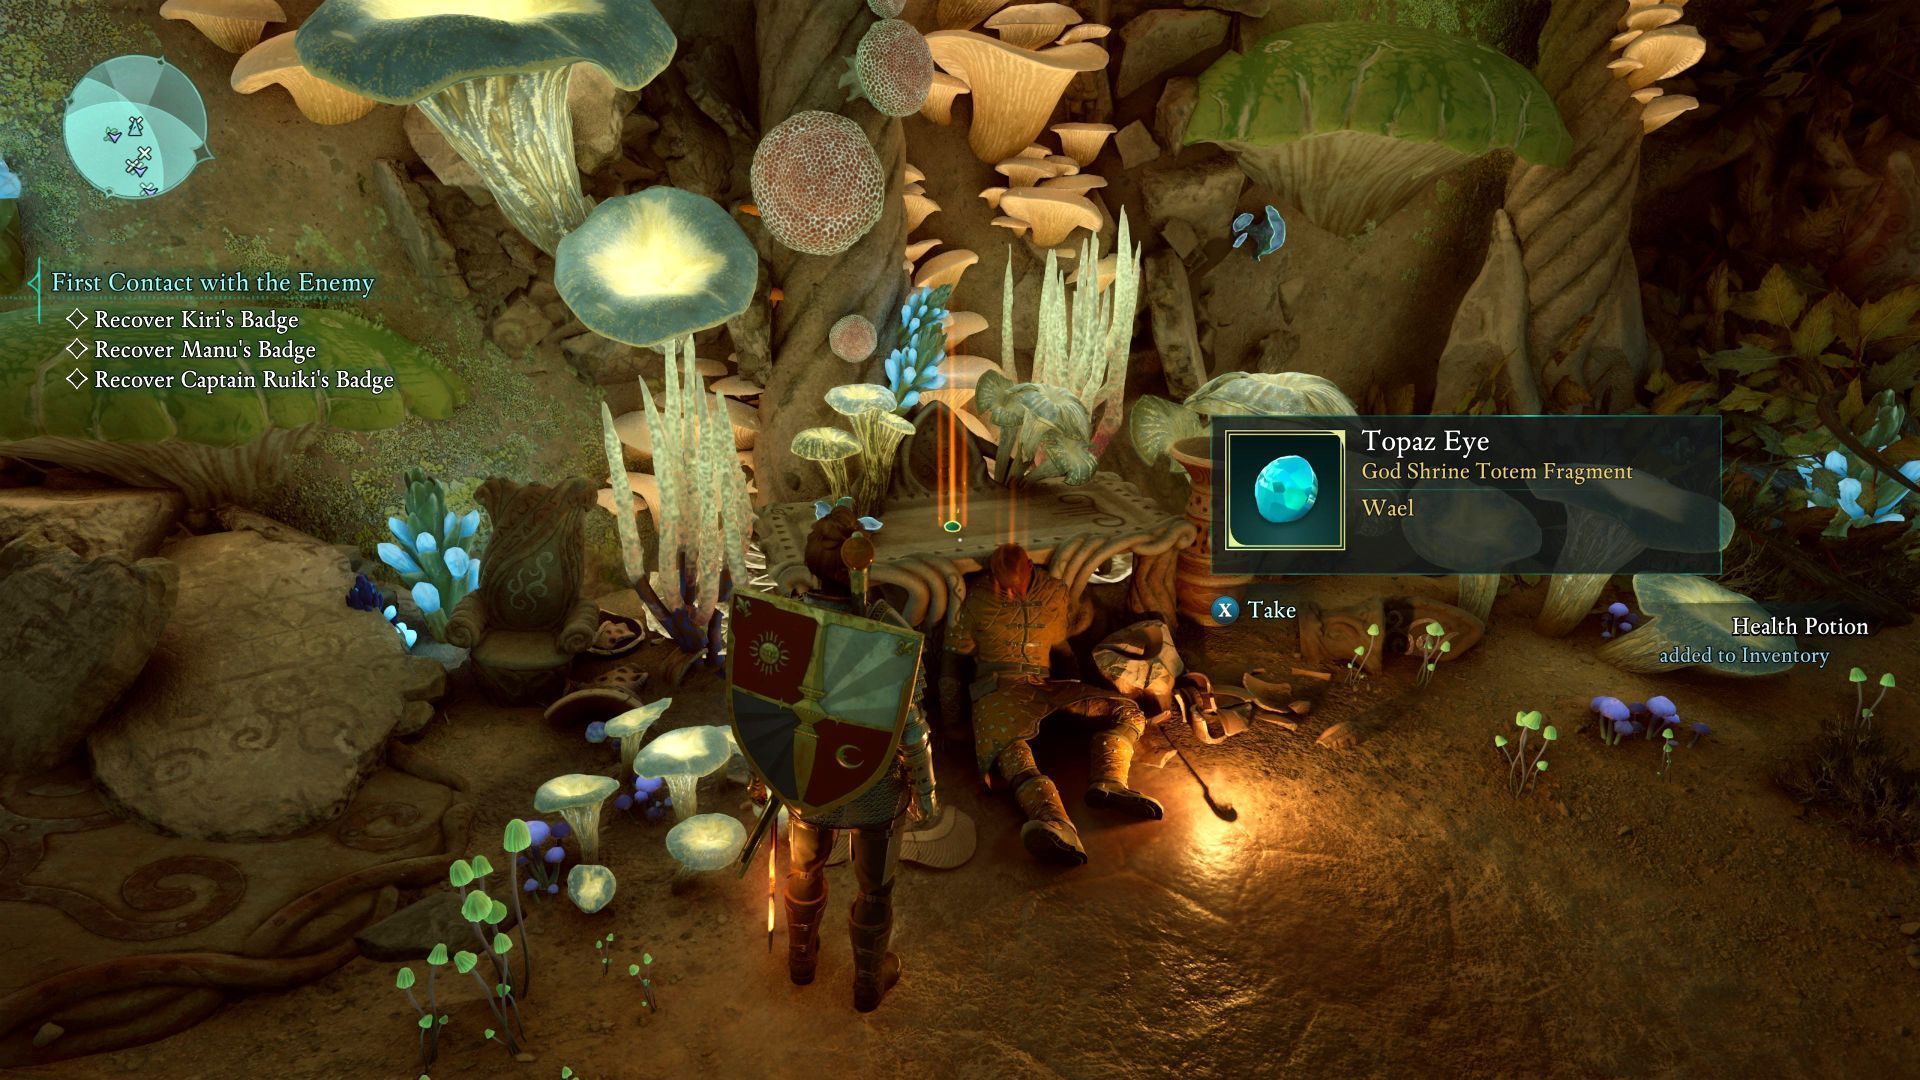
This totem fragment is in the Leviathan's Hollow location, in the northwestern part of the region. You can get there by swimming underwater.
You need to locate the altar next to the dead Manu - it is shown in the image above.
Amethyst Eye - Shatterscarp
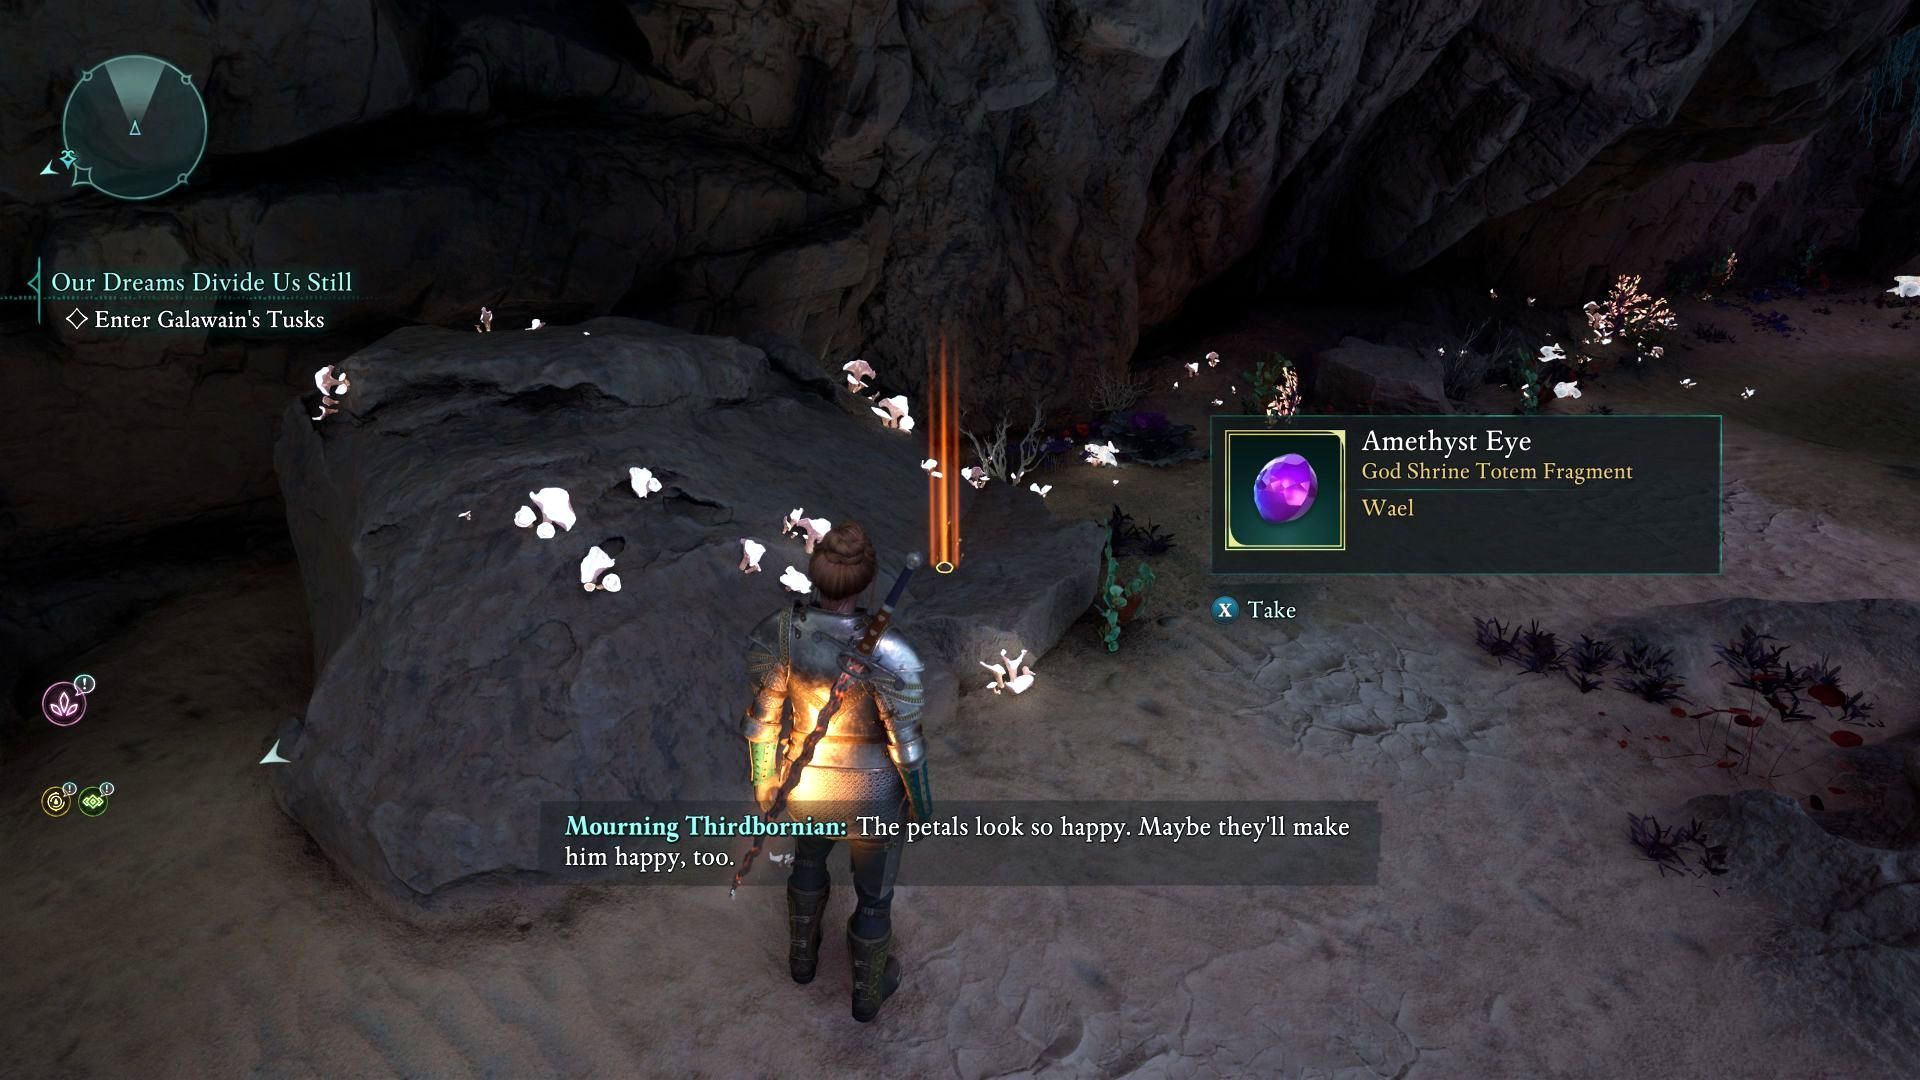
This totem fragment is in a cave in the eastern part of the Ancient Lakebed area. This is next to the place where you can also encounter the crying woman.
Ruby Eye - Shatterscarp
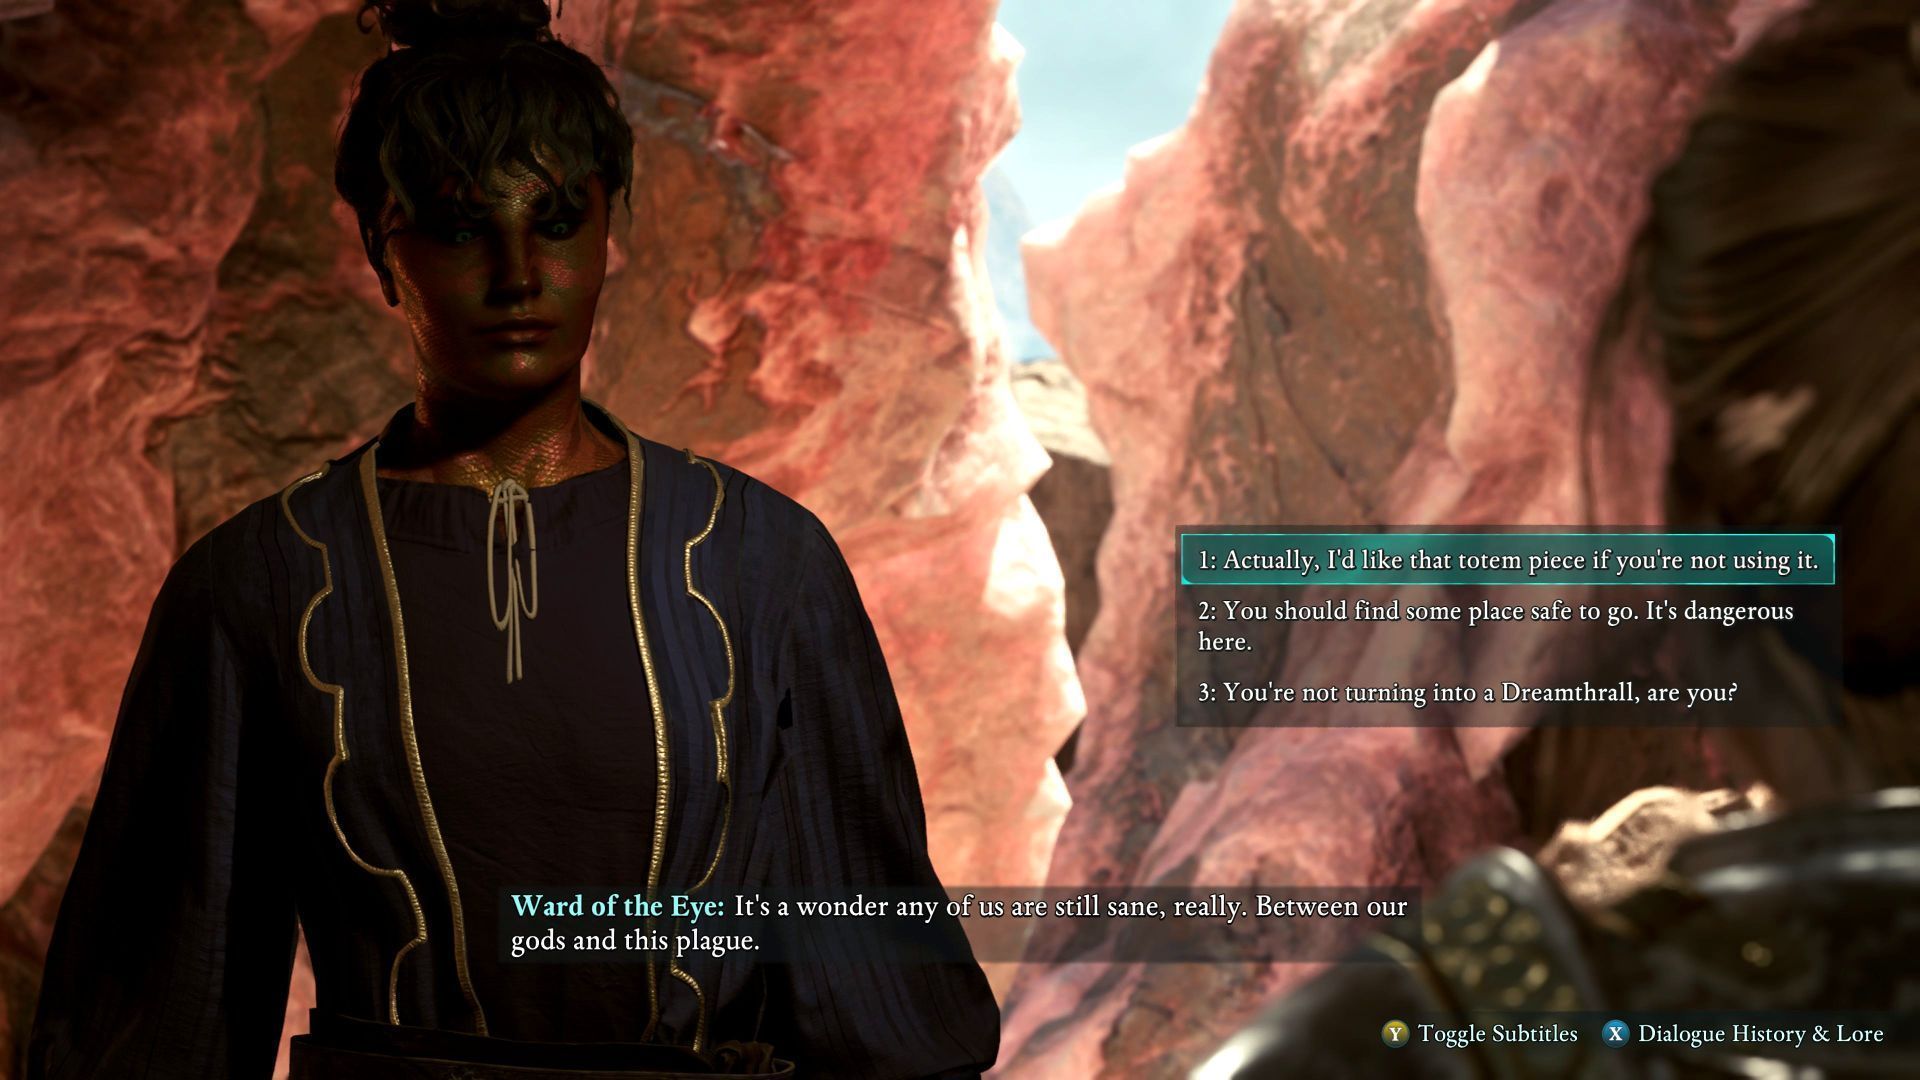
This totem fragment is in the Shrine of Wael location, the same one where you can also get the totem core. Talk to the woman you met in this place (image above). The collectible is a reward for having a full conversation.
Emerald Eye - Shatterscarp
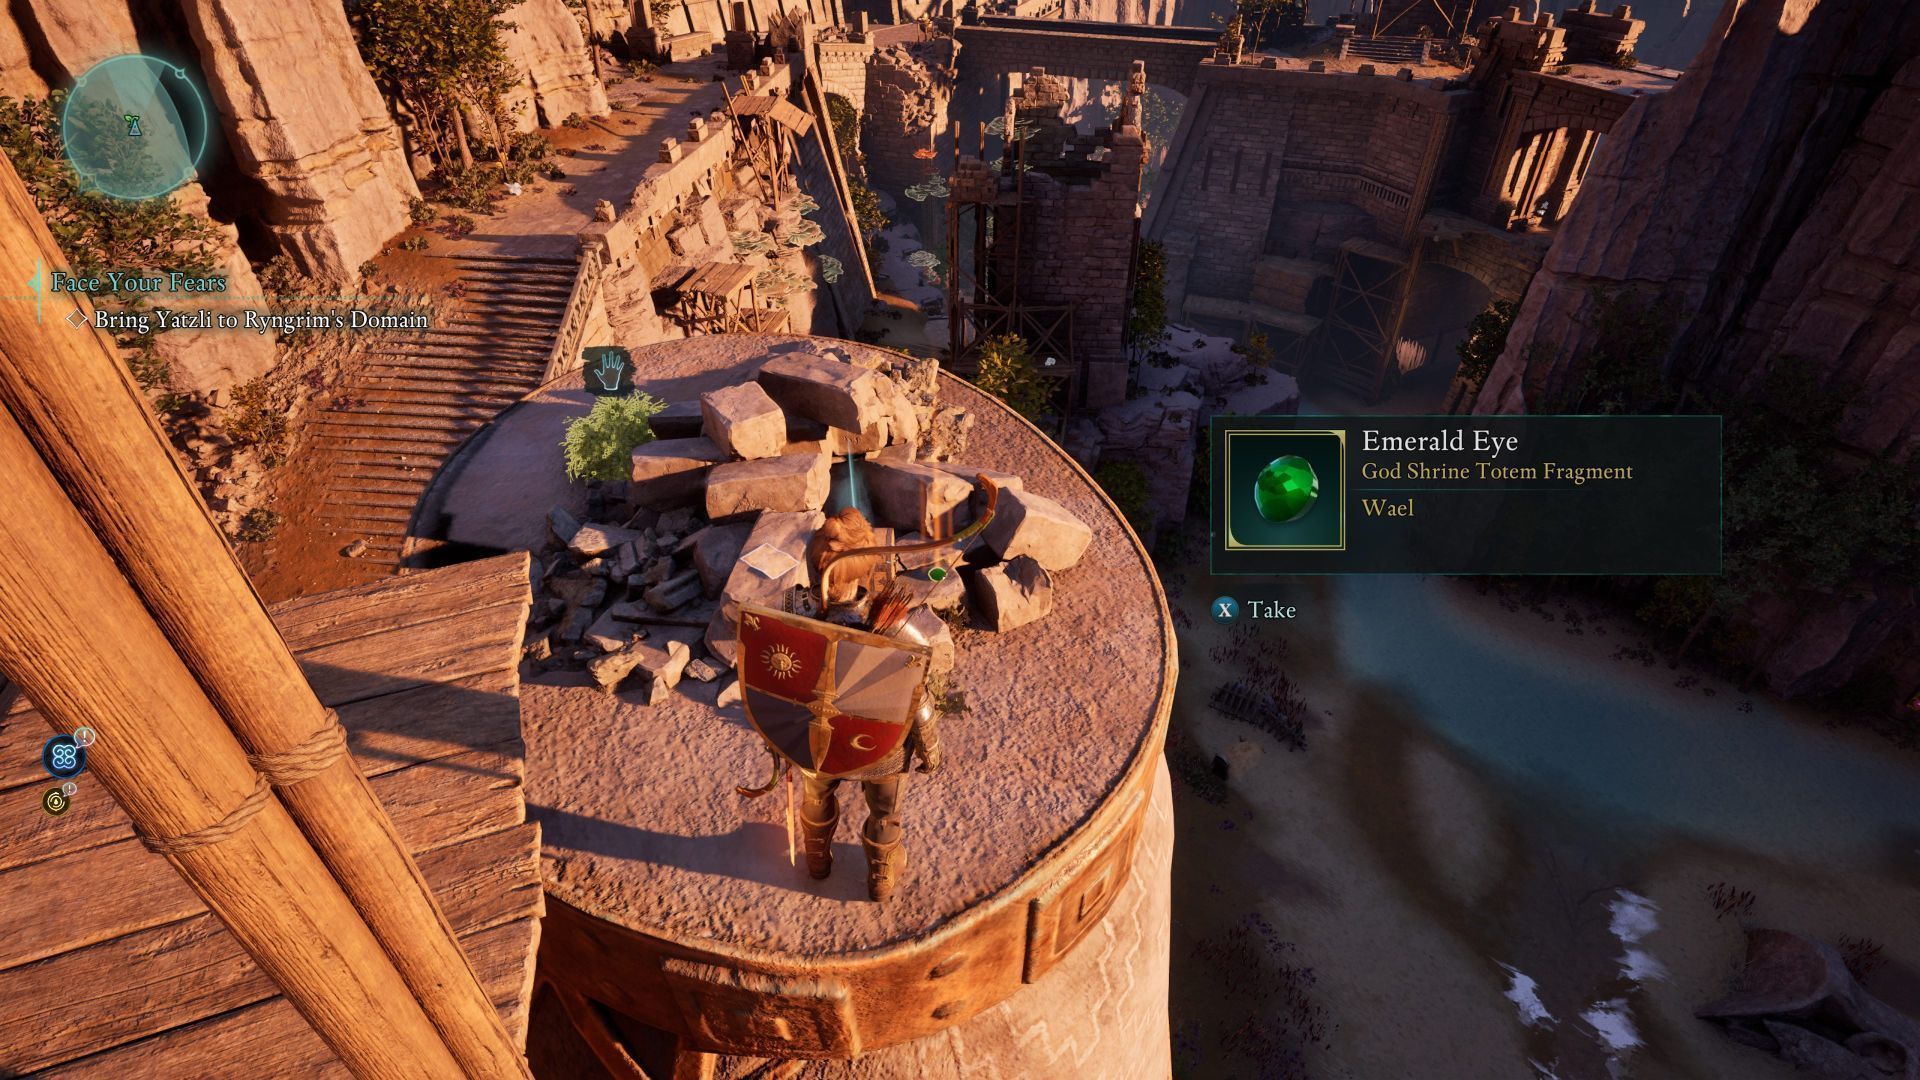
This totem fragment is in the Shark's Teeth location in the northeastern part of the region. Locate the ladder to get to the top of the small tower shown in the picture.
Agate Eye - Shatterscarp
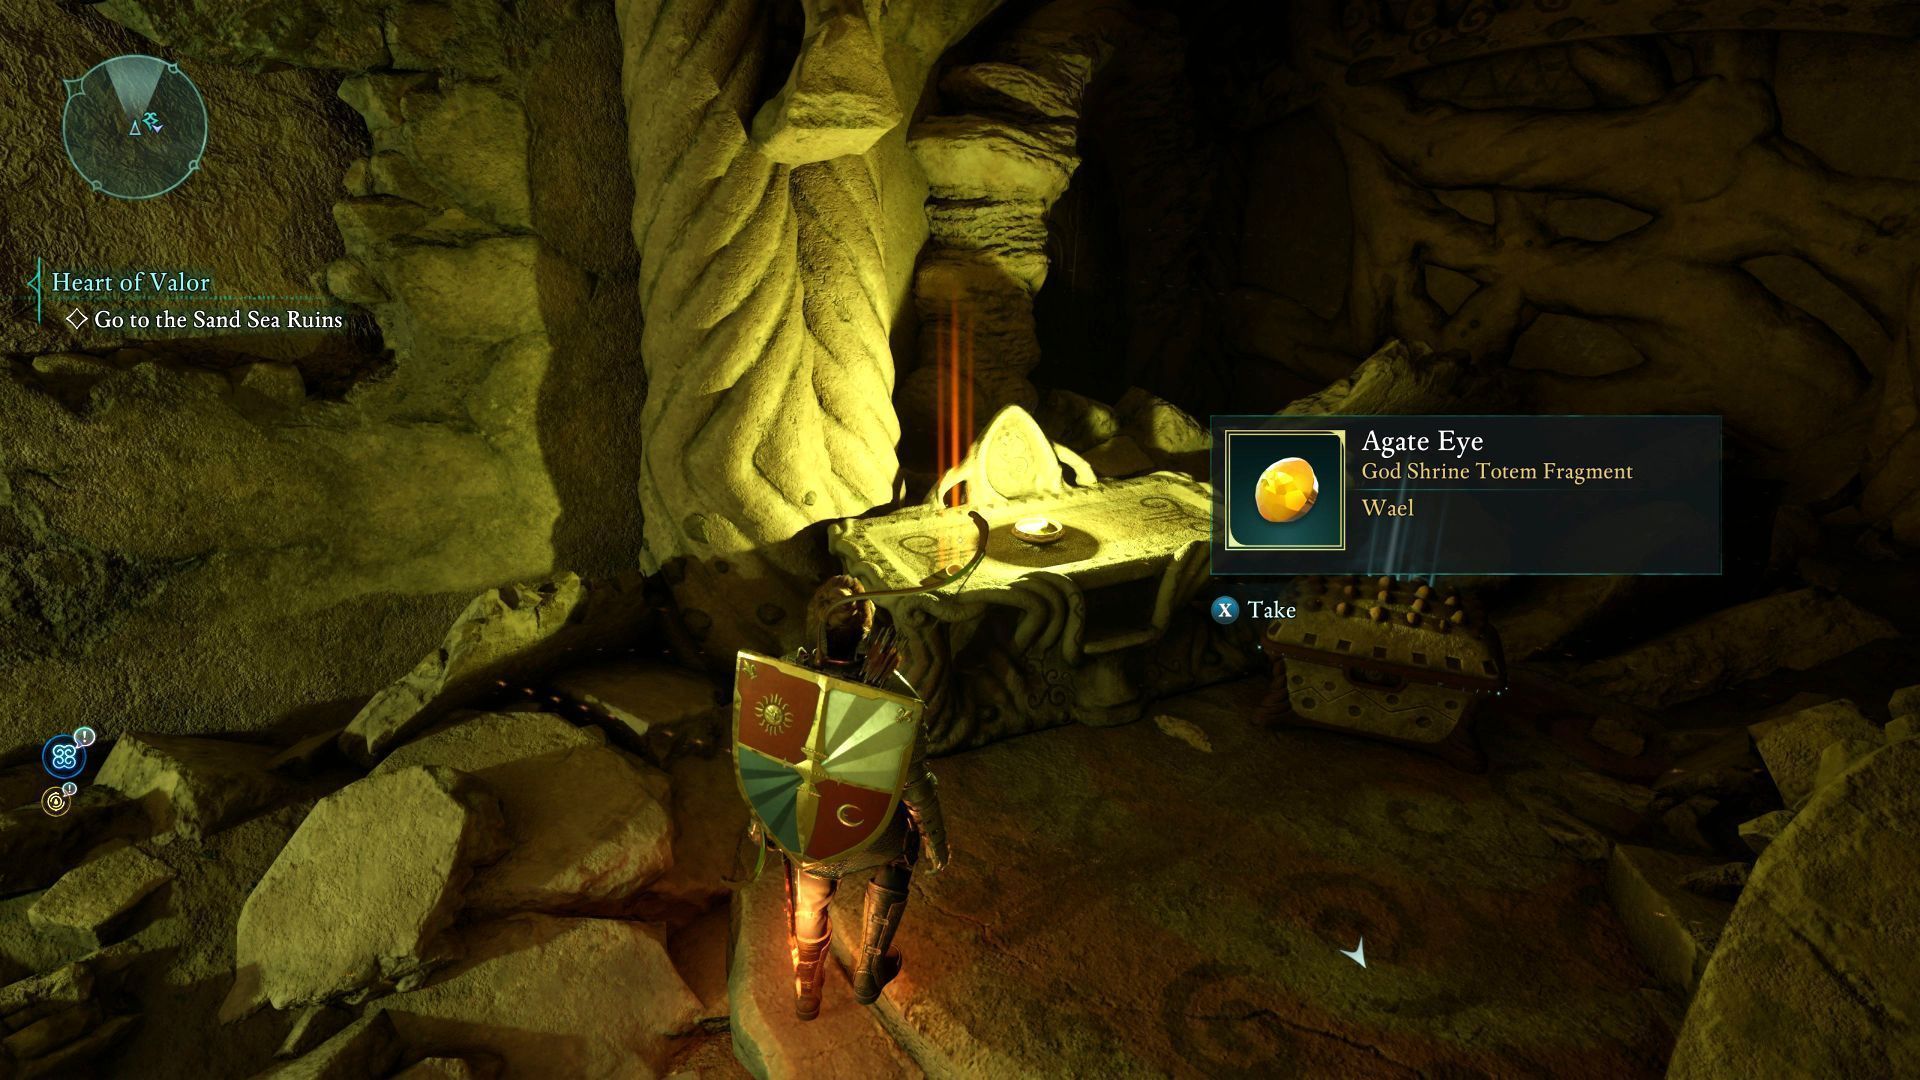
This totem fragment is near the entrance to the Sand Sea Ruins dungeon in the eastern part of the map. Do not enter the ruins, instead explore the area on the surface (you can reach the ruins from the north).
Sapphire Eye - Shatterscarp
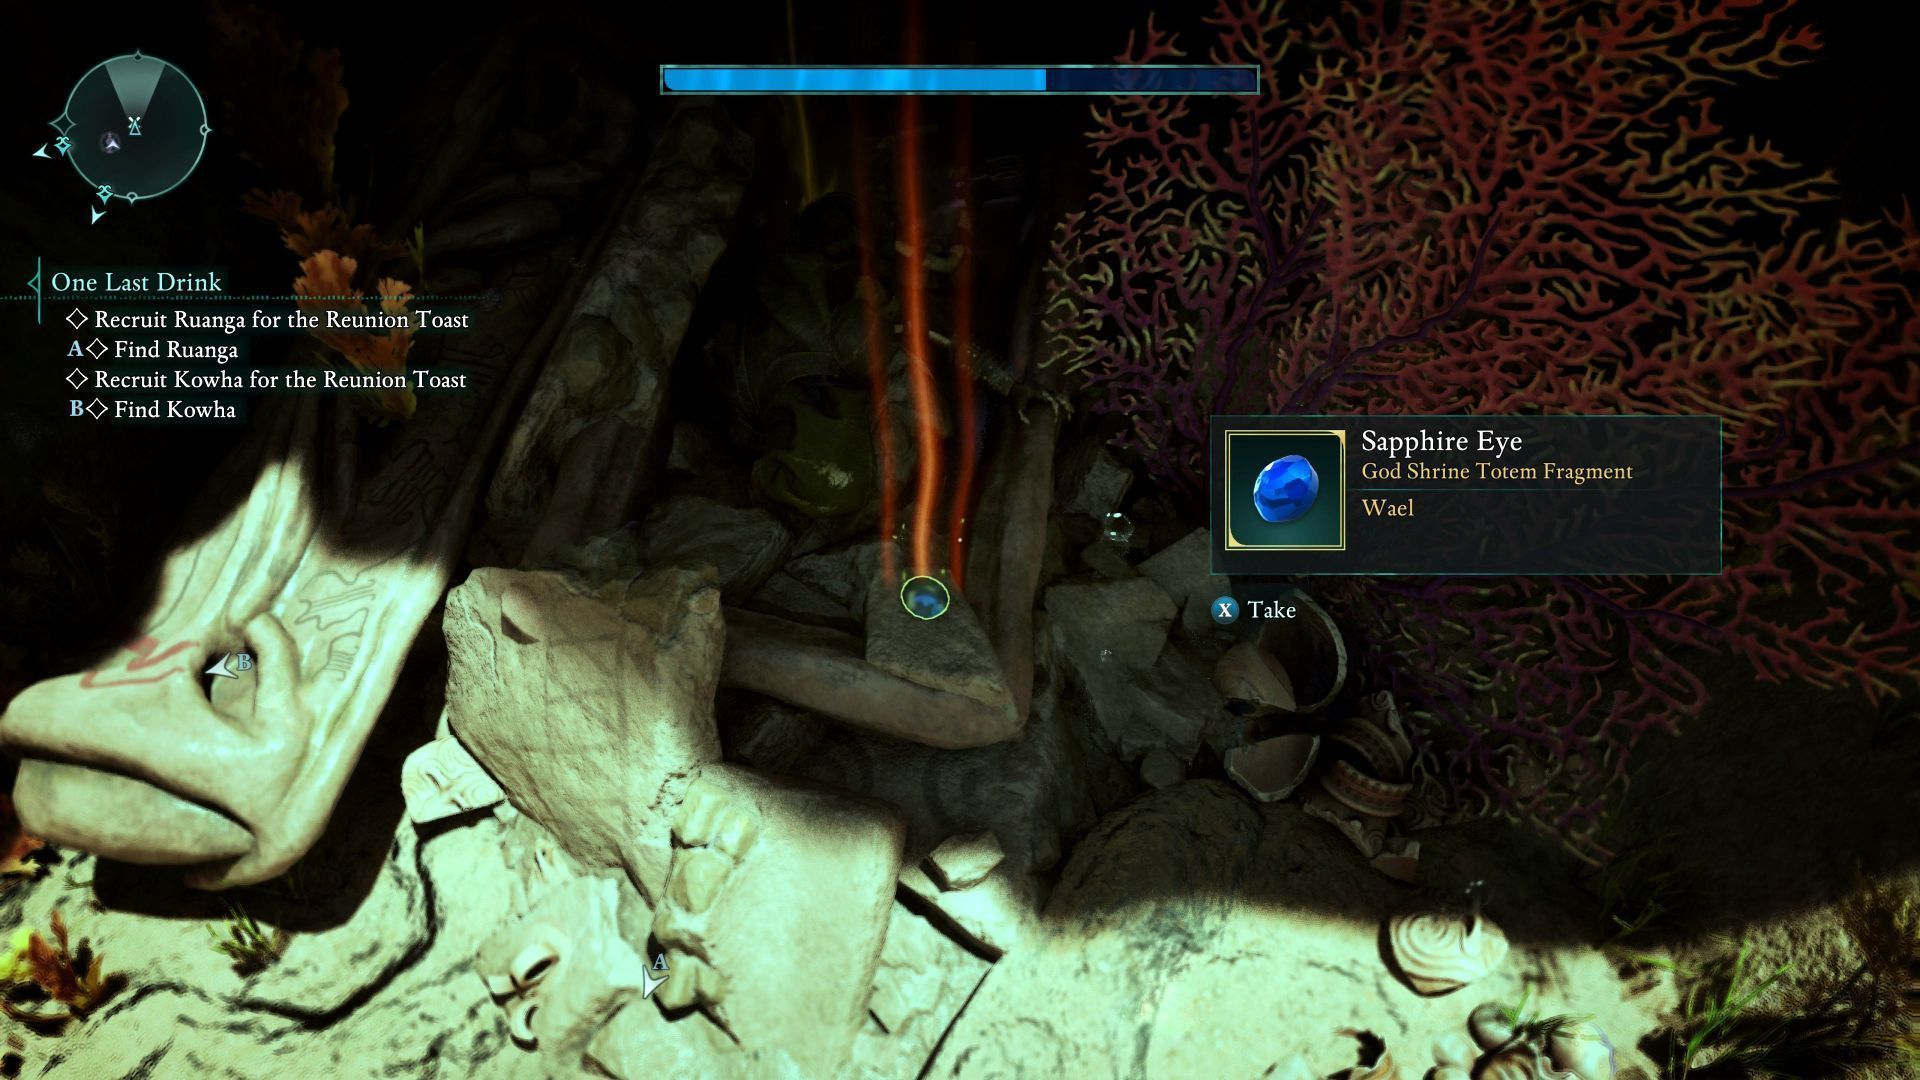
This section of the location is in the Sand Sea Oasis in the southeastern part of the region. You have to jump into the water and dive, because the collectible lies at the bottom (image above).
Eyes of the Obscured - Shatterscarp
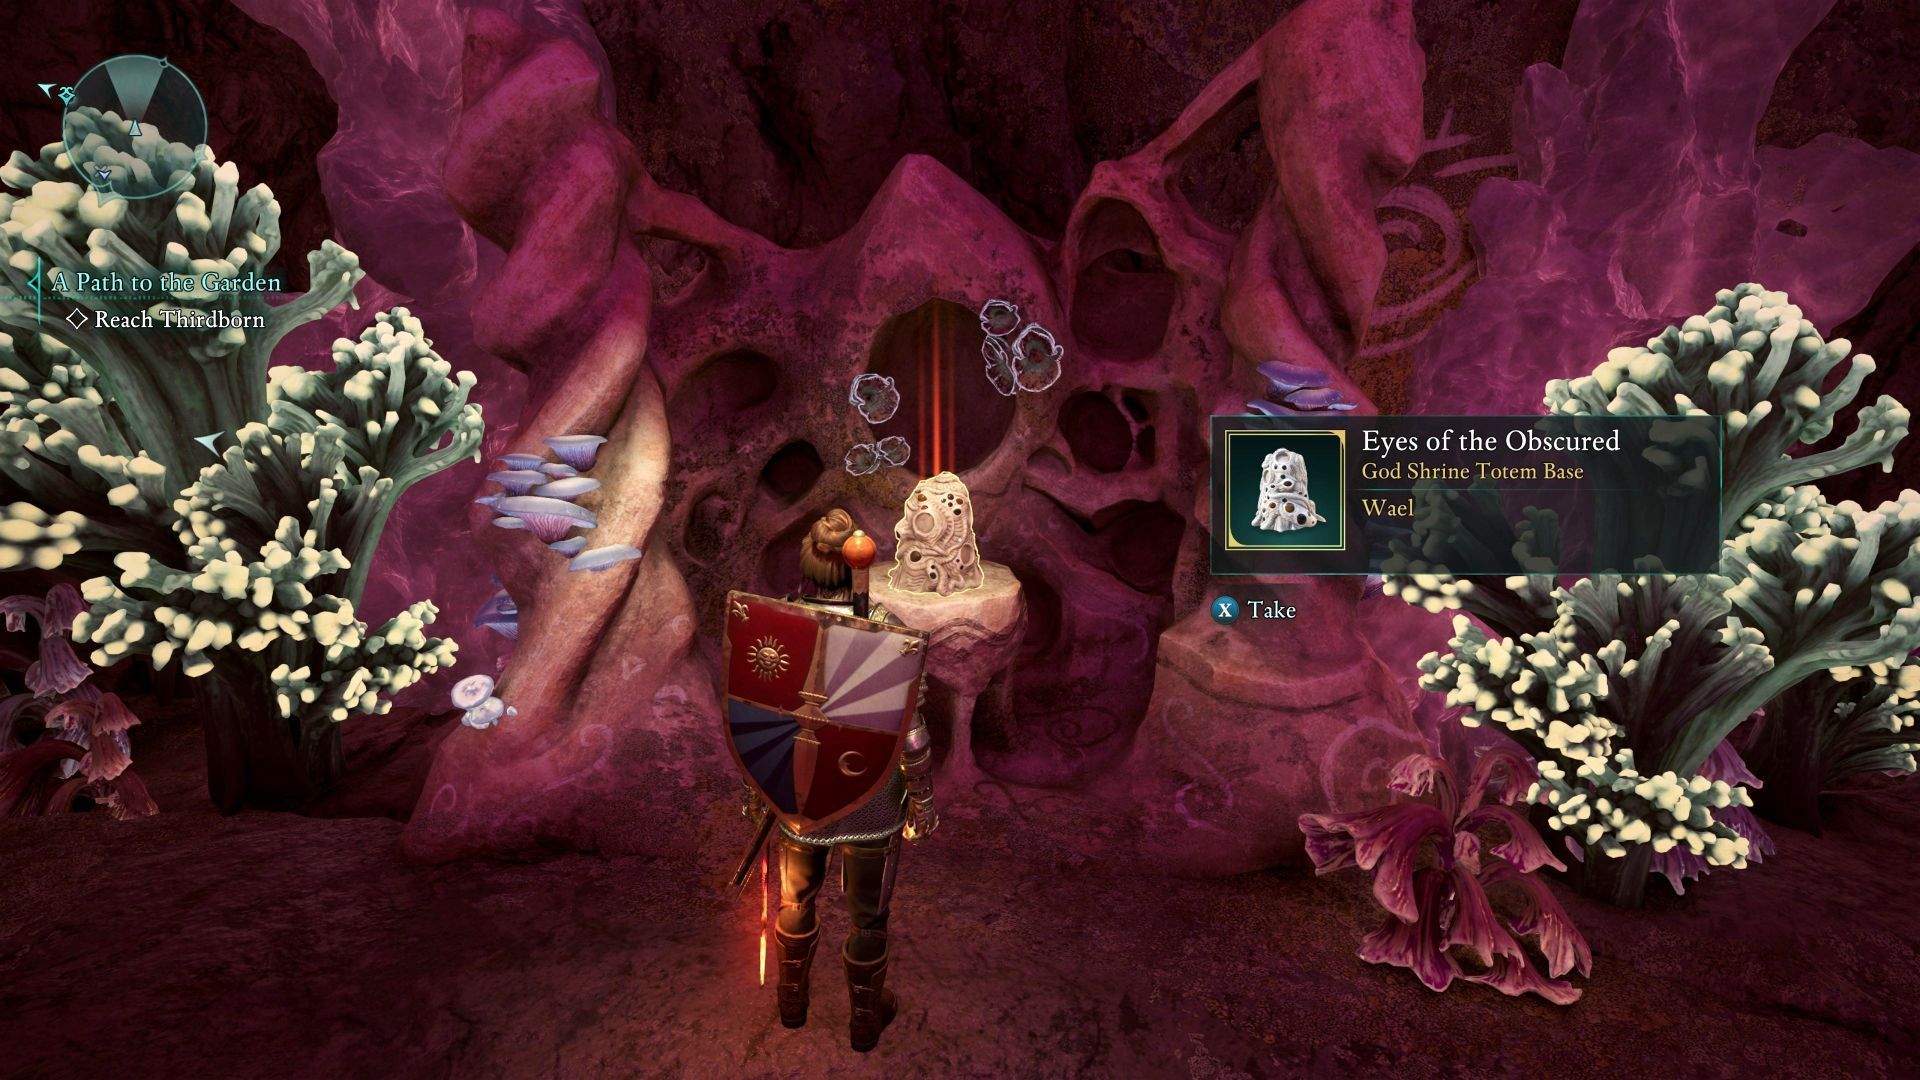
This is a totem core, and collecting it is required to place all of the fragments you have. You must visit the Shrine to Wael and take the secret from the altar. In the same location there is also one of the totem fragments.
Stat bonuses from the totem - Shatterscarp
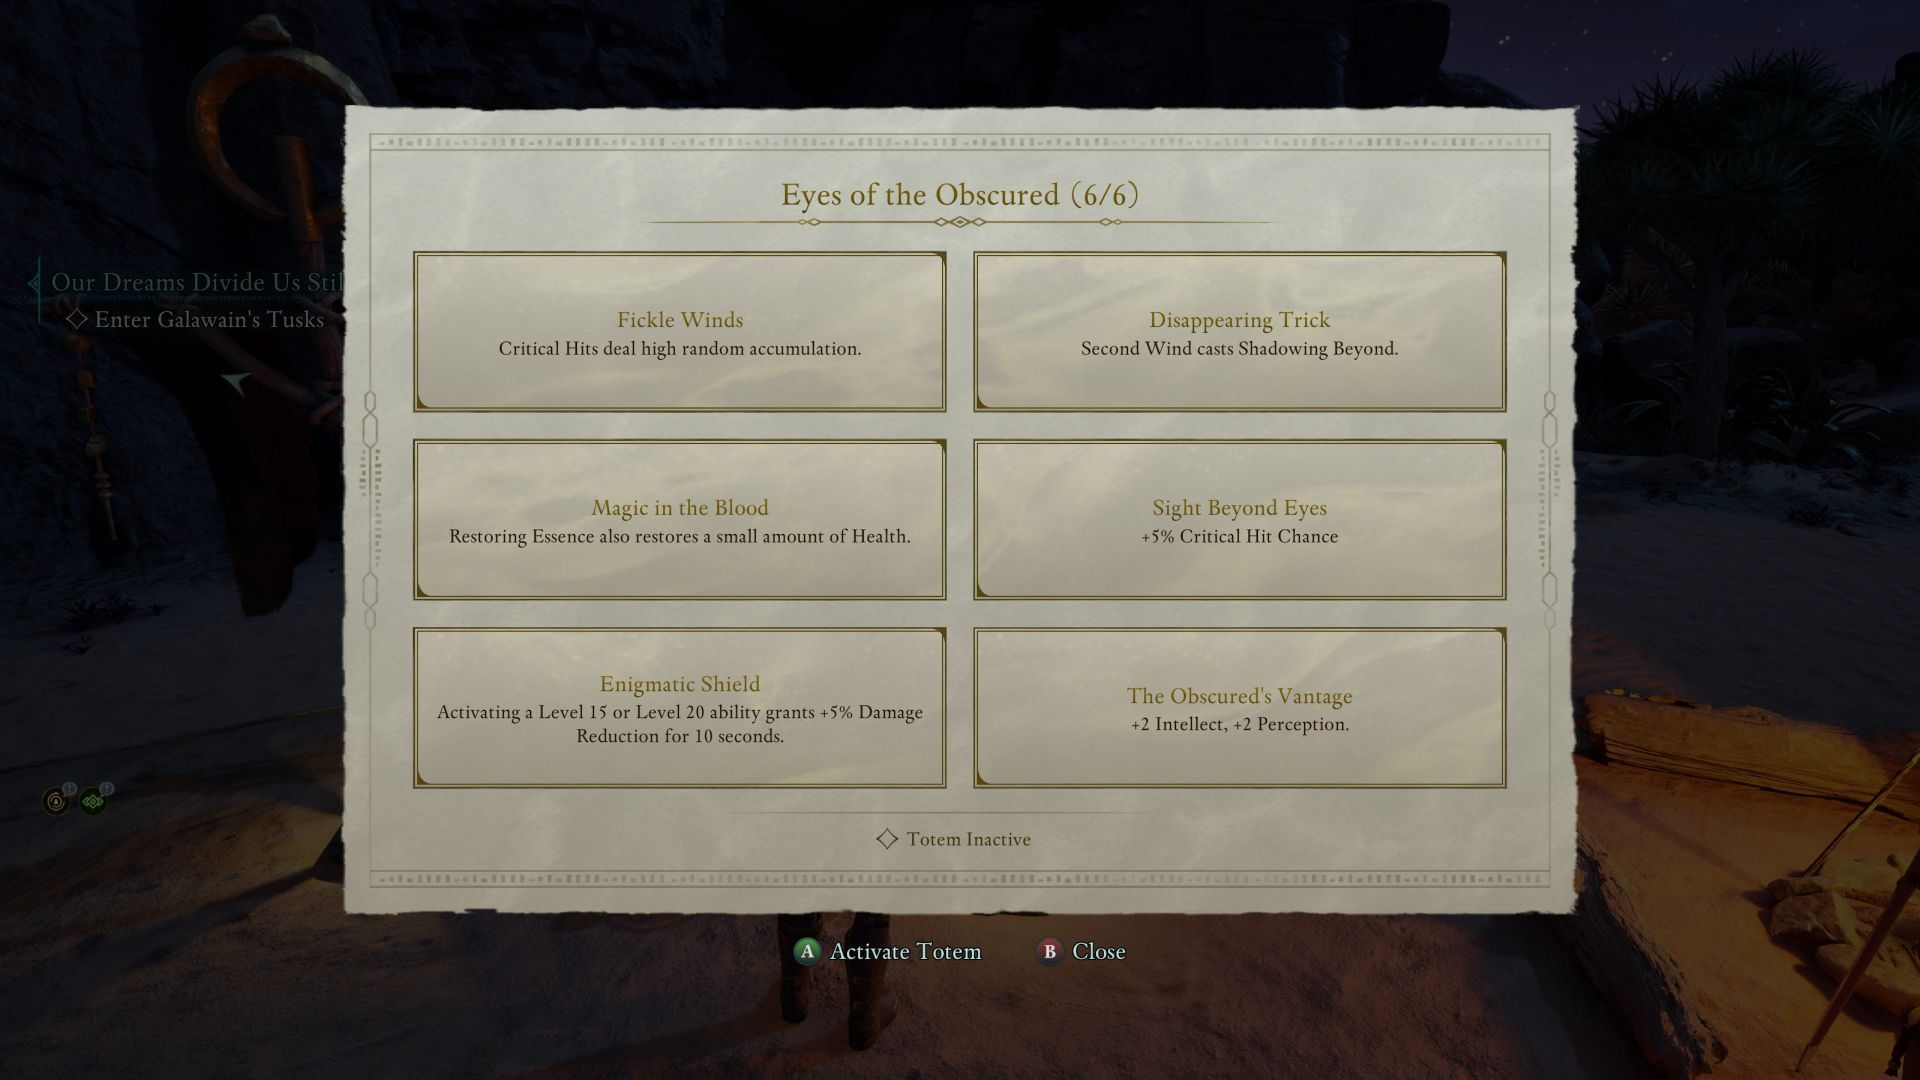
Below is a list of stat bonuses that the collected fragments provide:
- Fickle Winds - Critical hits generate a stack of random effects.
- Disappearing Trick - Second Wind activates Shadowing Beyond.
- Magic in the Blood - Restoring Essence can also restore a small amount of health.
- Sight Beyond Eyes - Increases your chance to deal a critical hit by 5%.
- Enigmatic Shield - Activating a level 15 or 20 ability grants 5% damage reduction for 10 seconds.
- The Obscured's Vantage - Increases Intellect and Perception attributes by 2 points.
Once again, you can optionally buy a note with hints regarding totem fragments - it is sold by Cinzia in Thirdborn city and costs 500 coins. We recommend saving your gold and collecting the set yourself.
All totem fragments in Galawain's Tusks
Hunter's Arrow of Slaying - Galawain's Tusks
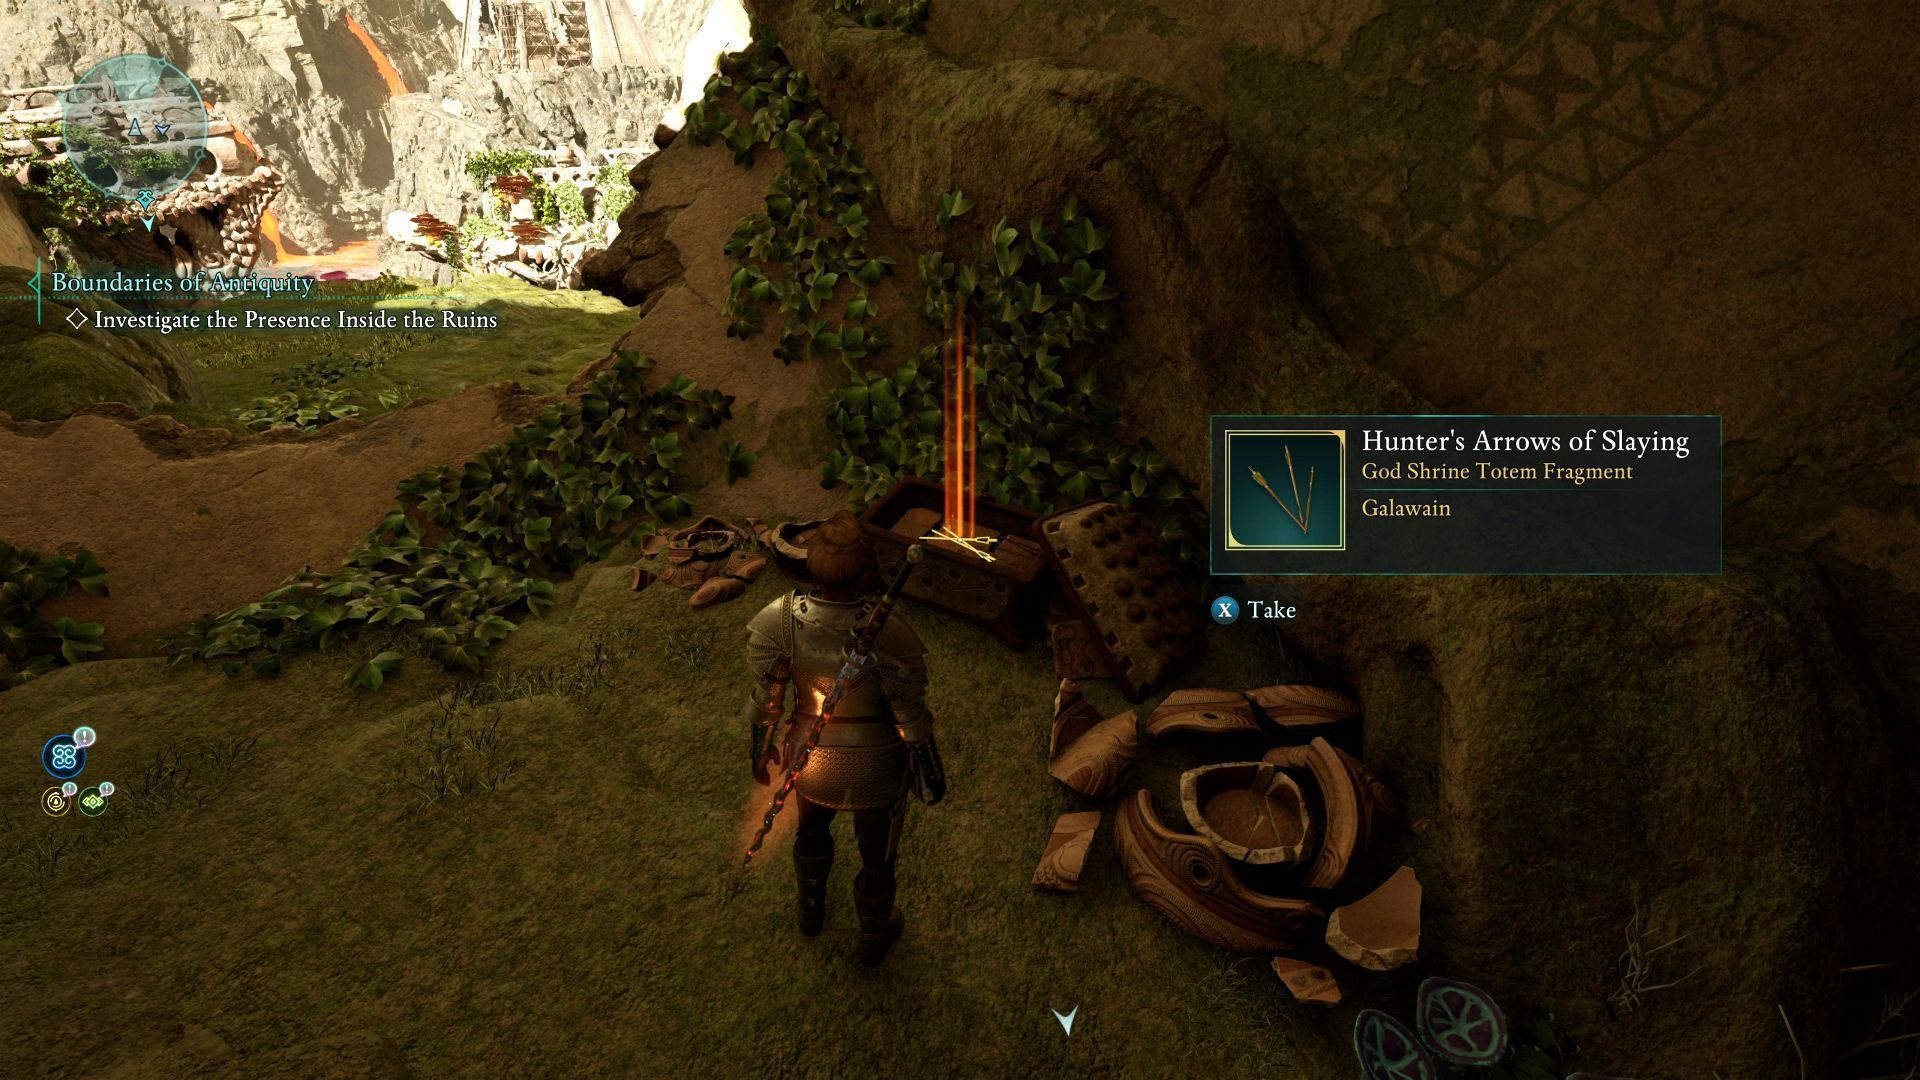
This totem fragment is in the Slumbering Fields location - it's a separate area in the southwestern part of the region, which you can reach by jumping over a river of lava.
Antler of the Persevering Stag - Galawain's Tusks
This totem fragment is next to the Bridge to the Garden location in the southeastern part of the region. Instead of crossing the bridge, jump down to the lower rock ledges to the right of the bridge. The collectible is on the corpse.
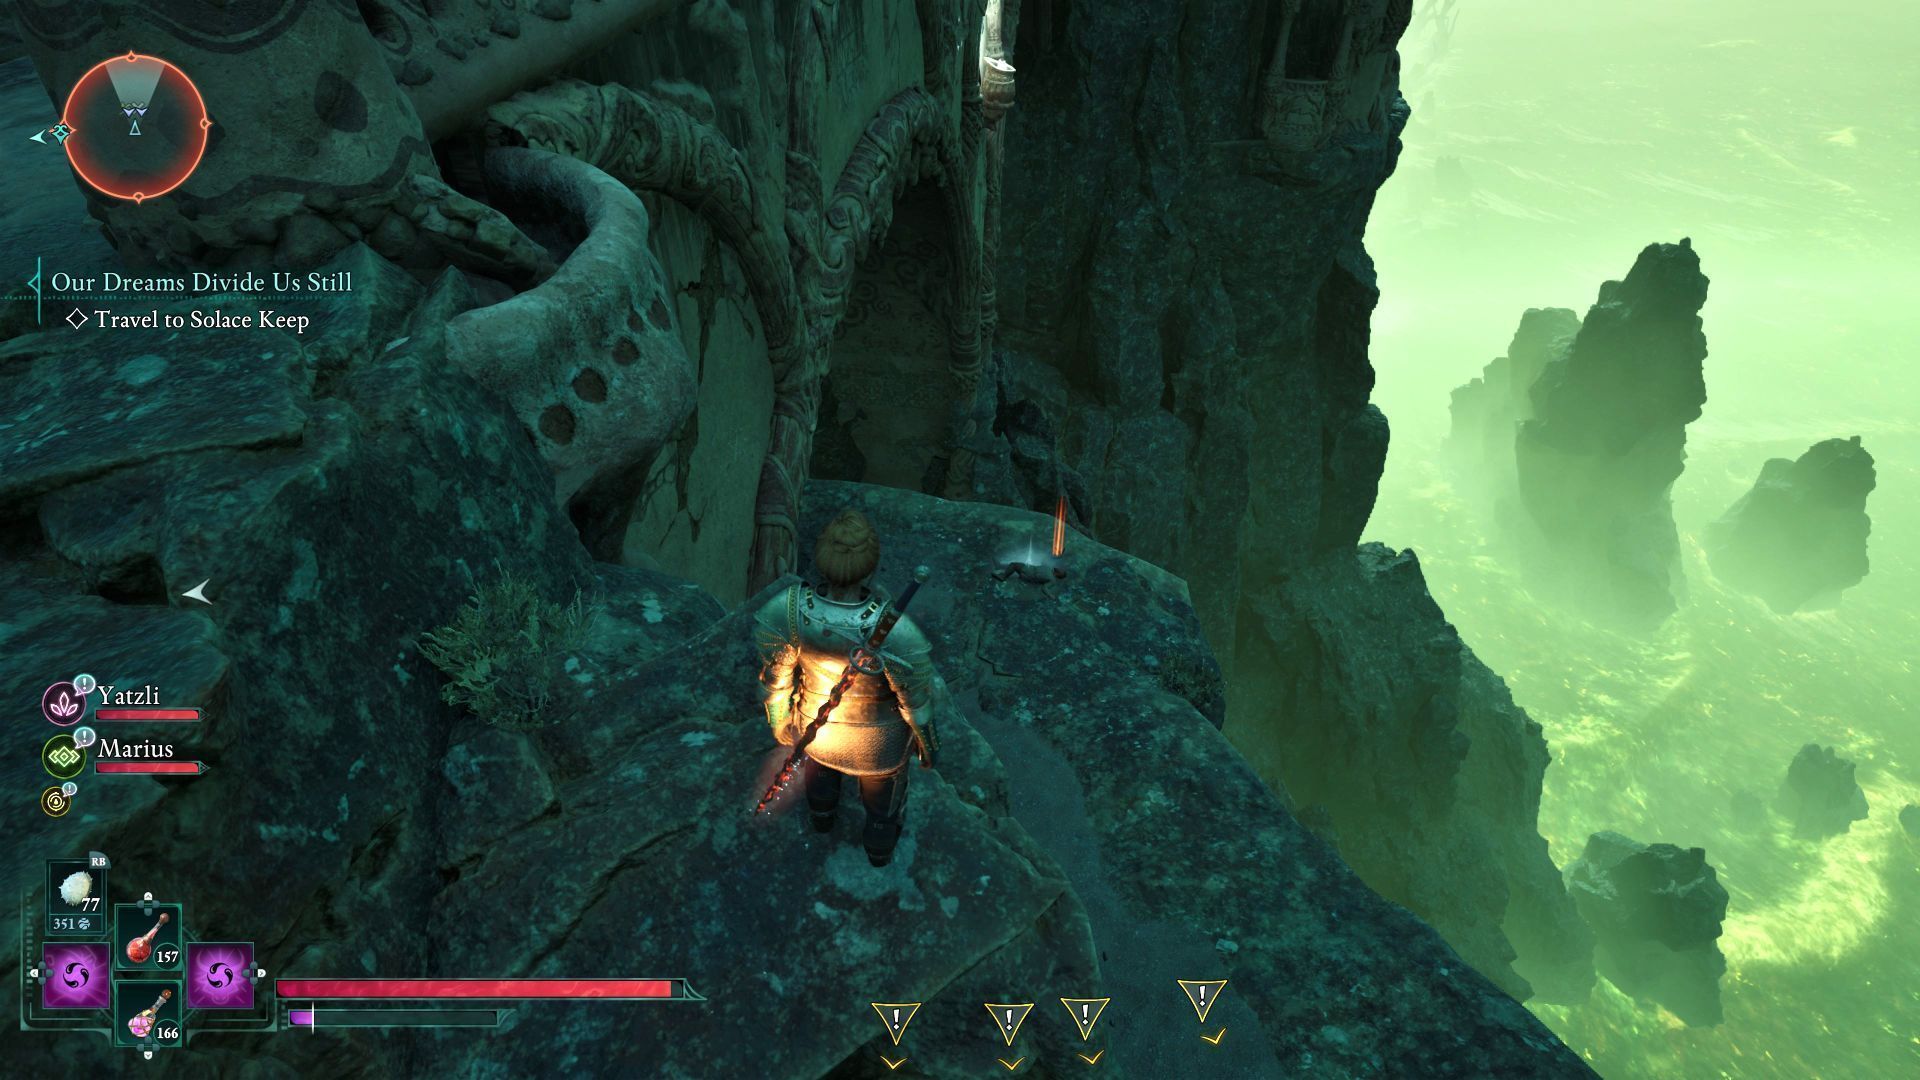
Hunter's Arrow of Seeking - Galawain's Tusks
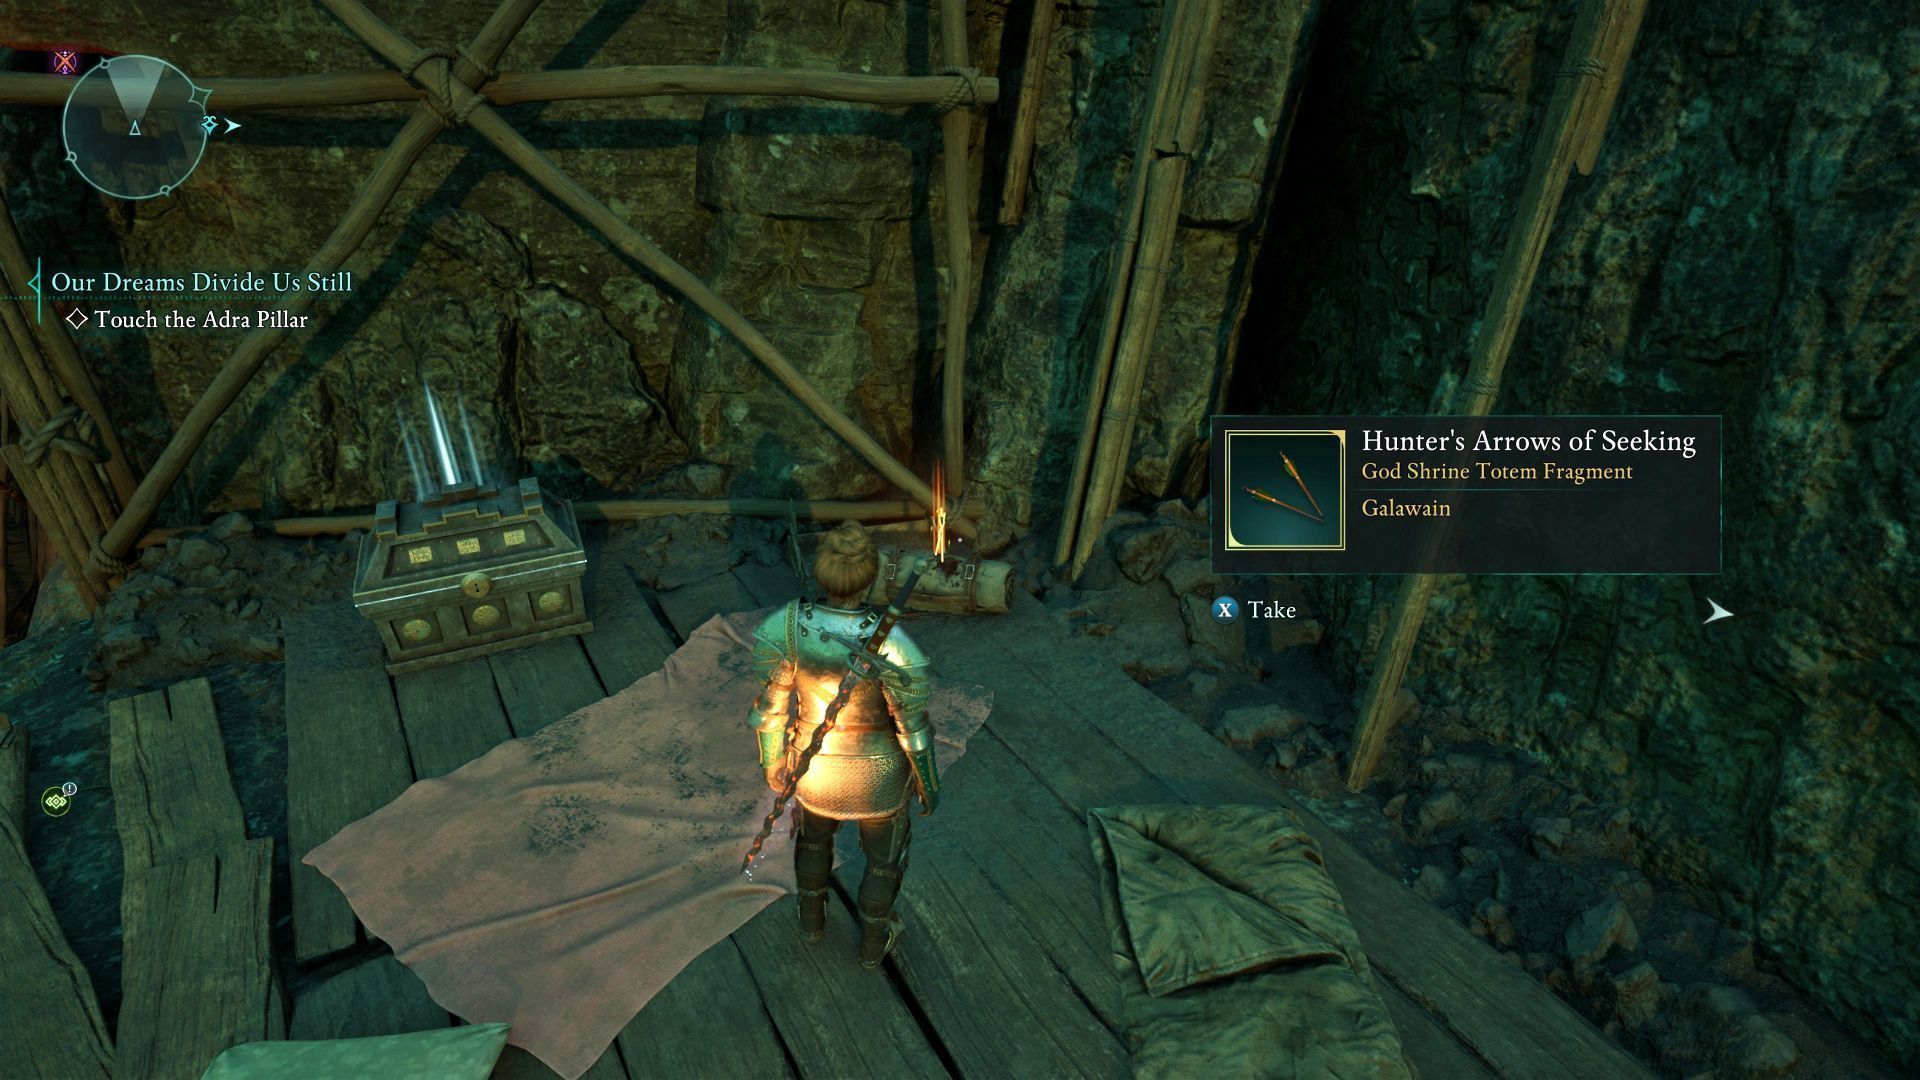
This totem fragment is in the Mt. Forja Summit location in the western part of the map. You will visit this place for the first time during the main quest Our Dreams Divide Us Still. This will happen after going through the mines. Explore the southeast area at the top of the mountain.
Wolf's Pelt Trophy - Galawain's Tusks
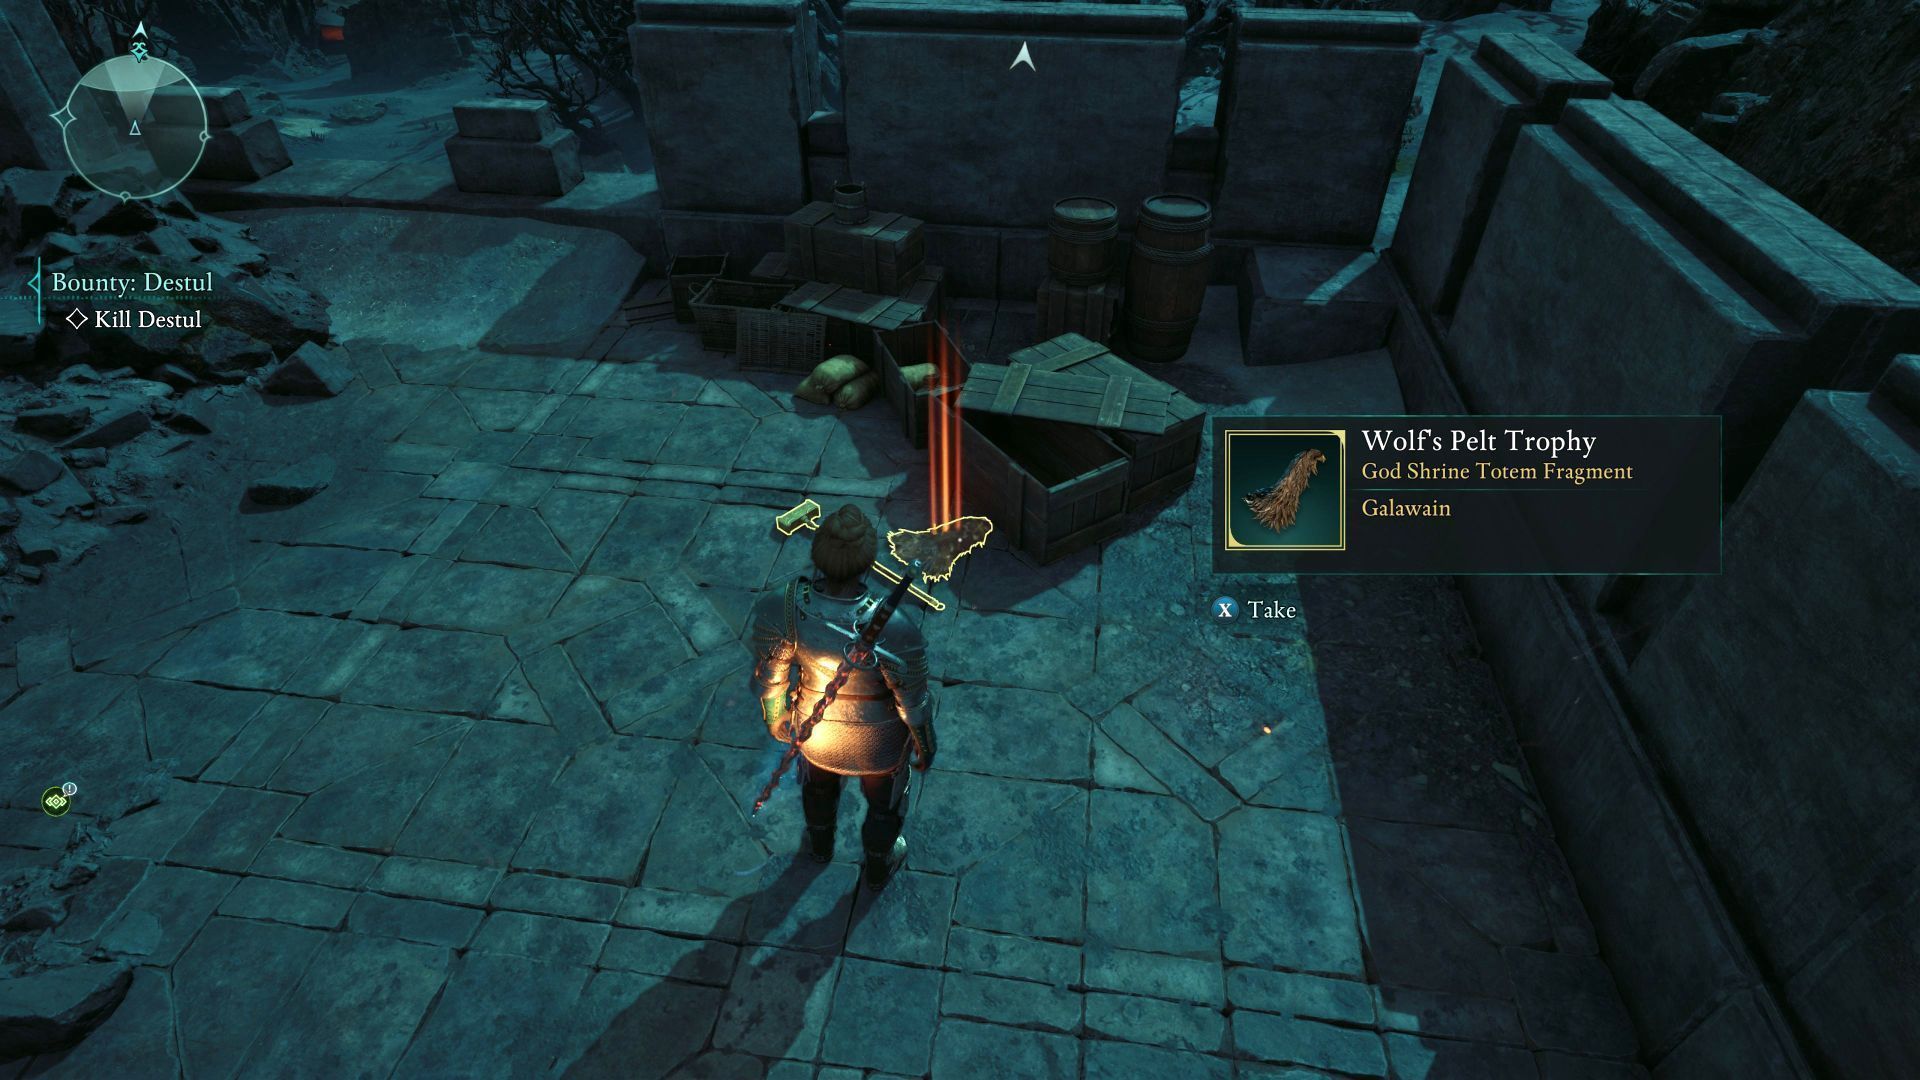
This totem fragment is in the Ash Forest Outpost - the northwestern corner of the region map. Get to the roof of one of the outpost buildings.
Antler of the Pursued Stag - Galawain's Tusks
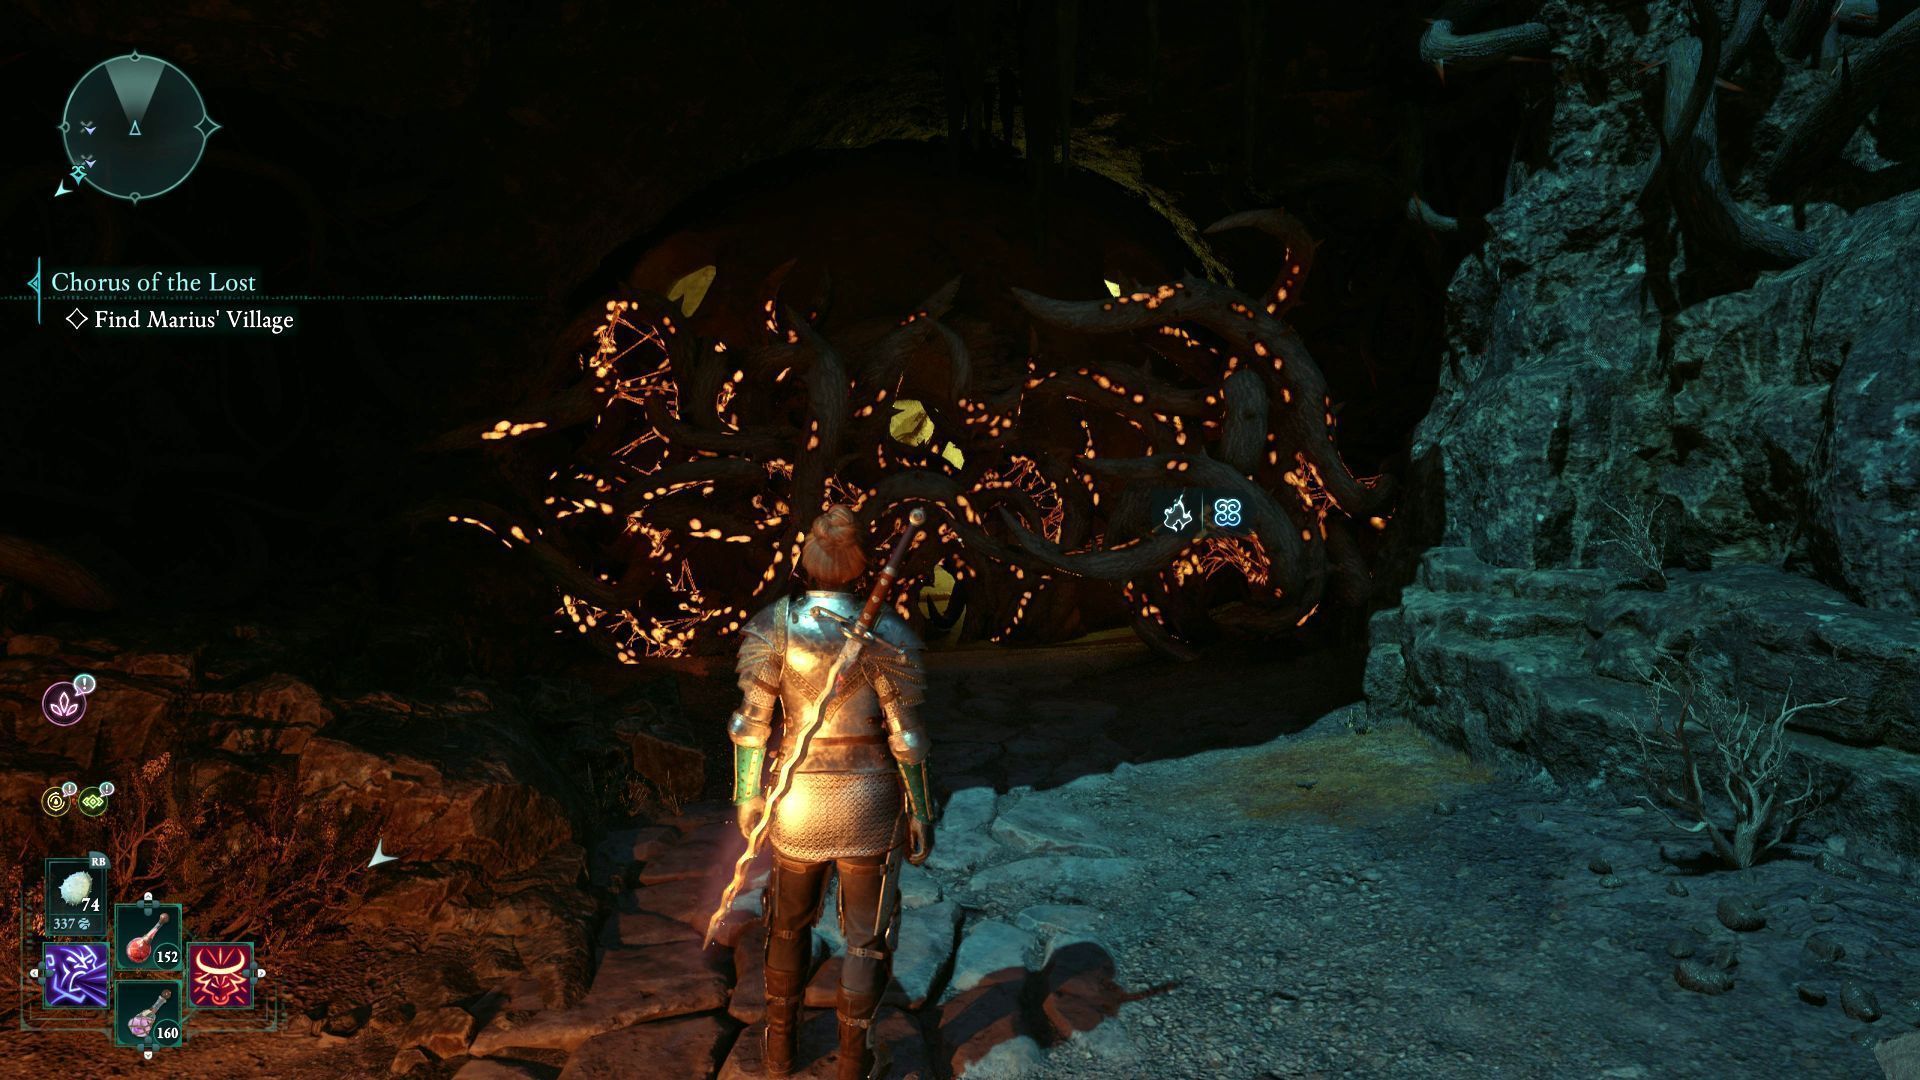
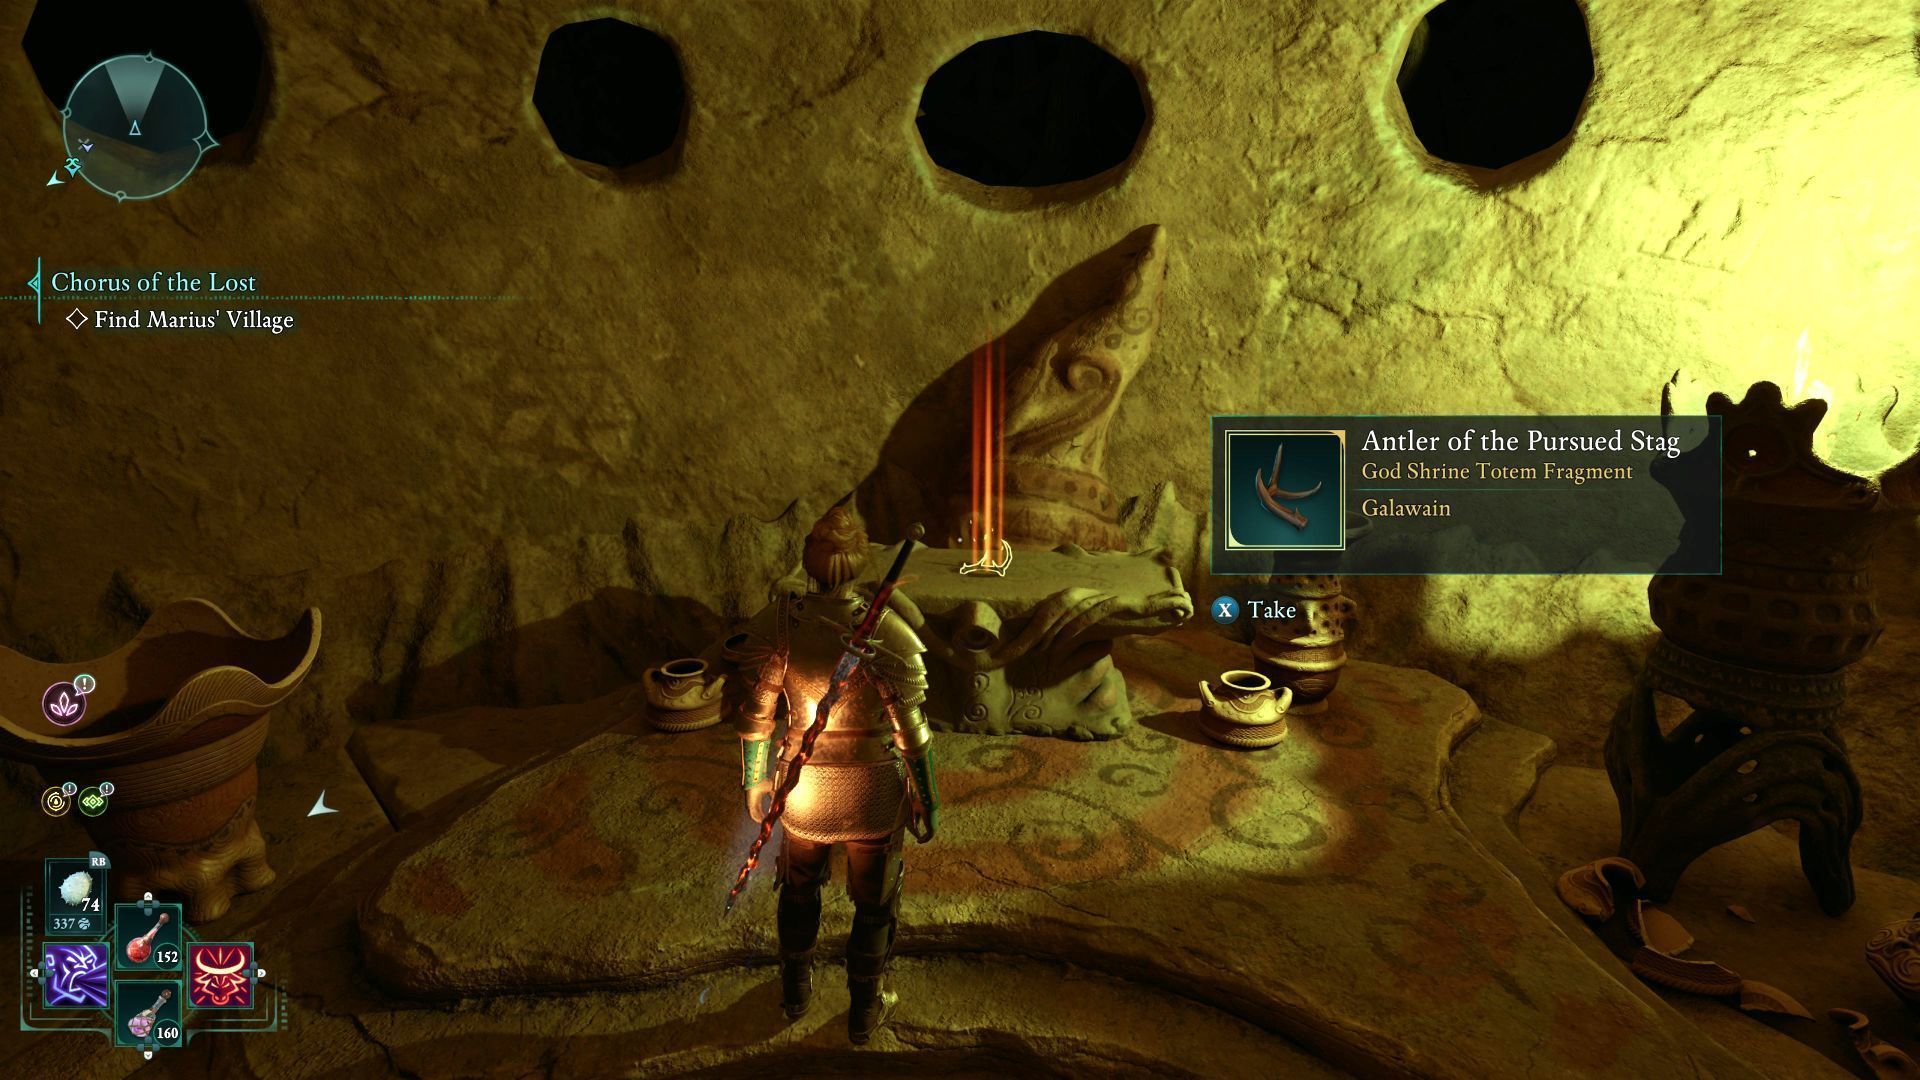
This totem fragment is at the northern end of the region map, west of the Lost Village. In this area there are Brambles you can set on fire shown in image 1. After removing this barricade, you will reach the collectible lying on the altar in the ruins (image 2).
Hunter's Arrows of Surviving - Galawain's Tusks
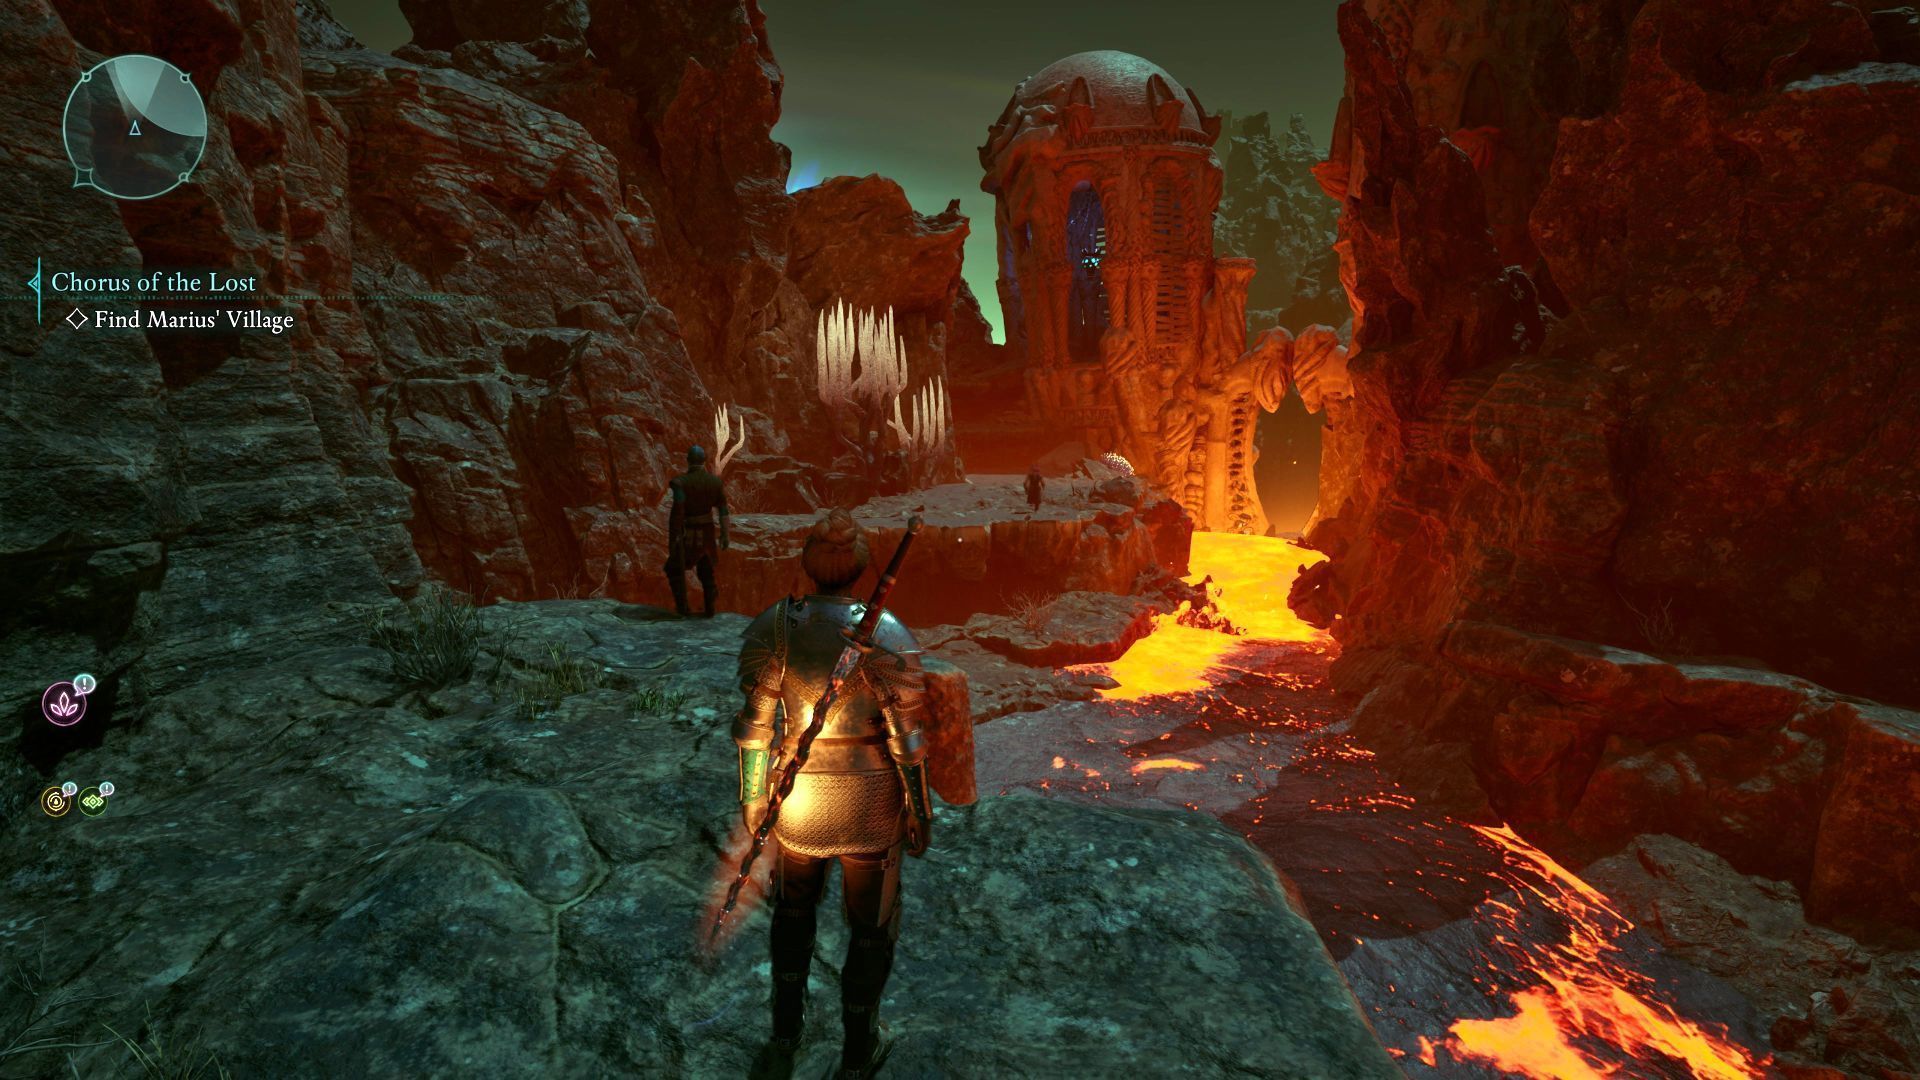
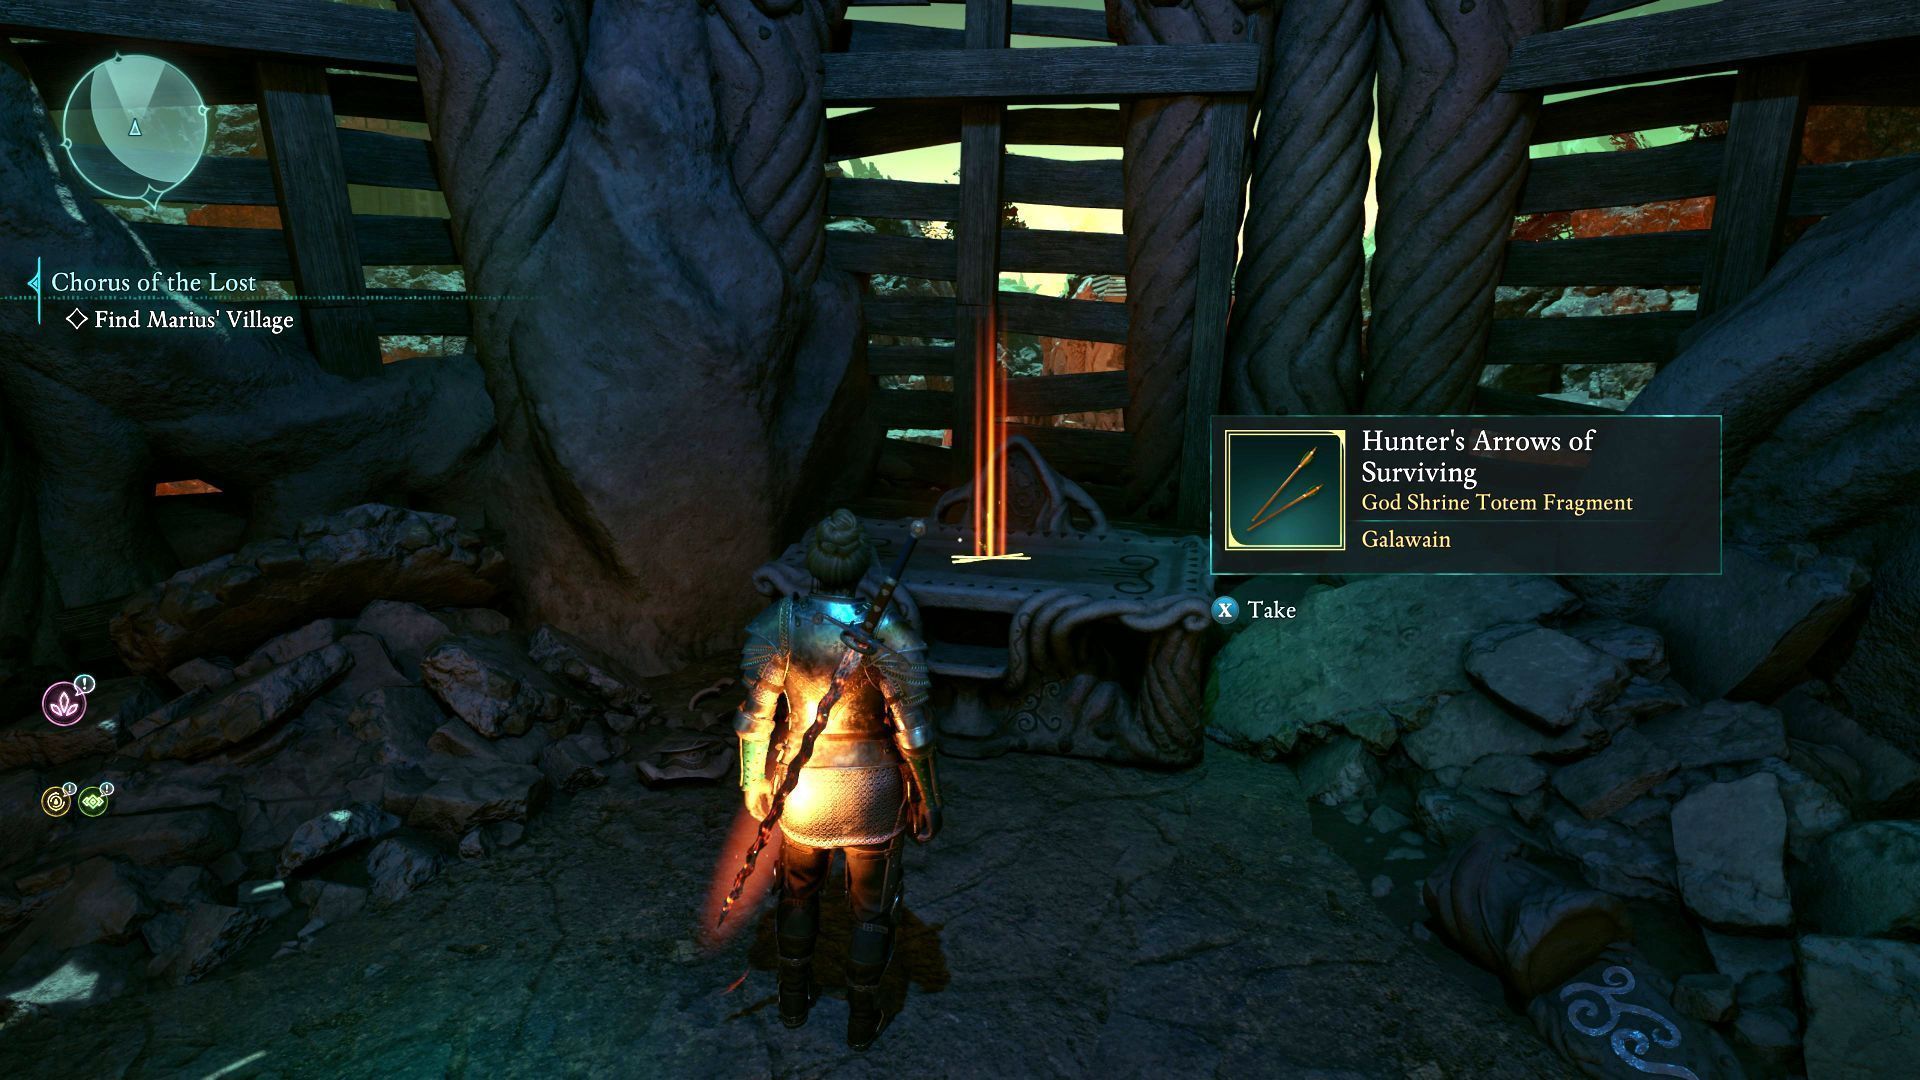
This totem fragment is in the eastern part of the Lost Village. The easiest way to get there is from the northwest, i.e. from the Pargrun Cache. There is a path running along the lava (image 1). Eventually, you will come across an altar with the secret (image 2).
Huntmaster's Spoils - Galawain's Tusks
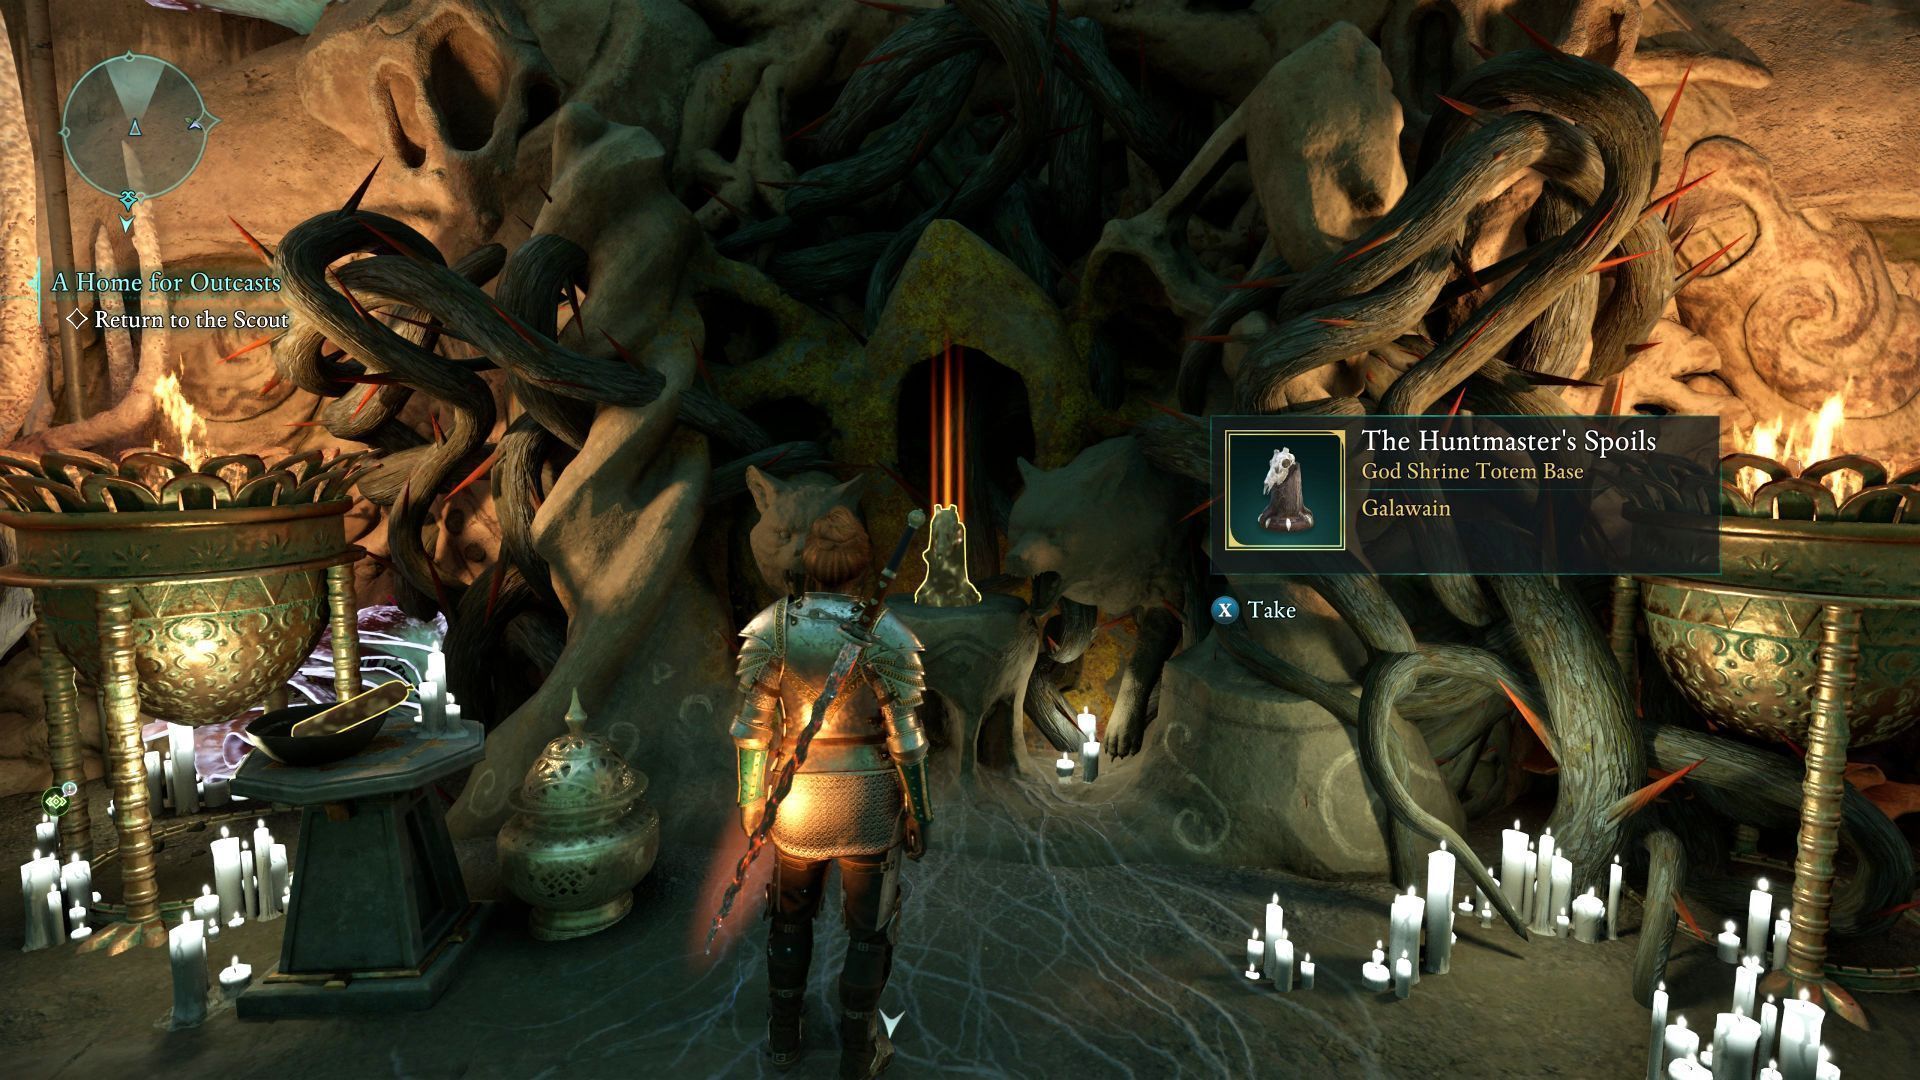
This is a totem core, and collecting it is required to place all of the fragments you have. You must visit the Shrine to Galawain in the central part of the region. The totem core is on the altar.
Stat bonuses from totem - Galawain's Tusks
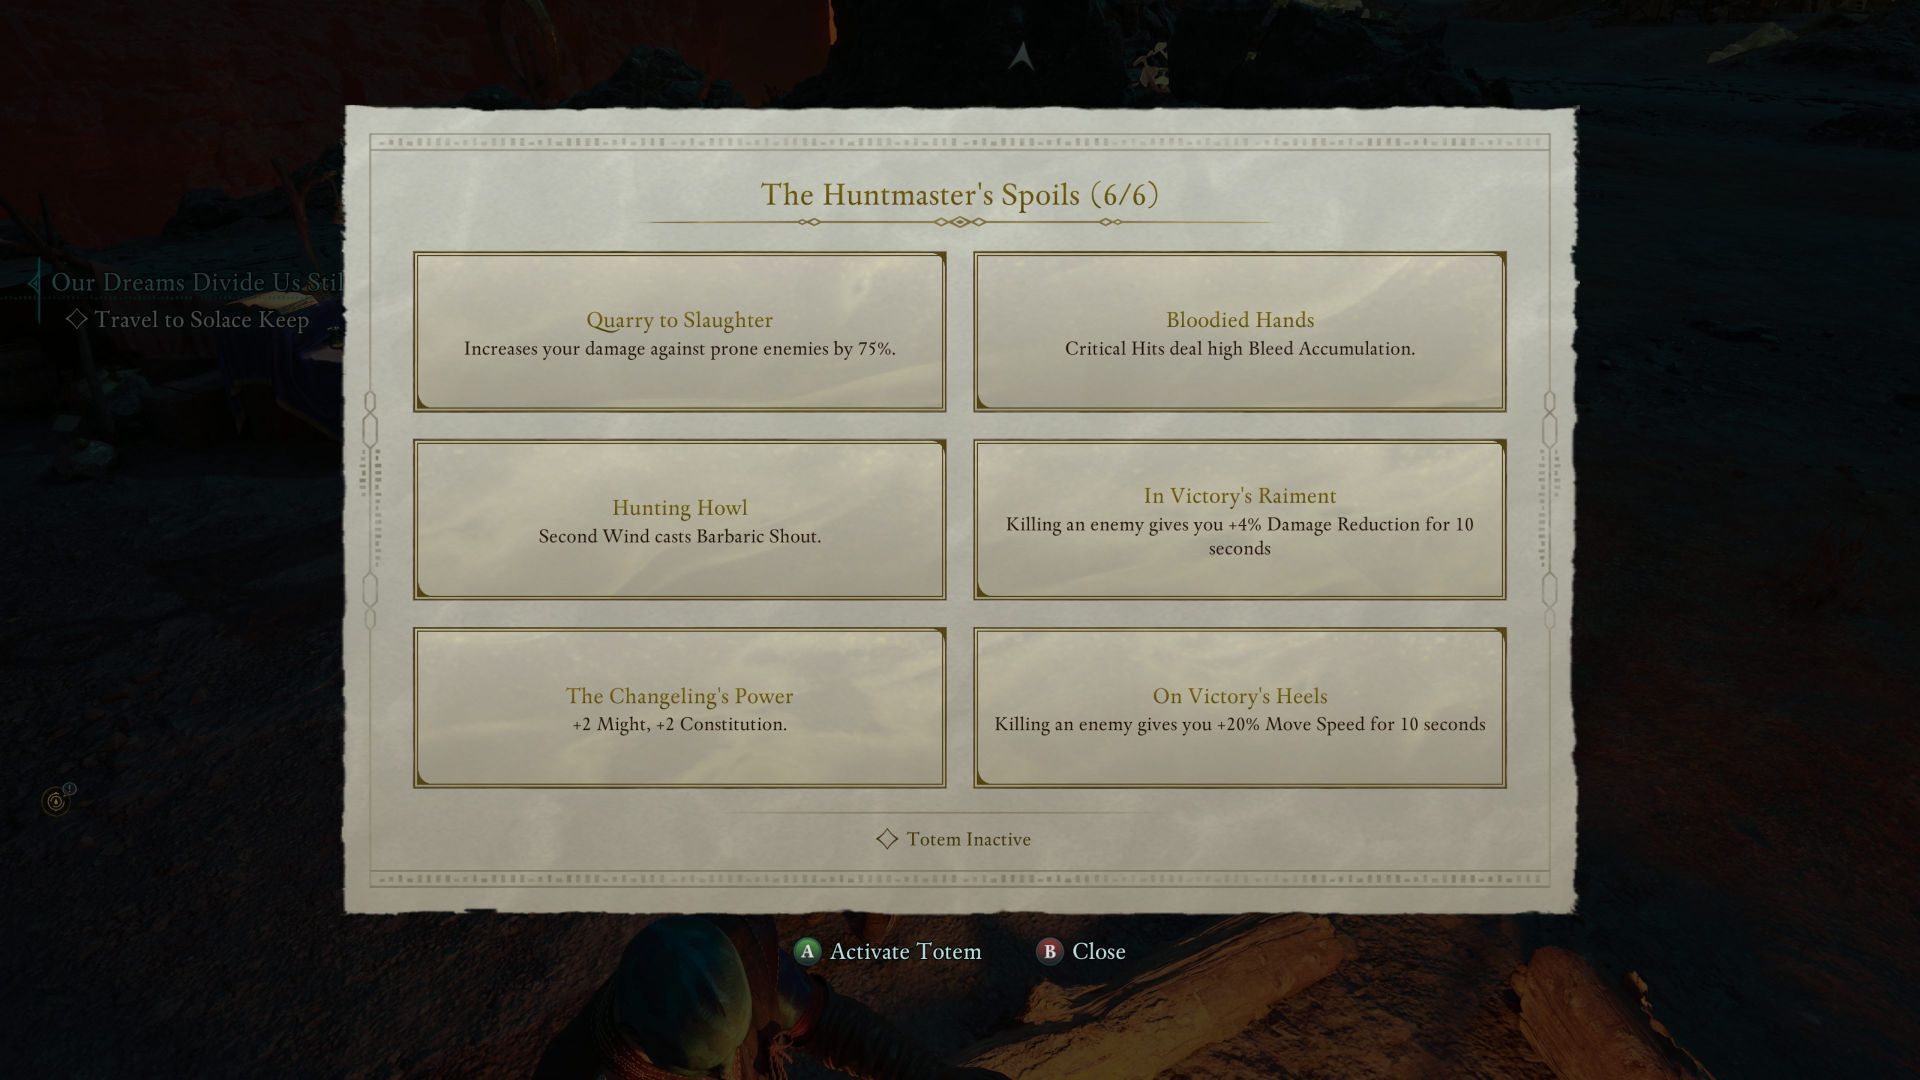
Below is a list of stat bonuses that the collected fragments provide:
- Quarry to Slaughter - Increases damage dealt to downed enemies by 75%.
- Bloodied Hands - Critical hits cause a stack of bleeding.
- Hunting Howl - Second Wind activates a Barbaric Shout.
- In Victory's Raiment - Killing an enemy temporarily increases your damage reduction.
- The Changeling's Power - Increases the Might and Constitution attributes by 2 points.
- On Victory's Heels - Killing an enemy temporarily increases the hero's movement speed.
You can buy a note with hints on the totem fragments - it is sold by Yorgu in Solace Keep and it costs 500 coins. We recommend saving your gold and collecting the set yourself.
How to activate a totem in the party camp?
- The earliest you can place each totem is after obtaining the totem core from a given set. Visit any party camp.
- In the camp there is a place for constructing various totems - from the Dawnshore region and the other three. Transfer the totem core and any totem fragments you have.
- You can only have 1 totem active at a time. We recommend enabling the totem for which you currently have the most fragments, and therefore the most active passive bonuses.
You can collect the totem fragments in any order and our order is only an example. You can also activate the totem with an incomplete set of parts - you will then only receive the selected passive stat bonuses.

You are not permitted to copy any image, text or info from this page. This site is not associated with and/or endorsed by the Xbox Game Studios / Microsoft Studios or Obsidian Entertainment. All logos and images are copyrighted by their respective owners.
Copyright © 2000 - 2025 Webedia Polska SA for gamepressure.com, unofficial game guides, walkthroughs, secrets, game tips, maps & strategies for top games.