Splinter Cell Blacklist: Mission 2 - Border Crossing
General premises
- You need to locate documents left in three different spots near the border crossing.
- You can't be detected by the enemies.
- If you want to receive a bonus, you can't drive the enemies into the state of uneasiness. This does not mean that you can't knock down/kill enemies but, they can't become suspicious, for example if you destroy a security camera or eliminate a person that stays put in one position.
- Apart from completing the mission objectives, you can also find Dead Drops, Blacklist laptops, or capture a high-value target.
Additional obstacles
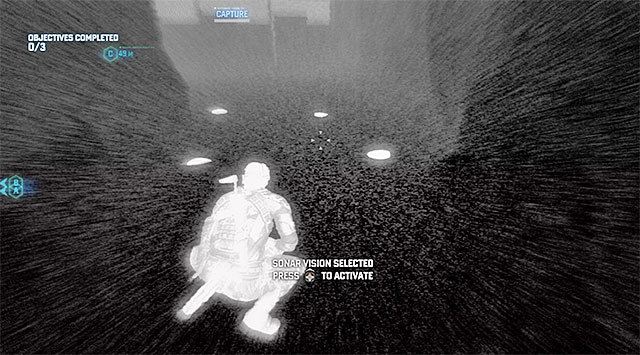
Apart from the ones described for the previous mission received from Grim, this one also introduces several new obstacles that it would be good to remember about. The most important issue is mine fields. For obvious reasons, you can't allow yourself to walk onto a mine because this would bring about the death of your character. According to the game's suggestion, you can cross mine fields with your sonar pulse on but, as a matter of fact, you will be able to do that without these because, it is enough not to hurry and look around carefully.
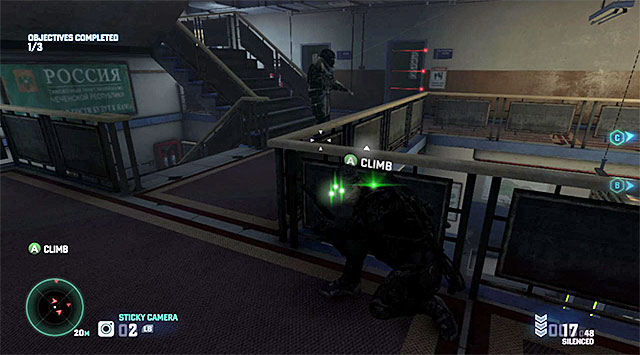
Another innovation is the presence of the enemies equipped with armor. If you aren't going to attack the hostiles, their appearance will, in general, change nothing. Otherwise, it is good to remember that the best method to eliminate enemies of this type is to get them from behind, or landing on them after jumping from a ledge above.
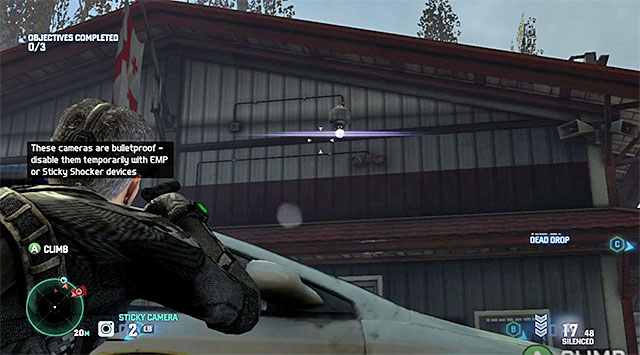
The least important change concerns the security cameras because all of these come encased now and, as a result, you can't destroy them. If, during the previous mission, you sabotaged cameras with the EMP charge, then you can use this tactic again.
Obtain the documents
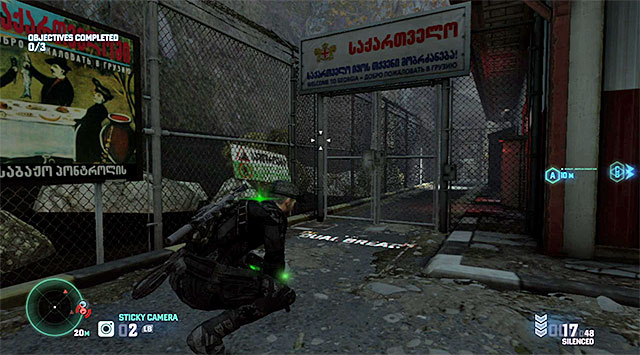
As I have already mentioned, there are three different documents that you need to obtain. The documents marked as A can be found on the ground floor of the building located closest to the starting point. You need to keep vigilant because the square in front of the building is being patrolled by, at least, three guards (numerous walls and parked vehicles will make things easier) and monitored with a camera. If you play the co-op mode, it is best to work together to unblock the side passage located to the left of the building. After you take the passage, you will pass by another camera.
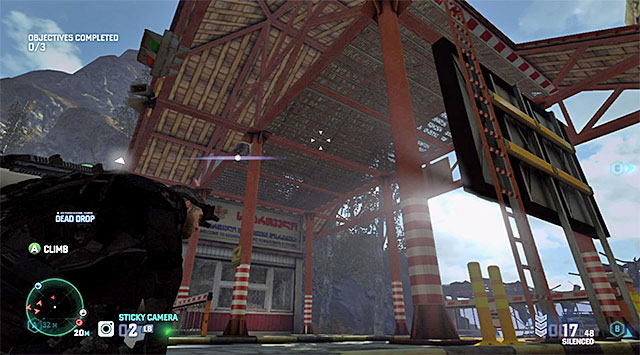
If you play solo or, you do not want to near the building from the left, you can go across from the starting point and climb onto the metal structure shown in the screenshot. Walk over to the other end to reach the building You can near your destination from the side of the square where document B is located but, I recommend against this variant because this would expose you to unnecessary stress while crossing two mine fields.
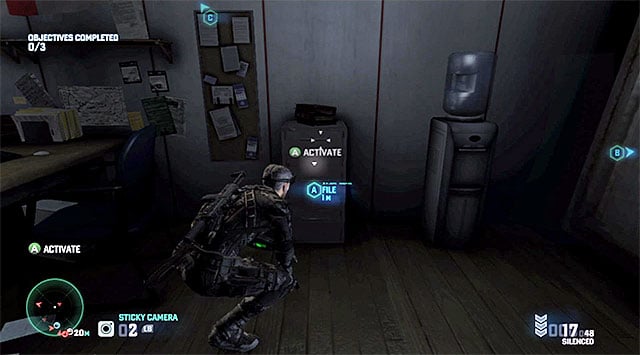
Regardless of how to got into the building, start to explore its ground floor carefully. Watch out for the enemies staying outside, who can notice you through the window or through the open door (the second player may distract them in the meantime). Also, do not walk through the metal detector to prevent activating it. The document you are after is in one of the lockers.
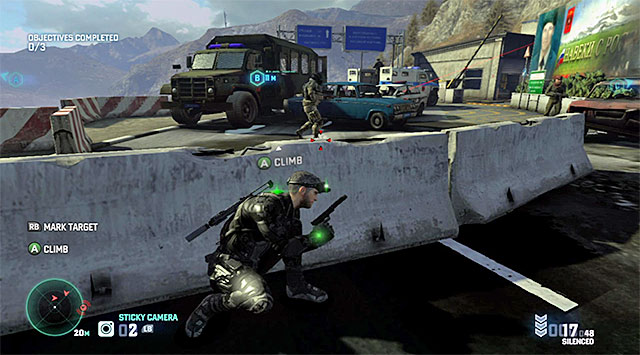
The document marked as B is definitely the most difficult to get to. It is inside a heavily guarded vehicle that is parked on a big square between two main buildings of this mission. If you are starting at the document A, you can reach the new location by going down the main road or through the side passage, which I mentioned earlier, that leads through two mine fields. If you start at document C, it is best to go down to the very bottom and walk through the unguarded garage.
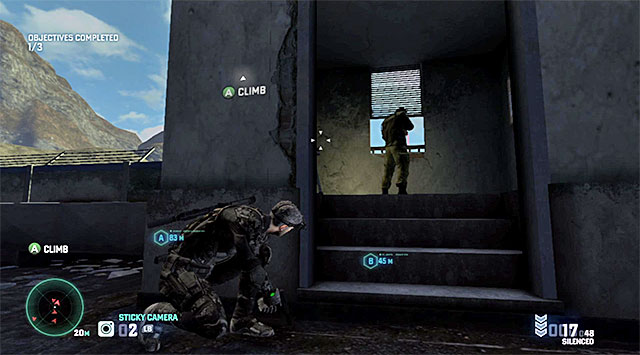
The most serious impediment is the fact that the square with the truck with document B is constantly being monitored by a sniper. The enemy is staying in the spot shown in the screenshot, i.e. on the roof of the building with the document C inside. The most obvious solution is to knock the sniper down but, if you do not want to attack him, you can ask the other player to distract him when the moment is right.
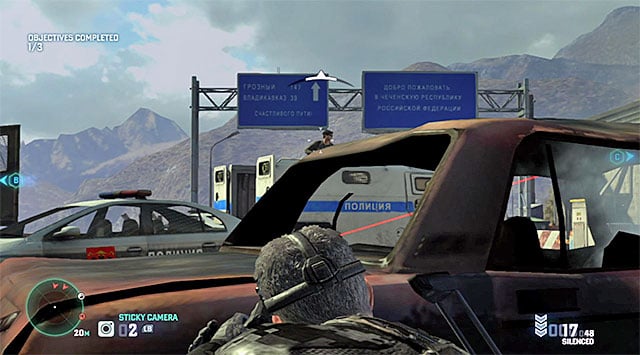
The sniper isn't the only problem because the square itself is being patrolled by two guards ( a standard and an armored). Moreover, one of the enemies is standing on the back of the vehicle parked there. I recommend against knocking him down (this would be possible using the crossbow or the reconnaissance drone) because this may drive the remaining terrorists into the state of uneasiness.
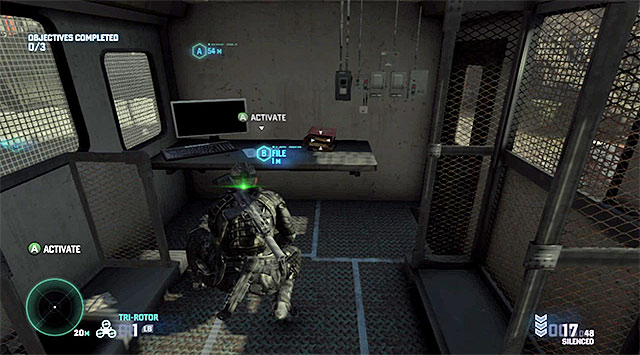
Approach the objective of the mission using the walls although, you can also slide down near the edge of the cliff. The key to success is, of course, waiting for the best moment to move into action - the enemy on the back of the truck should turn away and the enemies that are patrolling the area should have a conversation on the right. If you play the co-op mode, it would be good if the second player distracted the enemies but, make sure that these actions aren't too overt, because you can lose your bonus. Enter the truck quickly and obtain the document. Do not hurry to the exit because the enemy on the right, most probably, turned again.
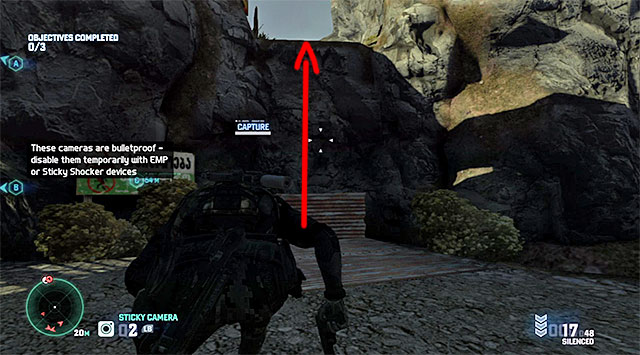
The document marked as C is in the building that is further away from the starting point, and neighbors the square with the truck with document B. It is on one of the higher floors. The easiest way to reach the building is from the vicinities of the starting point, through the passage between rocks shown in the screenshot. Although you will have to go around a mine field and a security camera on your way, the plan is worth giving a thought because you will find a high-value target and you will be able to knock this person down.
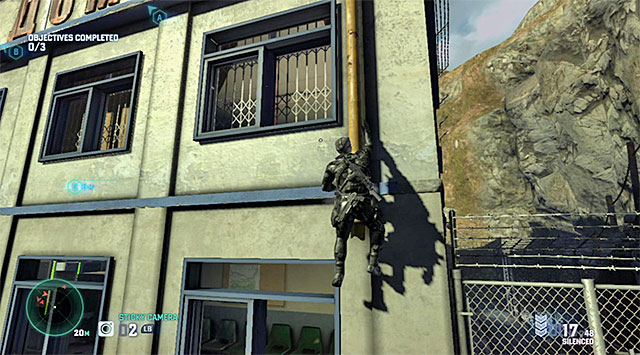
If you are starting on the square with document B, I recommend that you go to the garage located to the left of the main entrance, or approach the vertical pipe to the right of the entrance. Regardless of the decision that you have taken, remember about avoiding security cameras and also about the approaching two armored enemies that patrol the building (one of them stays on the ground floor and walks outside every now and then, and his colleague usually patrols the first floor).
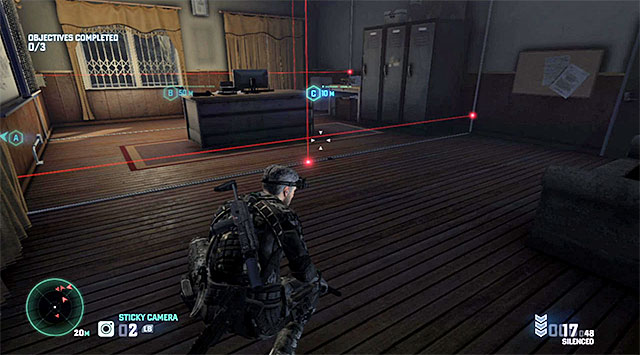
The document is in the room, shown in the screenshot, which is guarded by lasers. Therefore, you need to perform consecutive movements with care, and wait each time for the laser beams to move up and to the right. The good news is that after you get past the traps, you will be able to disable the lasers.
Locations of collectibles
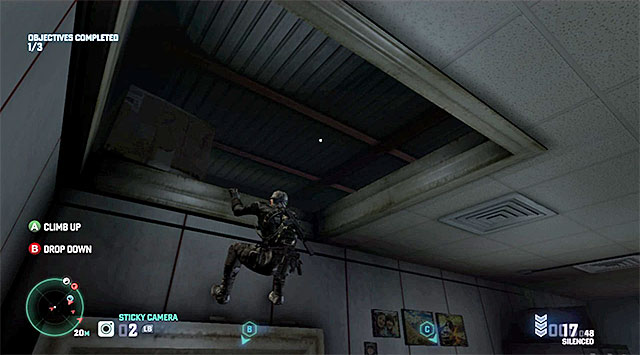
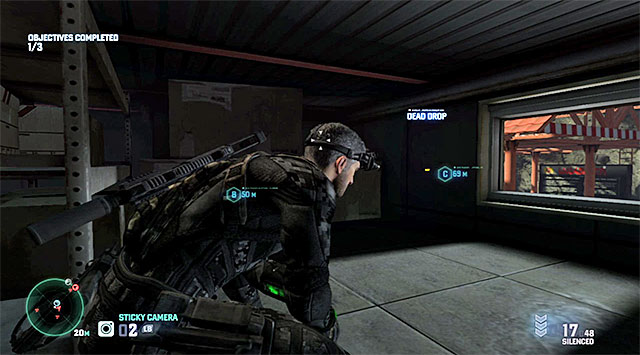
Traditionally, you should not be skipping the issue of finding collectibles in the area. The Dead Drop is located in the attic of the building located closer to the starting point, i.e. the one that you collected document A from. After obtaining the document, remain in the room where you found it and pull up in the spot shown in screenshot 1. This will take you to the attic. Examine this place carefully to find the collectible (screenshot 2).
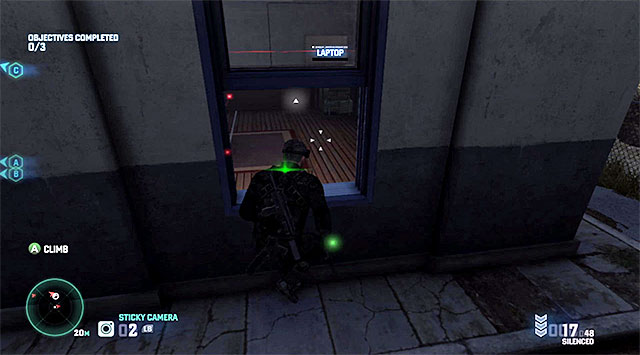
The Blacklist Laptop is located on the ground floor of the building where document C is. The best way to gain access to the room with the collectible is to open the gate at the back of the building and walk across the blue window shown in the screenshot. In the meantime, you need to watch out for the security camera that is attached to the building's wall. Walk around the lasers and approach the laptop to hack into it.
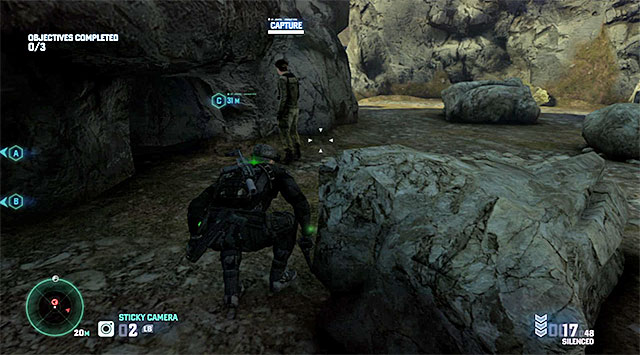
The High Value Target is patrolling the abovementioned side alley that you can reach by going to the right of the mission's starting point (the passage between the buildings with documents A and C). watch out for the mine field and necessarily wait until the target moves away from the security camera, before you decide to knock down and tie up this enemy.
Leave the vicinities of the border crossing
After you have taken care of all the business, return to the starting point . If you found the documents in the order in which they were marked, it will be the best solution to go through the passage between the rocks, which was earlier guarded by the high-value target.
After you return to the mobile command center, get acquainted with the statistics for this mission and receive the reward. You can talk to Grim about another optional mission - Hackers' Den.
- Tom Clancy's Splinter Cell: Blacklist Game Guide
- Splinter Cell Blacklist: Game Guide
- Splinter Cell Blacklist: Mission 12 - Site F
- Splinter Cell Blacklist: Disable vent fan
- Splinter Cell Blacklist: Infiltrate the bunker
- Splinter Cell Blacklist: Gain access to the bunker defense systems
- Splinter Cell Blacklist: Sabotage the bunker's defense systems
- Splinter Cell Blacklist: Initiate the bunker lockdown procedure
- Splinter Cell Blacklist: Stop Sadiq
- Splinter Cell Blacklist: 4E Missions - general premises
- Splinter Cell Blacklist: Optional missions assigned by Grim
- Splinter Cell Blacklist: Mission 1 - Hawkins Seafort
- Splinter Cell Blacklist: Mission 2 - Border Crossing
- Splinter Cell Blacklist: Mission 3 - Hackers' Den
- Splinter Cell Blacklist: Optional missions assigned by Charlie
- Splinter Cell Blacklist: Enemy types and general premises of Charlie's missions
- Splinter Cell Blacklist: Mission 1 - Pakistani Embassy
- Splinter Cell Blacklist: Mission 2 - Swiss Embassy
- Splinter Cell Blacklist: Mission 3 - Egyptian Embassy
- Splinter Cell Blacklist: Mission 4 - Russian Embassy
- Splinter Cell Blacklist: Optional missions assigned by Kobin
- Splinter Cell Blacklist: Mission 1 - Opium Farm
- Splinter Cell Blacklist: Mission 2 - Fish Market
- Splinter Cell Blacklist: Mission 3 - Blood Diamond Mine
- Splinter Cell Blacklist: Additional missions assigned by Briggs
- Splinter Cell Blacklist: Mission 1 - Smugglers Compound
- Splinter Cell Blacklist: Mission 2 - Missile Plant
- Splinter Cell Blacklist: Mission 3 - VORON Station
- Splinter Cell Blacklist: Mission 4 - Abandoned City
- Splinter Cell Blacklist: Mission 12 - Site F
- Splinter Cell Blacklist: Game Guide
You are not permitted to copy any image, text or info from this page. This site is not associated with and/or endorsed by the developers and the publishers. All logos and images are copyrighted by their respective owners.
Copyright © 2000 - 2026 Webedia Polska SA for gamepressure.com, unofficial game guides, walkthroughs, secrets, game tips, maps & strategies for top games.
