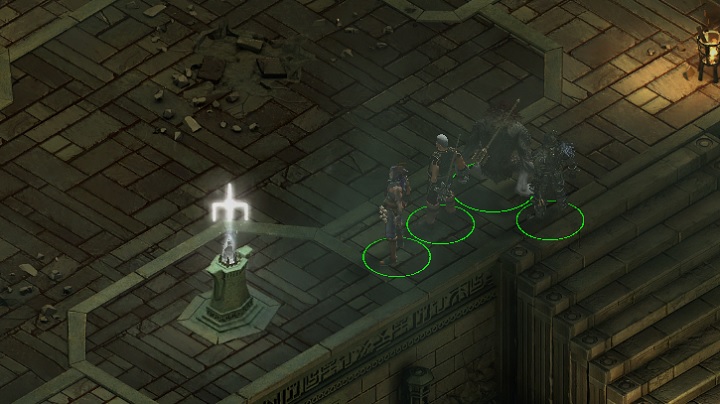
Tyranny: Forbidden Passage - main quest
Last update:
The following chapter provides a detailed description of Twin Rivers Oldwalls - Brotherhood's camp (M35) related to Forbidden Passage. You will find tips on main quests that you will come across and suggestions on how to complete these tasks in the most efficient way possible.
Certain aspects were described in dedicated sections.
- Starting the quest
- Visiting other chambers
- Twin Rivers Oldwalls - Brotherhood's Camp
- Twin Rivers Oldwalls - paths
- Facing Havoc
- Ending your task
Starting the quest
The mission will appear in your journal once you interact with The Bronze Brotherhood in Stare Twin Rivers Oldwalls - Brotherhood's camp. Depending on your approach towards Platfus Ferris, members of the Bronze Brotherhood may react in a hostile or natural way towards you.
Visiting other chambers

Regardless of the fact how you obtained torchkey Amith, you must use it at the nearby torch. Activate it and buttons on floor will activate, and access to further chambers will be granted. The game guide was divided into separate parts that will elaborate on separate levels of Twin Rivers Oldwalls.
Twin Rivers Oldwalls - Brotherhood's Camp

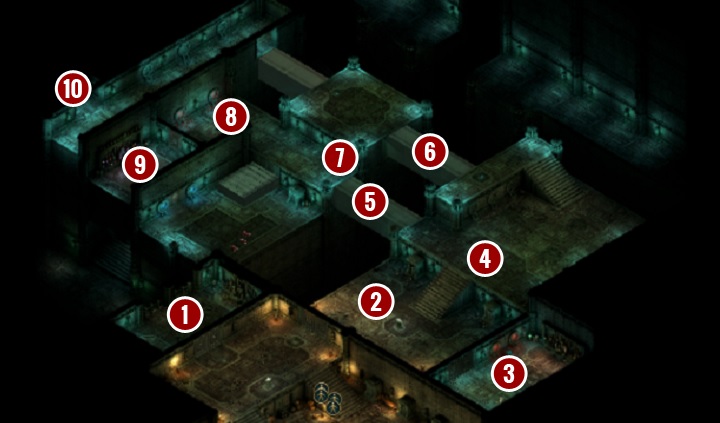
Use torchkey Amith to unlock two paths. First, enter a small room [1] and collect the scattered items. Get back to the main chamber and move north [2]. Use torchkey Ambir on the torch on the lowest level. This will unlock the chamber in the south [3]. You can collect hidden objects but you will have to fight your way through four banes.
Activate the torch [4] on the highest level of the chamber and use the buttons to unlock both bridges [5] and [6]. Cross the bridge [5], deactivate the trap [7] and activate another torch [8]. Defeat the banes and search the chamber in the west [9]. Right now you cannot activate the stairs to the lower level of the location, thus use the bridge [6] and access the platform. There, you will unlock another bridge and use the corridor. You will reach a passage to another location [10].
Twin Rivers Oldwalls - paths
![Access the new level of the ruins [1] and you will find a chamber with another torch - Forbidden Passage - main quest | Haven - Haven - Tyranny Game Guide](/tyranny/gfx/word/426949745.jpg)
Access the new level of the ruins [1] and you will find a chamber with another torch. There is a body on the floor. Search it to obtain torchkey Citren. The torch can be activate by both torchkeys. Ambir will unlock the passage to the west [2], and Citren the passage to the north [3].
In the first chamber in the west [4] you will come across a group of Bronze Brotherhood fighting the banes. As both sides are hostile towards you, it's best to let them finish each other off. Search the room for hidden treasures (however, this will set the nearby banes free). The path to the west will be blocked and you need to use the torch located in the chamber with torchkey Citren (the button on the wall will become active). Before you move any further, disarm the traps on the walls of the corridor. At the end of a narrow corridor, there is a button [5]. Use it to unlock the chamber in the south [6].
You will come across a member of the Forge Bound. You can kill him or save him. If you decide to help him, a new quest Leave No One Behind will be added to your journal. Exit the chamber and head north [7] by crossing the bridge. The next torch is guarded by two larger banes but what is most important is that the fallen body on the other side of the bridge has the last torchkey - Rho. Furthermore, there is a print on one of the walls, which may be helpful if you didn't unlock the Runic Hall. Once you use torchkey Rho on the torch in the chamber, the button on the floor will become active and more banes will appear.
Before you move any further, get back to the place where you started exploring this level of ruins and head north [3]. Disarm a trap on the floor and collect objects from the stone chest. Use torchkey Saphir, to gain access to another chamber [8]. There you will encounter some tough banes. Collect the objects from the chests and go back to the chamber with the last torchkey [7].
![Follow the path with traps on the floor [9] - Forbidden Passage - main quest | Haven - Haven - Tyranny Game Guide](/tyranny/gfx/word/426949760.jpg)
Follow the path with traps on the floor [9]. Disarm them and move to the next chamber [10]. There you will find three torches. You must use torchkey in the right order (see screenshot) to avoid fighting the banes. In the end, you will be granted access to a small room in the west [11].
Facing Havoc
![You will encounter Raetommon and a couple of members of the Bronze Brotherhood [1] - Forbidden Passage - main quest | Haven - Haven - Tyranny Game Guide](/tyranny/gfx/word/426949776.jpg)
You will encounter Raetommon and a couple of members of the Bronze Brotherhood [1]. As soon as you get close to them, one of the foes will deactivate the bridge and trap you on the platform. You may engage into a short conversation but you will have to fight them anyway. Search the fallen bodies and you will find torchkey Emir, a key essential to activate the bridge again.
Draw your attention to the fact that, Havoc [2], visible in the central part of the platform, will get out of his prison as soon as you activate the third torch. There is no other way but to defeat the creature and all other banes that will be summoned during the fight. Once the battle is over, activate the last torch and leave the platform. There is a trapped Leader of the Forge- Bound on the upper level of the ruins. Free her to continue your quest or kill her if you want (this will mean turning towards the Chaos).
Ending your task
Set her free and get back to the Elder in Lethian's Crossing. Now discuss the matter of Megabane Helm. Regardless of your decision to keep or give back the item, you will have to Graven Ashe. Inform him about your progress and you will complete the quest. A new quest - The Tiers Will Shake - will be added to your journal.
- Tyranny Game Guide
- Tyranny: Game Guide
- Tyranny: Act 2
- Tyranny: Haven
- Tyranny: Lethian's Crossing map
- Tyranny: Seats of Power - main quest
- Tyranny: Deserter's March map
- Tyranny: Blind Ambition, The Missing Shipment, Leave No One Behind
- Tyranny: Twin Rivers map
- Tyranny: Twin Rivers Oldwalls - Brotherhood Camp map
- Tyranny: Twin Rivers Oldwalls - Depths map
- Tyranny: Twin Rivers Oldwalls - Antechamber map
- Tyranny: Iron and Blood - main quest
- Tyranny: Remnants - side quest
- Tyranny: A Person of Interest - side quest
- Tyranny: The Bronze Thief - main quest
- Tyranny: Forbidden Passage - main quest
- Tyranny: Haven
- Tyranny: Act 2
- Tyranny: Game Guide
You are not permitted to copy any image, text or info from this page. This site is not associated with and/or endorsed by the developers and the publishers. All logos and images are copyrighted by their respective owners.
Copyright © 2000 - 2025 Webedia Polska SA for gamepressure.com, unofficial game guides, walkthroughs, secrets, game tips, maps & strategies for top games.
