Oddworld Soulstorm: Protect the Mudokons, Reunion...
Reunion At The Old Trellis walkthrough
This page of the Oddworld Soulstorm guide contains the second part of Mission 8 - Reunion at the Old Trellis. Our walkthrough tells you how to survive three encounters with the Sligs and how to save at least 200 Mudokons and complete the mission with a positive Quarma.
Additional note: The green color in this walkthrough stands for secrets and unique locations/activities associated with the badges (challenges) in the game. Mission 8 badges were described on a separate page of the guide.
First platform
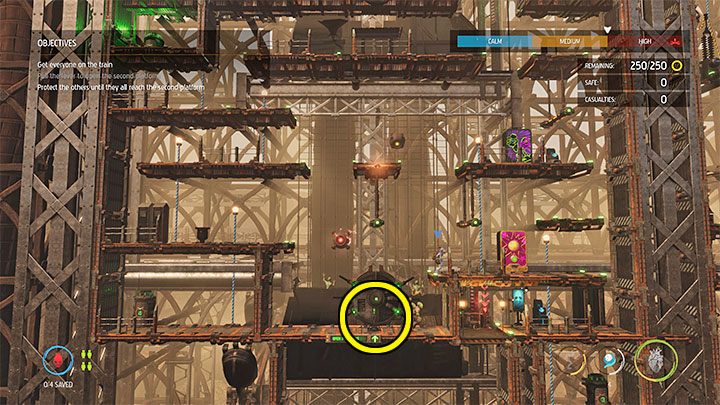
The main part of the mission features 3 battles, during which we will have to protect the fleeing Mudokons. This can be achieved by taking down the Sligs. 250 Mudokons are involved in the escape and if we want to get the best (platinum) badge for saving them, we must ensure that at least 200 Mudokons are saved once the mission comes to an end (this applies to all three battles).
The battle will not begin until we pull the lever marked in the attached image. Before using it, we should make some preparations, which we described below.
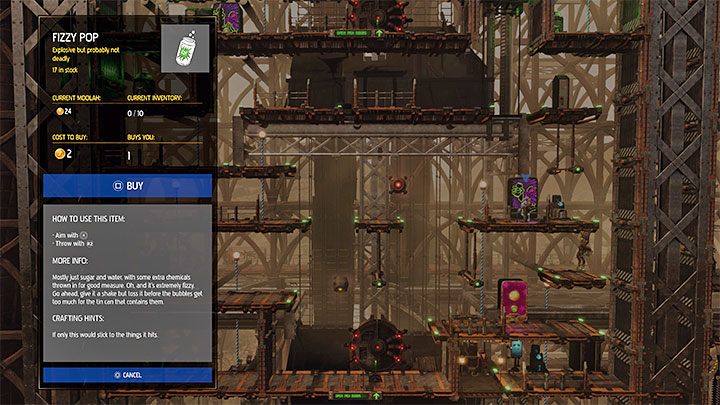
Have a look around the surrounding platforms. We search all containers and we can also use 2 vending machines to pick up Rock Candy for free and optionally buy Fizzy Pop cans. As a reminder, Fizzy Pop is a gadget that works like toxic grenades and can stun enemies after they come into the smoke.
Optionally, we can set mines around the area. This is not required, but it can make it easier to deal with Sligs from different parts of the arena. In the following section, we've summarized the locations where Sligs appear most often.
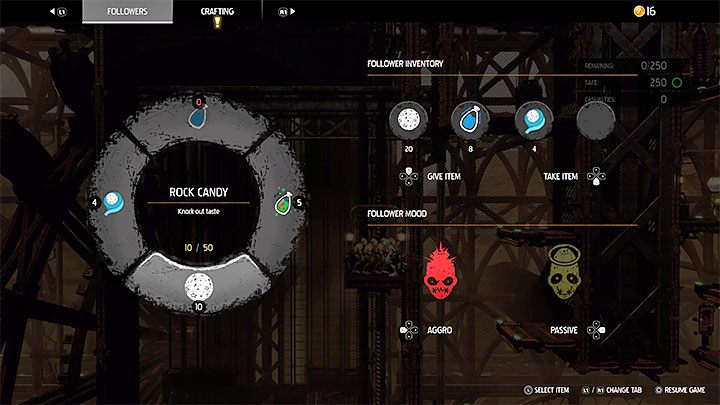
Another optional thing you can do is sharing the inventory with 4 commanded Mudokons. This is done in a separate Followers menu (press the Triangle on PS4/PS5). We can give Mudokons different varieties of candy or cans. This will allow them to use the objects on their own during the battle. In reality, the effects may be questionable.
Note - do not deprive Abe of all the best gadgets for attacking Sligs. If you want to complete the battle with the best result, try to get rid of as many enemies as possible. You will need throwable objects for this.
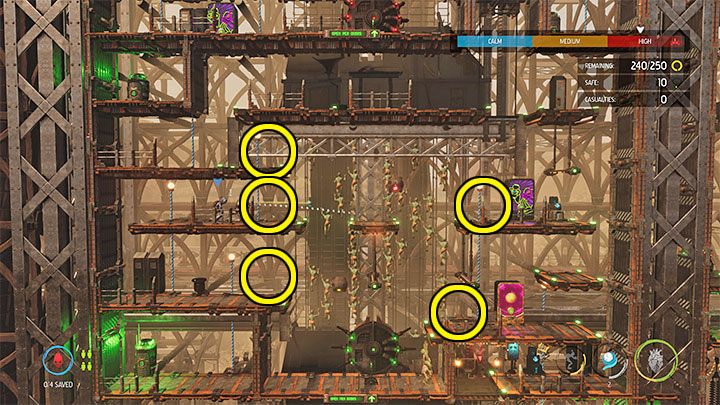
After the battle starts, the Sligs will gradually reach the central area heading from Guard Posts located on the edges of the arena. Spots where the Sligs can stop are marked on the attached image.
Let's try to get the enemies before they stop, because they will immediately begin to shoot at you and kill the fleeing Mudokons. Use double jumps and bars to move around the arena quickly.
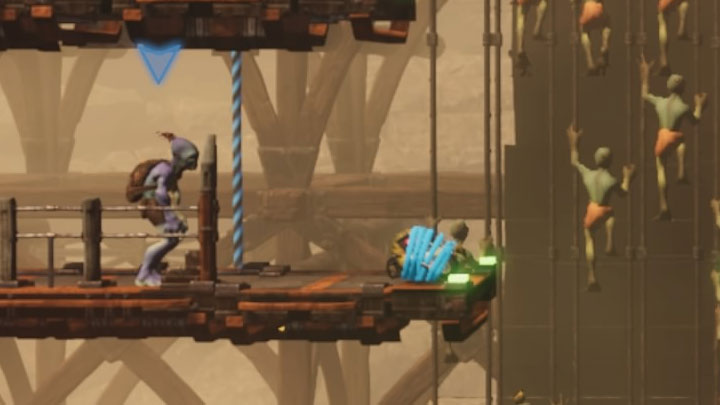
The best Slig elimination techniques are summarized below. Use gadgets that stun the target. Then, you can try to tie the Slig or take advantage of the fact that it will take him some time to regain consciousness and deal with other Sligs in the meantime.
- Using Bouncy Biding Candy - this is the best way of taking down a Slig, because the enemy, once hit, will be immediately tied (example in the picture above). Be careful not to use up all the candy in the first battle. Let's save some for the next one.
- Using Bouncy Candy - they are better than "standard" Rock Candies, because they can immediately stun hit enemies.
- Using Fizzy Pop cans - if 2 Sligs happen to be standing next to each other, they may be knocked unconscious by throwing just one can. However, we can also use cans to take out individual enemies.
- Using Stun Mines and Super Stun Mines - they're the only ones that we can set before the battle, but remember to stay away from them and do not activate them yourself.
Additional note - we can not use possession in any of the battles because there are Chant Suppressors in the vicinity.
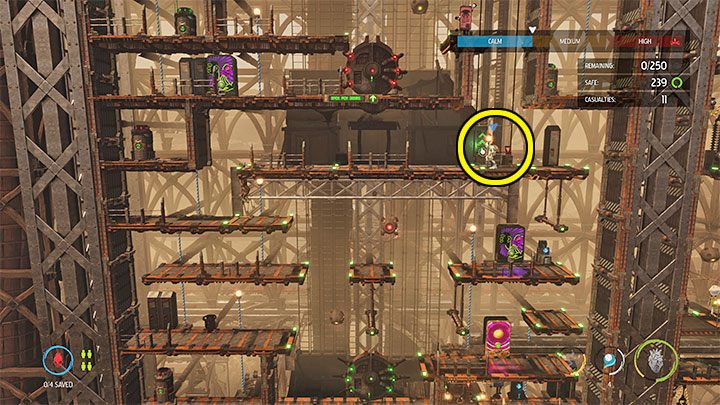
If too many fleeing Mudokons die, we suggest reloading the save. This will allow us to play through the battle again, which should be easier since now we know where Sligs are gonna appear and in what order.
The enemies will cease to appear after all the Mudokons have fled the area. An elevator located in the upper right corner leads to the next arena. Take your 4 subordinates with you (if they are still alive).
Second platform
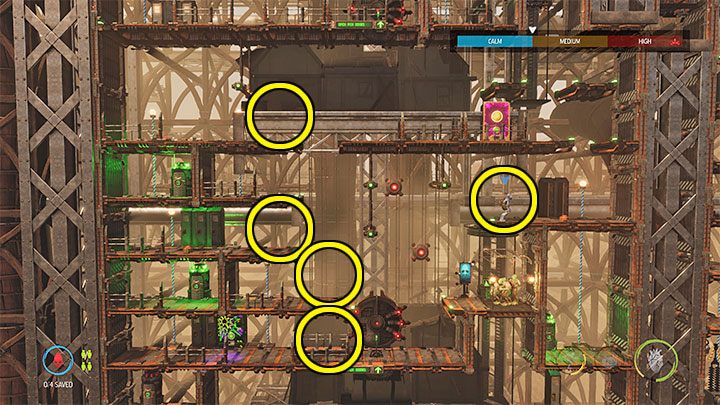
Prepare yourself for the second clash with the Sligs. First of all, we can explore new platforms. In addition to the interactive containers, there is a vending machine offering Rock Candy for free and a vending machine selling Fizzy Pop cans. If you have any mines, place some of them in the area, especially on the hard-to-reach upper right shelf. It'll give us more time after some Slig shows up.
We start the battle by pulling the lever. The attached picture presents spots where most Sligs will be heading to. After the Mudokons escape, we can use the upper right elevator to get out of here.
Third platform
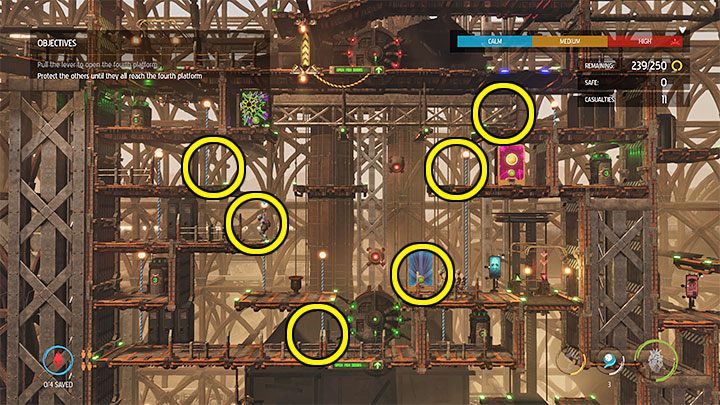
Before we begin the final confrontation with the Sligs, have a look around the area. We can pick up free Rock Candy, as well as get rid of the bottles using the recycling machine and spend some Moolah on Fizzy Pop cans. At this stage, we can use up any mines we have because they won't be needed after the fight.
We pull the lever and watch the places marked on the above picture. We may use up all other offensive gadgets as well. If possible, let's make sure that at least 200 Mudokons reach the top.
Pull the final lever to load the train
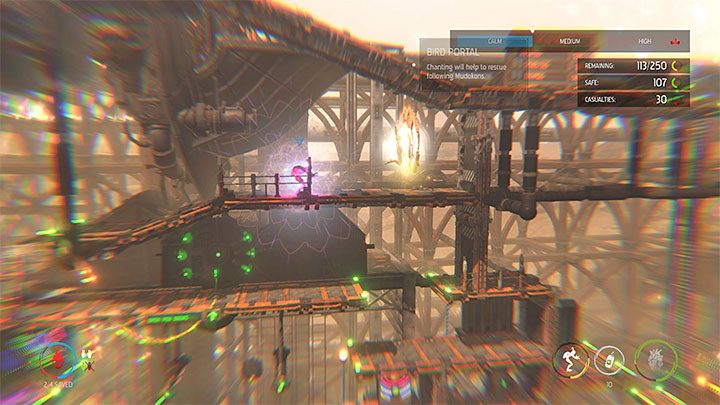
After surviving the last battle, we reach the lever located above the battle arena. We climb to the higher shelf - we can activate the bird portal and save 4 Mudokons who helped us in the battles (assuming they are still alive).
We use the left elevator to get to the top. Entering the train ends the mission.
You are not permitted to copy any image, text or info from this page. This site is not associated with and/or endorsed by the developers and the publishers. All logos and images are copyrighted by their respective owners.
Copyright © 2000 - 2026 Webedia Polska SA for gamepressure.com, unofficial game guides, walkthroughs, secrets, game tips, maps & strategies for top games.
