Oddworld Soulstorm: Freeing Mudokons from the cars, the Hijack
This page of the Oddworld Soulstorm guide contains the first part of the walkthrough of Mission 7: The Hijack. Our walkthrough tells you how to get inside the wagons, how to release all 15 Mudokons, how to solve the puzzle with the propane tank and how to use the fire extinguisher.
Additional note: the green color in this walkthrough stands for secrets and unique locations / activities associated with the badges (challenges) in the game. Mission 7 badges were described on a separate page of the guide.
- Free the first car of Mudokons
- Burn a path forward
- Free the second car of Mudokons
- Free the third car of Mudokons
- Blow up the propane tank
- Get to the front of the train
Free the first car of Mudokons
We begin the mission at the very end of the train and as we move towards the locomotive, we will be able to find and recruit Mudokons.
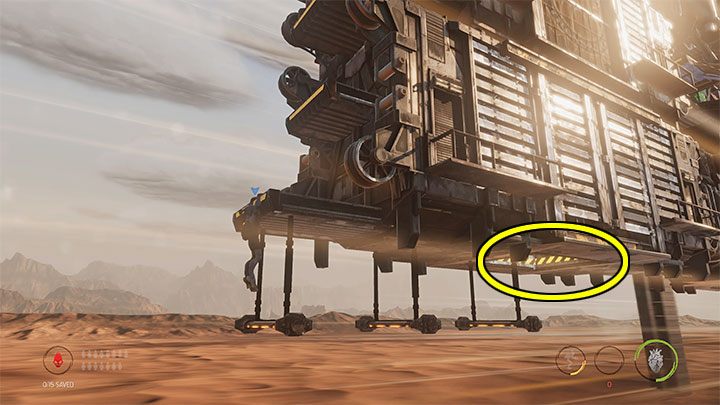
Stay at the starting point and descend to grab the first monkey bar. We can jump to the next bars and ultimately make a double jump towards the hole in the floor of the car as marked on the picture. This will bring us to the first secret area, which contains a Royal Jelly secret. There's also regular loot. We return to the starting point using the same path, i.e. with the help of bars.
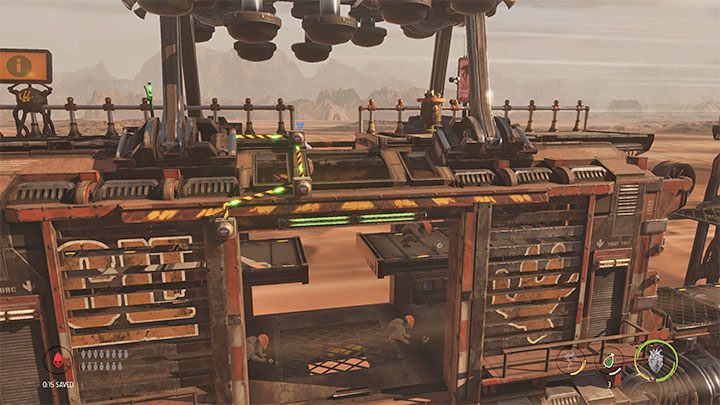
We jump to the next shelves until we reach the main one for the first car. We can optionally examine the top shelf (crates to destroy) or immediately pull the lever and open the car roof with 3 Mudokons. Summon them (the up button on the controller) so that they start following Abe. We search the inside of the car and go to the right.
Burn a path forward
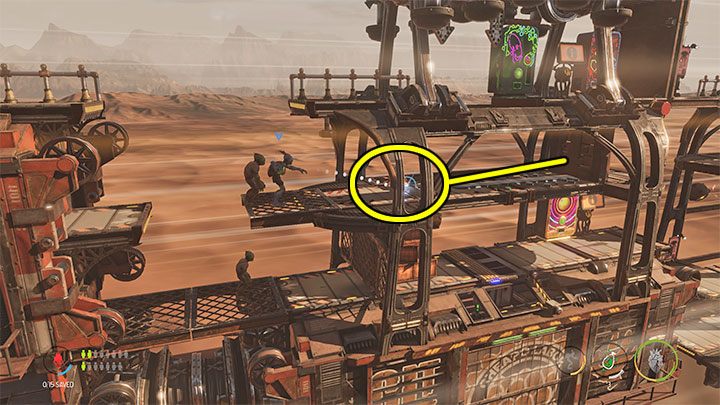
On the upper level, we will find 2 vending machines - we can pick up free brew bottles and get a fire extinguisher, which is a unique gadget for this stage. The fire extinguisher has a renewable tank, but if you use it continuously for too long, you'll have to wait a while until it automatically replenishes.
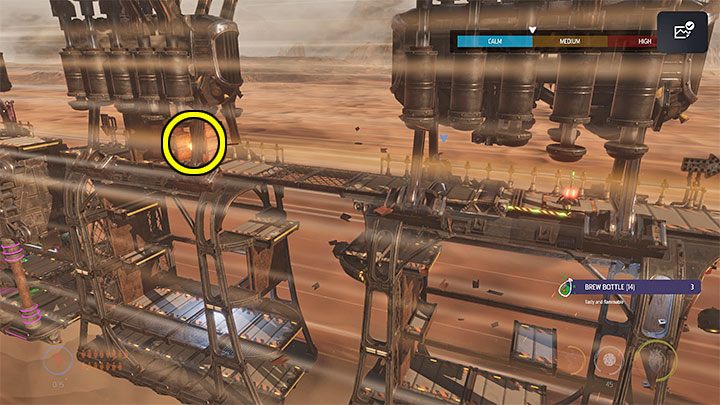
Our task is to set fire to the blockade to clear the way. We start by throwing a brew bottle into the area onto the ground where sparks appear - we marked this spot in the picture. Then, throw more bottles so that an oily substance appears on the floor and the line of fire reaches the barricade. Wait a few seconds for the barricade to burn down.
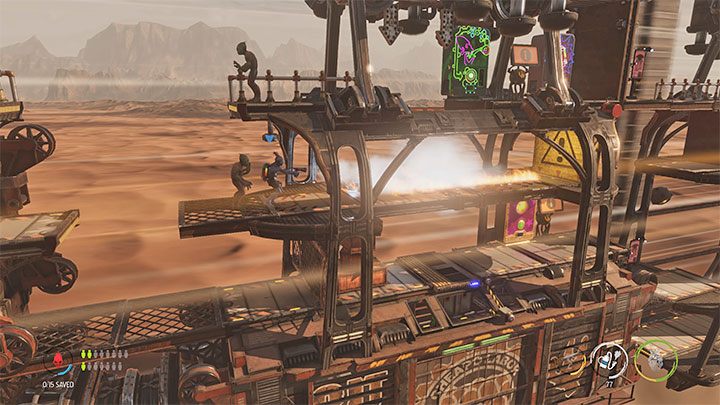
We can now choose a fire extinguisher from the inventory and use it to extinguish the fire. Let's remember to keep the escorted Mudokons at a safe distance in the back during the whole procedure so that they don't get hurt.
Free the second car of Mudokons
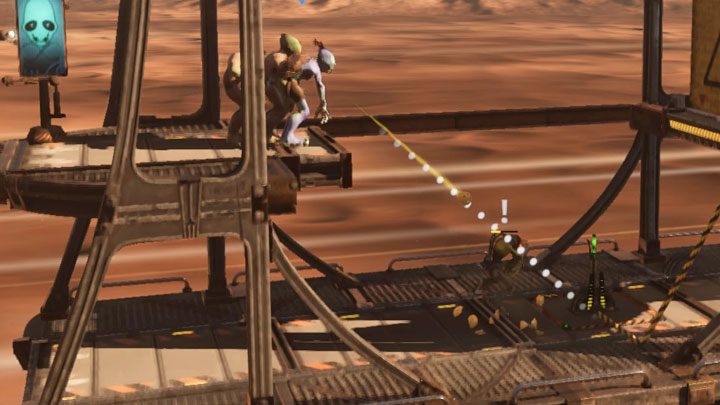
Soon after entering the new area, we will find the first vending machine that allows you to renew rock candy supplies for free. They are the new gadget available starting from this mission. Candies can be used to stun Sligs and we can test this on the nearest enemy.
In order to stun the Slig, we need to hit him with 3 candies. After the Slig loses consciousness, we can tie him up (if we have tape), search him or focus on moving on quickly.
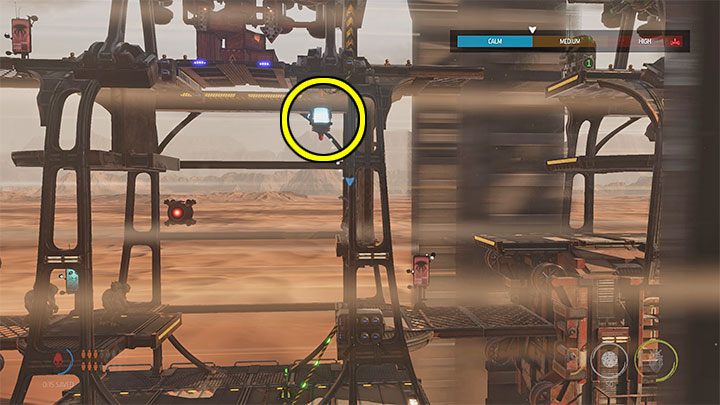
There is also an alternative way to get rid of the first Slig with the use of rock candy. We can throw the candy at the object near the ceiling as shown in the picture. Crates will fall down and, as a result, the lower level will be set on fire. The Slig is gonna die and we're gonna have to put out the fire with a fire extinguisher.
We can use this opportunity and jump to the upper area where the crates were dropped. We'll find a few other crates here that can be destroyed.
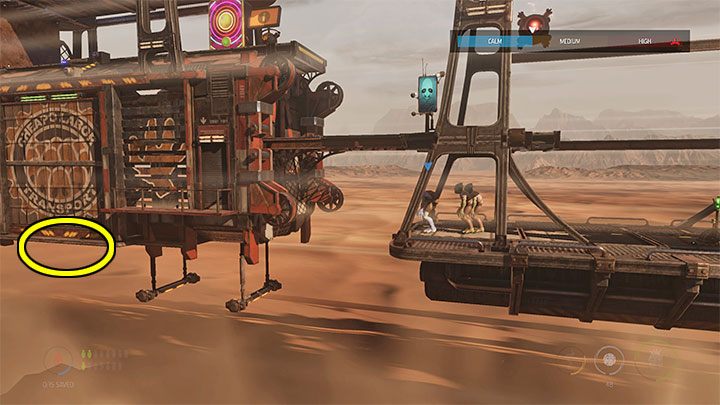
Let's stay in the area that was patrolled by the Slig and head a little to the left. In the place shown in the picture above, Abe can start to jump to the next bars. As before, the purpose is to reach the car through a hole in the floor. The interior of the wagon is a secret area. There are also 3 Mudokons here who can join you. We can use a lever to unlock the ceiling exit.
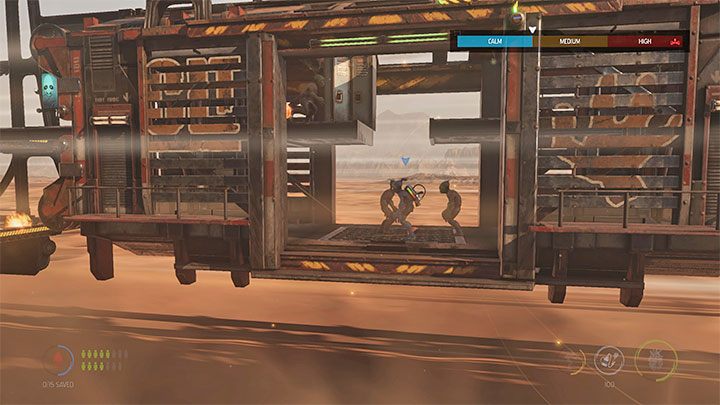
We return to the place where the Slig was, pull the lever and use the passage to the next car. We'll get to the lever of the new wagon. Pulling it will allow us to recruit 3 Mudokons (currently, Abe is already followed by 9 allies). Have a look inside the lockers and go back upstairs.
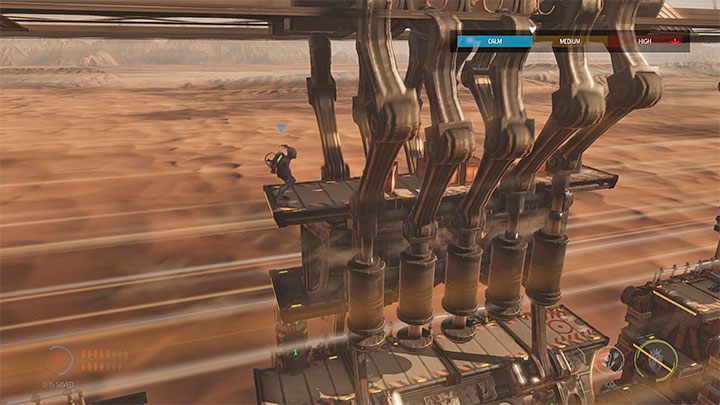
We remain in the same car and get to the highest balcony, as shown in the picture. In addition to new crates to destroy, we will also find here an invisible Royal Jelly secret. Now you can go to the next cars together with all the Mudokons.
Free the third car of Mudokons
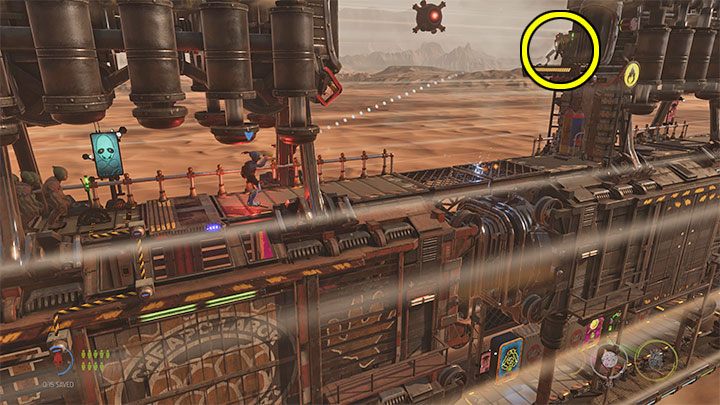
Another group of Mudokons can be released by pulling a lever by one of the checkpoints. There are 3 Mudokons inside the car. There is also regular loot, a vending machine with free brew bottles and a second vending machine with free rock candy.
We order all Mudokons to stay back so that their lives are not in danger.
Blow up the propane tank
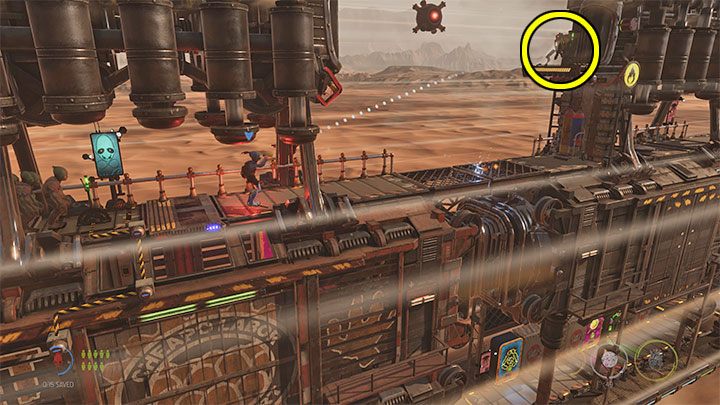
We carefully approach the Slig from the image above. We throw rock candy at him from a distance and tie him up. If he spots Abe too soon, there's a risk he'll shoot and kill the Mudokons.
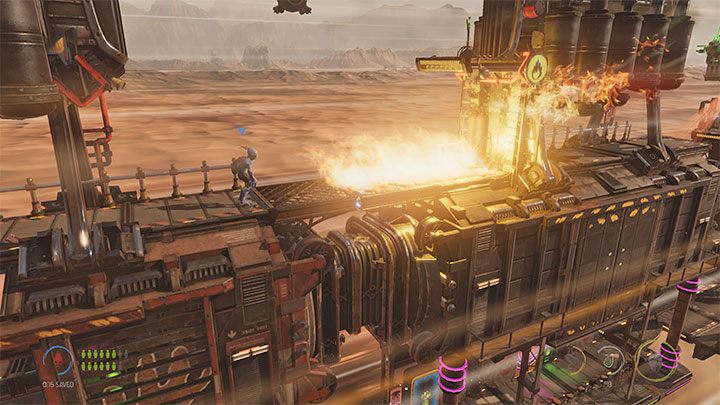
Our task is to blow up the propane tank blocking the passage to the next section of the train. To do this, we have to start throwing brew bottles - first, we aim at the sparks on the floor and then create an oily trail on the ground leading to the bottle. After the tank goes up in flames, wait a second for the big explosion.
You can extinguish the fire by jumping to the top shelf and pulling the lever - this will start the sprinklers. In the end, we'll probably have to use a fire extinguisher anyway to prevent any of the Mudokons getting harmed.
Get to the front of the train
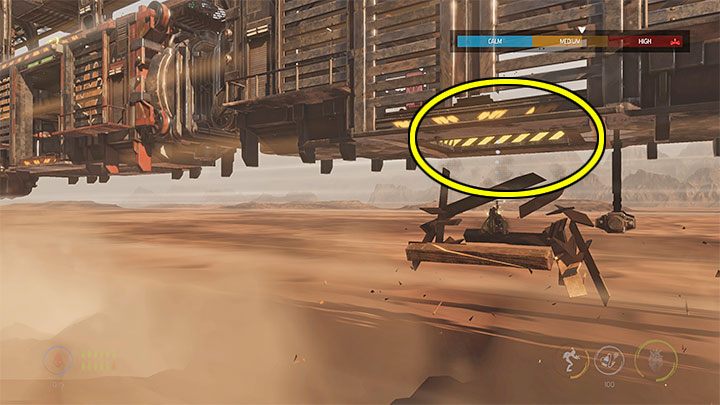
We're leaving the escorted Mudokons in the back. Don't take down the Slig flying in the vicinity. Instead, use possession on him. The flying Slig will be needed to reach two new secret locations.
Use the Slig to descend and then go to the left. The point is to get under the train. We fly to the left to destroy the car floor, in the spot shown in the picture. You need to shoot at it. If you don't do this, Abe will not be able to reach the inside of this car.
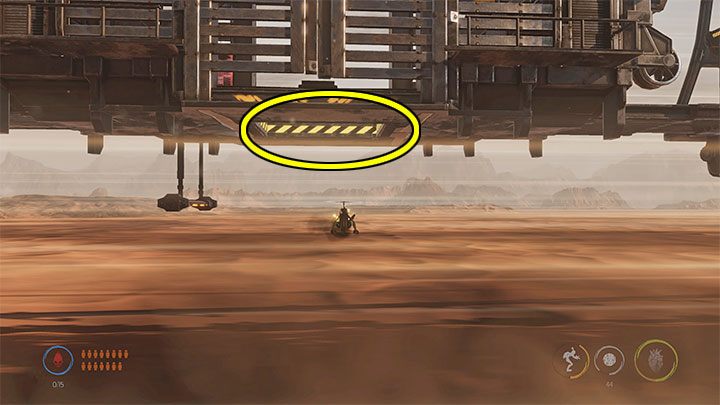
We're still using possession on the Slig and now, we're going to the right. We continue the flight until we reach a series of bars attached to the bottom section of the train. We can shoot at the hole shown in the picture. It will unlock a secret passage that Abe will reach later on.
After completing all the actions, we finish the possession and return to controlling the main character.
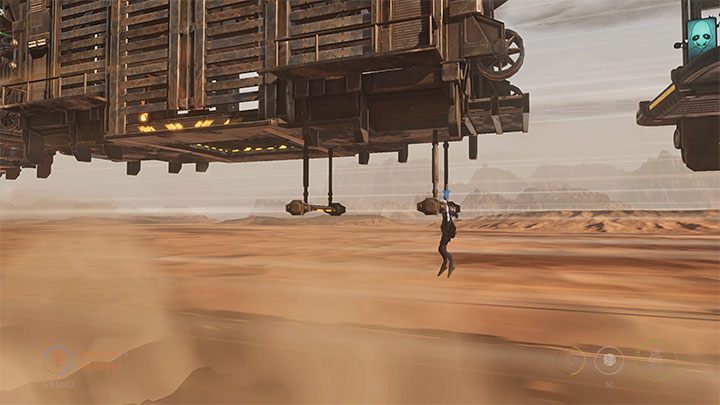
We go the same way as with the possessed Slig, i.e. down and then to the left. Along the way, we will find a recycling station (selling empty bottles) and two vending machines where you can buy brew bottles and rock candy for Moolah - remember that spending cash is associated with one of the challenges of this sequence.
We choose Abe himself and carefully grab the first lower bar (see picture above). We can jump through the bottom hole created by using the possessed flying Slig. This will allow us to reach the secret area with lockers inside, a Royal Jelly secret and the last 3 Mudokons. Using the lever will unlock the exit on the roof. We return to the main group of Mudokons.
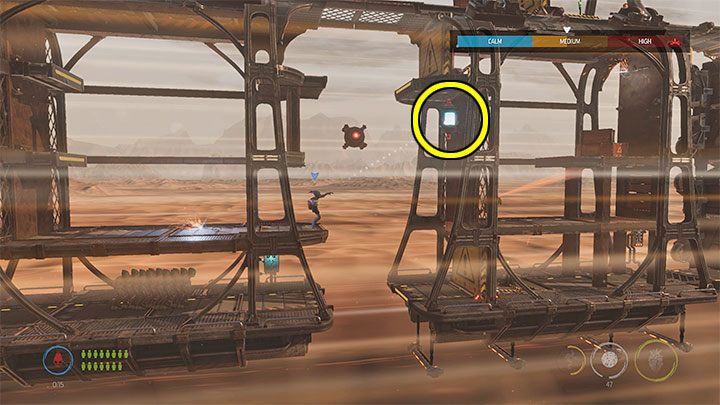
We head to the right of two vending machines. The Slig from the top shelf can be taken down by throwing rock candies at him from a hanging position. In the same place, we can also start throwing brew bottles at the sparks and the surrounding crates. This will lead to a series of explosions.
Finally, we need to throw the candy in the upper right object marked in the image. This will unlock a nearby passage and we can reach a new checkpoint there.
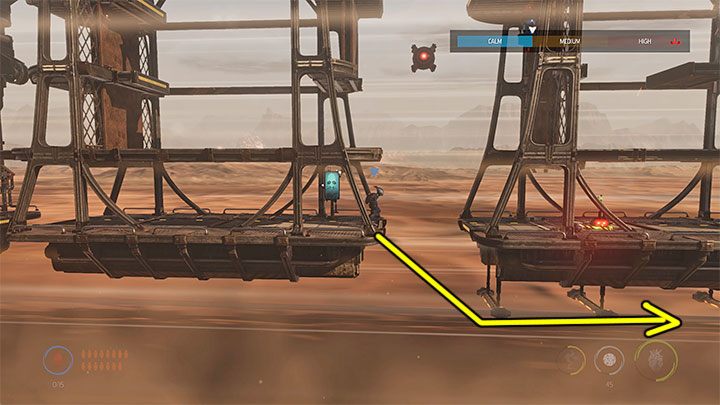
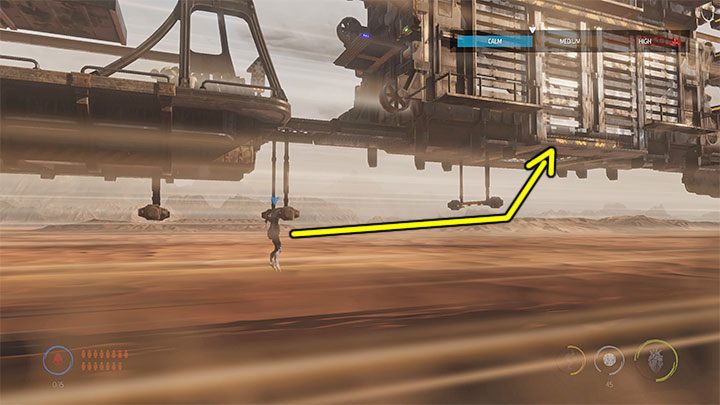
In the new area, we can throw brew bottles at the sparks near the ceiling and at the explosive crates below them. This will set the area on fire and there's a chance that the Slig here will die in the fire. We use a fire extinguisher and pull the lower lever.
We jump to the left platform. In the place from the picture 1, we can grab new lower bars. Note that jumps towards the next bars are problematic: some double jumps have to be performed with a delay, i.e. do not press the jump button immediately for the second time. Delaying the double jumps deliberately will prevent us from bouncing off the car and falling into the abyss. We can reach the hole in the floor from picture 2: this is the hole that we destroyed earlier using the possessed flying Slig. It leads to a secret area- there are padlocked lockers inside.
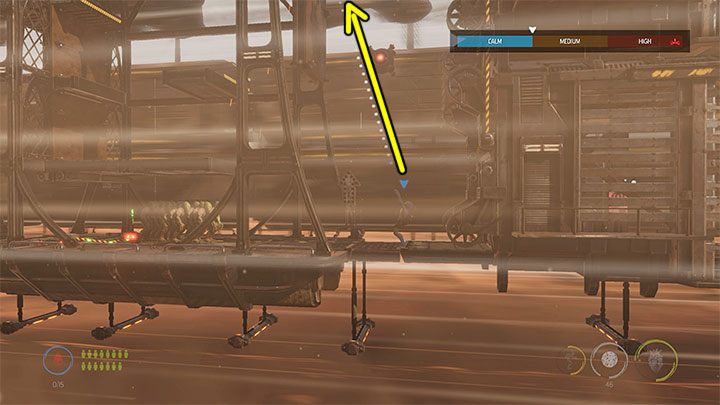
We return to the area where the Slig was located and then go to the right. Once you're in the location from the picture, aim the rock candy at the left corner. Hitting the top blue object will cause the side shelves to slide out.
After reaching the top, it is worth exploring the area on the left first. We can destroy the crates and get to the Royal Jelly secret marked on the picture.
We can go right now. After reaching the new checkpoint, we stop the escorted Mudokons and replenish the stock of brew bottles via the vending machine. Both of these steps are very important, because we're about to face a boss fight with Slig Mama.
You are not permitted to copy any image, text or info from this page. This site is not associated with and/or endorsed by the developers and the publishers. All logos and images are copyrighted by their respective owners.
Copyright © 2000 - 2026 Webedia Polska SA for gamepressure.com, unofficial game guides, walkthroughs, secrets, game tips, maps & strategies for top games.
