Star Wars Outlaws: The Droidsmith - walkthrough
The Droidsmith is the first mission in the plot thread of the Akiva planet. On this page of the guide we described how to infiltrate research station 57 and recruit engineer Gedeek.
The Droidsmith is the first mission in the Akiva storyline. To carry out the raid on Sliro's mansion, you'll need a droidsmith who can disable the sentry droid guarding the vault. On this page of the guide we have described how to infiltrate Research Station 57, the Imperial base where engineer Gedeek is located.
- Locating Gedeek
- Infiltrating Research Station 57
- Disabling the turret
- Escape from the research facility
Locating Gedeek
The mission will begin immediately after landing on Akiva. ND-5 will instruct you to go to the Alcazar cantina and talk to Surat, a gangster who knows the location of Gedeek. Head to the cantina - it's in the town you landed in - and talk to the bartender, who will direct you to the back of the building. Go there and enter the room where you will watch a cut-scene. You will receive the information you need.


Leave the city and get on the speeder. Gedeek is located in Research Station 57 on the other side of the map - go there. On the way, avoid the laser barrier by driving over the ramp next to it.
Infiltrating Research Station 57

Once you reach the cliff near the outpost, notice three huge streams of water flowing out of the wall. This is your way inside - head towards them, carefully making your way down the cliffs to avoid falling.
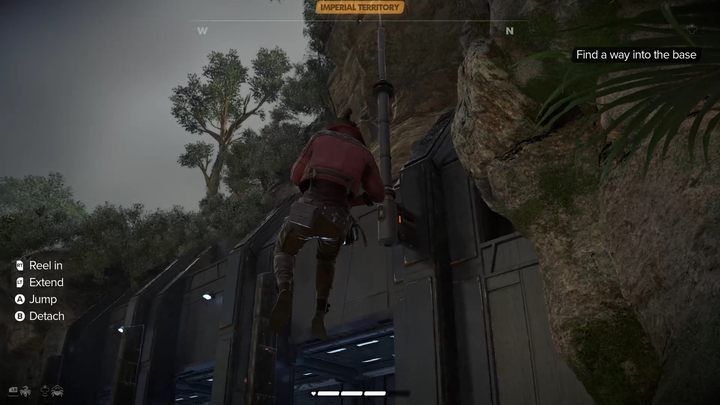

While standing near the streams you can use the grappling hook and swing to jump inside the structure. Then from here you can jump straight onto the facility wall. Lower the ladder at the end of the wall and climb down to the roof.
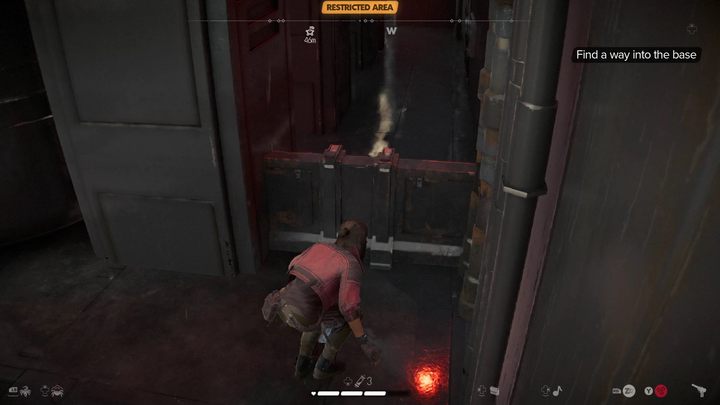

Approach the door with the camera above it. There are two enemies here - wait for them to go away, then go under the camera's field of view and through the door to enter the base. Close the door behind you to avoid detection.

Go straight - you'll need to avoid another camera and two stormtroopers on the left. The stormtroopers don't look in your direction, so you can go under the camera fairly safely by hugging the wall. In the next room, get rid of the guard and hack the computer to disable the cameras.

In the next, fairly large room, stick to the left wall and eliminate the guard. Then sneak up on the guard at the back of the room and finally on the enemy at the right wall. Exit the room and enter the elevator.
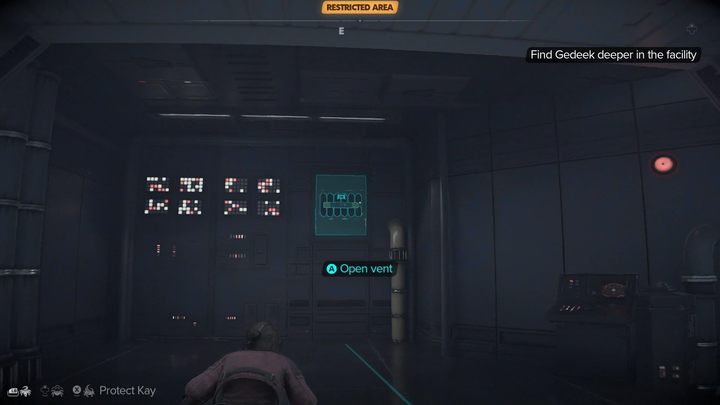
After exiting the elevator you will encounter a blue barrier. You can bypass it by going through the ventilation on the wall. After exiting the vent, use the grappling hook and the poles on the walls to get to the other side of the room and enter the second shaft.
Disabling the turret
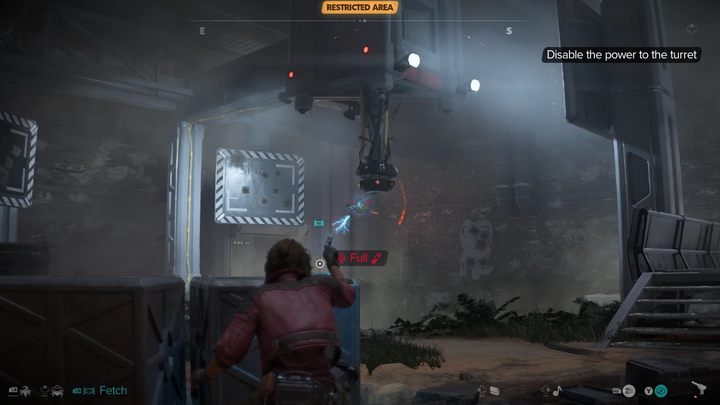
You'll find yourself in a room with an active security turret that you need to disable - there are no other enemies here, so you don't need to sneak. Stay behind cover - you can also temporarily stun the turret by firing ion rounds at it.


Go to the other side of the room, hiding behind covers, jump into the ditch and stand next to the red barrier. Send Nix to disable it and go to the other side, then get on the elevator. On the upper floor, pull the lever to activate the rail, which will move the crate towards you.
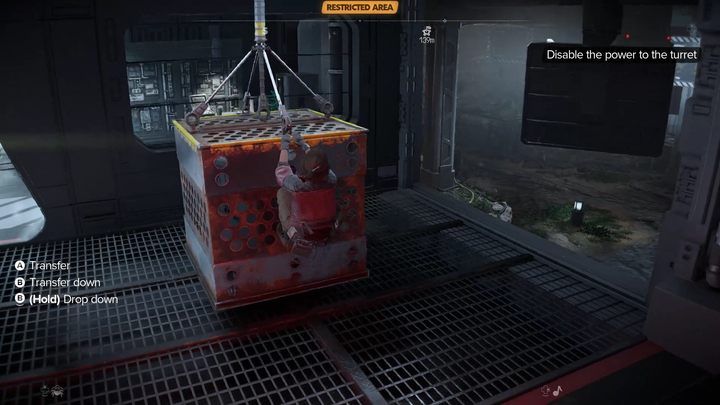
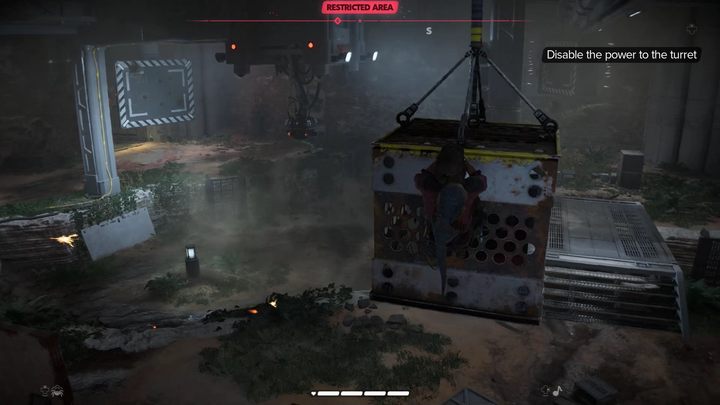
When the crate stops, send Nix to pull the lever again and immediately grab onto the right wall of the crate. You will get to the other side of the room while avoiding gunfire. Once the crate stops, get off it, interact with the computer next to it and disable the turret.

Go down to the bottom of the room and enter the newly opened elevator. In the room upstairs, pick up the loot found there and then go to the door to start a cut-scene.
Escape from the research facility
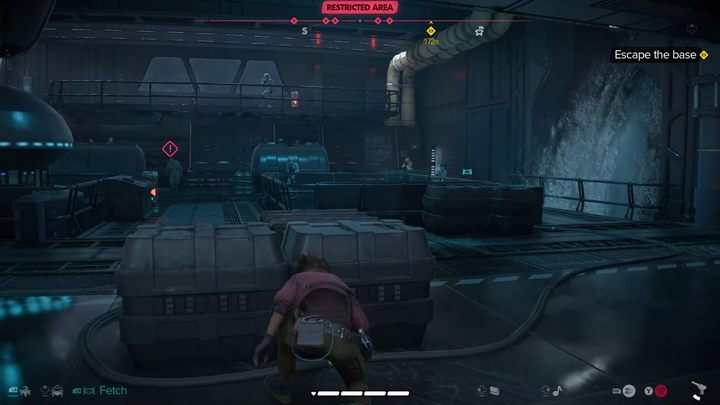
After meeting and recruiting Gedeek, you'll need to fight your way out. Enemies are not aggressive right away, but they will become the moment one of them notices you, even for a split second. Get behind cover and fight the guards - many of them are standing next to explosive barrels.

Continue through the next rooms. If you manage to remain undetected at the beginning of the fights, you can start them by taking out several enemies at once thanks to numerous explosive objects.


The linear path will eventually take you to the same structure you entered the base through. Use the grappling hook to escape from the base and return to the cliffs. Once you move away from the facility, the quest will end.

You are not permitted to copy any image, text or info from this page. This site is not associated with and/or endorsed by the developers and the publishers. All logos and images are copyrighted by their respective owners.
Copyright © 2000 - 2025 Webedia Polska SA for gamepressure.com, unofficial game guides, walkthroughs, secrets, game tips, maps & strategies for top games.