Night Terrors - p. 2
Step 4: Talk to the demon Torpor
 |  |
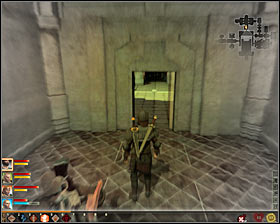
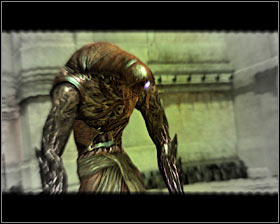
As mentioned before, you have to use any passage leading to the central room #1 and you can do this after solving puzzles or (if you do not want to think too much) immediately after your arrival to the Fade. You'll meet demon Torpor there #2 (M50, 5) who will have an offer for you.
 |  |
During your meeting with Torpor you can act in two ways. A first variant is to reject his offer and it can be done right after the beginning of your conversation #1 or after hearing the offer #2 concerning possessing Feynriel's soul and leaving Kirkwall in peace. If you have Anders in your party then rejecting the offer will result in 10 friendship points with him.
 |  |
Rejecting the demon's offer leads of course to the fight #1. I suggest to deal with Torpor first, because it is the greatest threat to your party. After killing the demon attack shades, which appear in the room #2. Fortunately they have very short health bars.
 |  |
A second variant is to take the demon's offer after hearing it #1. What's interesting, this is not final decision, because you'll be able to change your mind at the end of this quest. If Anders is in your party, you'll be now attacked by a Grey Warden #2 and you'll gain 15 rivalry points with Anders. Do not worry that Anders will die though - he will only leave the Fade. If you do not have Anders in your party, none of your allies will attack when you agree to take the demon's offer. As a reward you can ask demon for:
- power (four Attribute Points)
- knowledge (one Talent Point)
- magic (the unique Torpor's Barrier Rune, which increase magic resistance)
Of course you won't get the reward now but at the end of the quest and only if you won't betray Torpor.
Step 5: Kill desire and pride demons
 |  |
Regardless of whether you've killed Torpor and agreed to help him, your next objective is two kill two other demons seeking to take control over Feynriel. You can go to their locations in any order. The desire demon resides in the eastern room which is reached through the door marked with Feynriel's Desires #1 (M50, 6). Once you're inside, cut-scene stars and you act as Arianni #2, Feynriel's mother.
 |  |
During this scene you can act in three ways:
- try to explain Feynriel that the demon is his father (upper right dialog options)
- ideally play your role as his mother (middle right dialog options)
- try at any cost to convince Feynriel that he is a part of vision (bottom right dialog options)
The dialog options choice seems irrelevant but in order to reduce boy's stress the best is to choose upper dialog options. Regardless of your choices Feynriell realizes sooner or later that he is deceived and he will run away #1. And you have to face the desire demon #2.
 |  |
During a conversation #1 the desire demon succumbs one of your party members and unfortunately regardless of dialog options you choose, you won't be able to prevent it. After the battle starts, attack your possessed ally #2. If the fight is too difficult for you then load your previous savegame and now when you already know who is the one to be possesses, take away his (or her) equipment.
 |  |
Fight as long as your opponent looses the entire health bar and disappears. Do not worry though - this character won't die but only leave the Fade. Now you can start attacking Caress #1, the desire demon. After killing it, deal with very weak shades #2, which shouldn't be a challenge for you.
 |  |
You can now return to the central room, but beware of the rage demon, which appears at the stairs #1. Deal with him smoothly and head to the western door. It leads to the pride demon and it is marked with Feynriel's Pride #2.
 |  |
A cut-scene won't start immediately so you'll be able to look around the area. I suggest doing so, because you can find few books here #1. Now go to the western room (M50, 7). You will act as First Enchanter Orsino #2.
 |  |
During this scene you can act in three ways:
- try to convince him that the demon is a Keeper Marethari (upper right dialog options)
- ideally play your role as First Enchanter Orsino (middle right dialog options)
- try at any cost to convince Feynriel that he deals with a demon (bottom right dialog options)
The dialog options choice seems irrelevant but in order to reduce boy's stress the best is to choose upper dialog options. Regardless of your choices Feynriell realizes sooner or later that he is deceived and he will run away #1. And you have to face the pride demon #2.
 |  |
During a conversation next one of your party members will be succumbed by the pride demon #1. Same as before, regardless of dialog options you choose, you won't be able to prevent it. After the battle starts, attack your possessed ally #2. If the fight is too difficult for you then load your previous savegame and now when you already know who is the one to be possesses, take away his (or her) equipment.
 |  |
Fight as long as your opponent looses the entire health bar and disappears. Now you can start attacking Wryme #1, the pride demon. Do not be influenced by its size, since defeating it won't be a problem. But if you still think that the fight is too tough for you, load your previous savegame and visit the pride demon first - this time you'll have one more character in your party. After killing Wryme, fight with the very weak shadow elf #2.
You are not permitted to copy any image, text or info from this page. This site is not associated with and/or endorsed by the Electronic Arts Inc. or BioWare Corporation. All logos and images are copyrighted by their respective owners.
Copyright © 2000 - 2025 Webedia Polska SA for gamepressure.com, unofficial game guides, walkthroughs, secrets, game tips, maps & strategies for top games.
