Chapter 8 - Starkiller Sabotage | Walkthrough
This page contains walkthrough for Starkiller Sabotage, a level available in LEGO Star Wars: The Force Awakens videogame. In this chapter the player will fight Captain Phasma (a boss fight) and infiltrate the Starkiller base.
During this level the protagonists will have to reach the titular military base, infiltrate it and defeat Captain Phasma in direct combat. There will be some exploring to do, especially during the beginning of the chapter.
- Unlocking chapter 8 - inside the Millennium Falcon
- Exploring the area near the crashing site
- Exploring the walls of the Starkiller base
- Exploring the interior of the Starkiller base
- Fight with Captain Phasma
Unlocking chapter 8 - inside the Millennium Falcon
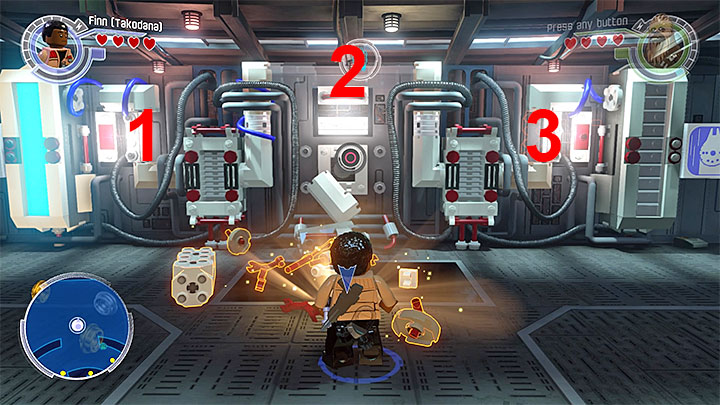
Before you can start the eighth chapter of the story campaign, first you will have to perform a few additional activities. The transparent studs will lead you to the important locations. First go to the place where the hyper drive is being fixed. Once you get there, hang on the interactive rod. Then you must use the interactive bricks. First add a part of the hyper drive on the left side. Once the blue liquid gets through it, quickly destroy it with blaster and build the middle part of the hyper drive. As earlier, let the blue liquid swim further. Destroy the middle part and finally the right one. If you're not fast enough somewhere, you will have to start the whole process from the beginning.
Now you can go to the computer and open the map of the galaxy. Select Starkiller Base and confirm that you want to start a new chapter.
Exploring the area near the crashing site
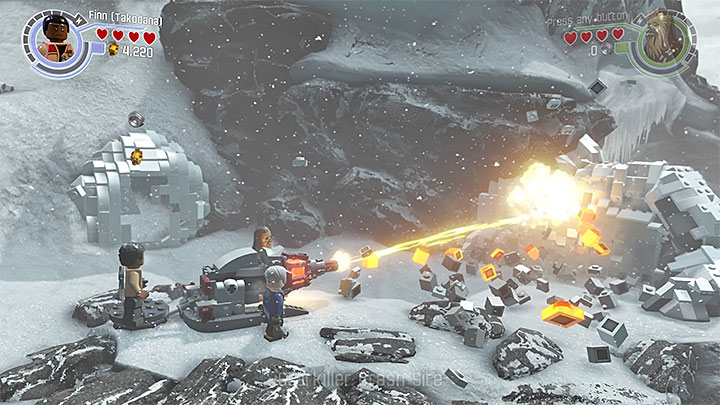
Once you regain control of the characters, destroy the two sentry drones that appeared in the arena. Blasters can be very effective against them. Once the drones are destroyed, switch to Finn. Hang on the rod located at the hill visible at the top of the screen. Then walk towards the part of the wreck which you can cut with the lightsaber.
Notice that next to the place where you used the lightsaber there are some interactive bricks. Use them to build a large flamethrower, sit on it and use it to partially melt the right ice wall. Then select Chewbacca and throw the thermal detonator at the wall in order to finally destroy it.
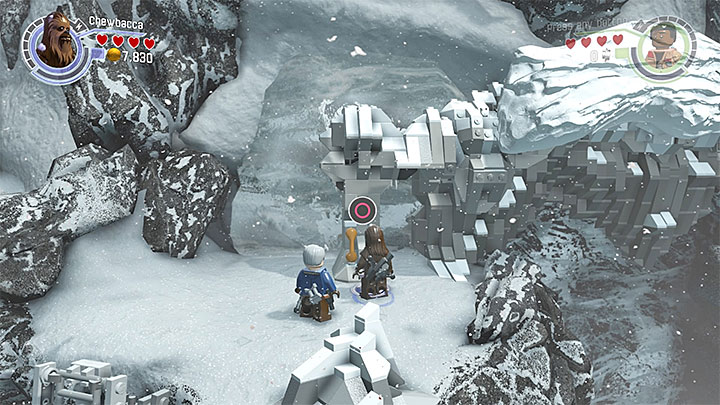
Carefully walk through the narrow edge. Once you reach the new rocky ledge, destroy another sentry drone and take interest in the two upper rods. Finn and Han Solo must hang on them. Once the bricks fall down, interact with them in order to build the missing piece of the ladder.
Select Chewbacca, use the ladder and walk towards the new handle. Press the interaction button at right time in order to pull the handle. This will uncover the interactive edges and the characters will be able to move to the area on the right side. During this trip be ready to quickly press the button on the screen so that the character you control won't fall down.
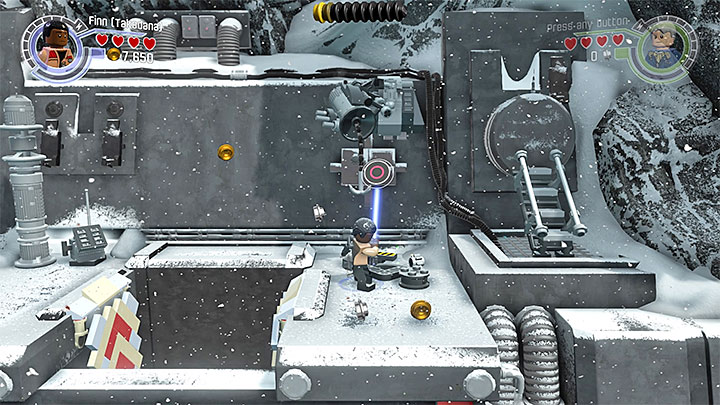
New battles will start once you reach the new area. Play as Chewbacca and try to use the thermal detonators to destroy the turret in the central part of the area as quickly as possible. Only after that you should take care of the remaining threats.
Walk towards the place where the turret was located and interact with the bricks. You will build a giant magnet. Two upper buttons will be uncovered, you must shoot them with the blaster. Select Finn, use the newly unlocked passage and start bouncing from the walls. You will reach the small upper balcony. Now use the bricks to finish the new construction. Finn will automatically use the rope to reach the new location. Once you finish using the rope, destroy the new sentry drone. Then go to the left, take care of the stormtroopers and use Finn's lightsaber on the generator responsible for maintaining the force field. Destroying the generator will remove the barrier and it will allow the remaining characters to get there.
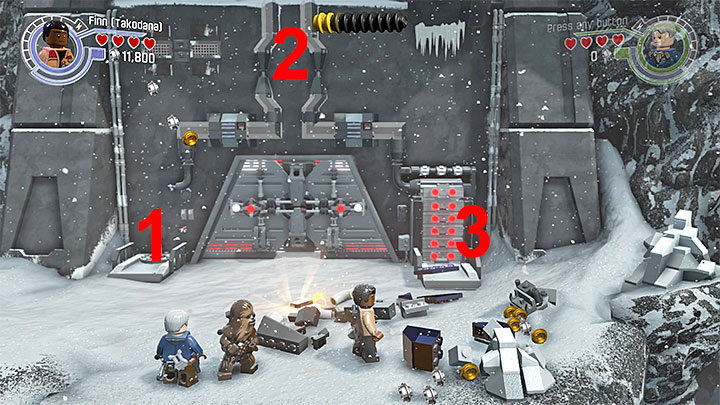
Now move everyone to the right. Once you reach the closed door, switch to Chewbacca and throw the grenade at the antenna located on the right side. Some bricks will appear, you will have to use them.
The above picture will be helpful in solving this riddle. Select Finn. Use the bricks to construct the device in point 1. Once it is constructed, activate it. Once the blue charge starts moving through the pipes, quickly destroy the recently constructed device and create a connection at point 2. If you weren't fast enough, you will have to start from scratch. If you succeeded, then you can use the right terminal (point 3). Complete the well known minigame by changing the look of the character on the screen so that it looks similar to a stormtrooper. Door will open and you will be able to use the elevator.
Exploring the walls of the Starkiller base
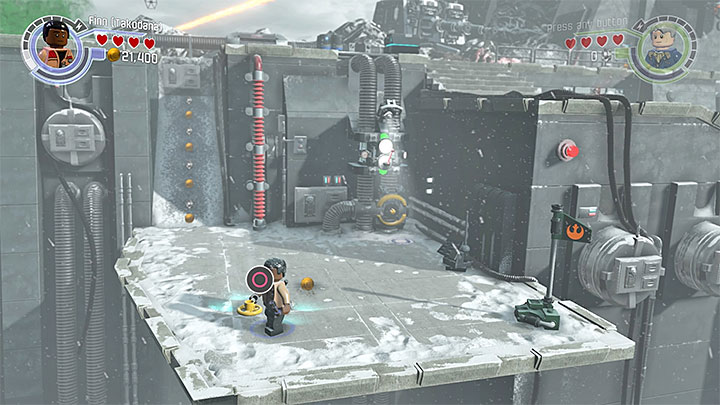
Go to the right. Once you reach the area with green fumes, select Finn who will be able to safely walk to the next area. Watch the cutscene and then don't get close to the red area in the range of the giant cannon. Instead of that, walk downstairs and jump down to the left lower ledge.
Defeat the enemies, destroy the surrounding objects and find the valve that can be picked from the ground. Go with the valve to the nearby device and use it to close the gas pipe. Now you can climb up the red pipe and join the remaining characters.
Select Chewbacca and reach the ledge located under the red passage targeted by the giant cannon. Use the thermal detonator to uncover the handle. Then pull it as Chewbacca. Interactive bricks will appear, use them for construction. You will create a miniature spaceship which will distract the cannon's crew.
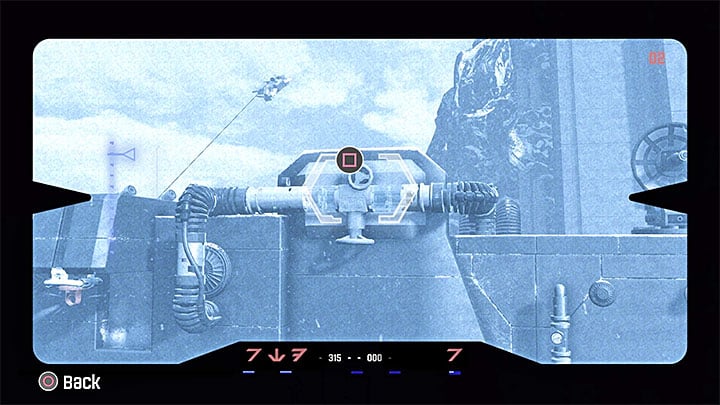
Now you can walk through the red area. Do it and go to the right. Select Han Solo, hang on the upper hook. Land on the right ledge and use the Quadnoculars at the proper place. Scan the upper pipe. When the button appears in its place, shoot it with blaster (use manual aiming).
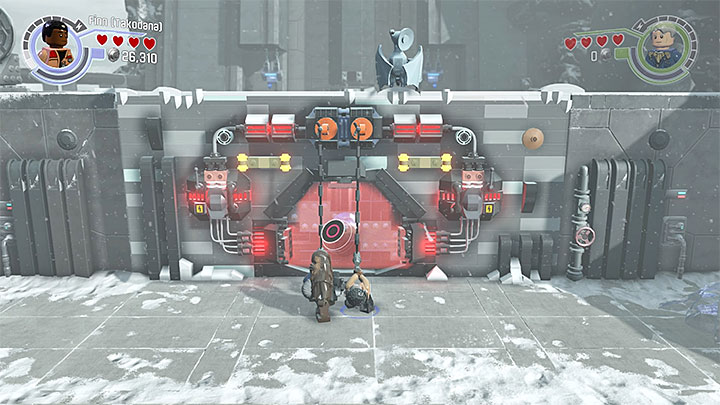
Hitting the button will cause an unordinary bridge to appear. Finn and Chewbacca will be able to walk through it. Walk towards the device on the right. Han Solo and Finn must hang on the upper handles here and pull them down. Once the force field is deactivated, switch to Chewbacca and throw the thermal detonator at the silver piece of the wall.
You will cause a powerful explosion. Eliminate the new stormtroopers and then switch to Finn. Interact as him with the left terminal. You must once again match the look of the character in the hologram with the white costume of the stormtrooper.
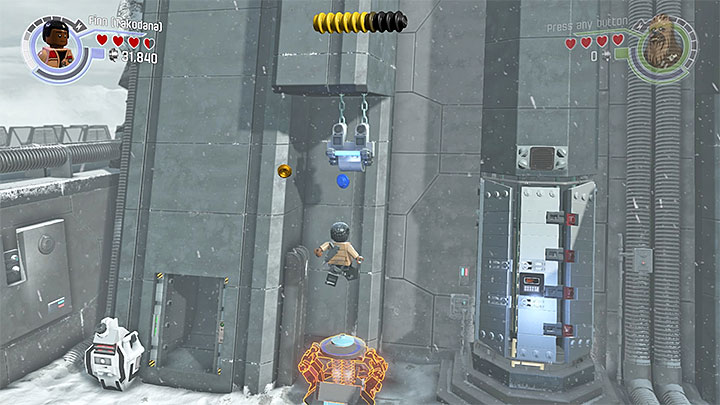
Walk towards the bricks that will appear in the place of the destroyed sentry drone. Construct a trampoline on the left side. Bounce from it a few times so that you can reach the handle connected to the chain. Lower it down.
Keep your character hanging and switch to any different character. Destroy the bricks and build a trampoline on the right side. You must bounce from it a few times as well. Jump to the right handle. Once both handles are lowered, access to the ladder will be unlocked.
Exploring the interior of the Starkiller base
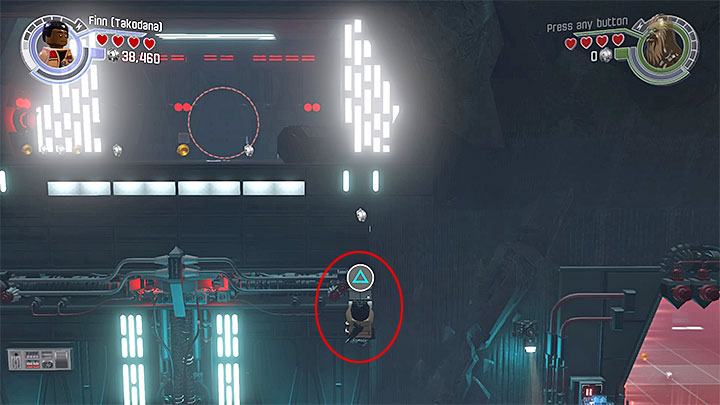
Go to the right, then upstairs. Eliminate the stormtroopers. Destroy the part of the wall in order to obtain bricks for constructing. First use them to create a pressure plate on the right side. Select Finn, position yourself on the small elevator and wait for one of other characters to enter the button and move the elevator. Once the elevator gets up, jump as Finn to the edge marked on the above picture.
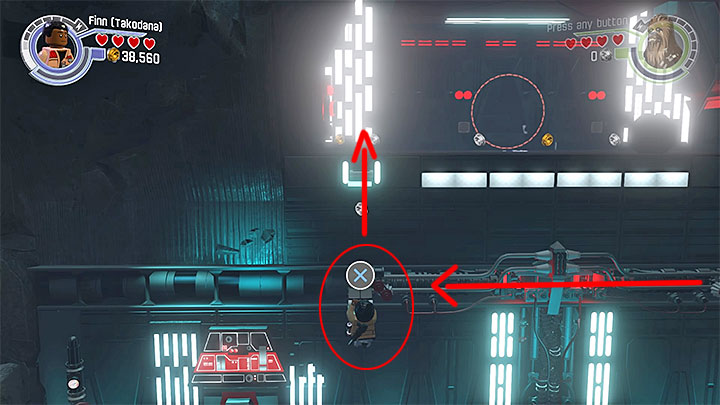
Leave Finn hanging and switch to Chewbacca. Destroy the right object you constructed recently and use the bricks to create a handle in the middle part of the corridor. Pull the handle as Chewbacca.
This will cause the left edge on which Finn is hanging to move. Switch to Finn and press the jump key/button so that you reach the nearby left edge. Select Chewbacca again and release the handle. The edge on which Finn is hanging will move to the left and stop at the place shown on the picture. Now you can safely press the jump button (don't press the directional keys/buttons!) in order to jump to the upper ledge and then climb to the nearby balcony.
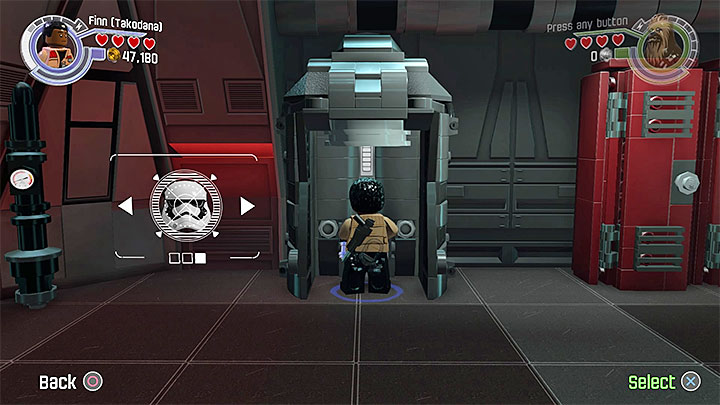
Walk as Finn to the closed entrance to the barracks and use lightsaber to create a circular entrance to the room. Once inside, eliminate a few new stormtroopers. Then reach the gray closet located at the end of the room which is near the two red drawers. Destroy the drawer and then construct a changing room on the left side. Use it and select the last object from the list - a white headwear with stormtrooper's head.
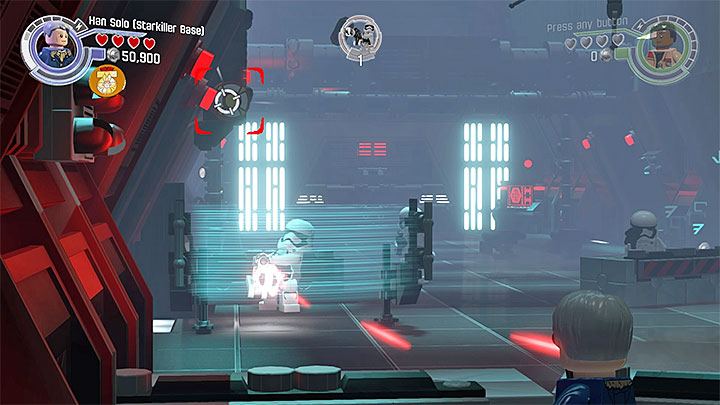
Go back down, to the place with Han Solo and Chewbacca. Walk as Finn to the previously passed terminal and interact with it. Once Finn is successfully scanned, the right force field will deactivate and you will be able to move forward.
Once you reach the nearby large corridor, a new blaster battle will start. Select Han Solo, reach the left covers. Lean from one of the covers and hang on the hook marked on the above picture. Pull the hook out. This will eliminate the stormtrooper with heavy blaster who hides behind the force field.
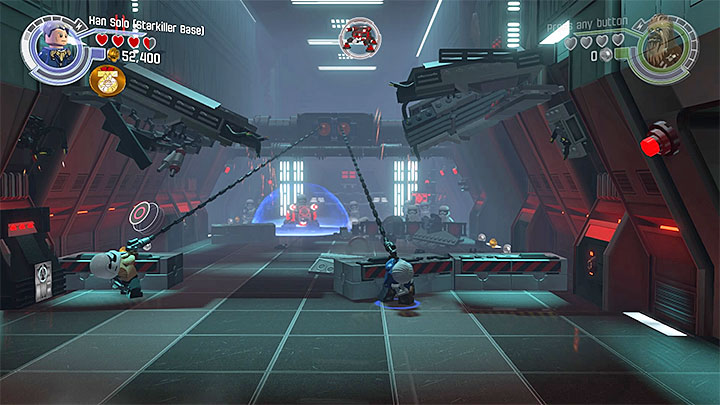
In the second part of the blaster battle you must eliminate twelve regular stormtroopers. Some of them will occupy the upper balcony. Select Chewbacca and drop the thermal detonator there. This will destroy the bridge.
Once the next part of the battle starts, select Han Solos and get to the blue markers on the right side. Lean from behind the cover, use Quadnoculars and scan the upper part of the corridor. You will uncover two handles. Han Solo can hang on the first one and Finn can hang on the second one. Start pulling them to you. This will cause the upper construction to fall and destroy the enemy turret. You can eliminate the final group of stormtroopers without using the covers. Once the battle is won, select Chewbacca and pull the handle. Enter the nearby room where a battle with Captain Phasma will start.
Fight with Captain Phasma
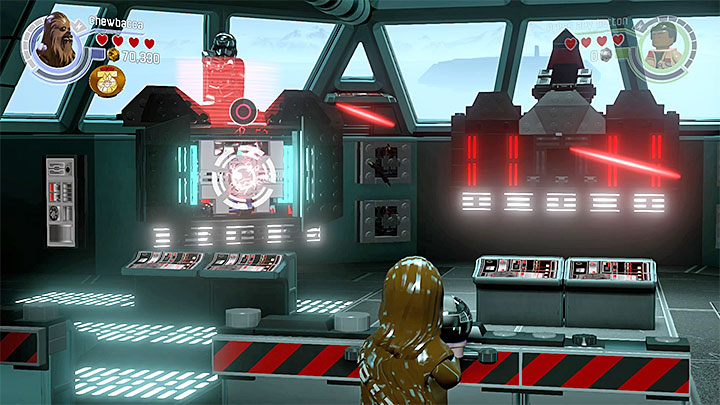
During the first part of the fight with Captain Phasma you should play as Chewbacca. Attack the nearby stormtroopers and sentry droids. Wait for when Phasma hides behind the left energy field. Lean from behind the cover, target the generator located under the force field and throw the thermal detonator at it. You will cause a small explosion.
Resume attacking the enemies and this time wait for Phasma to position herself behind the right force field. As previously, throw the explosive surprise at the generator.
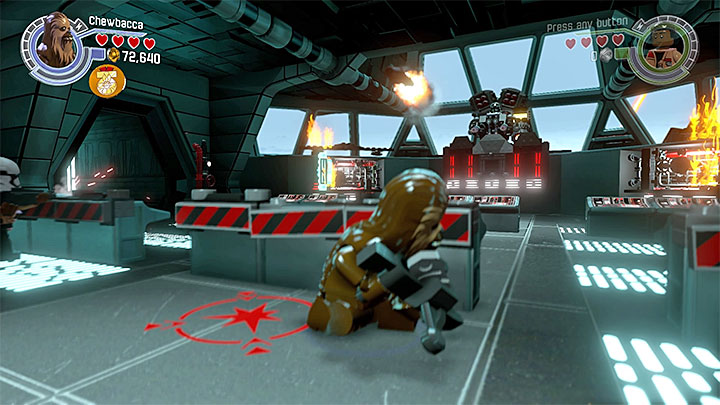
Once the second phase of the battle starts, Captain Phasma will start using the large cannon. It allows her to perform rocket barrage. Notice the red icons similar to the one shown on the above picture. Whenever you notice such icon on the ground, move away from it - a missile will be soon shot at that place.
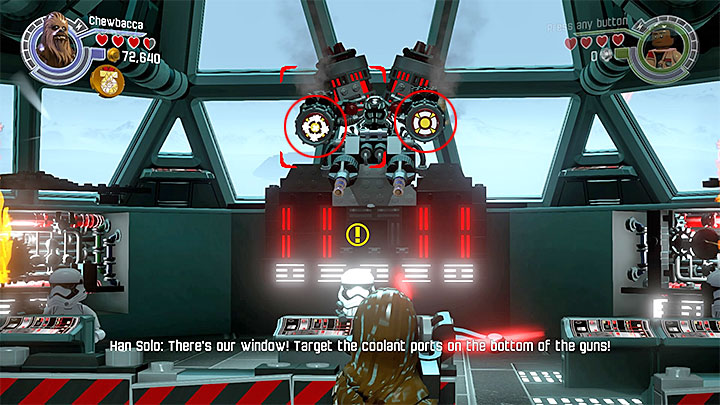
During the second phase of the battle you must be patient as well. After some time two shields will become uncovered on the turret used by Phasma. Lean out and quickly shoot one of them (help yourself with manual aiming if you have to). Resume avoiding Phasma's attacks. You must hide until the second shield is revealed - once that happens, hit it with any ranged weapon.
At the end of the duel you will have to test your strength against Phasma. Quickly press the button that will be appearing on the screen. Defeating Phasma will equal completing the chapter.
You are not permitted to copy any image, text or info from this page. This site is not associated with and/or endorsed by the Warner Bros Interactive Entertainment or Traveller's Tales. All logos and images are copyrighted by their respective owners.
Copyright © 2000 - 2025 Webedia Polska SA for gamepressure.com, unofficial game guides, walkthroughs, secrets, game tips, maps & strategies for top games.
