Guides & Walkthroughs New Guides Popular RPG Action Strategy Adventure YouTube Guides Mobile App
Download Game Guide PDF, ePUB & iBooks

Ratchet & Clank Rift Apart Guide by gamepressure.com

Ratchet & Clank Rift Apart Guide

Table of Contents

Ratchet & Clank Rift Apart: Reaching anomalies in catacombs - walkthrough Ratchet & Clank Rift Apart guide, walkthrough

Last update: 23 June 2021

This page of the Ratchet & Clank Rift Apart guide has the second part of the walkthrough for your second visit to Savali. The page explains, among other things, how to go through the catacombs, how to deal with the Undead Grunthor (boss) at the end of that location, and how to complete Clank's last 3 puzzles.

Access the Catacombs

You can go to the catacombs on the planet Savali after you have reached three locations with big pressure plates - these places are in the wastelands - Ratchet & Clank Rift Apart: Reaching the anomalies in the catacombs - walkthrough - Savali - return - Ratchet & Clank Rift Apart Guide

You can go to the catacombs on the planet Savali after you have reached three locations with big pressure plates - these places are in the wastelands.

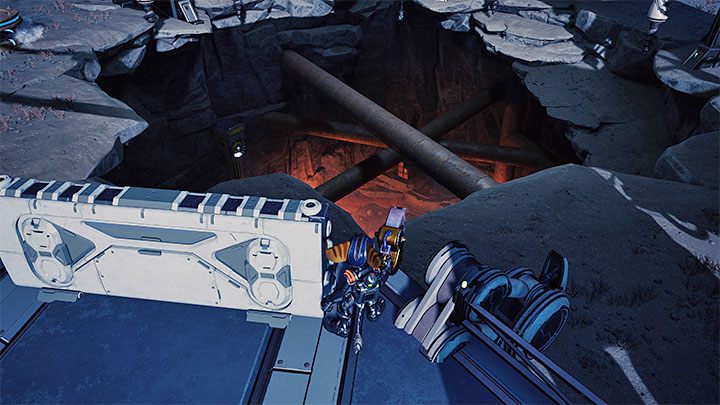
There will be an explosion in the northwestern part of the wastelands, which will unlock a passage to the catacombs. You can jump down there.
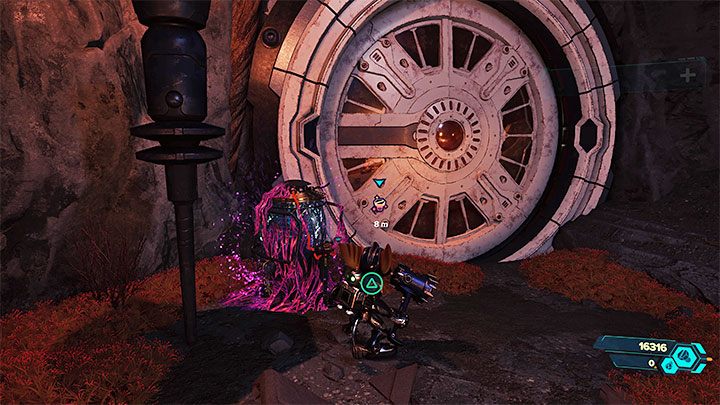
In the catacombs, you will come across a new infected console - this is optional - Ratchet & Clank Rift Apart: Reaching the anomalies in the catacombs - walkthrough - Savali - return - Ratchet & Clank Rift Apart Guide

In the catacombs, you will come across a new infected console - this is optional. Interact with the console to have Glitch's last sequence.

Glitch's final stage also has an optional boss - we have described this confrontation on the Master Virus page. If you manage to pass Glitch's scene, you will obtain a Gold Bolt (collectibles).
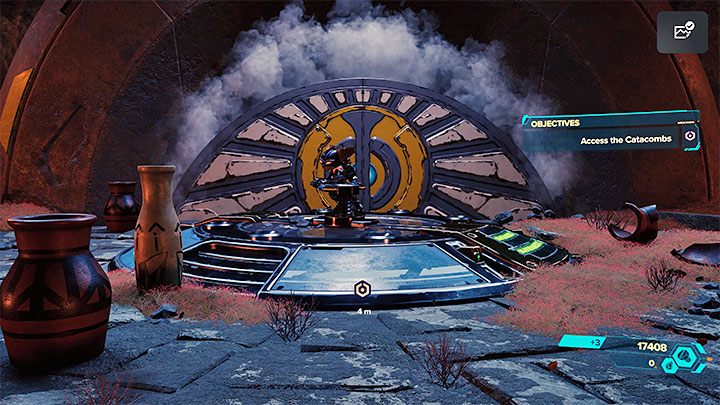
To continue the story, you have to explore the catacombs - interact with the crank of the rotating mechanism - Ratchet & Clank Rift Apart: Reaching the anomalies in the catacombs - walkthrough - Savali - return - Ratchet & Clank Rift Apart Guide

To continue the story, you have to explore the catacombs - interact with the crank of the rotating mechanism. This will unlock the entrance to the Ancient Aqueducts.

Access the Anomaly
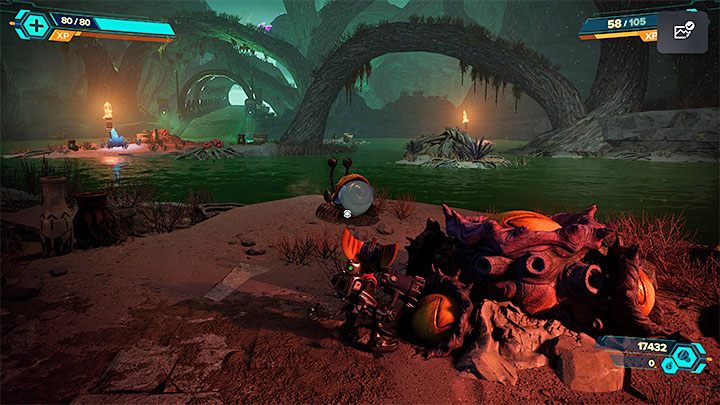
Soon, you will reach an area with a portal that will take Ratchet to a new dimension - Ratchet & Clank Rift Apart: Reaching the anomalies in the catacombs - walkthrough - Savali - return - Ratchet & Clank Rift Apart Guide

Soon, you will reach an area with a portal that will take Ratchet to a new dimension. In the new location, you will find a Speetles nest - you will be able to travel on one of them.
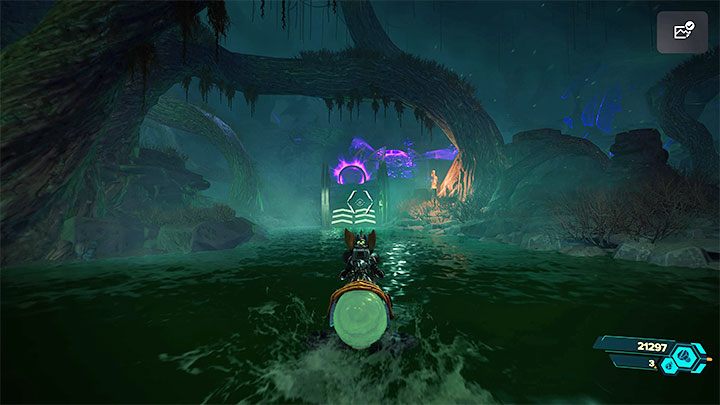
This part isn't complicated - Ratchet & Clank Rift Apart: Reaching the anomalies in the catacombs - walkthrough - Savali - return - Ratchet & Clank Rift Apart Guide

This part isn't complicated. You can optionally explore locations and find, e.g. Raritanium, or you can focus on reaching the next portals.

Some of the ramps can catapult you - remember to always ride over them while boosting.
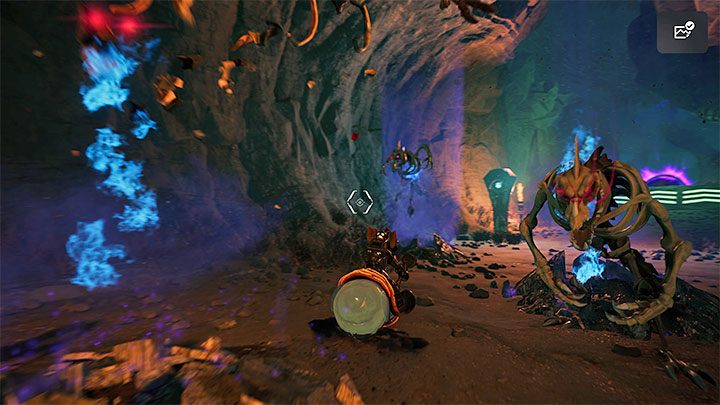
During the ride, you will encounter new undead enemies - Ratchet & Clank Rift Apart: Reaching the anomalies in the catacombs - walkthrough - Savali - return - Ratchet & Clank Rift Apart Guide

During the ride, you will encounter new undead enemies. You can ignore them completely or hit them while driving fast enough. Just avoid hitting indestructible obstacles and walls.
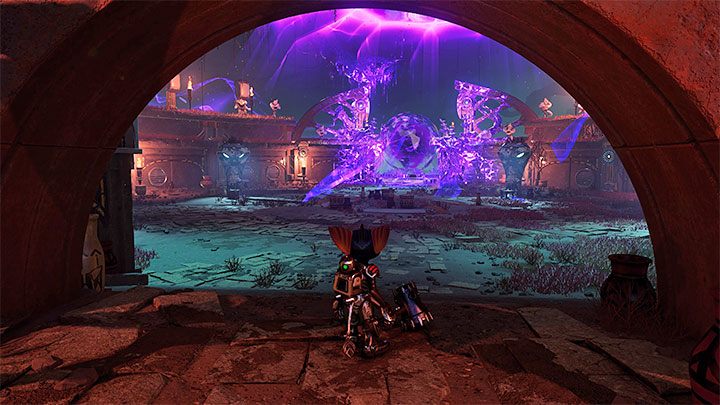
The last portal will allow you to reach a secret chamber in the catacombs, where you will meet monks - Ratchet & Clank Rift Apart: Reaching the anomalies in the catacombs - walkthrough - Savali - return - Ratchet & Clank Rift Apart Guide

The last portal will allow you to reach a secret chamber in the catacombs, where you will meet monks. Go through the gate to enter a large cavern. Defeat more enemies.

Mini-boss fight - Undead Grunthor
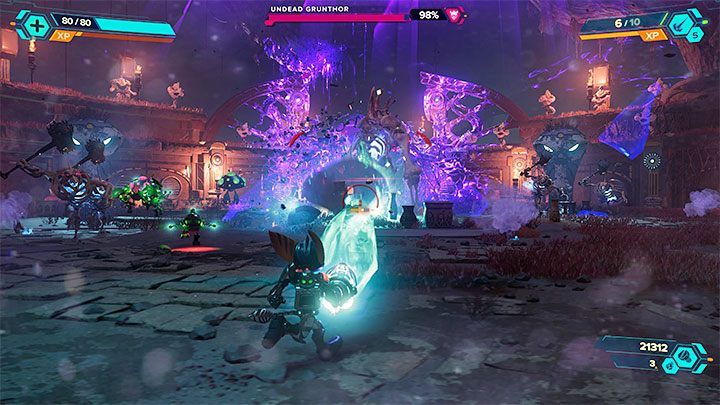
An Undead Grunthor will appear - Ratchet & Clank Rift Apart: Reaching the anomalies in the catacombs - walkthrough - Savali - return - Ratchet & Clank Rift Apart Guide

An Undead Grunthor will appear. If you have played Bronze Cup battles in the arena, you should be familiar with this monster. Fortunately, even without experience in dealing with these beasts, you shouldn't have problems defeating this enemy - the undead variant has the same attacks as the standard. These include:

  1. charging,
  2. throwing big boulders.

Avoid these attacks by suing Phantom Dash and Hoverboots.

There will be other enemies, too - Ratchet & Clank Rift Apart: Reaching the anomalies in the catacombs - walkthrough - Savali - return - Ratchet & Clank Rift Apart Guide

There will be other enemies, too. You can summon your allies by using the Bombardier, Mr. Fungi or the Glove of Doom.

There are crates with ammunition and health.

Get the Map
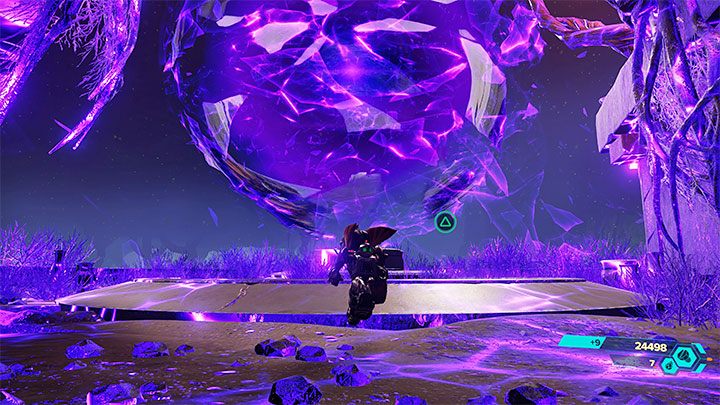
After the battles, approach the new anomaly - Ratchet & Clank Rift Apart: Reaching the anomalies in the catacombs - walkthrough - Savali - return - Ratchet & Clank Rift Apart Guide

After the battles, approach the new anomaly. Investigating it to start Clank's last 3 puzzles.

Clank's riddle #1
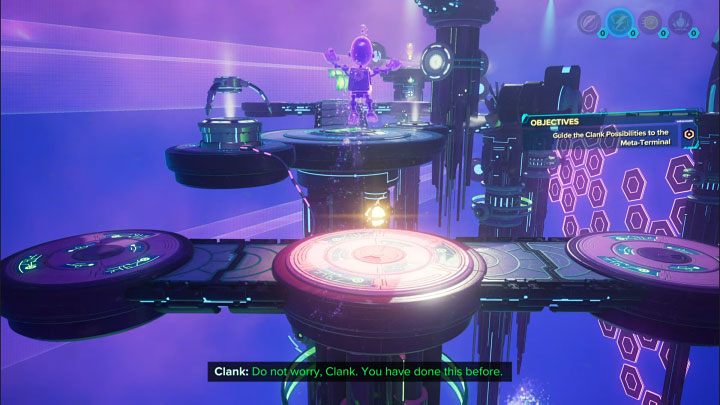
1 - Ratchet & Clank Rift Apart: Reaching the anomalies in the catacombs - walkthrough - Savali - return - Ratchet & Clank Rift Apart Guide
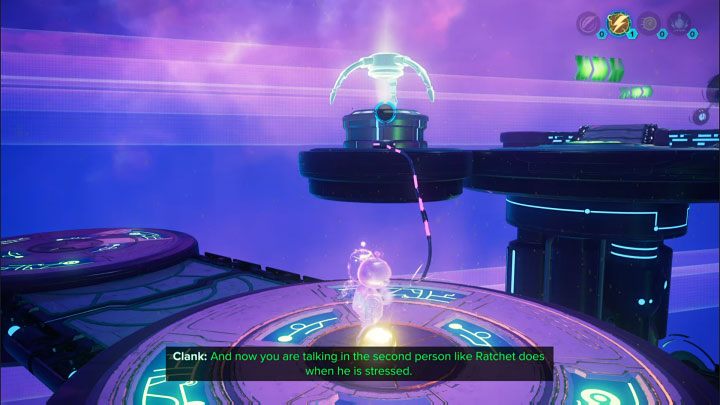
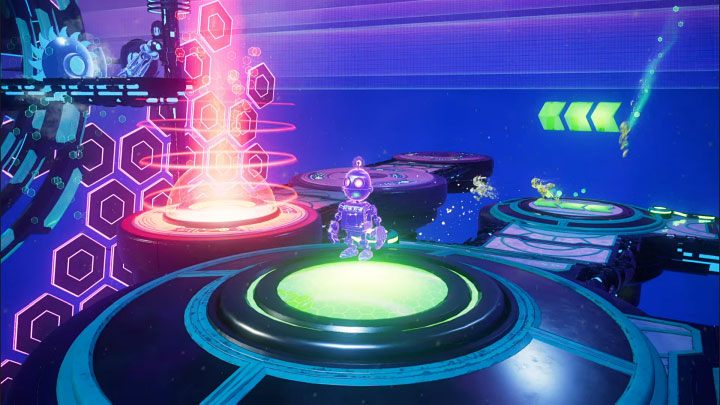
Start by doing a double jump over the chasm to land on the shelf with the Electric Sphere - Ratchet & Clank Rift Apart: Reaching the anomalies in the catacombs - walkthrough - Savali - return - Ratchet & Clank Rift Apart Guide

Start by doing a double jump over the chasm to land on the shelf with the Electric Sphere.

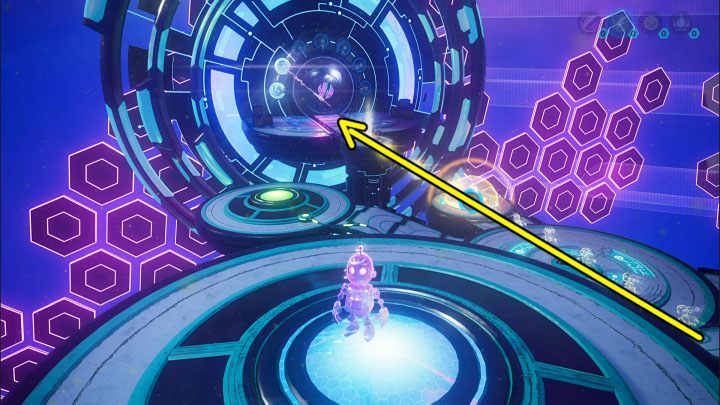
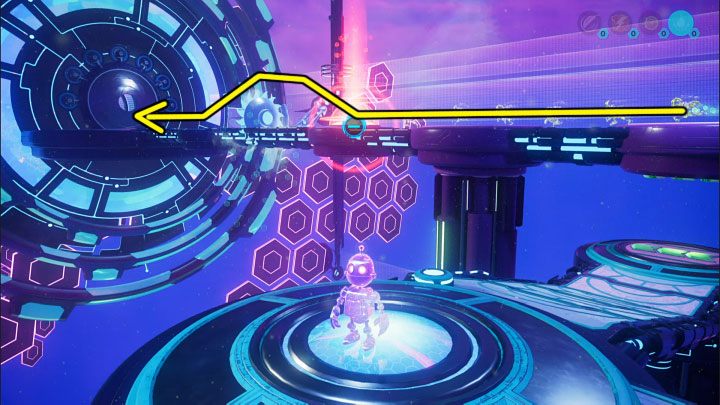
Immediately throw the electric sphere at the left generator shown in picture 2. This will rotate the whole platform you're standing on by 90 degrees.
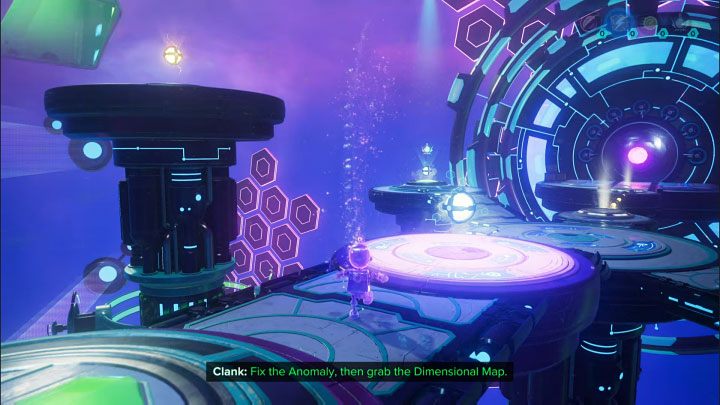
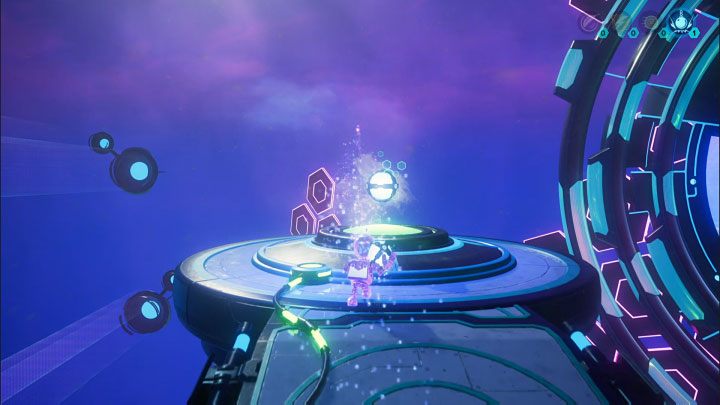
2 - Ratchet & Clank Rift Apart: Reaching the anomalies in the catacombs - walkthrough - Savali - return - Ratchet & Clank Rift Apart Guide
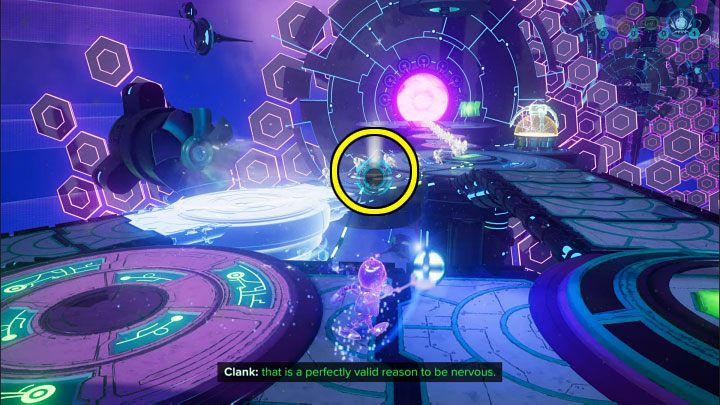
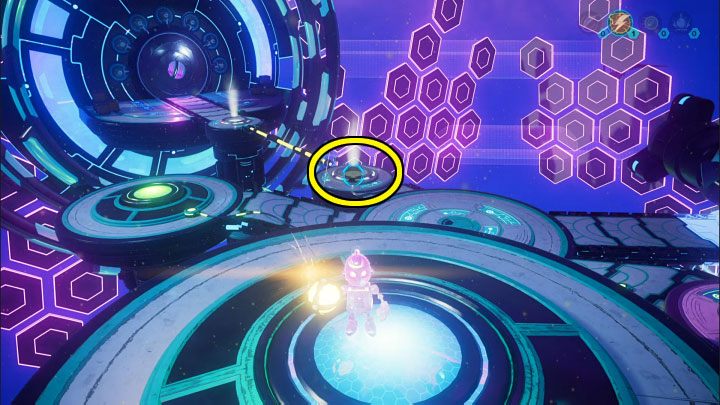
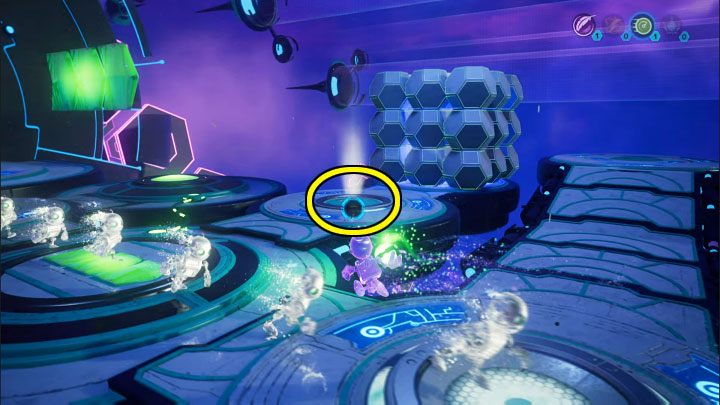
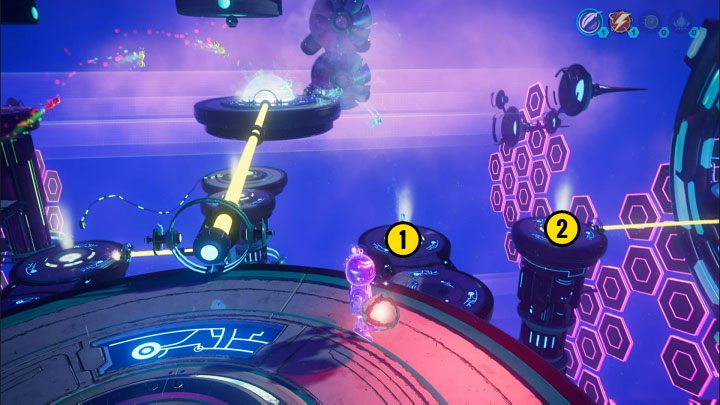
Go straight ahead to the place where you have to take the Heavy Sphere (picture 1) - Ratchet & Clank Rift Apart: Reaching the anomalies in the catacombs - walkthrough - Savali - return - Ratchet & Clank Rift Apart Guide

Go straight ahead to the place where you have to take the Heavy Sphere (picture 1).

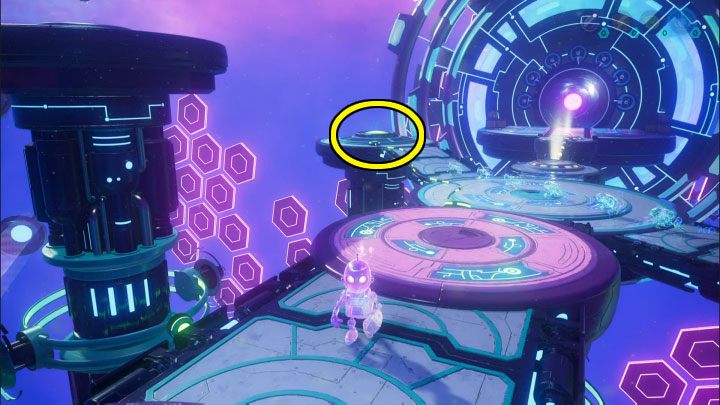
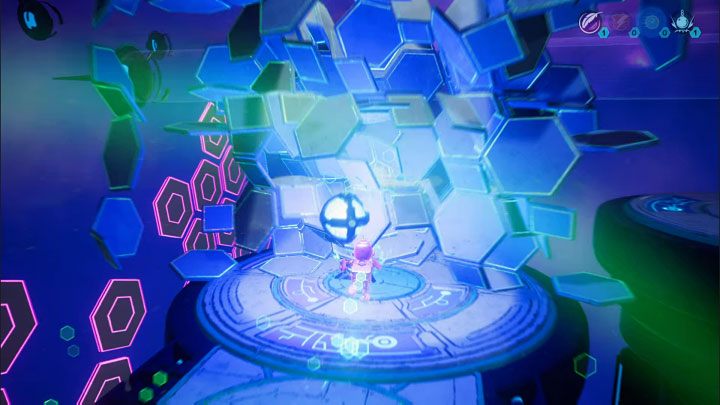
A little further to the left is a second heavy sphere (picture 2), so you should currently have two in your inventory.
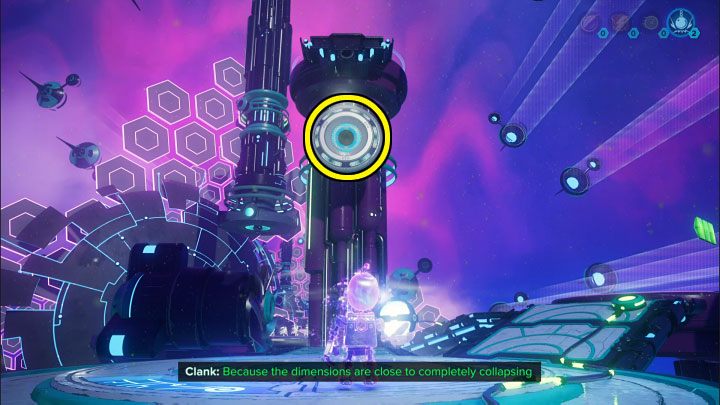
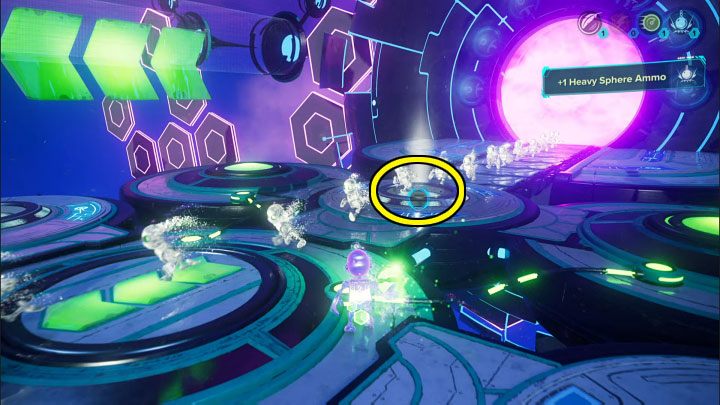
Turn 180 degrees where you picked up the second heavy sphere - Ratchet & Clank Rift Apart: Reaching the anomalies in the catacombs - walkthrough - Savali - return - Ratchet & Clank Rift Apart Guide

Turn 180 degrees where you picked up the second heavy sphere. Throw one of the them into the moving platform slot marked in the picture. This way, you will lower it.
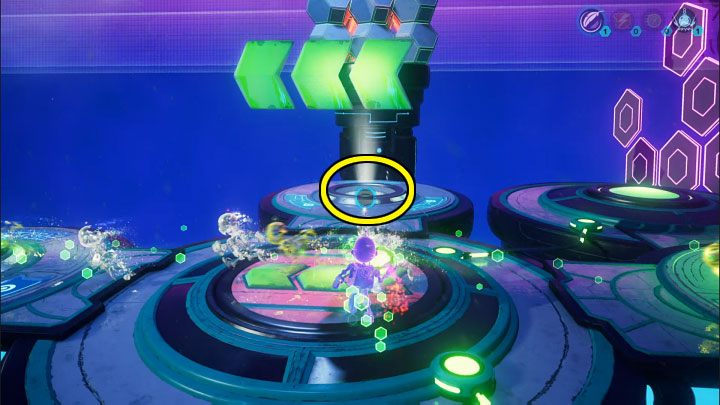
Select the first heavy sphere you still have with you from your inventory - Ratchet & Clank Rift Apart: Reaching the anomalies in the catacombs - walkthrough - Savali - return - Ratchet & Clank Rift Apart Guide

Select the first heavy sphere you still have with you from your inventory. Stand in the spot visible in the picture (this will later be a rotating platform) and throw the heavy sphere into the marked slot next to the platform you just left. This way, running projections won't be blown away by the running fan.
3 - Ratchet & Clank Rift Apart: Reaching the anomalies in the catacombs - walkthrough - Savali - return - Ratchet & Clank Rift Apart Guide
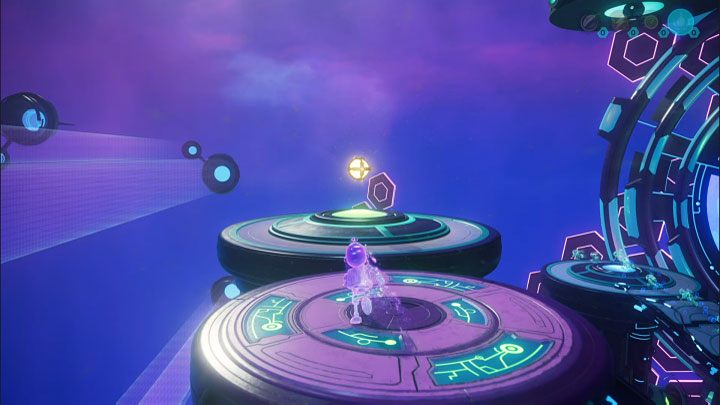
Stay still and wait for the projections to reach the pressure plate in picture 1 - Ratchet & Clank Rift Apart: Reaching the anomalies in the catacombs - walkthrough - Savali - return - Ratchet & Clank Rift Apart Guide

Stay still and wait for the projections to reach the pressure plate in picture 1.

The platform you are standing on will move. This will allow you to take the electric sphere from picture 2.
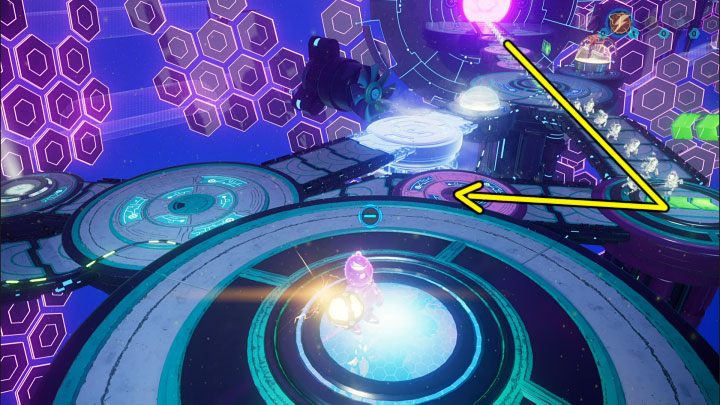
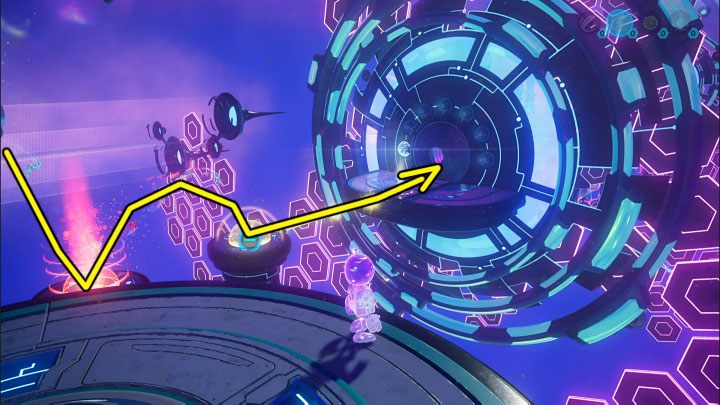
There is also a pressure plate on the shelf you took the electric sphere from - Ratchet & Clank Rift Apart: Reaching the anomalies in the catacombs - walkthrough - Savali - return - Ratchet & Clank Rift Apart Guide

There is also a pressure plate on the shelf you took the electric sphere from. Stay on it and wait for the running projections to move the adjacent platform. Ultimately, the projections should follow the path shown in the picture.
4 - Ratchet & Clank Rift Apart: Reaching the anomalies in the catacombs - walkthrough - Savali - return - Ratchet & Clank Rift Apart Guide
Remain on the pressure plate - Ratchet & Clank Rift Apart: Reaching the anomalies in the catacombs - walkthrough - Savali - return - Ratchet & Clank Rift Apart Guide

Remain on the pressure plate. Throw the electric sphere at the slot marked in picture 1. This will allow the projections to travel by the cable and reach the meta-terminal. Teleport once the exit unlocks.

Clank's riddle #2
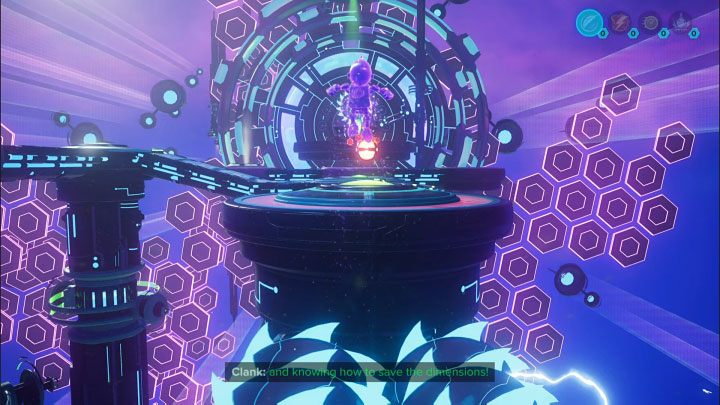
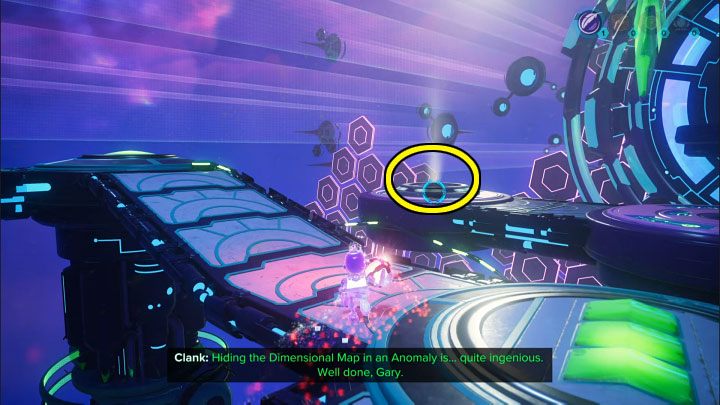
Go straight ahead and perform a double jump over the spikes to reach the Lift Sphere - Ratchet & Clank Rift Apart: Reaching the anomalies in the catacombs - walkthrough - Savali - return - Ratchet & Clank Rift Apart Guide

Go straight ahead and perform a double jump over the spikes to reach the Lift Sphere. You also need to watch how the pressure plate activates (it's a short scene).

5 - Ratchet & Clank Rift Apart: Reaching the anomalies in the catacombs - walkthrough - Savali - return - Ratchet & Clank Rift Apart Guide
With the lift sphere, reach the slot in picture 1, which is to the left of the meta-terminal - Ratchet & Clank Rift Apart: Reaching the anomalies in the catacombs - walkthrough - Savali - return - Ratchet & Clank Rift Apart Guide

With the lift sphere, reach the slot in picture 1, which is to the left of the meta-terminal.

After placing the lift sphere in the slot, enter the red area to catapult Clank. Try to safely land on a higher ledge where you have to take the Speed Sphere - the location is shown in picture 2.
6 - Ratchet & Clank Rift Apart: Reaching the anomalies in the catacombs - walkthrough - Savali - return - Ratchet & Clank Rift Apart Guide
Go back towards the starting location, but on your way remove the lift sphere from the slot you used to catapult Clank - Ratchet & Clank Rift Apart: Reaching the anomalies in the catacombs - walkthrough - Savali - return - Ratchet & Clank Rift Apart Guide

Go back towards the starting location, but on your way remove the lift sphere from the slot you used to catapult Clank.

Use the speed sphere on the slot in picture 1, located near the starting point. Then, run through the blue area to break the blocks and find a heavy sphere.
Take the speed sphere from a nearby slot and throw it at the slot in the picture above - Ratchet & Clank Rift Apart: Reaching the anomalies in the catacombs - walkthrough - Savali - return - Ratchet & Clank Rift Apart Guide

Take the speed sphere from a nearby slot and throw it at the slot in the picture above. It is located right next to the starting point on the main path, and from now on, the projections will run faster.
Turn towards the slot shown in the picture and throw the lift sphere at it - Ratchet & Clank Rift Apart: Reaching the anomalies in the catacombs - walkthrough - Savali - return - Ratchet & Clank Rift Apart Guide

Turn towards the slot shown in the picture and throw the lift sphere at it.
7 - Ratchet & Clank Rift Apart: Reaching the anomalies in the catacombs - walkthrough - Savali - return - Ratchet & Clank Rift Apart Guide
Now stand on the pressure plate from picture 1 to make the projections run in another direction - Ratchet & Clank Rift Apart: Reaching the anomalies in the catacombs - walkthrough - Savali - return - Ratchet & Clank Rift Apart Guide

Now stand on the pressure plate from picture 1 to make the projections run in another direction. They must destroy the obstacles on the upper level.

Make Clank run through the red area and you will be catapulted to the top. You will find the second lift sphere there (picture 2)
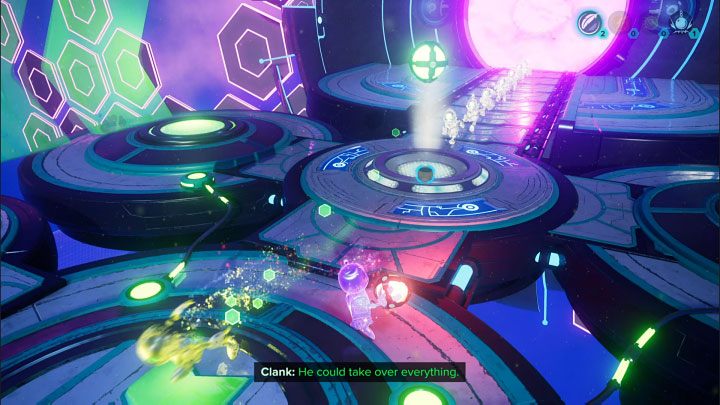
Along the way, take the first lift sphere from the bottom slot and the speed sphere from the starting area - Ratchet & Clank Rift Apart: Reaching the anomalies in the catacombs - walkthrough - Savali - return - Ratchet & Clank Rift Apart Guide

Along the way, take the first lift sphere from the bottom slot and the speed sphere from the starting area. Ultimately, you should have 2 lift spheres and 1 speed sphere in your inventory.
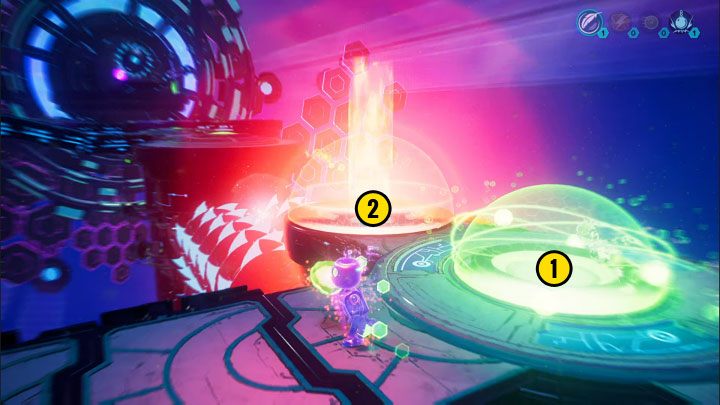
Reach the main path near the spikes again and do the following - Ratchet & Clank Rift Apart: Reaching the anomalies in the catacombs - walkthrough - Savali - return - Ratchet & Clank Rift Apart Guide

Reach the main path near the spikes again and do the following:

  1. place the speed sphere in the slot at point 1 in the picture,
  2. place the lift sphere in the slot at point 2 in the picture.

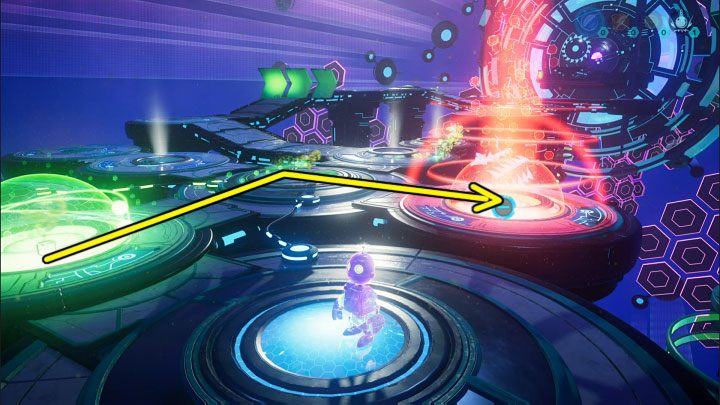
The speeding projections should now make long jumps over the spikes.
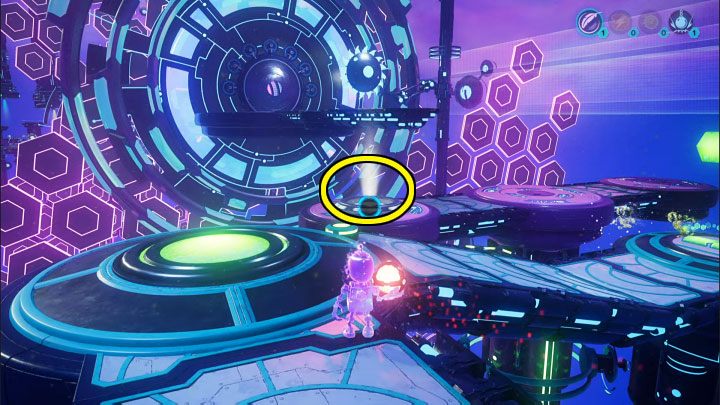
8 - Ratchet & Clank Rift Apart: Reaching the anomalies in the catacombs - walkthrough - Savali - return - Ratchet & Clank Rift Apart Guide
Take the side path towards the meta-terminal - Ratchet & Clank Rift Apart: Reaching the anomalies in the catacombs - walkthrough - Savali - return - Ratchet & Clank Rift Apart Guide

Take the side path towards the meta-terminal. Throw the lift sphere in the slot from picture 1.

Catapult where you used the last lift sphere and throw the heavy sphere at the working spiked machine from picture 2.
9 - Ratchet & Clank Rift Apart: Reaching the anomalies in the catacombs - walkthrough - Savali - return - Ratchet & Clank Rift Apart Guide
You may have already reached the side pressure plate from picture 1 - Ratchet & Clank Rift Apart: Reaching the anomalies in the catacombs - walkthrough - Savali - return - Ratchet & Clank Rift Apart Guide

You may have already reached the side pressure plate from picture 1. Standing on it will rotate the platform by 90 degrees.

If you did everything right, the projections will catapult correctly over the spikes and start hitting the meta-terminal. Wait for the exit to unlock and use teleportation.

Clank's third (final) puzzle
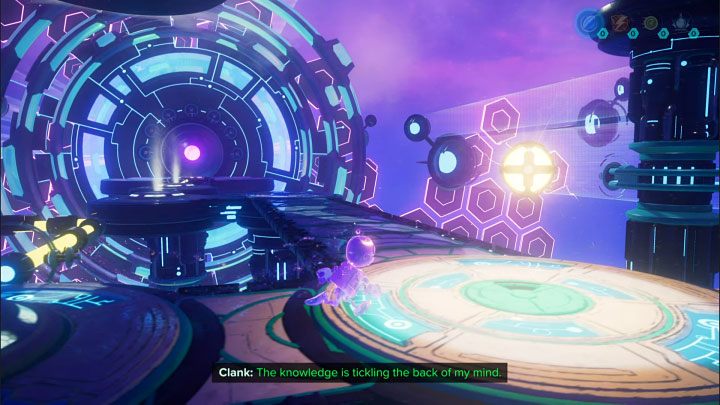
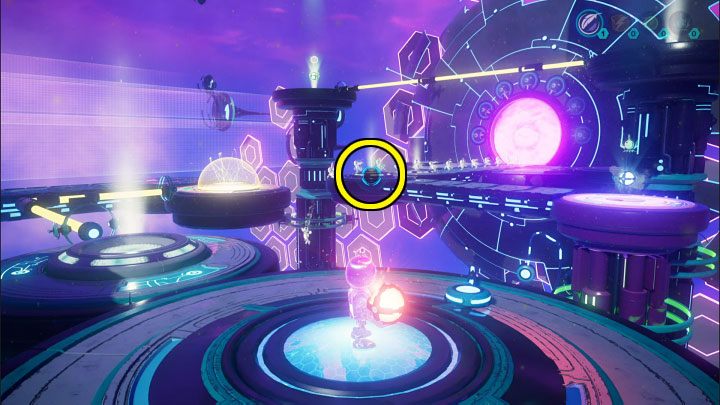
Go straight ahead, jump over the chasm and take the Electric Sphere - Ratchet & Clank Rift Apart: Reaching the anomalies in the catacombs - walkthrough - Savali - return - Ratchet & Clank Rift Apart Guide

Go straight ahead, jump over the chasm and take the Electric Sphere.
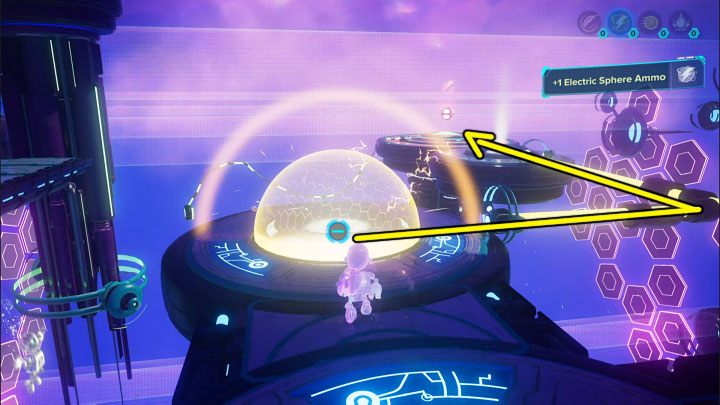
You must place the electric sphere in the slot right next to it - Ratchet & Clank Rift Apart: Reaching the anomalies in the catacombs - walkthrough - Savali - return - Ratchet & Clank Rift Apart Guide

You must place the electric sphere in the slot right next to it. Touch the cable and you will be transported to a shelf with a Lift Sphere.
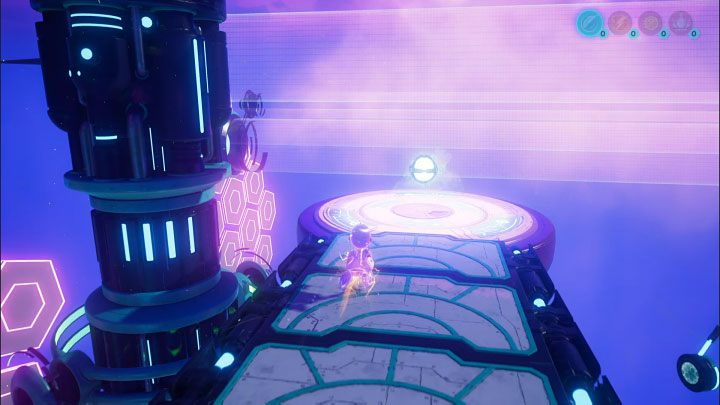
Make sure Clank is standing on the pressure plate at the lift sphere location - Ratchet & Clank Rift Apart: Reaching the anomalies in the catacombs - walkthrough - Savali - return - Ratchet & Clank Rift Apart Guide

Make sure Clank is standing on the pressure plate at the lift sphere location. Throw the lift sphere at the slot marked in the picture.
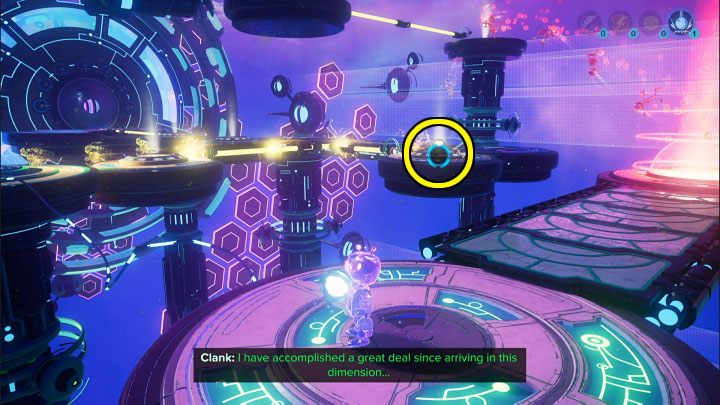
Perform a double jump to return to where you put the electric sphere earlier - Ratchet & Clank Rift Apart: Reaching the anomalies in the catacombs - walkthrough - Savali - return - Ratchet & Clank Rift Apart Guide

Perform a double jump to return to where you put the electric sphere earlier.

Wait for the running projections to reach the pressure plate you were standing on a moment ago. This will lower the side platform shown in the picture. You can take the Heavy Sphere from it.
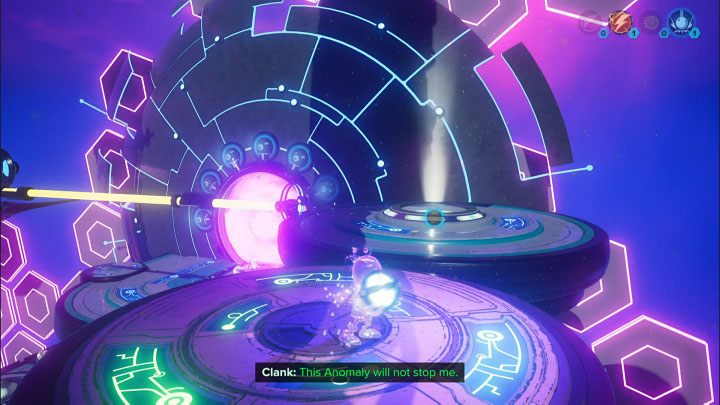
Remain in that location - Ratchet & Clank Rift Apart: Reaching the anomalies in the catacombs - walkthrough - Savali - return - Ratchet & Clank Rift Apart Guide

Remain in that location. Pull the electric sphere from the picture above to you and wait until the projections stop coming to the pressure plate.

10 - Ratchet & Clank Rift Apart: Reaching the anomalies in the catacombs - walkthrough - Savali - return - Ratchet & Clank Rift Apart Guide
The platform you are standing on will move upwards - Ratchet & Clank Rift Apart: Reaching the anomalies in the catacombs - walkthrough - Savali - return - Ratchet & Clank Rift Apart Guide

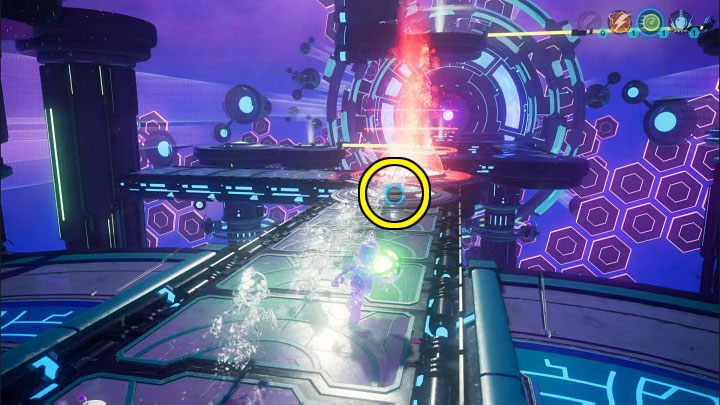
The platform you are standing on will move upwards. Use the electric sphere on the new slot here (picture 1).

Touch the cable to move to the next shelf. You will find a Speed Sphere (picture 2).
Turn 180 degrees and pull the electric sphere you just used towards you - Ratchet & Clank Rift Apart: Reaching the anomalies in the catacombs - walkthrough - Savali - return - Ratchet & Clank Rift Apart Guide

Turn 180 degrees and pull the electric sphere you just used towards you.

Jump down to the bottom, next to the starting area. Place the speed sphere in the slot next to the lift sphere, as shown in the picture above.
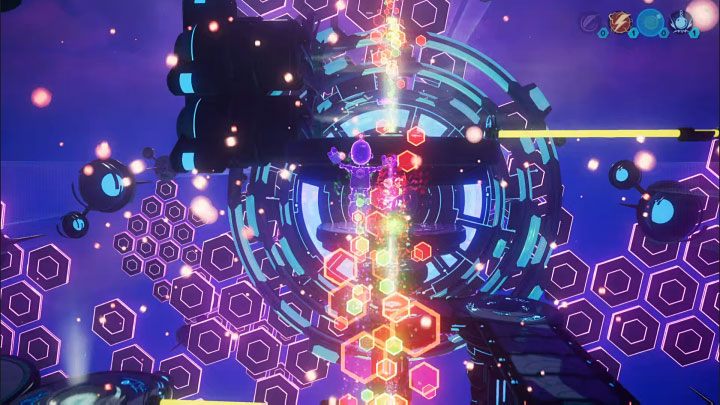
Run through the green area to speed up, and then through the red area to catapult Clank to another high ledge shown in the picture - Ratchet & Clank Rift Apart: Reaching the anomalies in the catacombs - walkthrough - Savali - return - Ratchet & Clank Rift Apart Guide

Run through the green area to speed up, and then through the red area to catapult Clank to another high ledge shown in the picture.
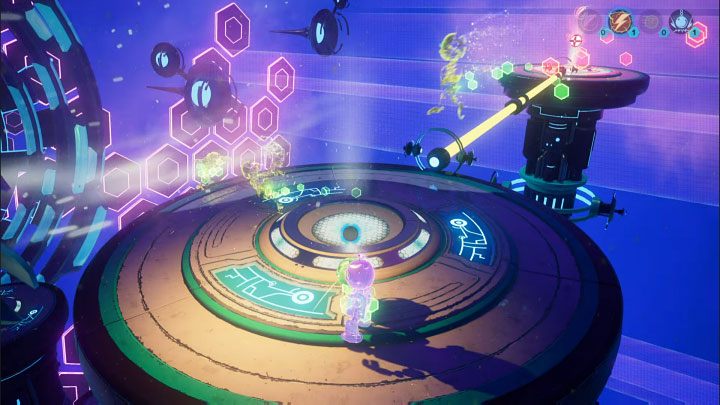
There, use the electric sphere on the slot and touch the cable to transport Clank to the next platform - Ratchet & Clank Rift Apart: Reaching the anomalies in the catacombs - walkthrough - Savali - return - Ratchet & Clank Rift Apart Guide

There, use the electric sphere on the slot and touch the cable to transport Clank to the next platform. Another lift sphere is located there.
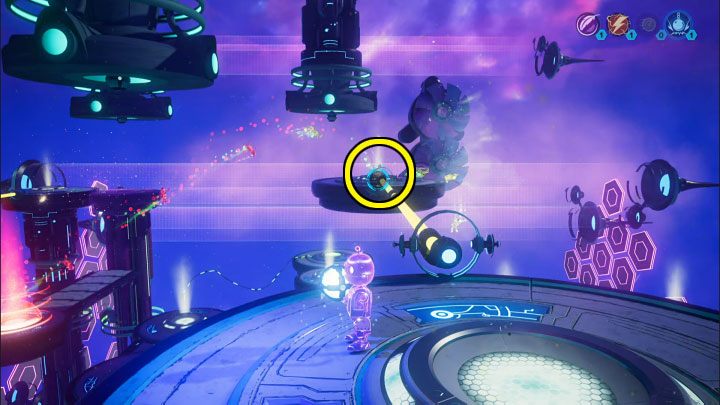
Once you got the lift sphere, turn 180 degrees and pull the electric sphere towards you - Ratchet & Clank Rift Apart: Reaching the anomalies in the catacombs - walkthrough - Savali - return - Ratchet & Clank Rift Apart Guide

Once you got the lift sphere, turn 180 degrees and pull the electric sphere towards you. Don't leave your current location.

Now throw the heavy sphere towards the same slot (see the picture above), so the catapulted projections won't be affected by the fans anymore.
You will have to make two more throws from the same shelf - Ratchet & Clank Rift Apart: Reaching the anomalies in the catacombs - walkthrough - Savali - return - Ratchet & Clank Rift Apart Guide

You will have to make two more throws from the same shelf:

  1. throw the lift sphere into the slot from point 1 in the picture,
  2. throw the electric sphere at the slot from point 2 in the picture.
If you've done everything right, the projections should reach the last cable and then make their way to the meta-terminal to unlock the exit a moment later - Ratchet & Clank Rift Apart: Reaching the anomalies in the catacombs - walkthrough - Savali - return - Ratchet & Clank Rift Apart Guide

If you've done everything right, the projections should reach the last cable and then make their way to the meta-terminal to unlock the exit a moment later. Teleport to the final location of the stage.
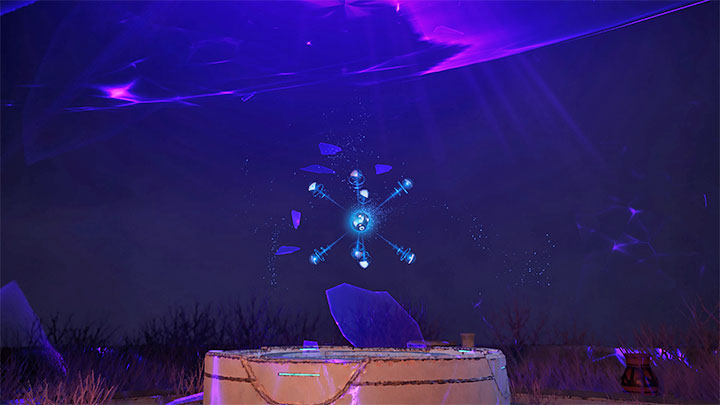
Characters will try to obtain the Dimensional Map - Ratchet & Clank Rift Apart: Reaching the anomalies in the catacombs - walkthrough - Savali - return - Ratchet & Clank Rift Apart Guide

Characters will try to obtain the Dimensional Map. You will also watch new cut-scenes. The action will automatically move to Zordoom Prison on the planet Viceron - this location is described in the next chapter of the walkthrough.

See/Add Comments

You are not permitted to copy any image, text or info from this page.

This site is not associated with and/or endorsed by the Sony Interactive Entertainment or Insomniac Games. All logos and images are copyrighted by their respective owners.

Copyright © 2000 - 2024 Webedia Polska SA for gamepressure.com, unofficial game guides, walkthroughs, secrets, game tips, maps & strategies for top games.