Deus Ex Mankind Divided: Securing the Convention Centre - main quest
This chapter contains a walkthrough for the main quest Securing the Convention Centre from Deus Ex Mankind Divided. The walkthrough includes tips on how to silently deal with all eleven guards in the reception area, and how to access the catering area.
Securing the Convention Centre is a first task connected to Apex Convention Centre, i.e. the location that is visited in the final part of the main plot. The flight to London takes place during the main quest Hunting Down the Final Clues. The most important objective of the visit in the convention center is stopping Marchenko's planned terrorist attack, but the matters will quickly get out of hand and Jensen will have to adapt to the new situation.
Note - Before you embark on a flight to Apex Centre, make sure that you've completed all quests in Prague. You should also visit the local merchants and stock up to be sure that you are ready for the final phase.
- Mission objectives
- Meeting with Liam Slater
- Reaching Slater's office and activating the security override
- Reaching the reception
- Silent elimination of the guards
- Acquiring the access card for the catering area
- Using the keycard and investigating the catering area
- Epilogue
Mission objectives
1. MANDATORY - Meet Liam Slater in the C.S.O. - This objective will be canceled after talking to one of the guards on level seven (M25,2). Don't worry about that, as this event is connected to the plot, and it cannot be prevented.
2. MANDATORY - Get to Slater's office - Slater's office is in the northern part of the building, on level seven (M25,3).
3. MANDATORY - Activate the security override switch - The security override is in Slater's office.
4. MANDATORY - Find the keycard to catering - The keycard can be stolen while exploring the ventilation shafts (M25,5) or taken from one of the guards patrolling the reception (M25,6).
5. SECONDARY - Quietly neutralize all the guards - There are eleven guards present. You cannot alarm them, and their bodies cannot be found by the guests present in reception.
6. MANDATORY - Investigate the catering area - The catering area is separated from the rest of the building by a closed door that requires the keycard. A cut-scene will begin automatically (M25,8) once you enter the catering area, and the mission will end.
Very important note - This mission places a great emphasis on stealth. If you cause an alarm in the early phase of the task, you'll have to eliminate all enemies before using the elevator to the reception. Additionally, if you alarm enemies while trying to access the catering area, this mission will end prematurely, and will be substituted by one of the final quests of the game - Stopping Marchenko.
Meeting with Liam Slater
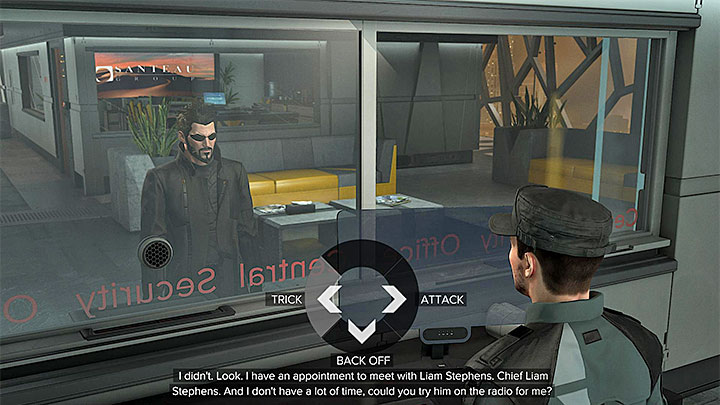
Once you arrive to London, you'll listen to a conversation between James Miller and Nathaniel Brown (Jensen won't influence the exchange in a major way). You begin on the roof of the conference center (M25,1) and you have to use the elevator to reach level 7.
Reach the security outpost (M25,2) and begin a conversation with a guard, who will mention that Liam Slater is too busy with other matters. If you want, you can just proceed to action and attack the guards, who in reality are Marchenko's henchmen. This is not such a good idea, as aside from few guards you would be attacked by a security bot. The best approach is to choose the left dialogue option - asking the guard for an urgent meeting with Slater. This will make the guard leave the security room, and you'll have an easier time accessing it later.
Reaching Slater's office and activating the security override
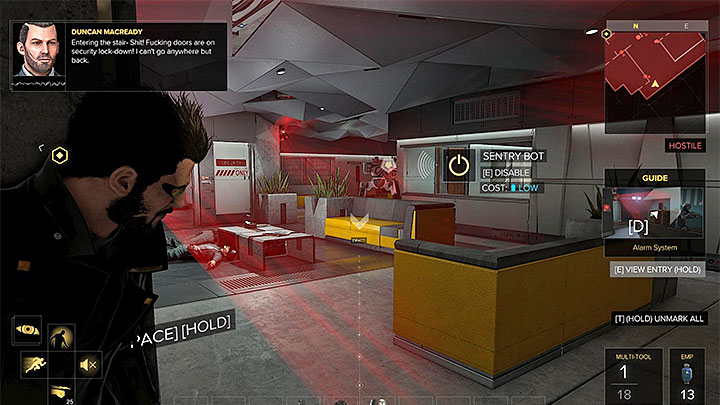
Slater's office is in the northern part of level 7 (M25,3). You have to be aware that all the neighboring areas aside from the starting point are treated as a restricted zone. If you get caught by the guards (in reality, Marchenko's men), you will be attacked instantly. Defeating them won't be easy, as aside from firearms they can use augmentations, especially camouflage. Aside from that, when the alarm goes off, you need to watch out for security system elements, such as the robot and the turret.
Note - If have begun fighting with the guards from levels 6 and 7, you won't be able to leave this part of the conference center (even if you reach Slater's office and activate the override) until you defeat all of them.
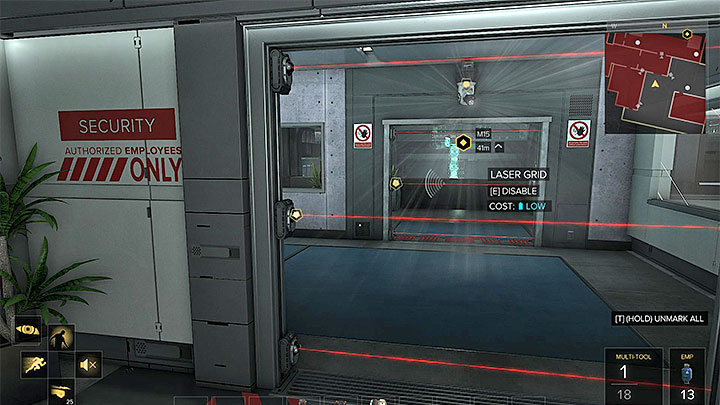
If you want to reach Slater's office quickly, you should investigate the laser barriers near the northern pathway. You can use Remote Hacking to disable the first barrier and active security cameras located here, then jump into the restricted area when the local guard will be facing the other way. You can now turn left (this side path is described in detail below) or close in to the main room connecting levels 6 and 7 of the conference center.
In case you sent away the guard with whom Jensen was talking, you can begin the way to Slater's office by breaking into the room where your interlocutor was staying (M25,4). This lock has only level one security, but the room has a camera that you either have to sabotage or sneak through using, for example, camouflage.
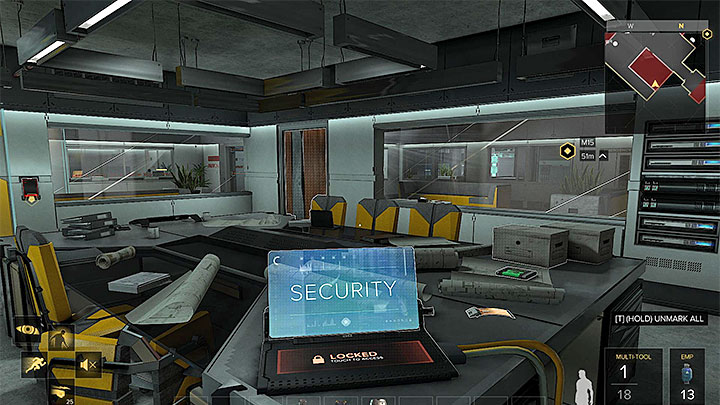
If you don't have Remote Hacking, or you don't want to do any risky moves, your first priority should be turning off the local security systems. The room with the security computer is just by the elevator. Don't try accessing it through the main door. Instead, go the back and move one of the vending machines to discover a ventilation shaft (M25,6). Proceed through this shaft and once you enter the room (M25,5) activate the curtains to avoid detection. You can now take care of the security computer. It has level four security, but you should put the extra effort into cracking it, as hacking the system will allow you to turn off four cameras, a robot, a laser barrier, and alarms.
Note - If you want, you may continue travelling through the ventilation shaft that was behind the vending machine. It will lead Jensen to the main hall, allowing him to bypass laser barriers.
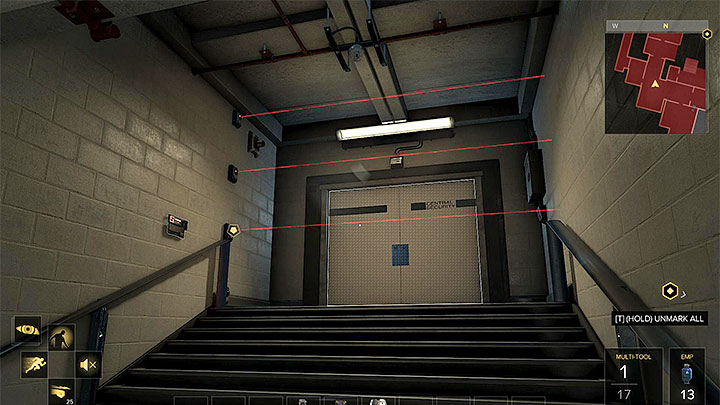
Barging into the main room is not a good idea, as the area is patrolled by 6-7 enemies, and eliminating them may prove to be problematic. The preferable approach is to use the corridors and rooms located in the western part of the building. You can reach them turning left once you cross the room with the single guard (besides, you'll find two clues - a golden mask and blood marks) or after turning off/bypassing the first laser barrier and the camera.
You'll encounter a new laser barrier behind the corner - you can use Remote Hacking and break into the terminal on the left (security level 3) or wait until the lower laser turns off for a moment. A bit further you'll notice a locked door (security level 4). Another idea is to enter the small room on the left (M25,7). There, you can break through the wall and in the next area (+300 experience) jump to the upper ventilator. Disabling this ventilator (EMP charge or Remote Hacking) will allow you to proceed (+300 experience points).
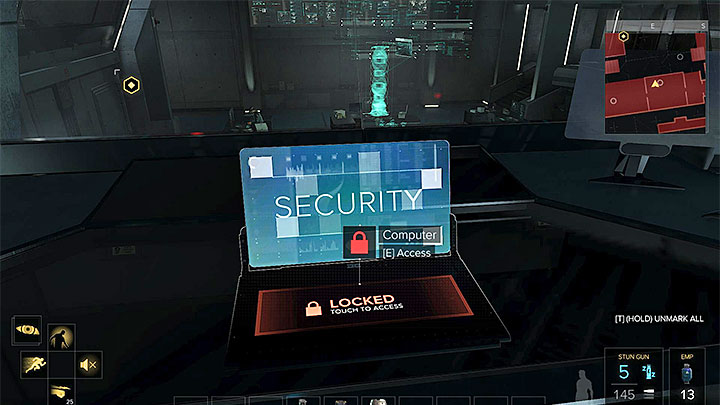
The paths described above will allow Jensen to reach a security room with a large number of bodies (M25,9). If you've used stealth up to this point, our hero will contact Miller to inform him about this horrific find. You should look for the second security computer while being in this room. It has level four security, but if you crack it or use a multi-tool, you will be able to turn two new cameras, a laser barrier and a turret mounted near Slater's office. Before you proceed further ahead, you can check the local armory and pick up some valuables.
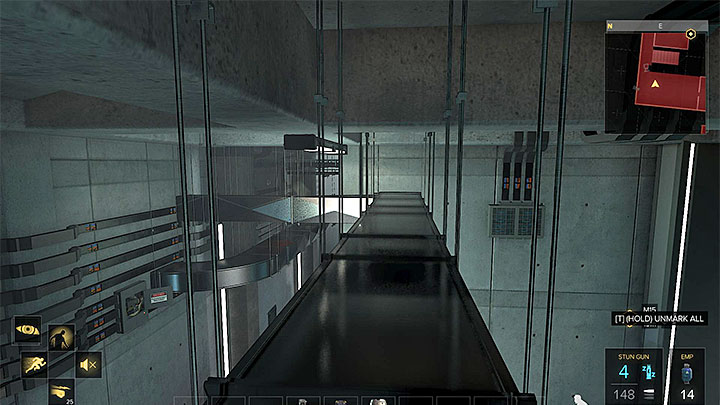
You should choose the northern exit from the security room. There may be two security guards around, but they should disperse once their conversation is over. Continue in the direction of Slater's office (M25,3). If you were able to turn off the defense turret using the second security computer, you can enter the office right away. Otherwise, you need to use camouflage, Remote Hacking, or reach the office through a different path. For example, you can climb to narrow ventilation shafts hanging by the ceiling (above screenshot). Follow them and stand exactly above the main entrance to the office. There should be a grate there that you can open, and enter a small area above the office (+300 experience points)
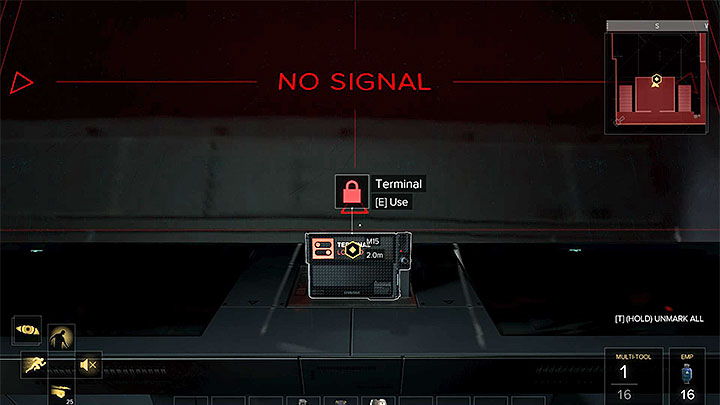
Once you enter Slater's office (1950 experience points + a bonus if you avoided detection), you may begin to search his computer, acquiring the terminal code in progress (it's an optional step). Once you took a look around (there is a unique Devastator shotgun in the closet), approach the terminal responsible for activating the override. You can complete the mini-game, or use 5359 as the code. You'll receive 1950 experience points (and a bonus if you avoided detection), and you'll be rewarded with another cut-scene.
Reaching the reception
You have to return to the elevator that you used to reach level seven (preferably by backtracking, as there still may be some enemies around). The elevator can be used straight away, except in case you've alarmed the enemies. Then, you won't be able to leave this part of the building until you've eliminated them all.
Press the new button on the panel to reach level 5 (M25,4). You should now be in a non-restricted part of the building.
Very important note - If you cause an alarm while exploring the reception or the areas surrounding it, the quest will end in a failure, and will be exchanged for one of the final quests of the game - Stopping Marchenko. From that moment, you'll have 10 minutes for stopping Marchenko before he destroys the skyscrapers or/and saving the delegates before they get poisoned by Orchid.
Note - Preferably, you should take care of the secondary mission objective, involving silent elimination of eleven guards (it has been described below). If you are not interested, you can just focus on finding the keycard and using it to reach the catering area (M25,8).
Silent elimination of the guards
Note - The described objective involves eliminating eleven guards and it's not mandatory, as the keycard can be acquired by eliminating only one of the guards, or found in a completely different place in the conference center. If you want to take the challenge (for example, for extra experience points) you need to know about four things:
1) The attacked guards cannot move to the alert state (even for a very short moment), or the objective will be failed. As a result, don't use the Tranquilizer Rifle or gas grenades, as they have a delayed effect. Instead, focus on takedowns, Stun Gun, or silenced firearms (aim for headshots).
2) You cannot let your attacks on guards be seen by the guests arriving for the party, or that the bodies of eliminated henchmen are found by someone. Try to catch the guards in more secluded areas, or quickly move their bodies after a successful attack.
3) The guards can be taken care in any order. Below, we show an exemplary order, but you can approach the objective in any order you want. IF you use the radar, the guards will be marked on it, which will allow you to locate any guard you may have left out.
4) You cannot be noticed by a camera or cause an alarm in any way. Such events won't get by Marchenko, and as a result, the current quest will be substituted in favor of the main quest directly linked to him.
Note - only one guard (the last, eleventh one from the walkthrough below) has the sought keycard. Nevertheless, you shouldn't forget about checking the bodies of other eliminated enemies, as some of them have, among others, palmtops with passwords or valuable messages.
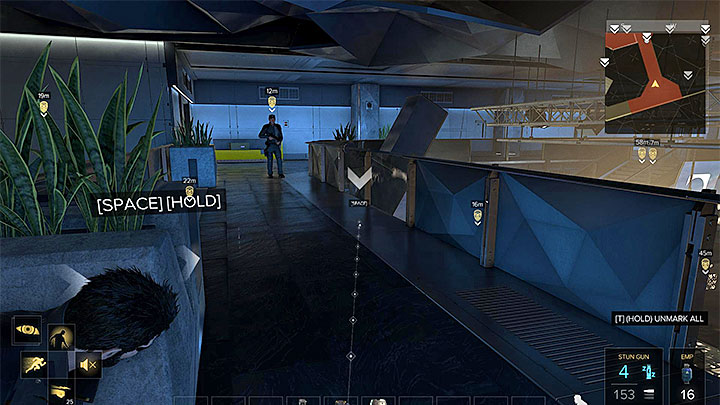
Ignore the guard standing near the elevator, as he is in the camera's field of view. He'll be an easy target later on. Go right and reach the stairs leading to level four (M25,14). Here, you can activate the camouflage and jump to the restricted zone on the left (the one behind the red tape) or jump to the balconies located above the stairs. Regardless of your approach, wait for the first guard, who sometimes stops on the balcony. Once you stun or eliminate him, drag his body to a place where won't be noticed by the guests downstairs.
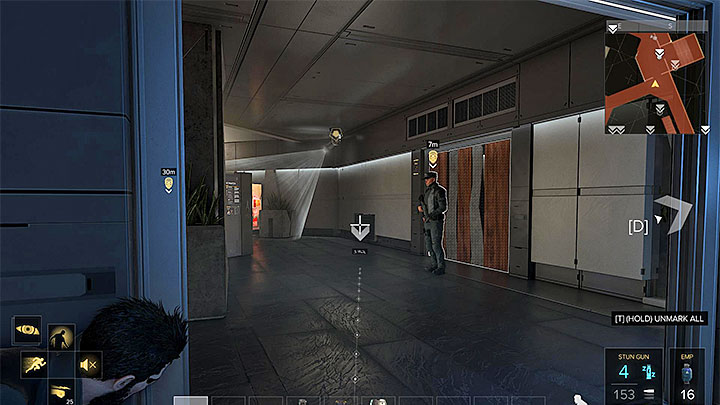
The second guard guards the staircase. This encounter is made harder by the fact that there is an active camera near him. You can take care of this obstacle by disabling the camera using Remote Hacking, or by using, for example, throwable objects to encourage the guard to approach the balconies where you disposed of the first guard.
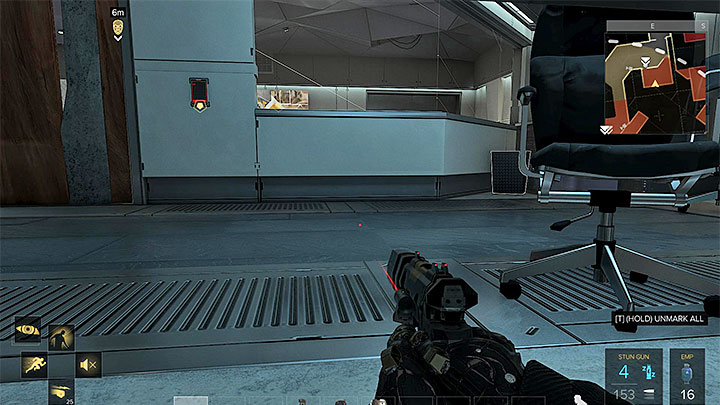
Reach the staircase that was guarded by the second guy. Don't use it; just turn left so you can notice an entrance to a ventilation shaft. Use the ventilation shaft to reach the room near the starting location. Begin exploring the room with hacking the security computer (level 3 security), which allows you to turn off as much as 4 local cameras. You can now approach the exit from the room, open the door, and attack the third guard (your task is much easier now that the camera is off and you don't have to worry about a place to leave the body)
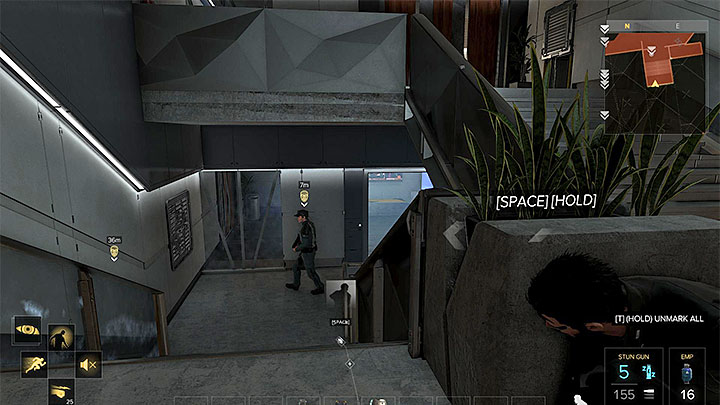
Return to the staircase guarded by the second guard and start slowly descending to the floor below. The staircase is sometimes patrolled by the third guard. Wait until he appears and eliminate him then - as a bonus, you won't have to worry about where to hide his body.
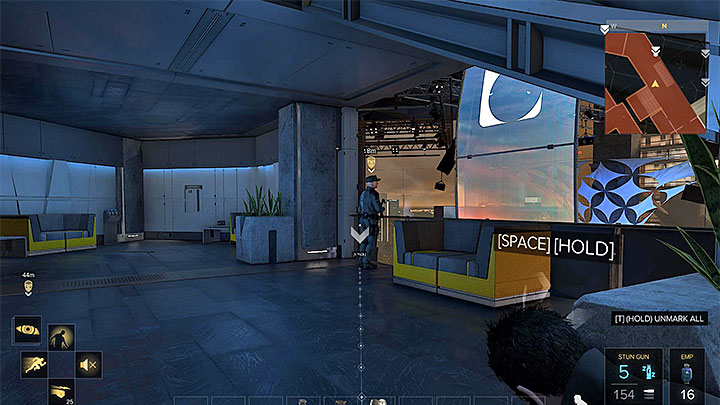
Finish descending to the fourth floor (it's still a restricted zone) and once you reach a big balcony, turn left. The fifth guard should be by the railing, or patrolling the area. Once you get rid of him, hide his body somewhere so that he won't be found by the guests in the reception and by other enemies (you can, for example, put him in the nearby storeroom - room 24A).
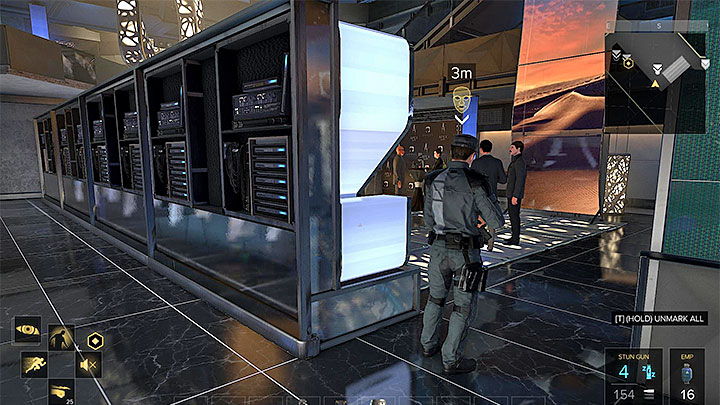
Now go to the widely available reception area on level two, where there is a row of huge letters (SAFE HARBOUR). This area is patrolled by the sixth guard. You should attack him when he stands near the first letter (S). Once you get rid of him, place his body behind the letters, so it won't get noticed by people located in the reception.
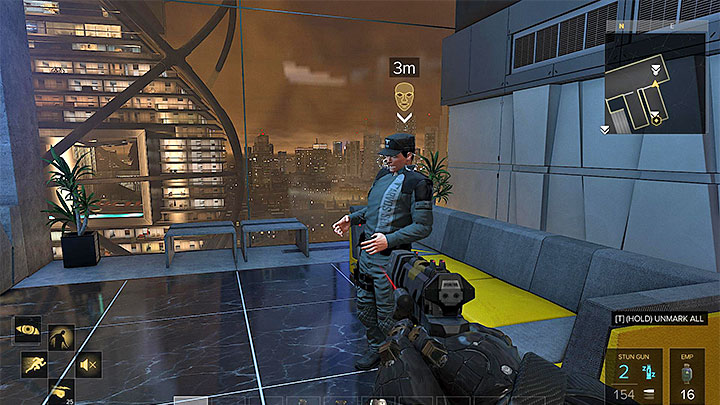
Descend to level one and find two toilets. The seventh guard stands before them. You have to wait for a right moment to attack him, as the other guard sometimes visits this place, and some guests may also stumble upon this location. Once you eliminate the said guard, drag his body to women's toilet, so you won't risk that it will be found in the further part of the mission. You can leave the body in the toilet's main area, or if you want to be sure, put it in one of the cabins (it may require few tries as body dragging system is a bit imprecise.
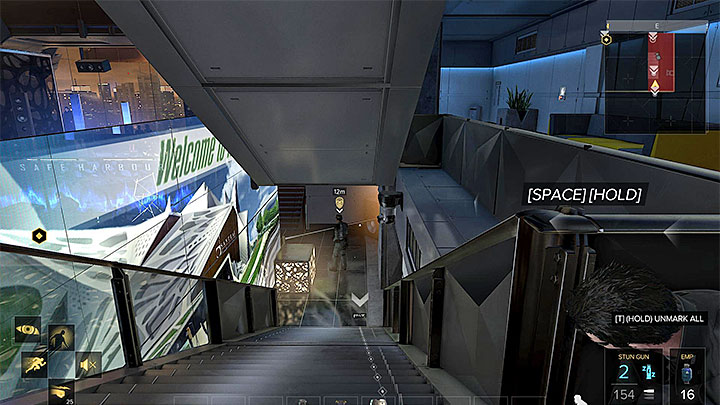
Stay on level one and find the stairs to level two (west from toilets) that are guarded by the eighth guard (If you haven't used the security computer, an active camera will also be present here). Ignore the guard for a moment, go a little to the right and jump to the upper balcony. This will allow you to bypass the aforementioned enemy and reach a mezzanine behind his back. Here, you can stay behind cover and wait until the guard ascends the stairs or get him from behind (if you turned off/hacked the camera above his head). In the second case, drag the guard's body so it won't be found by one of the guests.
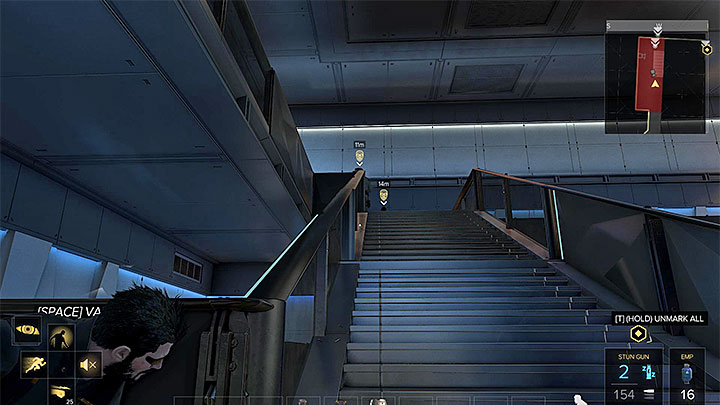
Next two guards are above the place where you attacked the aforementioned eighth guard (level four). Approach them with caution, and wait until they end their conversation. First, take care of the ninth guard, who should go right. Then, follow the tenth guard, who went the opposite way. You can get rid of him instantly, or wait until he returns to the stairs (choose this variant if you hadn't disabled the local camera).
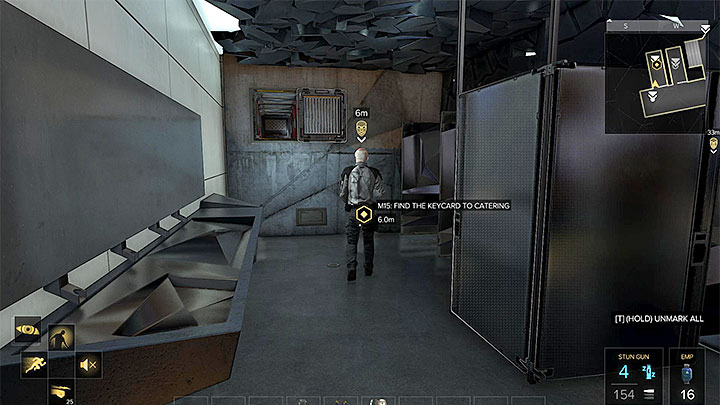
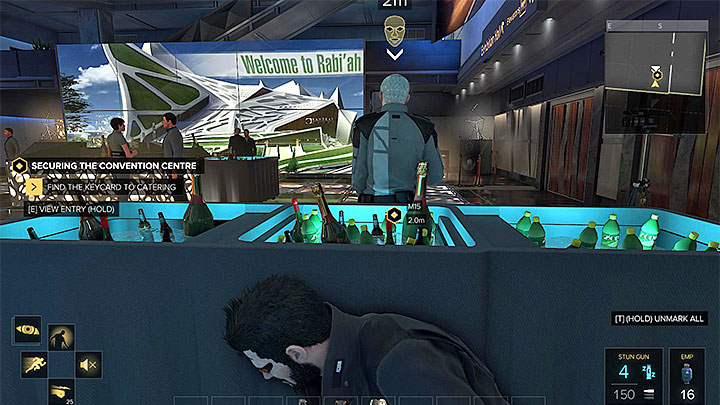
All that is left to do is to eliminate the last, eleventh guard, who is at the same time the most important person in the area, as he has the sought keycard. This guard can be identified by the fact that he doesn't wear headgear, and he has grey hair. He travels between two areas on the widely available, first level of the building.
The first area is the men's toilet (screenshot 1). This is the inferior place for the attack, as if you wanted to be sure that alarm won't go off, you would have to eliminate at least two more people present in the toilet. The second area is the bar (screenshot 2) (M25,6). This is a better idea, but if you want to be sure that the attack will be successful, hide behind a cover and press the takedown button.
For neutralizing all eleven guards, you'll receive 1000 experience points + a bonus for avoiding detection.
Acquiring the access card for the catering area
Note - The card can be acquired before you take care of the guards (or if you are not interested in this objective), during the objective, or once it's done (it will be much easier).
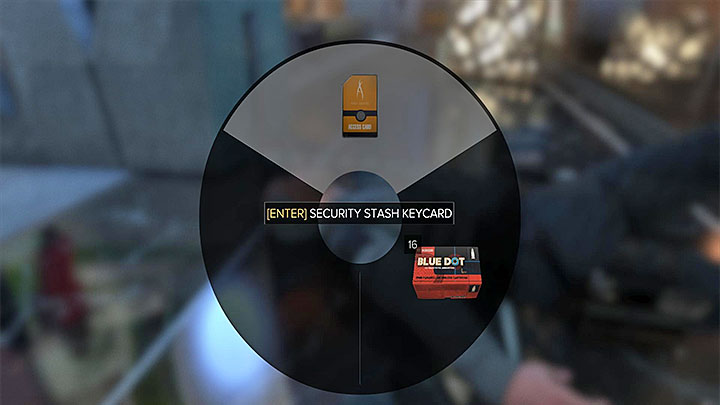
The keycard can be acquired in two different ways. First way involves retrieving it from one of the guards - it's the eleventh guard from the above walkthrough, who travels between toilets and the bar on level 1 (M25,6). Once he is neutralized, all you have to do is search his body.
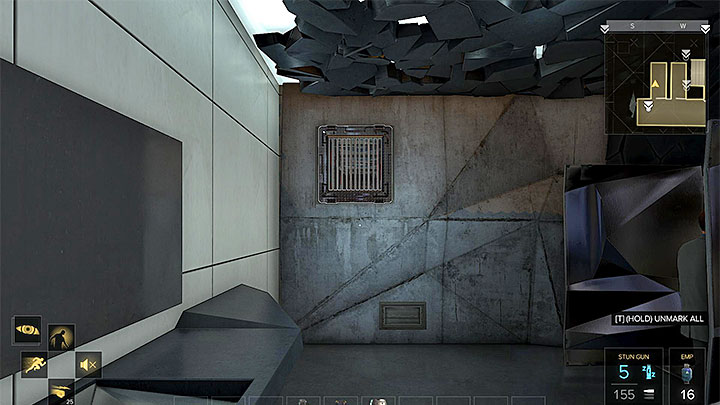
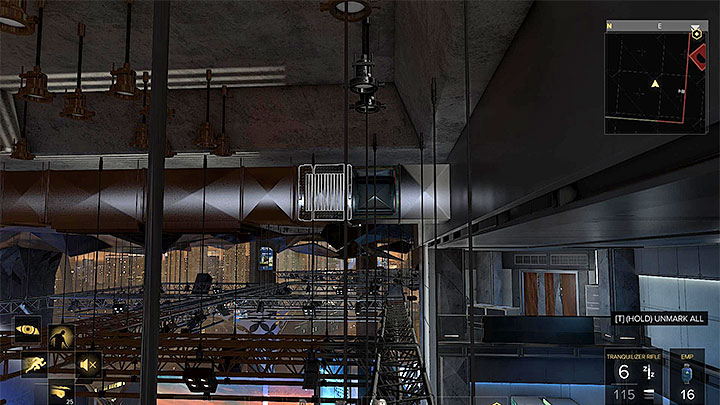
The second method involves stealing the keycard from one of the rooms on level four (M25,5). You cannot access this room directly; you have to go through the ventilation shaft. The entrance to the ventilation shaft is in one of the toilets on level 1 (screenshot 1) (M25,18), but you would have to use Klipspringer Jump Mod to make the jump in the vertical part of the shaft. Alternatively, you can reach one of the ventilation entrances by the reception ceiling (screenshot 2). Here, the whole process is much easier, as the only thing you have to do is to descend down the ladder.
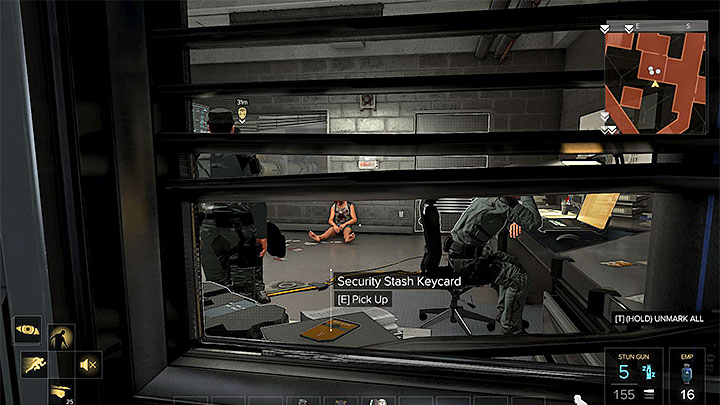
Regardless of the chosen entrance, you need to move through the ventilation shafts to the end, and turn in the direction of the room with enemies. The card is in the place shown on the attached screenshot - you can take it without leaving the shaft.
For acquiring the card you'll receive 1950 experience points + a bonus if you used stealth.
Using the keycard and investigating the catering area
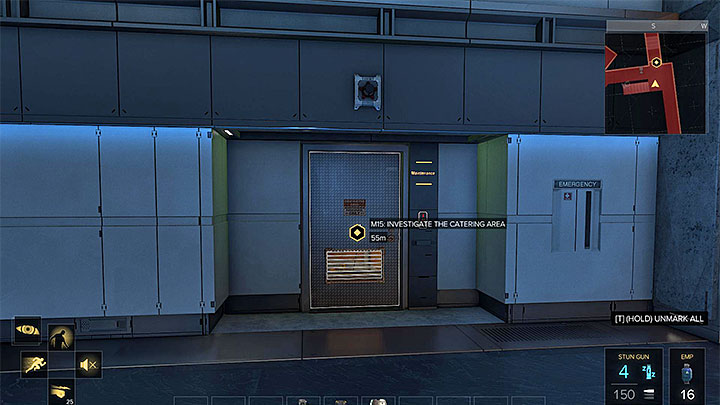
Once you acquire the keycard you need to reach a locked door in the northern part of the building's level four (M25,7) (screenshot above). You can reach your goal from level one, climbing to the following floors, or by travelling on the upper levels or even by the ceiling. If you hadn't eliminated all the enemies connected to the side objective, you have to be aware that there will be at least two in the neighborhood - eliminate them or wait until they split and reach the card reader.
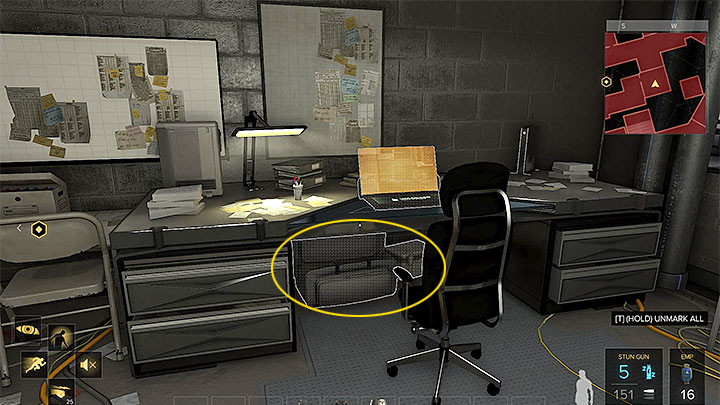
The corridor behind the corner is guarded by two guards, but can ambush them easily or bypass them by entering the cloakroom and using the ventilation shaft (M25,17). Before you reach your current objective, consider visiting the northernmost room in which one of the guards sits by a computer (it's a room from where you could steal the keycard while hiding in the ventilation shaft). Eliminate the guard and check underneath the desk. In the place shown on the above screen you'll find a satchel. Inside, you can find Marchenko's Kill Switch. This item can be useful during the final confrontation. You could also acquire it in the earlier phase of the game, while completing the main quest GARM (if you already have the kill switch, you don't need another one).
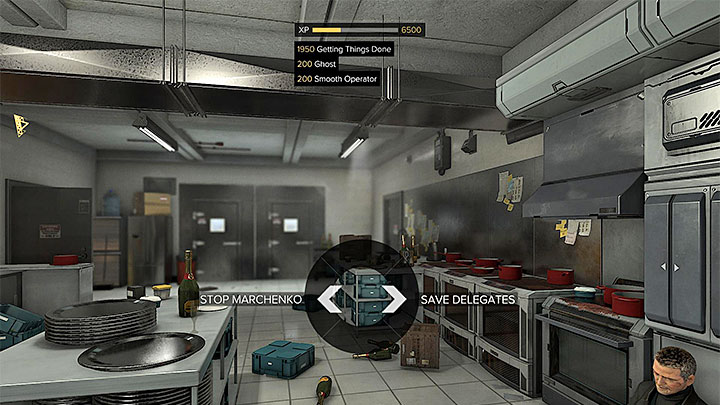
Once everything is ready, SAVE THE GAME and enter the catering area (M25,8). A cut-scene depicting a meeting with injured Miller and an infolink conversation with Marchenko will begin.
Once the cut-scene is over (1950 experience points + a bonus if you stayed undetected) the game will present you with a choice whether you want to take care of Marchenko first, or save the delegates (two new main quests will be unlocked - Stopping Marchenko and Protecting the Future). Regardless of the chosen option on the dialogue wheel, your decision is not yet binding. Order of your actions is finally confirmed when you enter either the exhibition hall, or the room with delegates.
Epilogue
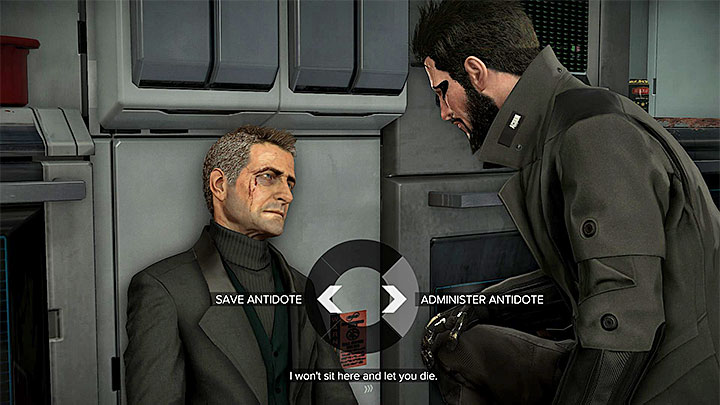
If during the earlier phase of the game you've chosen The Heist (the quest involving reaching the VersaLife corporate vault) and found the Orchid Neutralizing Enzyme in the vault, you can now save Miller's life. Approach him and during the conversation decide to use the antidote. The enzyme can be also saved for later, in case you haven't been able to reach the delegate room in time, as they will also be poisoned with the Orchid.
If you won't administer the enzyme or you just don't have it, Miller will die, albeit his death won't have any influence on the two final quests.
- Deus Ex: Mankind Divided Game Guide
- Deus Ex Mankind Divided: Game Guide
- Deus Ex Mankind Divided: Apex Convention Centre Quests and maps
- Deus Ex Mankind Divided: Map of the Apex Convention Centre
- Deus Ex Mankind Divided: Securing the Convention Centre - main quest
- Deus Ex Mankind Divided: Endings - What Should I Know How To Unlock the Best Ending
- Deus Ex Mankind Divided: Stopping Marchenko - Main Quest
- Deus Ex Mankind Divided: Protecting the Future (Stopping Marchenko) - Main Quest
- Deus Ex Mankind Divided: Apex Convention Centre Quests and maps
- Deus Ex Mankind Divided: Game Guide
You are not permitted to copy any image, text or info from this page. This site is not associated with and/or endorsed by the developers and the publishers. All logos and images are copyrighted by their respective owners.
Copyright © 2000 - 2025 Webedia Polska SA for gamepressure.com, unofficial game guides, walkthroughs, secrets, game tips, maps & strategies for top games.
