Civilization 6: Terrain - tips
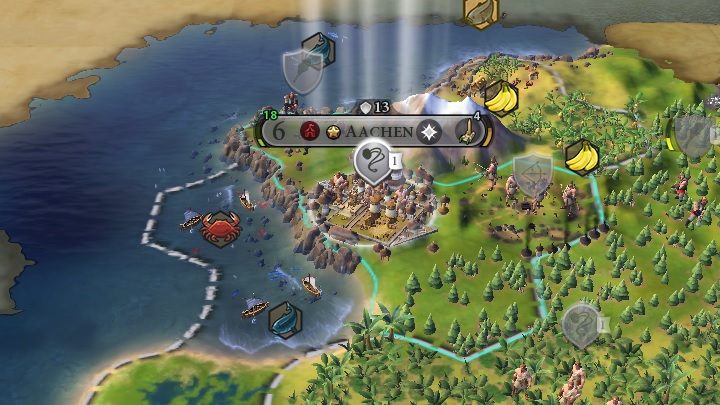
The chapter below of Civilization 6 game guide thoroughly describes each type of terrain on the map in Civ 6. You will be able to make instant decisions regarding building cities after just looking at the map's characteristics.
Keep in mind that each tile might represent a completely different type of terrain. The terrain type determines its characteristics that might affect its usefulness (forests etc). Advantages shown in the tables only apply when the tile is within borders of your territory.
Terrain types
The section below describes all terrain types in the game. Depending on a type, the terrain might be friendly - it might have food, gold, or production points. Some terrains are completely useless, while others can be used in various ways.
Type | Advantages | Usefulness |
Grasslands | +2 Food | High. The main terrain to build a city on. The city should develop fairly quickly even on little tiles. |
Grasslands (hills) | +2 Food +1 Production | High. One of the most important terrains. Make settlements as soon as possible. |
Desert | None | Useless. Often appears near coasts, so if you settle by the water, you will sooner or later acquire desert tiles. |
Desert (hills) | +1 Production | Medium. Production bonus is useful, but its value is not high enough. |
Mountains | None | Tactical. Mountains cannot be crossed, so if you settle near them, your town will be harder to reach by enemies. |
Ocean | +1 Food | Medium. If you settle by the ocean, you can acquire vast expanses of ocean. Even though you cannot build there, you will receive Food bonus while expanding your settlements. |
Plains | +1 Food +1 Production | High. Similar to grasslands, but the bonus is split into two. If you don't have a better option, settle on plains. |
Plains (hills) | +1 Food +2 Production | High. More Production bonus and the same Food bonus. A constant rate of development with a high production speed of units and infrastructure. |
Snow | None | Useless. If you have to acquire this terrain, try to build on it, since it won't be of much use. |
Snow (hills) | +1 Production | Medium. Just like any area with hills, if provides you with Production bonus. |
Coast | +1 Food +1 Gold | High. One of main advantages of settling near large bodies of water is a passive Gold bonus at the beginning of the game. Moreover, you can find sources of food there (seafood). |
Tundra | +1 Food | Medium. With no better options, you can settle there, but population growth will be rather slow. |
Tundra (hills) | +1 Food +1 Production | High. Hills add a typical bonus - an extra Production point. Even if the population growth is slow, it will make catching up easier. |

Regardless of a combination, the best solution is to settle by the coast, near a mountain that will protect you from enemies. The terrain should consist mostly of grasslands and plains. If you don't get such a combination, try to pick the best one you can, as long as moving your settlers there takes no more than two turns. Obviously, the terrain can have advantages or disadvantages (explained in the next section). You need to calculate what's more beneficial, because a location with better terrain combination is much more beneficial than making settlements on a desert just to have access to an oasis.
Terrain features
The section below contains a thorough description of features that might occur on almost any terrain type described in the previous section. Terrain features affect the terrain's production potential in each tile, usually at the cost of possible upgrades. Keep in mind that the features may increase cost of movement on the tiles and often increase their attractiveness. Remember that after developing proper technology, you will be able to delete the features to use the terrain to your advantage.
Feature | Advantages | Comment |
Forest | +1 Production | The easiest feature to delete. As long as you can use the forests to your advantage, you should keep them. Movement cost applies to every player, so forests can buy you some precious time in case of an invasion. |
Rainforest | +1 Food | A small bonus that can save you in the early parts of the game. You can never have too much food, so think twice before you get rid of them. Finally, they can slow your enemies down, so they are worth keeping a bit longer just for defensive purposes. |
Oasis | +3 Food +1 Gold | The best possible feature. Unfortunately, it is usually surrounded by desert, so its attractiveness drops down. If you manage to get an oasis along your expansion, it will come in handy. Obviously the game might generate a map where building settlements near an oasis is the only way to enter the game. |
Marsh | +1 Food | A minor bonus, use it to slow down enemy units. If it occurs on a good terrain, it is worth keeping. |
Ice | None | Ice is important in terms of strategy, similarly to mountains. It cannot be crossed, so build settlements near it to be sure that enemies will not attack you from that side. |
Flood Plain | +3 Food | Very high Food bonus can help you develop. If you come across this feature, use it as long as possible. |
Remember not to delete terrain features too carelessly. You might be unable to build one of crucial districts or wonders just because you have deleted a feature. There aren't many buildings that require "unfriendly" terrain but it is always worth checking out.
Movement limitations
The table below shows the movement points required to cross various tiles. As you can see, flat terrain is the easiest to cross. If there are hills on the area, moving across it costs twice as much. Each feature increases the cost of movement by 1 point.
Terrain | Movement cost |
Flat | 1 |
Hills | 2 |
Flat + Feature | 2 |
Hills + Feature | 3 |
Water access
Fresh water access is one of the main factors that determine population growth and its speed. Remember to choose areas that have plenty of fresh water, the more the better. It will let your city grow without buying extra buildings. If a city is located far from any source of water, it quickly requires new buildings to grow. If you don't buy them, you will receive a development penalty which will hinder acquiring new citizens.
The best sources of fresh water include rivers, lakes, and oases, but none of them are available, build your settlements near the coast. The bonus you will receive is not going to be as high, but it will buy you some time to build upgrades.
If your current conditions allow you to fully use fresh water, you can build a district with an aqueduct on an area adjacent to the center. You will only receive a bonus if a river, a lake, or a mountain is adjacent to the city center. A district receives a bonus that's more beneficial to the city, so for areas abundant in fresh water, the maximum amount of housing areas is 7. If you haven't had access to fresh water, the amount of these areas is reduced to 6.
Water access | Housing areas |
No access | 2 |
Coast | 3 |
River, lake, oasis | 5 |
No body of water + aqueduct | 6 |
Coast + aqueduct | 6 |
River, lake, oasis + aqueduct | 7 |
Remember that some natural wonders can be a source of fresh water.
You are not permitted to copy any image, text or info from this page. This site is not associated with and/or endorsed by the 2K Games or Firaxis Games. All logos and images are copyrighted by their respective owners.
Copyright © 2000 - 2025 Webedia Polska SA for gamepressure.com, unofficial game guides, walkthroughs, secrets, game tips, maps & strategies for top games.
