Seven The Days Long Gone: Quests in zone 3 (Visa 03)
Last update:
This page contains walkthroughs for side quests in Seven: The Days Long Gone that can be unlocked during your exploration of the third zone on Peh island. These terrains are available for those who have visa 03. This zone is definitely the biggest one out of all of them. Besides its unique locations (e.g. Our Savior's Temple) it connects all other zones.
- Taken
- Stand On Ceremony
- Power Underwhelming
- Butch s Day Off
- Deep in the Mire
- You Scratch My Back
- Blind Bessy
- The Sozzled Mosquito
- Cirrhoside
- Cures Abound
- Veil of Darkness
- The Lost Disciple
- DIY
- The Path to Enlightenment
- Fistlewick and Scotch
- The Saboteur
- MDD
- Double Cross Marks the Spot
Taken
How to unlock: Examine the burned house in zone 3 or speak with Yana imprisoned in the Mire.
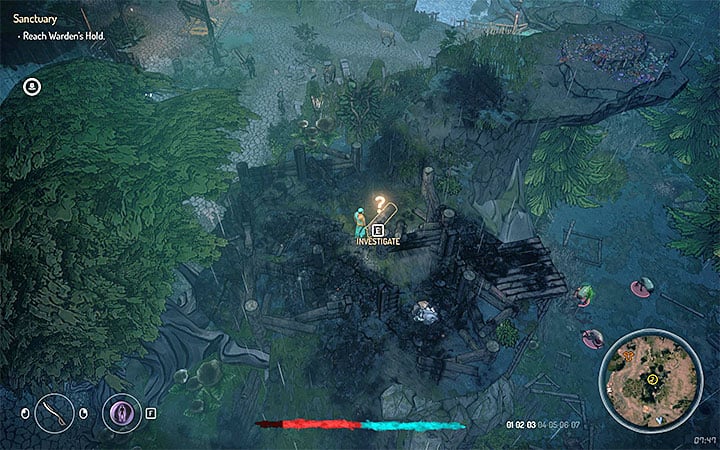
The most obvious way to start this quest is to find and examine the burned house, presented in the picture - you can find it near one of the main paths in location called Malkin's Pass in the center of zone 3. There, you can find a note that informs about an abduction.
Go west and use Sense Mode to locate the place on the stone ledge (examine it) near the main path. The message points you to the destroyed bridge.
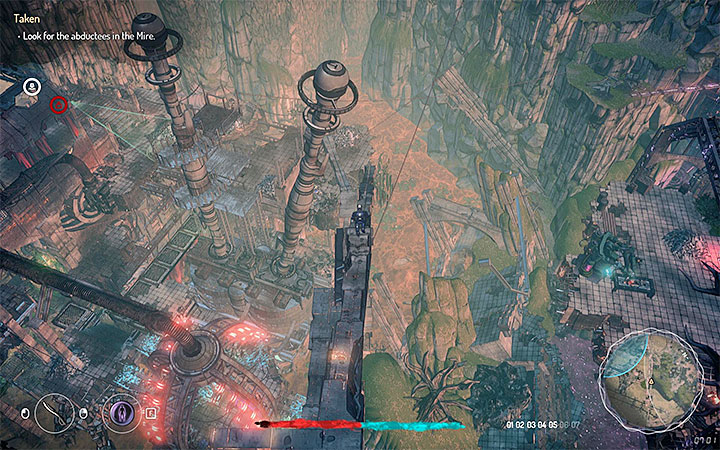
The destroyed bridge is north-west from the place where you found the second clue. The third, last, message is on that bridge.
Jump on the destroyed bridge and go CAREFULLY towards the Mire. Thanks to that you can reach the zealots' camp presented in the picture. You don't have to fight with them. Try to avoid the enemies. However, this can be difficult because there are a lot of them in the ruins (use stealth attacks if you get a chance).
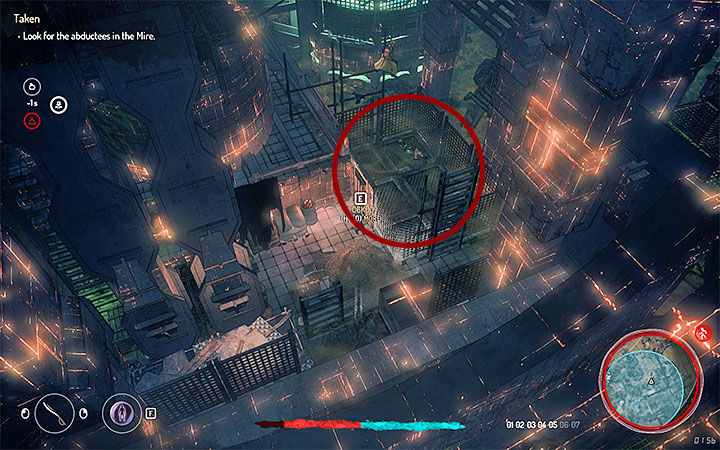
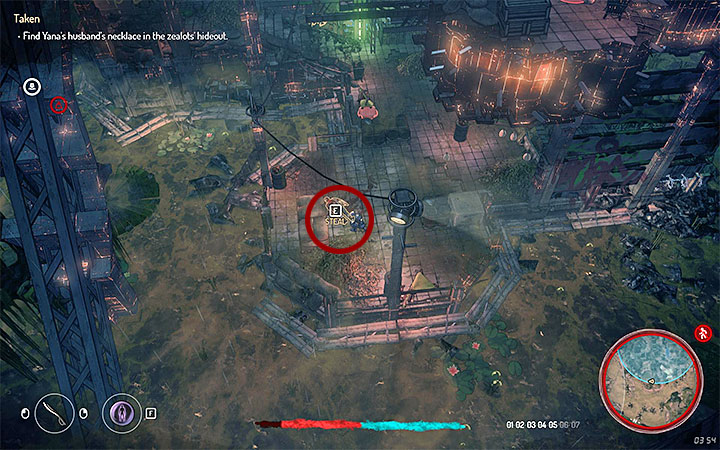
Reach the lowest floor of the ruins and go to the big cage from the picture 1 - Yana is imprisoned in that one. The cage can be opened with a lockpick or a key that you can take from one of the zealots. Speak with dying Yana and take Yana's Wedding Necklace. You must also find her husband - his corpse is in the center of the camp where you can find the biggest group of zealots (picture 2 - north edge of the blue circle on the map). Search the man's corpse and take Yana's Husband Wedding Necklace. Warning - If you found this place by accident then you can skip the first few steps during which you had to find messages about the abduction.
Leave the Mire. In order to complete this quest, you must head to the hunters' camp located in zone 6 (go north through the huge bridge and turn north-west by climbing on the stone ledges that are above). Give the necklaces to Yantar.
Stand On Ceremony
How to unlock: Speak with Mitar in zone 3.
Mitar can be found with a group of other people near one of the main paths in the west part of zone 3, near the security checkpoint 04. Mitar asks Teriel to collect larvae that are necessary to prepare an ointment used in burial rituals. Larvae can be found in the Mire in zone 3. Examine bushes similar to the one from the picture (there are more than 6 of them in the Mire). Collect 6 larvae and go back to Mitar.
Lastly, you have to head to Our Savior's Temple located in the east edge of zone 3. Meet with the participants of a burial ceremony and participate in it. You receive 100 auryte, Core Upgrade Toxic I Schematic and Jar of Jasin.
Power Underwhelming
How to unlock: Speak with Dvir in zone 3.
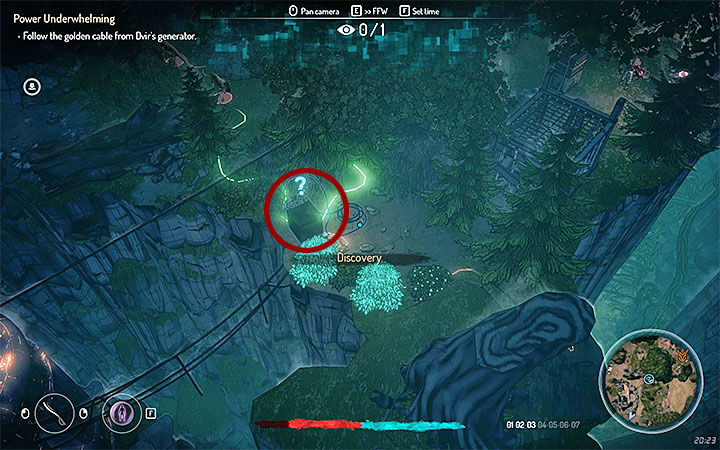
A merchant called Dvir stays in a small camp in the west edge of zone 3, near the security checkpoint 04 that leads to zone 4. You can help him to solve a problem with power. Activate Sense Mode and notice the golden power cable. Follow it. You can be attacked by various monsters, e.g. giant spiders and hyenas. Face them or run away. Stop near the crates similar to the one from the picture - scan them in Sense Mode and examine. This allows you to determine your next destination.
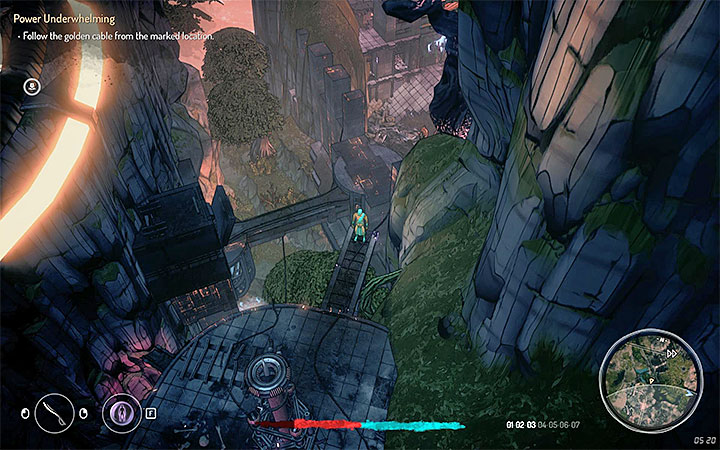
The golden cable leads to the Mire. When you reach one of the crates, you will be near a rope that goes across the chasm. The golden cable goes along it. Slide down the rope (you will go above the slaughterhouse). Keep following the golden cable. Avoid infected people and watch out for the energy sentry from the location presented in the picture - it's a trap. It can electrocute you and deal heavy damage if you stay near it for too long (quickly run past it). Your destination is the bandits' camp behind the sentry. The bandits use a ghoul to create energy.
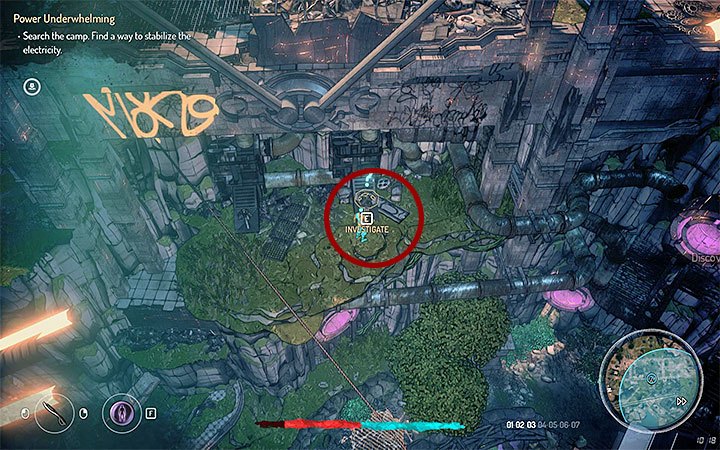
You should kill the bandits from the camp because that will make things easier for you (if you don't want to fight with them, you can sneak above their heads). Don't attack the ghoul in the "spinning wheel", even if the creature starts running towards Teriel (run away and let the monster go back to the water wheel). The creature's death won't solve Dvir's problem.
Climb on the cliff adjacent to the bandits' camp. Reach the place where a valve should be (that place is presented in the picture above) and investigate it in Sense Mode.
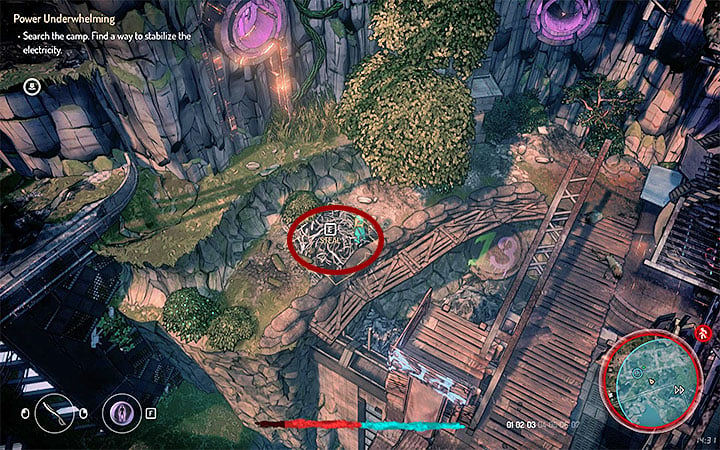
You must find Rusty Valve. It is located under the stone ledge where the empty valve slot is - this place is presented in the picture (a garbage heap). Take the valve and go back to where it is supposed to be. Turn it to make water run again.
You can now leave the Mire and go back to Dvir. The man is thankful to you and rewards you with 100 auryte and a Nectar vessel. You also unlock Butch's Day Off side quest.
Butch s Day Off
How to unlock: Speak with Dvir after completing Power Underwhelming quest or find Butch imprisoned in the Mire.
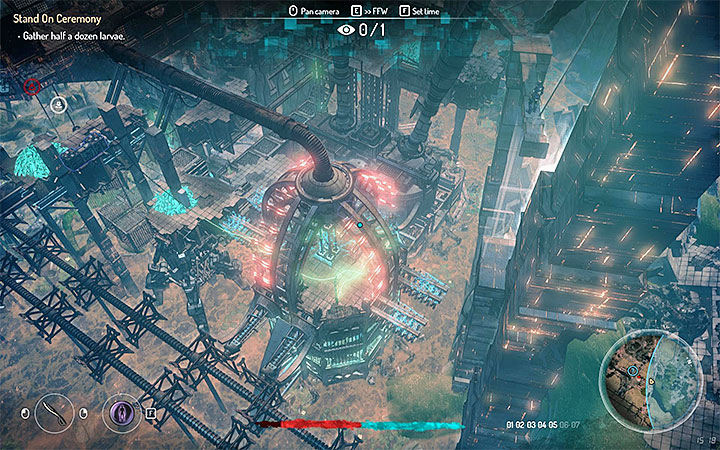
The more obvious way to start this quest is to speak with Dvir again after you solved his problem with power. This time, he wants you to search for Butch. He should be somewhere in the Mire located in the north-west part of zone 3. Reach the destroyed bridge and start slowly going down by using the fragments of the destroyed construction. Your destination is the zealots' camp presented in the picture (to be more precise, you have to reach the giant electric cage). You can't defeat the zealots - focus on stealth.
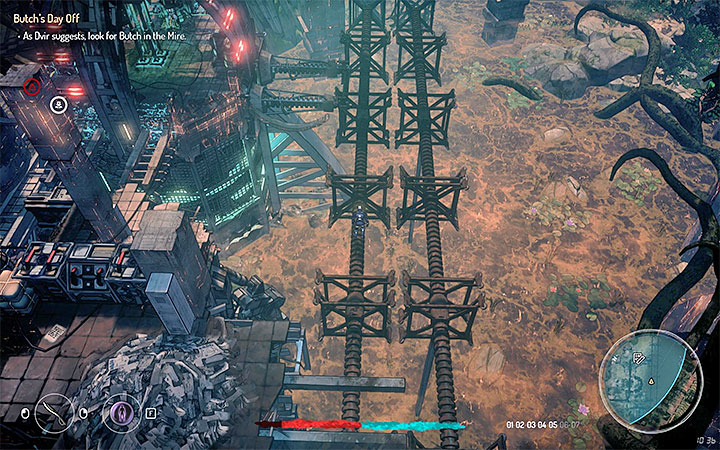
Reach the aforementioned cage. Don't go through any of its main entrances because Teriel will get electrocuted. Instead, get on the metal elements on the side (see the picture) but don't move too fast because you can fall down. Go through the hole and speak with Butch about a way to set him free.
Warning - You can start this quest by going right to Butch. You don't have to meet with Dvir and complete a different quest for him first.
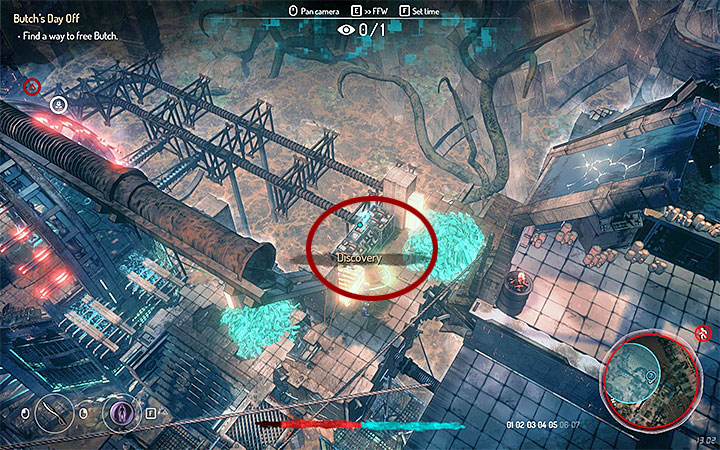
Go back by following the same path and reach one of the safe platforms. Activate Sense Mode to locate the switch presented in the picture (one of the cables leads to it). Reach it and press the switch. Butch is thankful to you. Go back to Dvir to complete this quest. He gives you a discount and 50 auryte.
Butch stands near Dvir. You can unlock another side quest - Faulty Production. Warning - after starting this quest you are automatically moved to another location (the slaughterhouse!)
Deep in the Mire
How to unlock: Find one of the discovery logs in the Mire.
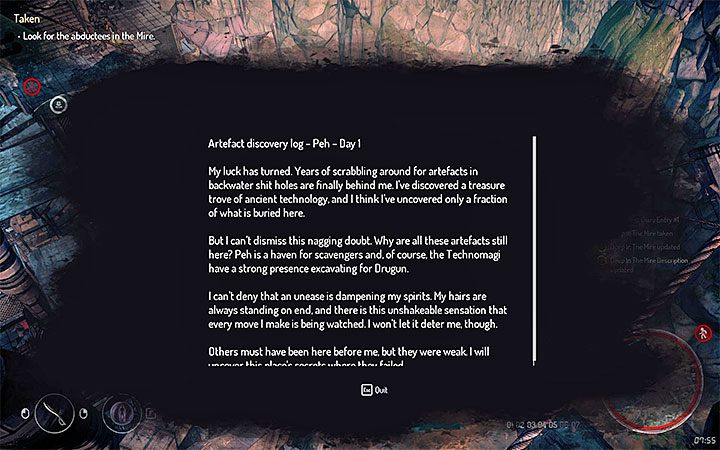
You should do this quest while you are doing the one described above because it is also connected to the zealots' camp in the Mire. In zealots' camp you can find Discovery Logs (the picture above shows an example). Use Sense Mode to locate them. You have to find 3 logs.
After that you can face a demon that is slightly more powerful than the regular monsters. Defeat the enemy and get Energy Passive ability. You can also go under the bridge where the security checkpoint 04 is and watch a cut-scene that shows Technomagi assault.
You Scratch My Back
How to unlock: Speak with Butch after saving him during Butch's Day Off side quest.
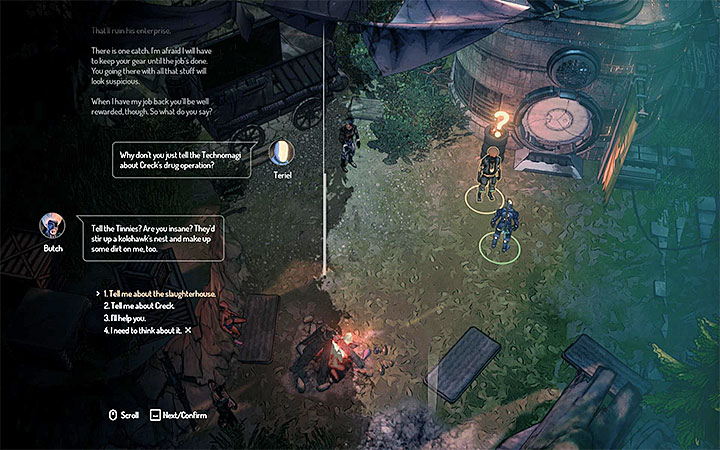
You can talk with Butch only after saving him from the cage in the Mire. You also need to complete Butch's Day Off side quest. He stands next to Dvir. You can promise Butch to help him (see the picture) and decide to infiltrate the slaughterhouse.
Important note - Accepting this quest moves Teriel automatically to the slaughterhouse. You can't use any of your items (weapons, pieces of armor, medicaments etc.) and abilities. You get your gear back after completing the quest. However, you can't leave this location until you finish this mission. Save your progress before you accept it!
Note - During your stay in the slaughterhouse (a labor camp) you have to pay attention to announcements that you can hear from the speakers. When your working hours are over, you must go to the room with beds or you can speed up time. Guards can take you there by force if you ignore these announcements (you will lose a little bit of health).
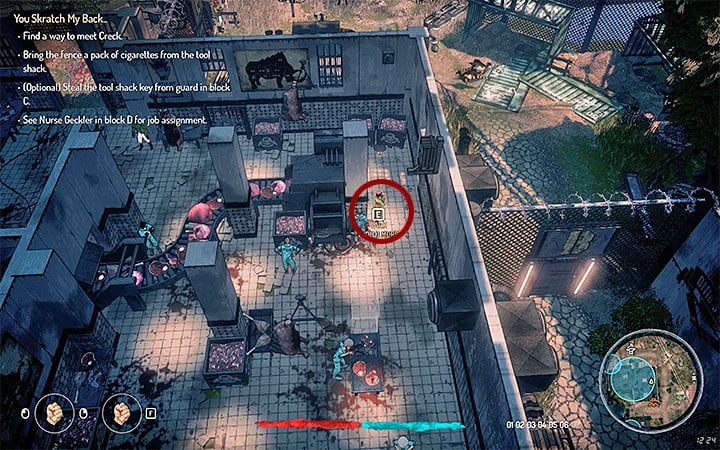
Leave the building. You can speak with Dina, she stands on the back of the building, and unlock Blind Bessy side quest - focus on this quest before you finish your business in the slaughterhouse.
Go to block D. Speak with Nurse Geckler and receive Bandelisk Vaccine. You have to use them on three bandelisks. Avoid being detected by the animals - use stealth and press the interaction button when you get closer to one of the animals. You are rewarded with an empty bottle - this item will be useful during Blind Bessy quest.
Speak with Fence Noltar, he leans on the wall of block C. You learn that he wants to smoke a cigarette. You can find them in the shack behind block C but it is locked. You have the following options:
- Get Slaughterhouse Tool Shack Key by pickpocketing a guard in block C (see the picture).
- Use lockpicks to open the shack. Pick up any of the items that you can find in the slaughterhouse (e.g. bandelisk meat), speak with Noltar, open the trading screen and buy Metal Lockpick. Use it to open the shack.
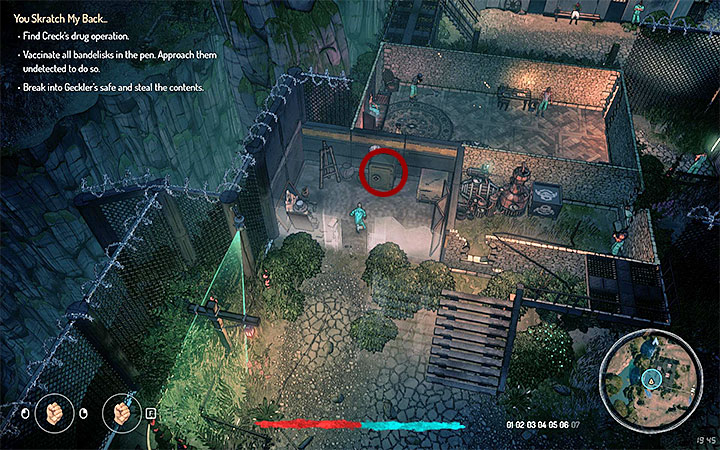
Take Cheap Cigarettes. Go back to Noltar. You can now talk with Creck and get another quest. You have to break into Nurse Geckler's safe. Enter block D through a window, activate Sense Mode and investigate distillery.
The safe is in the room presented in the picture. Activate stealth mode BEFORE you enter the courtyard. Avoid the guards and the cameras (hide in bushes). Enter the storeroom and start a lockpicking mini-game. Take Nurse Geckler's Portraits and bring them to Creck.
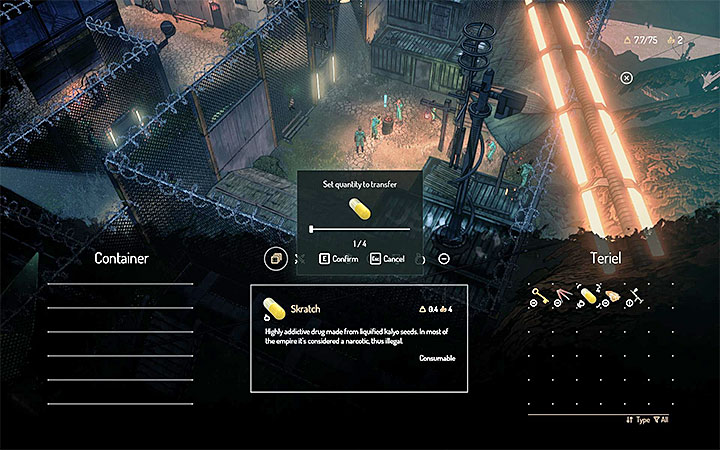
The second task that you get from Creck is related to Scratch that you received from him. Place the pills into inventories of the marked characters. Reach them in any order, get behind their back (use stealth if they are vigilant) and select pickpocketing option. Each "victim" needs only one pill (example in the picture). Complete the task and go back to Creck.
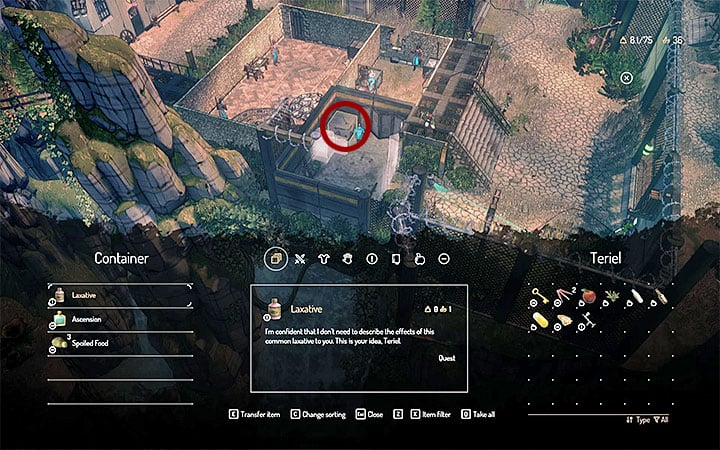
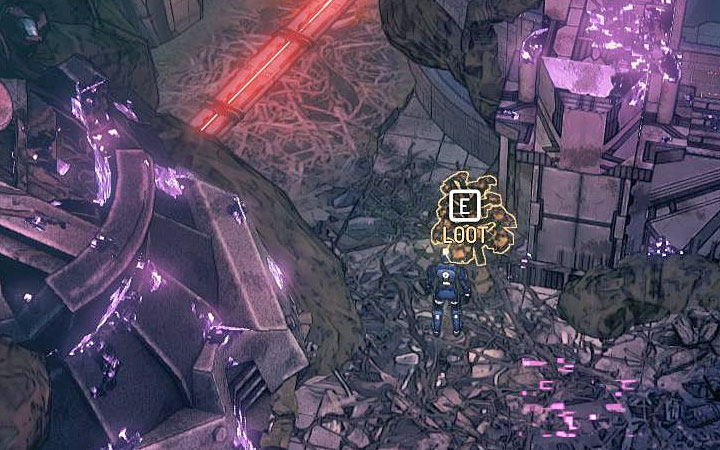
The last part of this quest is about sabotaging the previously found distillery (located in one of the rooms on the ground floor of block D). Go back to the storeroom with Geckler's safe. Laxative is in the crate marked in the picture. Pick it up, head to the distillery and pour it into the device.
Watch a cut-scene (it starts playing automatically after you complete all steps). After that you have to speak with Butch and get your gear back (you need to place everything back into the slots). You also receive a Nectar vial and 50 auryte.
Blind Bessy
How to unlock: Speak with Dina in the slaughterhouse.
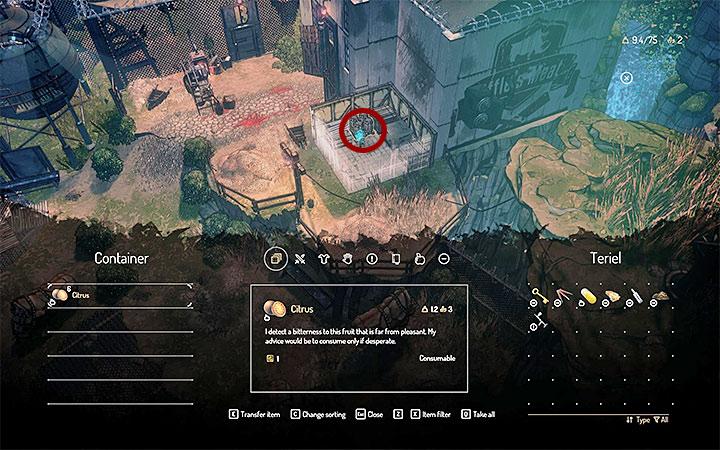
This quest can be started once you get inside the slaughterhouse during You Scratch My Back... side quest. Speak with Dina, she is near the "starting" block (the one with mattresses). You need to bring her three types of unique ingredients:
- 6 Citrus - They are inside of one of the crates in the shack, the one with the cigarettes (see the picture).
- Empty Bottle - Complete Nurse Geckler's request during which you had to vaccinate bandelisks (available during You Scratch My Back... side quest).
- Bandelisk Sh*t - Go to the place where bandelisks are grazing and click on any of the feces.
Collect the ingredients and go back to Dina. Wait one day (you can, e.g. speed up time). She gives you a bottle of Blind Bessy - it can be useful during The Sozzled Mosquito side quest in Everglade Swamps.
Note - You can get more bottles of this liquor by collecting ingredients again (this time you need to find different ones - 3 Citrus, 1 Bandelisk Sh*t, auryte) and place them into the stash near the slaughterhouse's north fence.
The Sozzled Mosquito
How to unlock: Speak with Mungo in The Sozzled Mosquito in Everglade Swaps.
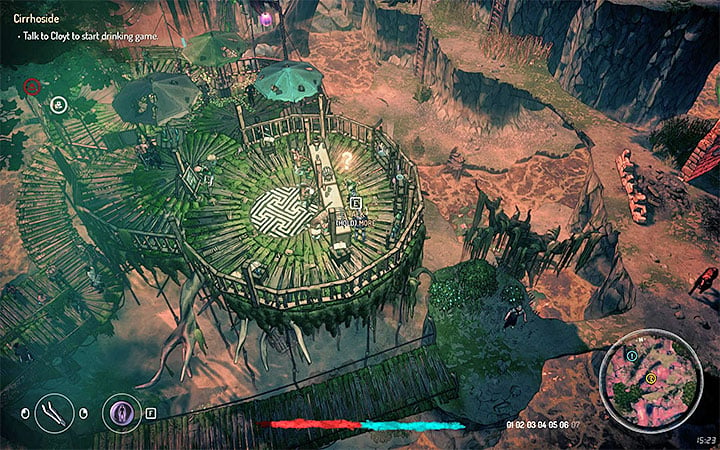
Mungo works in The Sozzled Mosquito located in Everglade Swamps in the zone 3 (the picture above). He can give you a quest during which you have to bring him a unique beverage. That drink is Blind Bessy from the side quest with the same name (description above). If you don't have it in your inventory anymore then you can go back near the slaughterhouse and bring Dina new ingredients.
Give the drink to Mungo and receive 100 auryte. This quest won't disappear from your journal. You can give Mungo as much beverages as you want.
Cirrhoside
How to unlock: Speak with Cloyt in The Snozzled Mosquito in Everglade Swamps.
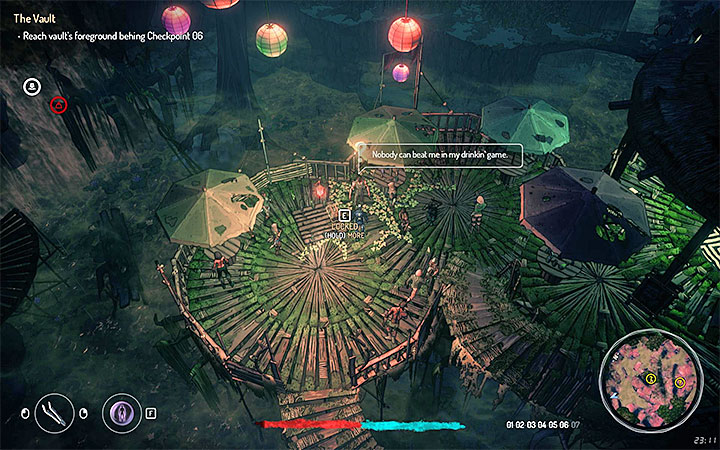
Cloyt stays in The Sozzled Mosquito located in Everglade Swamps in the zone 3 (the picture above). He challenges Teriel to participate in a contest during which you will have to drink the titular (strong) drink. In default, Teriel has no chances in wining this contest because you lose consciousness after the third round and you wake up in trash. However, you can repeat this challenge as many times as you want.
To "survive" the third round you need to get a kolohawk egg and eat it before the contest. This makes Teriel invulnerable to the drink which, in turn, allows you to beat Cloyt. The easiest way to find an egg is to locate kolohawks and kill them (but not all of them have eggs).
Cures Abound
How to unlock: Speak with Kolbrek in Artee village after starting Belly Of The Beast main quest.
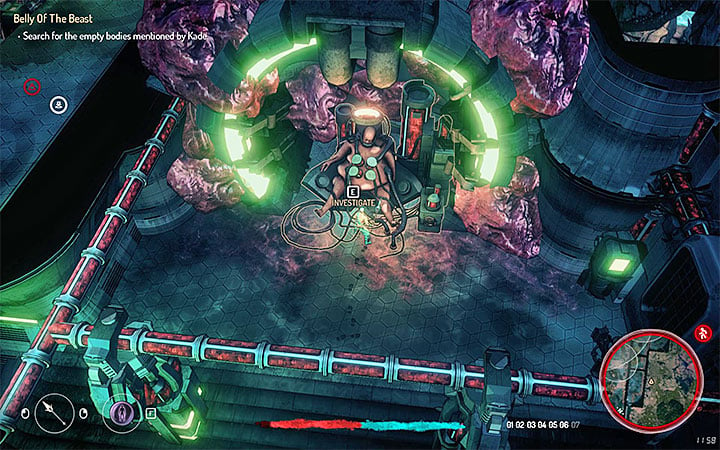
Meet with Kolbrek after starting Belly Of The Beast main quest. During your visit in Our Savior's Temple you have to find an item related to this side quest - a cure for tech rot.
Infiltrate the temple (preferably while wearing a Biomancer's outfit) and reach the lower floor. Find the creature presented in the picture. Interact with it and receive Tech Rot Cure. Give it to Kolbrek. You receive a Nectar vial and 100 auryte.
Veil of Darkness
How to unlock: Speak with Kolbrek in Artee village after starting Belly Of The Beast main quest.
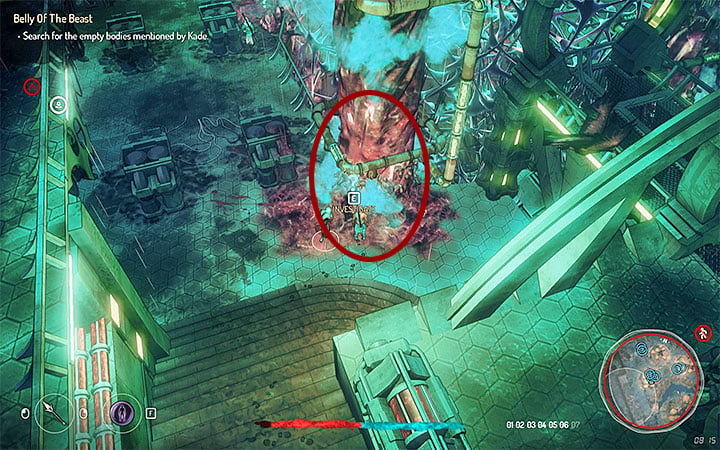
Meet with Kolbrek after starting Belly Of The Beast main quest. During your visit in Our Savior's Temple you can try to destroy an organic shell that blocks sunlight from reaching the swamps.
Infiltrate the temple (preferably while wearing a Biomancer's outfit) and reach the lower floor. Activate Sense Mode and examine any of the neural nodes that are connected to living people. The picture above shows an example.
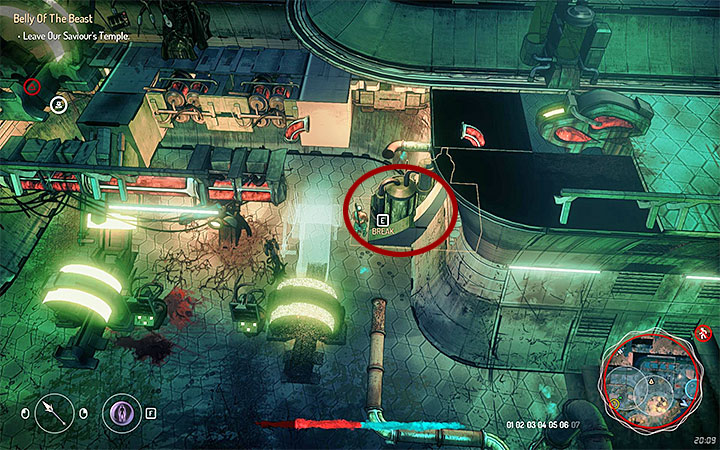
Look around for gas pumps. Again, rely on Sense Mode (example in the picture). Reach the pumps and sabotage them. There are four of them in total.
After that you have to leave Our Savior's Temple and watch a short cut-scene during which the shell gets destroyed. Go back to Kolbrek and receive a Nectar vial.
The Lost Disciple
How to unlock: Speaking with Irdis in Artee village after starting the Belly of the Beast main quest.
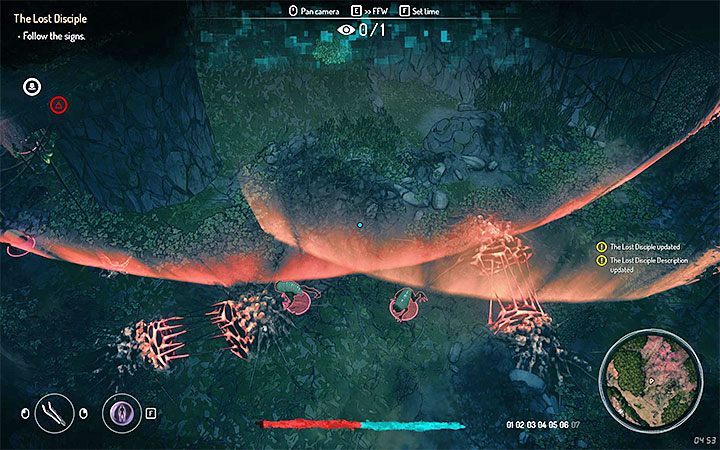
Find Irdis in Artee village and speak with the man. You will be given a task to find his disciple. Leave the village via the elevator and examine the area to the east of it. Artanak will interrupt the exploration a number of times. Waves of energy (as shown in the above screenshot) that can be seen in the detection mode will aid you in your search. Head towards the area from which the waves are coming. You should soon find Ezekiel.
Ezekiel will be hostile - you can defeat him in combat if you want. Once the encounter is over, search his body and reclaim the core (Ezekiel's Core). If you want Ezekiel to live, use the detection mode to pinpoint the location of a weird biomant device. Order Teriel to approach the device and disable it. Regardless of your approach, return to Irdis. For the completion of the quest you will be given a Nectar Vial.
DIY
How to unlock: Speaking with Hinbrik in Artee village after starting the Belly of the Beast main quest.
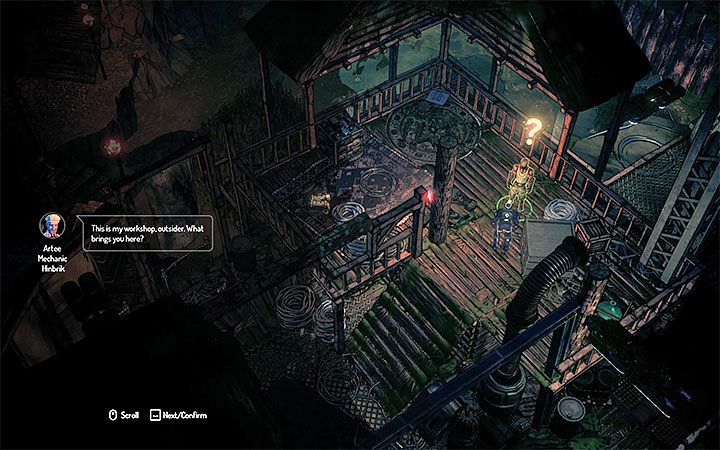
Hinbrik can be found in Artee village, but you should meet with him after you've unlocked the Belly of the Beast main quest. He has a long shopping list and you can start finding the requested items for him. The objects you will be looking for are as follows:
- 33x Duct Tape;
- 28x Magnet;
- 45x Gasoline Container;
- 15x Metal Plates and Wires;
- 66x Metal Rivet;
- 25x Chain.
You can acquire the items from the list through the exploration or by purchasing them from the merchants and/or machines selling crafting materials. Return with the items to Hinbrik to complete the quest (if you want to witness the effects of his work, visit Hinbrik again in the later part of the game).
The Path to Enlightenment
How to unlock: Speak with the quartermaster in Our Savior's Temple.
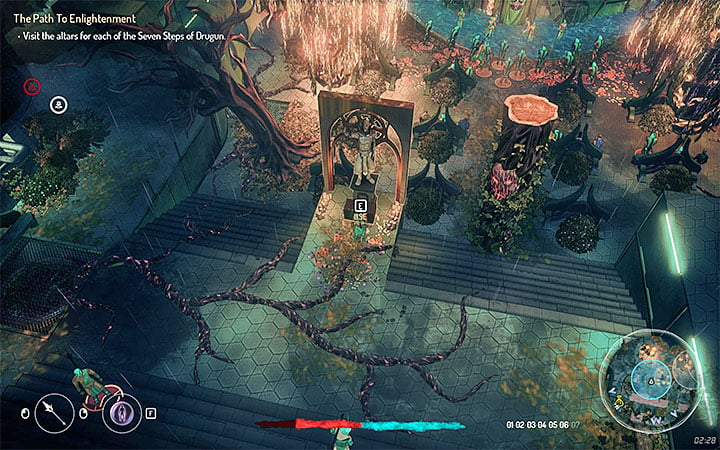
The Biomancers' quartermaster is in Our Savior's Temple's main room (available for anyone). He informs Teriel that you can participate in a pilgrimage. You have to visit seven altars of Drugun that are located in different places on the entire Peh (some of them can be occupied by bandits and monsters!). Reach the altars (example in the picture), interact with them and receive Pilgrimage Memento. Collect all seven and go back to the quest giver.
Note - The altars can be examined even before you start the quest. You don't have to go back to those from which you got a Memento.
Fistlewick and Scotch
How to unlock: Reach the group of bandits near Fistlewick's transport.
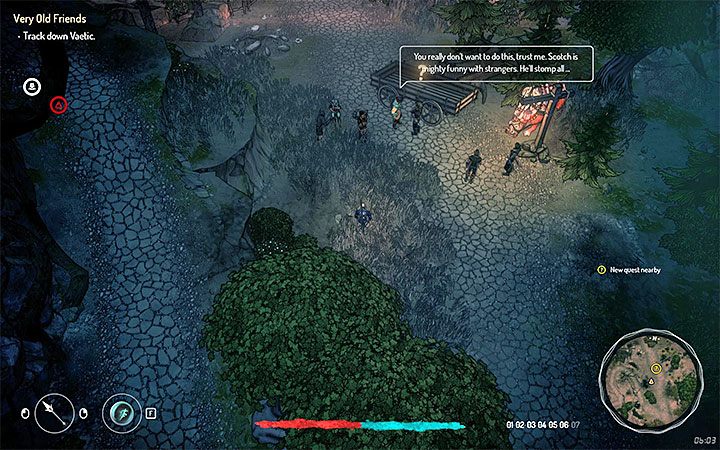
You can unlock this quest on the small road located west from Artee and east from the zone 7. Teriel comes across a group of bandits who surrounded Fistlewick's cart (this place is presented in the picture). You can:
- Decide to attack the bandits. The best way to do that is to perform a stealth attack. Try to kill them one after another (they use Double Techno Swords which are good weapons). If Fistlewick survived then you can meet him again and receive 100 auryte. Besides that you also unlock a free fast travel option to Our Savior's Temple.
- Don't intervene. Fistlewick won't die. You can meet him in the later part of the game - he stands near Our Savior's Temple. You have to pay him if you want to use his service.
The Saboteur
How to unlock: Find the message from the Consortium in Savaash's hideout after completing Memory Lane main quest.
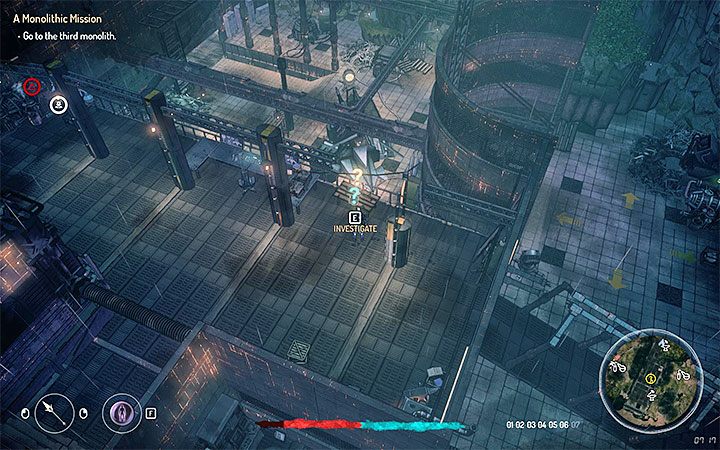
This quest can be unlocked only after completing Memory Lane main mission and contacting the Consortium for the first time. Go back to the loading station in the zone 3, the one that you investigated during Sanctuary main quest where you had to explore Savaash's hideout. The picture above shows the place where you can find a message from the Consortium, a pass and a Consortium Top Hat (note - don't sell or drop this hat, you will need it later!).
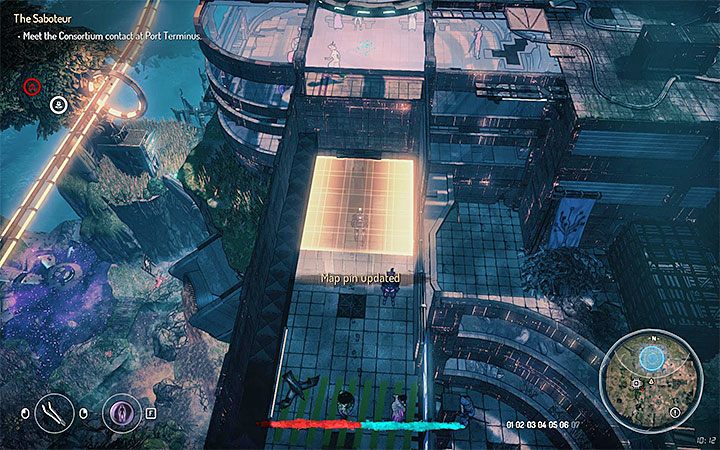
Go to Port Terminus in the Warden's Hold. Show your pass to the guard. Save the game and remove all weapons from your inventory (the ones that you are using too) BEFORE you enter the scanning room (see the picture). If you ignore this step then the scanner can raise the alarm and Teriel will die automatically. You can leave the weapons somewhere near this place and get them back after completing your mission in the port.
Open the inventory, equip Consortium Top Hat and speak with the Consortium representative about the plan.
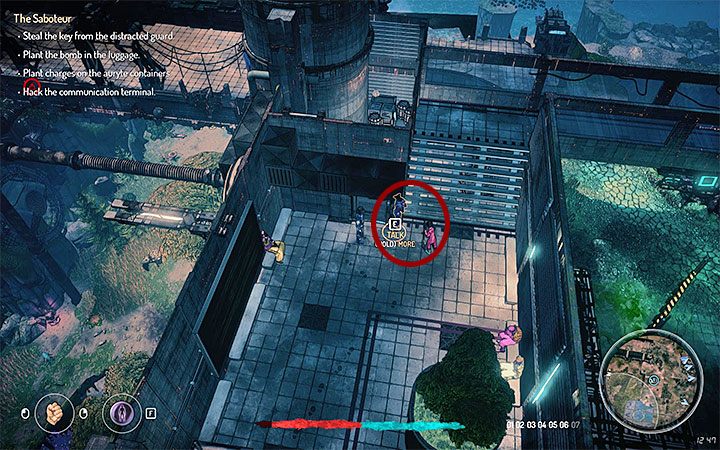
You have to steal a key that will allow you to enter the restricted part of the port. Reach the guard, get behind his back and be sure that no one is looking towards your direction. Then, steal Port Terminus Storage Key. Move forward and use the key at the end of the corridor.
Jump twice to reach the new location. This is a restricted area which means that getting caught triggers the alarm. This can happen even if you wear a Technomagi armor. Avoid the two port guards and cameras. If you get caught, you can try to complete the mission objective as fast as you can. Teriel needs to plant 2 explosives - near baggage and auryte tanks. After that you can leave the restricted area and return to the public part of the port. You can also go back for your weapons.
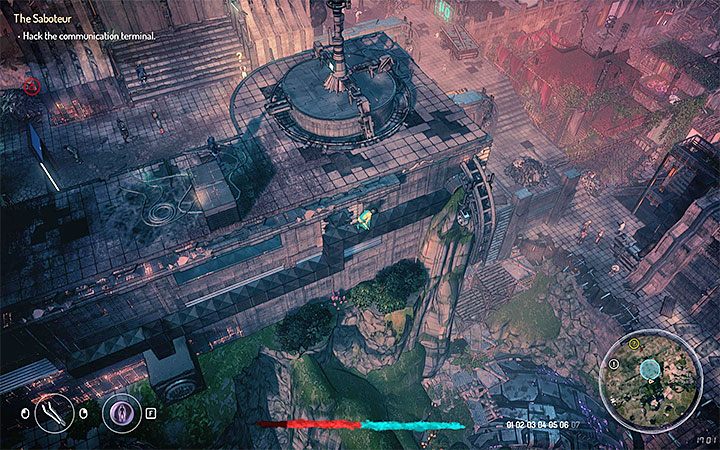
Your new objective is to hack the communication terminal. Catch the vent shafts above and walk on them (see the picture). Reach the rooftop. The terminal is next to the antenna. Eliminate the nearby guard or wait until he walks away. Then, you can try to hack into the terminal. After that you can go back to the Consortium representative.
You can also do something optional: pickpocket up to 4 passengers who wait for the airship. By taking their passes (remove the items from their inventories) you save them from death. Speak with the Consortium representative again and watch the cut-scene that shows the airship crashing.
The ending of this quest has two serious consequences. From now on, you can start collecting auryte scattered around the entire island. This catastrophe also raises prices for the goods offered by the merchants. You can decide to complete this quest in a later stage of the game.
MDD
How to unlock: Speak with the technomagi in the visa control.
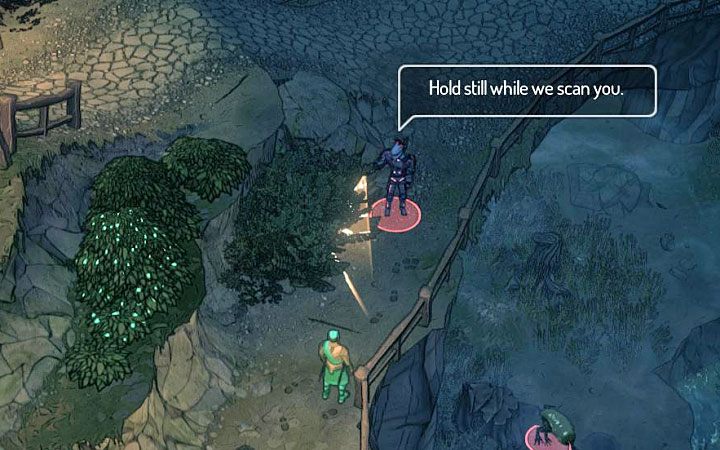
During the exploration of zone 3 of the island, you can be stopped by the technomagi from the visa control (as shown in the above screenshot). The described quest will begin only if you lack the 03 visa permitting you to travel through this part of the island. The technomagi may refrain from murdering Teriel if he completes a task for him. The task requires you to reach a nearby bandit camp and prevent the bandits from using the title MDD device, disrupting the elements of the technomagi equipment.
You can either sneak into the camp or fight against the bandits. The most important thing to do here is to locate the switch that disables MDD (use the detection mode). Once you turn the MDD off, technomagi will appear in the camp and will help you deal with the rest of the bandits.
Note - examine the body of the leader of the bandits (once you kill him on your own or the technomagi do so). This will unlock the Double Cross Marks the Spot quest.
Note - completing this quest won't solve the problem with the lack of visa 03. If you encounter another technomagi without it while in this zone, Teriel will be attacked without a warning.
Double Cross Marks the Spot
How to ulock: Finding a note at the corpse of a bandit leader during the MDD quest.
Once you complete the described above MDD quest, look for the body of the bandit leader in the camp and collect a note concerning the Bald Bob secret locker. You can reach it in two ways:
- Look for another note, hidden in the trunk of a tree on a small island. Inside you will find a note telling you that Bald Bob's secret locker can be found to the west of this location, in the kolohawk nest.
- Head to the excavation site in zone 07 (try to get the worker's outfit to prevent the technomagi from bothering you) and look for Bald Bob. Don't try to speak with him, wait for the nightfall instead (you can fast-forward the time) and follow him to his resting place. Return there the following day and examine the area to find his diary with the information about the locker.
Regardless of your method, you must reach the kolohawk nest and search for the locker. You can set the correct combination to open the locker by reading the diary or by using a lockpick.
- Seven The Days Long Gone Game Guide
- Seven The Days Long Gone: Game Guide
- Seven The Days Long Gone: Side Quests
- Seven The Days Long Gone: Quests in zone 1 (Visa 01)
- Seven The Days Long Gone: Quests in zone 2 (Visa 02)
- Seven The Days Long Gone: Quests in zone 3 (Visa 03)
- Seven The Days Long Gone: Quests in zone 4 (Visa 04)
- Seven The Days Long Gone: Quests in zone 5 (Visa 05)
- Seven The Days Long Gone: Quests in zone 6 (Visa 06)
- Seven The Days Long Gone: Technomagi contracts
- Seven The Days Long Gone: Remaining quests
- Seven The Days Long Gone: Side Quests
- Seven The Days Long Gone: Game Guide
You are not permitted to copy any image, text or info from this page. This site is not associated with and/or endorsed by the developers and the publishers. All logos and images are copyrighted by their respective owners.
Copyright © 2000 - 2026 Webedia Polska SA for gamepressure.com, unofficial game guides, walkthroughs, secrets, game tips, maps & strategies for top games.
