Seven The Days Long Gone: Quests in zone 2 (Visa 02)
Last update:
This page contains walkthroughs for side quests in Seven: The Days Long Gone that can be unlocked during your exploration of the second zone on Peh island. These terrains are available for those who have visa 02. Zone 2 is uninhabited but, despite of that, it has a lot of activities. The most important locations are in the north and east parts - Mortbane village and an arena.
- The Birdcage
- Burden of Leadership
- Ancient Monolith
- A Monolithic Mission
- Poor Sister of Mine
- Hunting the Treasure
The Birdcage
How to unlock: Speak with the arena's owner near the Birdcage.
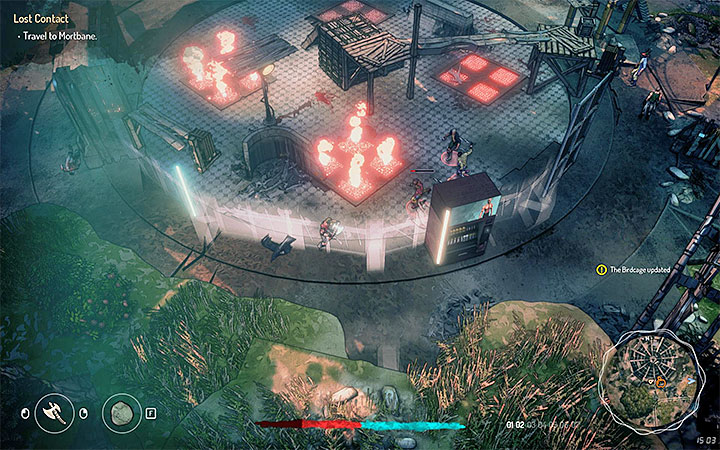
The Birdcage is a combat arena. It is located in the north part of zone 2. You can come across it while you are heading to security checkpoints 02 and 03. Speak with its owner to learn about rules and show your interest in participating in fights. You can choose from two types of fights:
- One on one - Entry fee: 10 auryte. Fight with your enemy however you want. After that you must go back to the arena's owner and receive your reward - your first victory grants you Small Potency Booster Syringe Schematic.
- Free for all - Entry fee: 20 auryte. Teriel must be the last one standing. After that you can take your reward - your first victory grants you Pommel Upgrade Cooldown I Schematic.
A few useful tips for arena fights:
- There are four places on the arena with metal bars that emit fire at regular intervals (example in the picture). Stay away from them. However, the moment in which fire comes out is easy to spot.
- You should take items from defeated enemies. You can also search corpses that were here from the beginning.
- Start free for all fights by running away from enemies and standing behind obstacles. Let them kill each other and deal with those (injured) gladiators who are still standing on the battlefield.
- Fights can be replayed as many times as you want. This quest won't disappear from your journal.
What matters most is to win at least one 1vs1 fight and one Free for all. When you try to leave, you will meet Graith. He invites Teriel to fight in the Crucible and gives you an invitation. This is the beginning of Forged in the Crucible quest.
Warning - If you want to skip fights in the Birdcage or you don't do well then you can steal the invitation from Graith by pickpocketing him.
Burden of Leadership
How to unlock: Speak with sheriff Whitaker in Mortbane, overhear a conversation in Mortbane or find mayor Hucknell.
The goal of this quest is to find Mortbane's mayor, Hucknell. You can start this quest in a few different ways. The easiest way is to meet with sheriff Whitaker in Mortbane - the rooftop that you reach when you slide down the rope is his default location. The alternative way to start this quest is to reach the church in Mortbane and overhear a conversation about the mayor.
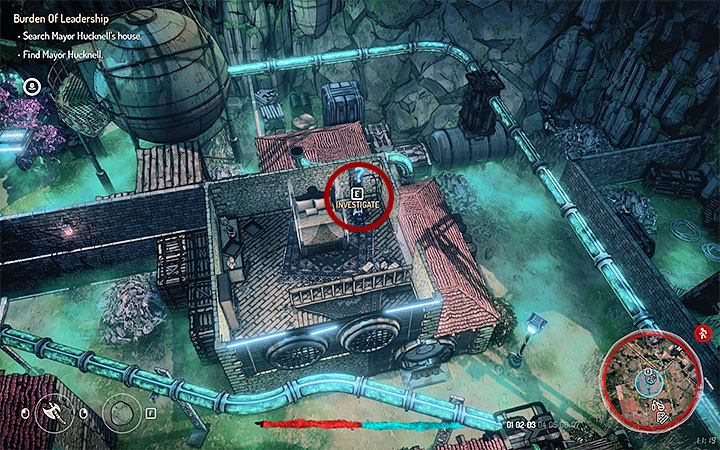
Your first objective is to examine the mayor's house, located in the west part of the city. This is a restricted area - start sneaking or get a Biomancer's outfit (more details in Where and how to get a good disguise? chapter). If you are using stealth then walk on rooftops and climb pipes that run above the buildings. You can get inside by going through the skylight on the rooftop. Use Sense Mode to find tracks. Start with the ground floor and then move to the bedroom on the upper floor. Investigate the clock, marked in the picture, to discover a switch. Hack into the system (hacking mini-game) or use an access card if you have one. Go down on the ground floor and enter the secret room. Here, you can find Health Capacity Upgrade II and two new objects that you can examine (activate Sense Mode again).
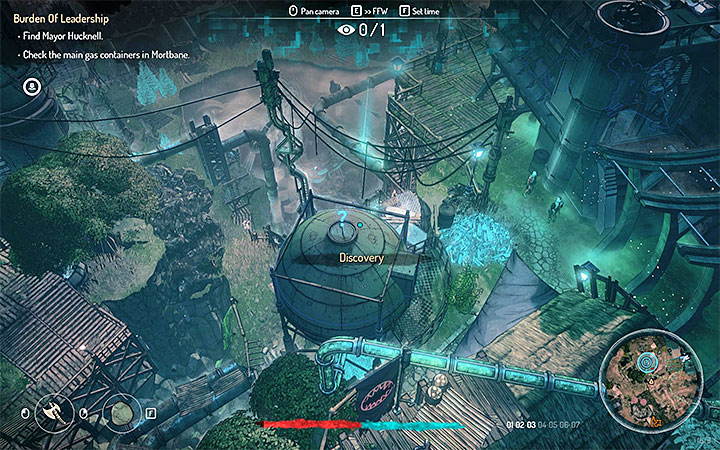
Teriel's new objective is to investigate three gas tanks located in different parts of Mortbane. You don't have to go to each one of them - the most important gas tank is the one located in the south-west part of Mortbane (see the picture). Sneak there or equip a Biomancer's outfit to reach it safely. Activate Sense Mode and use a drill on the door located on the gas tank's wall (get inside quickly if you were spotted).
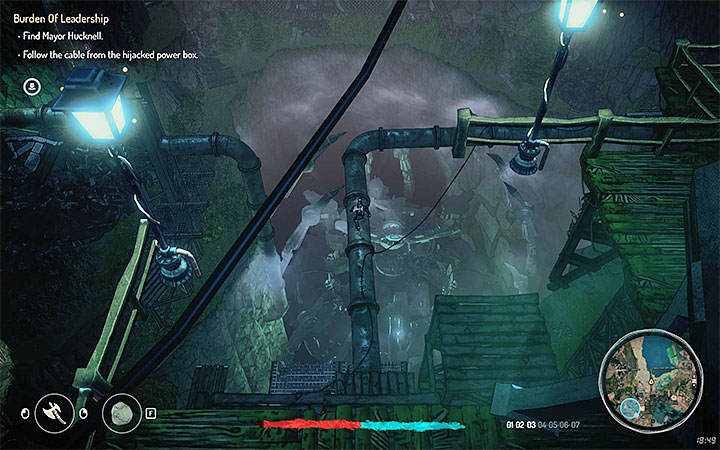
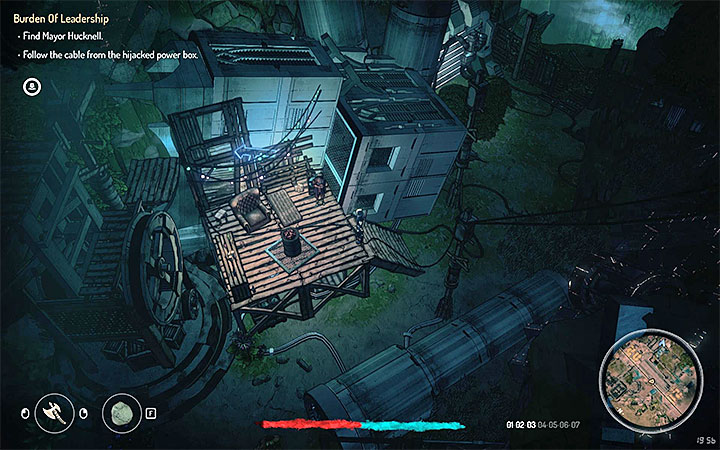
Enter the empty gas tank, go down and continue exploring the area. Examine the fuse box. You must now follow the cables - use Sense Mode to spot them with ease. Walk on the pipe that hangs above a chasm (picture 1). Move slowly so you won't fall down. This allows you to reach the place where mayor Hucknell hides (picture 2) - the west edge of the city. Speak with him to learn his version of events.
Note - If you want, you can skip all above steps and go straight to the mayor. This has no impact on the quest's ending.
The quest has two possible endings:
- Inform sheriff Whitaker about the mayor's hideout. Go back to the sheriff and talk with him. The mayor will get brutally executed. You receive 50 auryte and Guffaw Grenade Schematic.
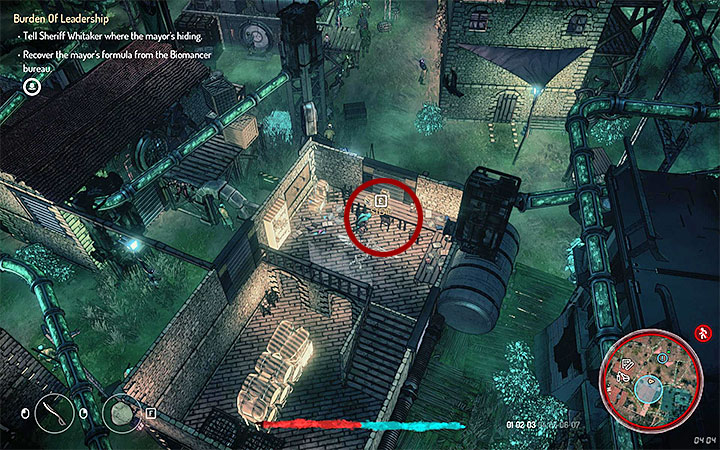
- Fulfill mayor's request and find his formula. Go back to his house and start sneaking or use a disguise. The best way to get inside the house is to go through the skylight in the rooftop. The Mysterious Formula lies on the table presented in the picture above. Take it and go back to the mayor. You won't receive your reward right away. You must meet with mayor in the later part of the game, in Wasted Mosquito in Marshy Ponds. He will give you perfected formula.
Ancient Monolith
How to unlock: Get closer to the monolith in zone 2.
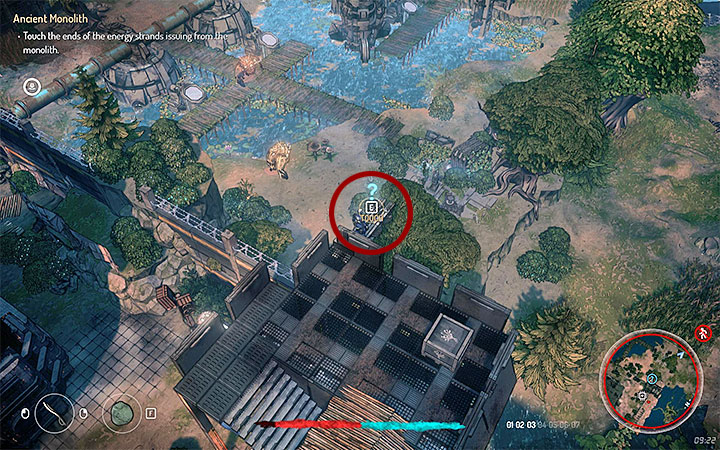
The ancient monolith is located north-west from Lewmer. Artanak will inform you about that when you get closer to it. Activate Sense Mode to detect energy signatures (3 different ones in total). Follow the blue lines to where the energy strands end and examine them too. Run away from Sporeox monsters. The most difficult end of a strand is the one from the picture above. Here, you should equip Technomagi soldier outfit, jump on the Port Horizon's wall and walk on it towards the observation tower.
Examine all signatures and go back near the monolith. Speak with Pilgrim Hidlar to start another quest called A Monolithic Mission.
A Monolithic Mission
How to unlock: Speak with Pilgrim Hydlar after completing Ancient Monolith mission.
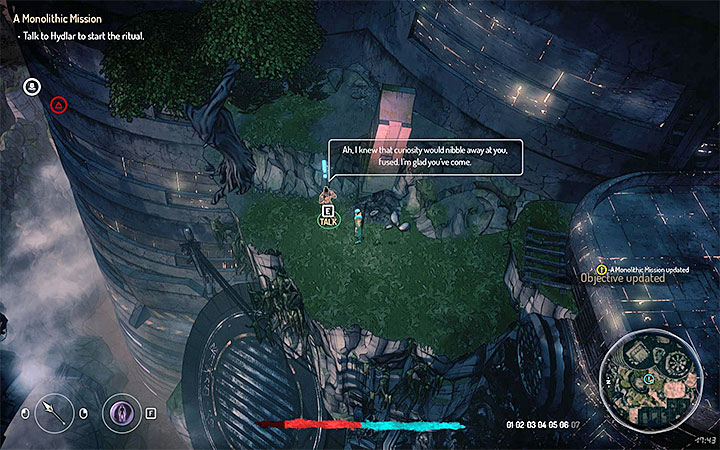
Pilgrim Hydlar gives you a quest during which you have to visit a few monoliths. The first one is located in Lewmer's cliffs in the zone 1. You have to reach the rooftop of the tall building, located in quarantine zone, that is overrun by the infected (kill them or run away). Hydlar stands on the stone ledge near the quarantine (see the picture).
Talk to the man and then start using Sense Mode to detect new energy signatures. They are on different floors of the building with the infected so be careful. One of the energy strands ends in the long corridor with the terminal that opens doors. Get there by coming from the direction of Mortbane. Find all endings and go back to Hydlar. You receive Armour Core Upgrade Poise I.
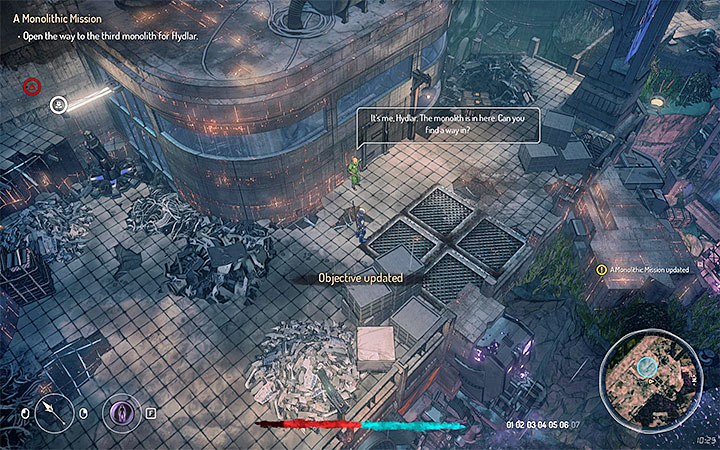
The second monolith is located in the excavation site in the zone 7 - get an Excavation Worker outfit before you go there. Reach the place presented in the picture and use lockpicks on the locked door.
You have to locate new energy signatures. One of them leads to an end that is inside of an area that is available only to workers. However, the rest is available in places that are easier to reach. Find them all and go back to Hydlar. He gives you Armour Coating Upgrade Electricity Resist I.
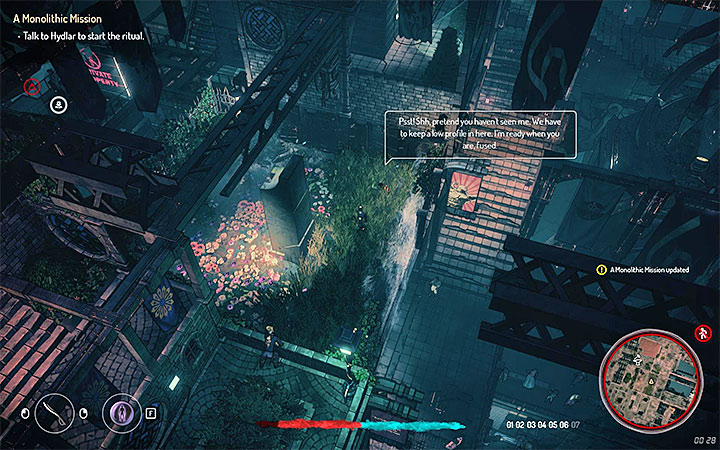
The third monolith is in Petalyn manor located in the Warden's Hold city in the zone 4. Hydlar hides in the garden (see the picture). The manor is a restricted area. Backstab one of the Fellohugh Guards and get their outfit - this allows you to explore this area without problems.
The ends of the energy signatures are located on various floors of the manor (one is also on a metal beam above the manor). You can reach some of them by going through the windows - this allows you to avoid stealing keys from guards or using lockpicks. Go back to Hydlar and receive Armour Core Upgrade Poise II.
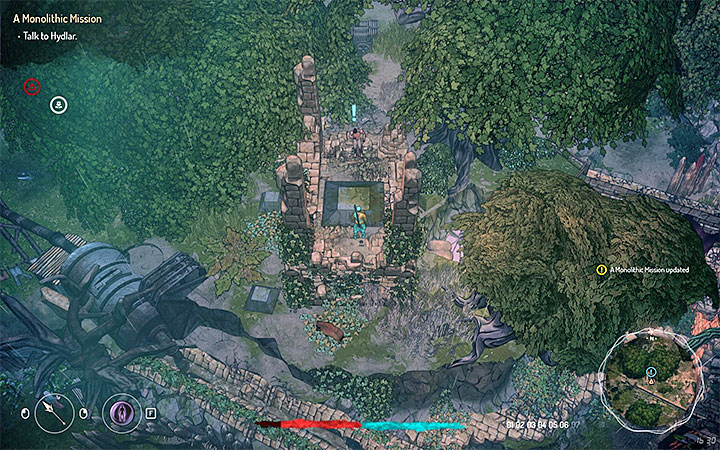
Talk with Hydlar in the spot where all energy signatures meet in one place. Go to the forest located south-west from the Birdcage in the zone 2. The meeting spot is presented in the picture. Watch the cut-scene that ends this quest. You also receive the last schematic, Armour Coating Upgrade Electricity Resist II).
Poor Sister of Mine
How to unlock: Speak with Lilly or with imprisoned Lucille.
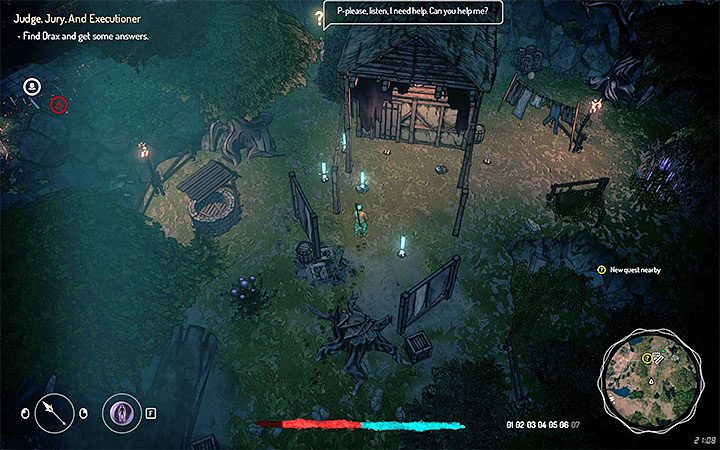
Find the building located north-west from the Lewmer's exit (the security checkpoint 02). This place is presented in the picture above - you can recognize it by numerous traps placed outside. You should first speak with Lilly, who stands outside, and receive a quest in which you have to free her sister, Lucille. You can also ignore this conversation and focus on getting inside the building.
Doing that isn't easy. You can try to disarm the traps but make one mistake and you will see an explosion. Detonating them deliberately can injure Teriel greatly or even kill the hero. Avoid or disarm the traps and use either a lockpick or the Multi-tool to open the entrance door. Go up on the floor and find Immobilization Trap schematic.
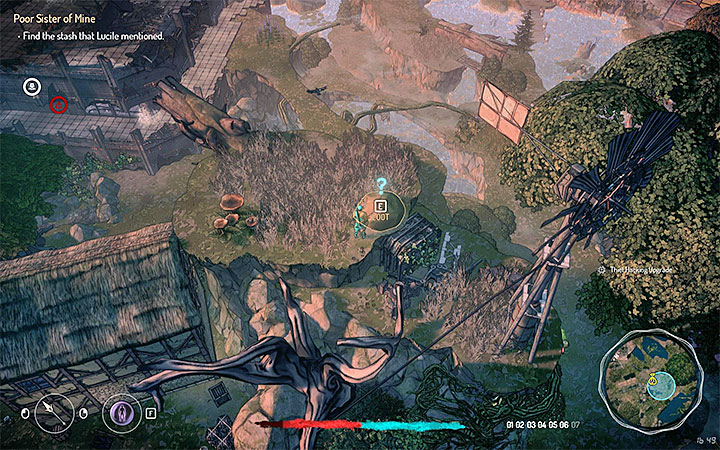
Lucille is kept on the ground floor. Unlock the door with a lockpick or your Multi-tool. Speak with the woman. Soon, the sisters will reunite. Warning - Lilly can die if some of the traps are still active. Save the game before you open the door on the ground floor.
Speak with Lilly. You can accept your reward or tell her to keep it. The second option allows you to learn about Diago's stash. You can find it in the place presented in the picture. The stash contains a Nectar vial. You can also find Thief Hacking Upgrade.
Note - The stash with the Nectar vile can also be found without receiving information about its location. Find it by using Sense Mode.
Note - Even though you have completed the quest, you can still find Diago - Lucille's husband. Doing that is completely optional and the only reason you might want to do that is to get justice. Hints about his location are written in the letter that you can find in the house - Diago is inside of a bar near the Lewmer's cliffs.
Hunting the Treasure
How to unlock: Overhearing a conversation on the farm and finding all the notes.
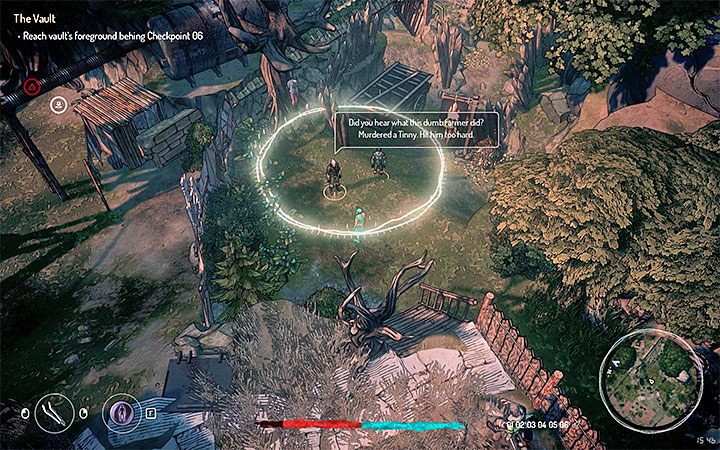
You can find about this quest by reaching the farm north-west of the Lewmer village and overhearing a conversation of the men standing next to the hangman - the above screenshot shows the location. Starting from this place you can look for notes scattered around the world. The first note can be found inside the house, near the place where the men are talking (aid yourself with the detection mode). Further notes can be found in the following locations (each new note directs Teriel to the next one):
- Large stone head located to the south of the house with the first note.
- A tree near the yellow ruins, west of the stone head.
- A t-shaped pipe in the southern part of the Lewmer settlement.
- Biomant's clinic in the Lewmer settlement.
- A fallen tree near the Lewmer Cliffs.
- A chest near a waterfall and a water wheel in Lewmer Cliffs.
- The roof of the main building (warehouse) in Port Horizon, next to Lewmer village.
- A locked building in the southern part of the Lewmer village (use a lockpick to get inside).
- A locked chest near the farm.
In order to open the locker, you must enter the correct combination: I;_;_;III;_;IV;III;_;IV. This will complete this quest.
- Seven The Days Long Gone Game Guide
- Seven The Days Long Gone: Game Guide
- Seven The Days Long Gone: Side Quests
- Seven The Days Long Gone: Quests in zone 1 (Visa 01)
- Seven The Days Long Gone: Quests in zone 2 (Visa 02)
- Seven The Days Long Gone: Quests in zone 3 (Visa 03)
- Seven The Days Long Gone: Quests in zone 4 (Visa 04)
- Seven The Days Long Gone: Quests in zone 5 (Visa 05)
- Seven The Days Long Gone: Quests in zone 6 (Visa 06)
- Seven The Days Long Gone: Technomagi contracts
- Seven The Days Long Gone: Remaining quests
- Seven The Days Long Gone: Side Quests
- Seven The Days Long Gone: Game Guide
You are not permitted to copy any image, text or info from this page. This site is not associated with and/or endorsed by the developers and the publishers. All logos and images are copyrighted by their respective owners.
Copyright © 2000 - 2026 Webedia Polska SA for gamepressure.com, unofficial game guides, walkthroughs, secrets, game tips, maps & strategies for top games.
