Mass Effect Andromeda: Taming a Desert on Elaaden
How to Unlock: Travel to Elaaden and approach one of the monoliths.
This page contains the walkthrough of the mission Taming a Desert. This is one of Heleus Assignments (side quest) in Mass Effect: Andromeda, and you can pick it up during your stay on Elaaden. This assignment involves investigating three monoliths on Elaaden and activating it in order to gain access a new Remnant Vault. Investigating the vault will significantly raise Elaaden Viability.
Note - you can investigate the monoliths in any order.
- Unlocking the assignment
- Activate the first monolith (north)
- Activate the second monolith (west)
- Activate the third monolith (south)
- Investigate vault entrance
- Activate Emergency power
- Lift the vault lockdown
- Escape the purification field and exit the vault
Unlocking the assignment
This assignment becomes available when you first land on Elaaden. You can activate it either in your journal or by approaching one of three monoliths scattered on the planet's surface.
Activate the first monolith (north)
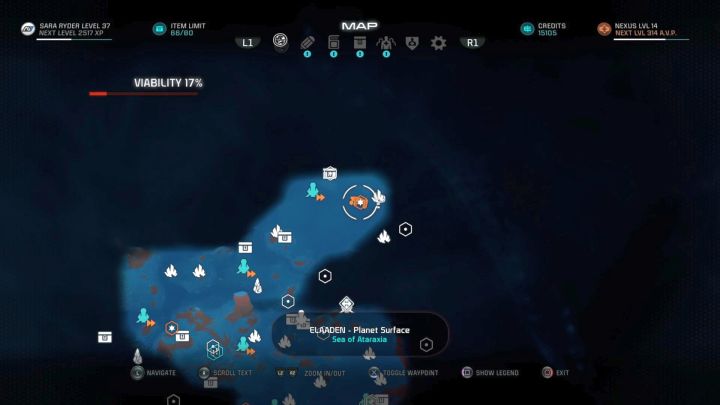
The first monolith is in the north of the planet, i.e. straight north from the starting point on Elaaden - reaching this place should not be problematic, you just need to climb up the hill. There are 3 glyphs to activate, each one set on the top of a different tower, which are set around some Remnant Consoles. The scanner will be helpful for that - stand by a Remnant Console in the middle, activate the scanner and look around. You should easily spot the paths to all three glyphs.
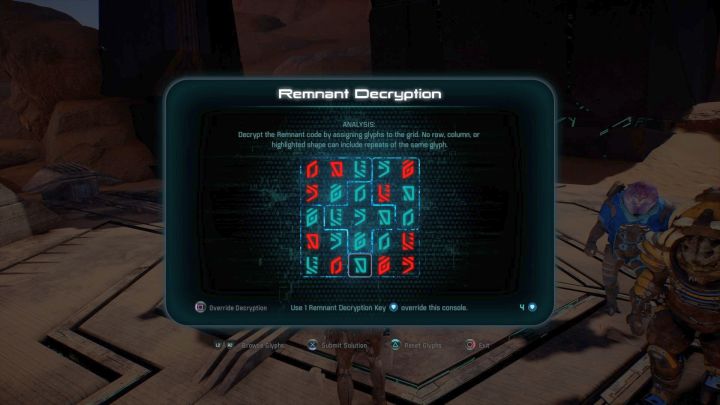
Activate all three glyphs, and then interact with the Remnant Console. There is a Remnant Decryption puzzle to solve there. You can find the solution in the picture above - as usually, you can also use a decryption key to skip the puzzle, provided of course that you have one.
Activate the second monolith (west)
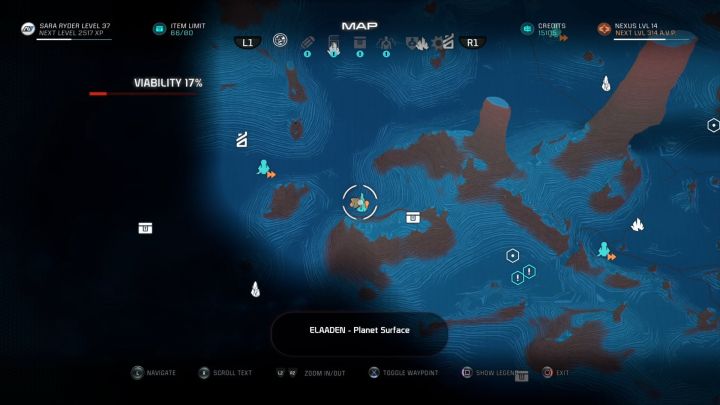
The second monolith is in the west part of Elaaden - you can find it at the foot of a mountain range. When you get there you will notice two Remnant Consoles. For now ignore the one in the middle of the ruins, and approach the other one, located in the north-west. Now interact with that one.
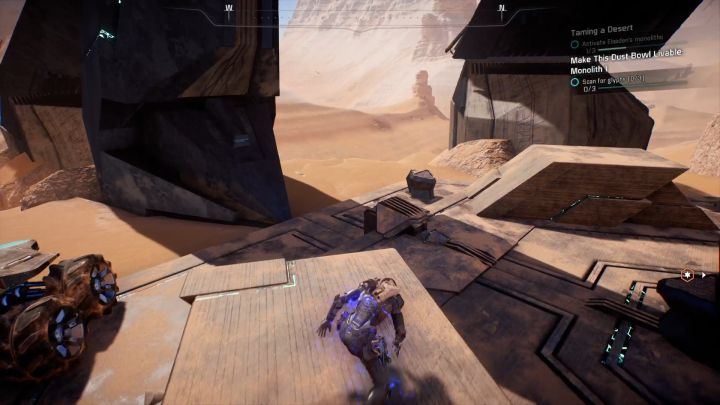
When you do that a couple of columns will appear behind you, which you should use to get to where the glyphs are located. Climb up these columns, scan the first glyph and then jump onto the structure ahead of you in order to reach another glyph. Scan the second glyph at the end of the structure and stay there - you just need to face north in order to scan the third and last glyph. Now, jump down and activate the Remnant Console - there are no puzzles to solve here.
Activate the third monolith (south)
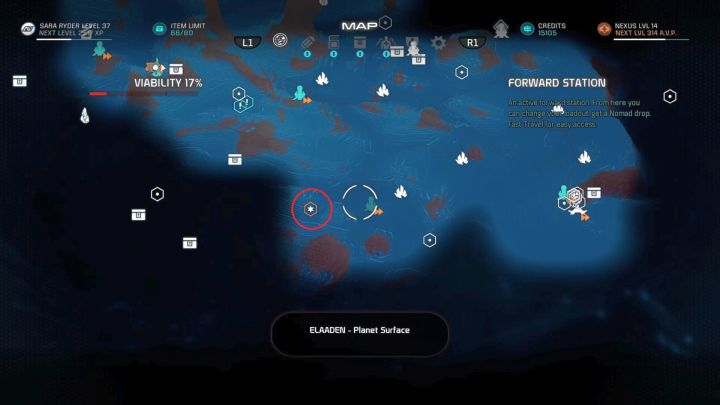
The third and last monolith you must activate in order to reach the Remnant Vault is located in the northern part of the map - there is a Forward Station east of that. When you get there you will see 4 Remnant Consoles. Just like before, ignore the one set in the middle of the ruins and focus on the other three. They will open a way to the glyphs for you, which would otherwise be unreachable.
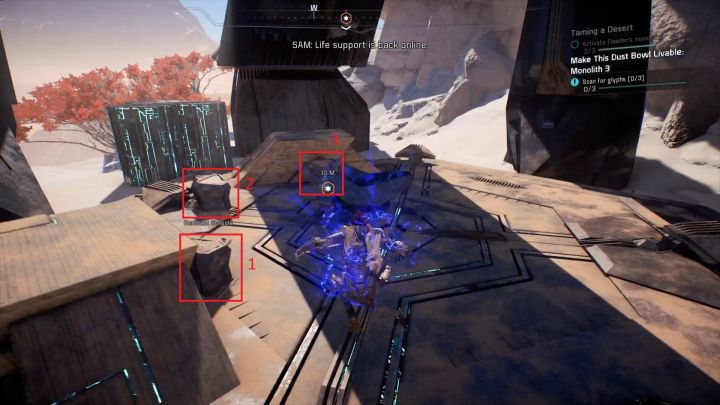
However, there is a catch here - you can activate each console more than once, every time to a different effect, lowering or rising different platforms. The picture above has all 3 Remnant Consoles marked and numbered. In order to create stairs for yourself you must activate the first (1) console, then the second one (2), then the third one (3), and lastly the second one again (2). This will set the platforms just right for you to reach the glyphs.
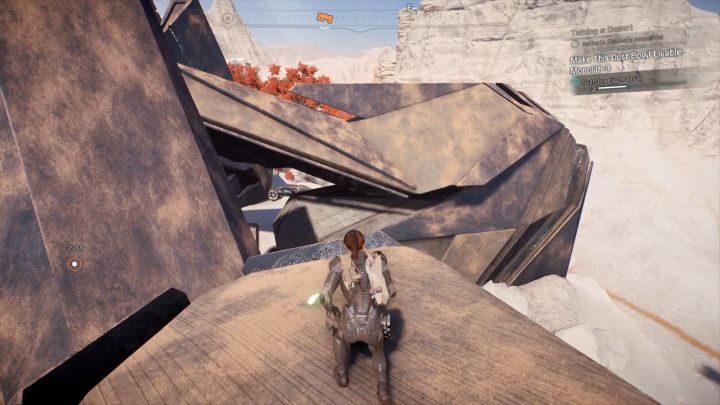
Climb up and scan the first glyph at the end of the structure that you can see before you. Jump over to the nearby structure (heading eastward), at the end of which you will find another glyph. The last piece to scan is at the end of the structure located west from your current position - you can reach it without moving away from the previous glyph's location. When you scan all 3 of them, jump down on the ground and activate the Remnant Console - just like in the case of the west monolith, there is no puzzle here.
Investigate vault entrance
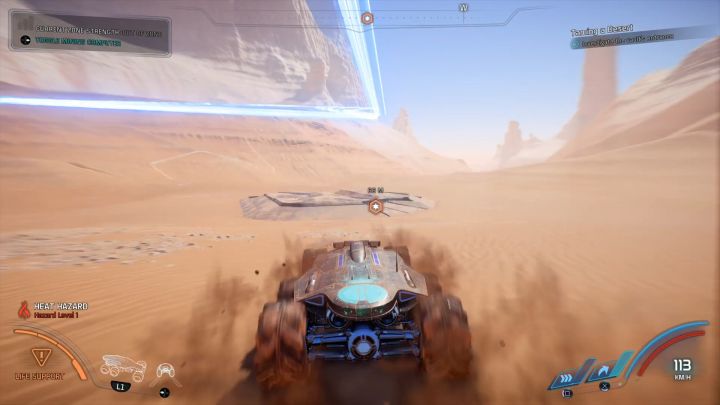
After scanning all glyphs and activating the three Remnant Consoles the entrance to the vault on Elaaden will be unlocked. Getting there poses no problems - even if you encounter any enemies on the way you can just ignore them. Once you are there, go inside and use the gravity well in order to get into the vault.
Activate Emergency power
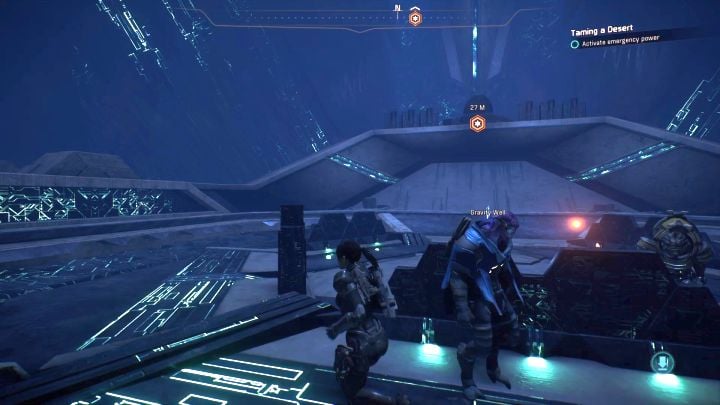
As soon as you get to the Remnant Vault and regain control of your character head for the Remnant Console pointed at by the navpoint and activate it.
Lift the vault lockdown
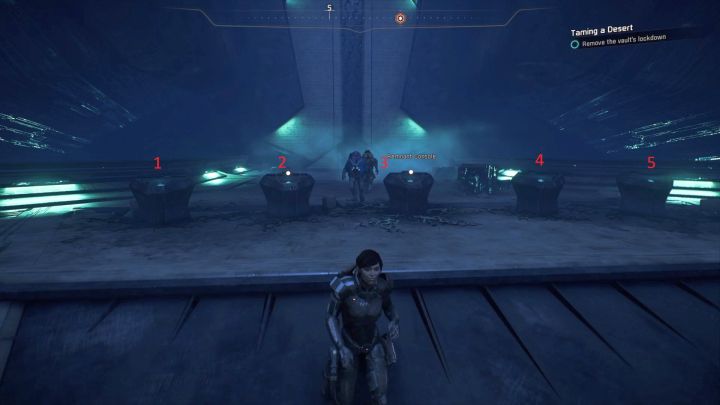
After restoring emergency power five more Remnant Consoles will emerge from underground. They are essential for the puzzle that you must solve in order to proceed to the next part of the vault. Each console activates three hidden switches and using a given switch for the second time turns it off. Your goal is to activate all five switches, therefore interacting with the consoles randomly won't do the trick. However, the solution to this puzzle is very simple - you must first activate the first console from the right (if you count from the right this is the 5th console), then the one on the left from that (number 4) - the numbers are given in the picture above. This way you will solve the puzzle, thus unlocking the door to the next part of the vault.
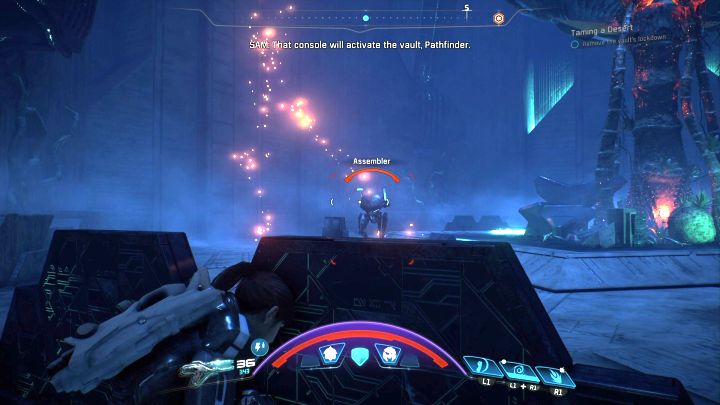
Go straight ahead into the room with a big plant in the middle. Eliminate the Remnants there, then head westward and walk through the door. At the bottom of the ramp there is a Remnant Console - activating it is essential for proceeding to the next part of the vault. Kill the enemies hiding in the corridor and press on forward. You will come out to an open area where a lot of Remnant roam around - you should eliminate them now in order to make the rest of the mission easier.
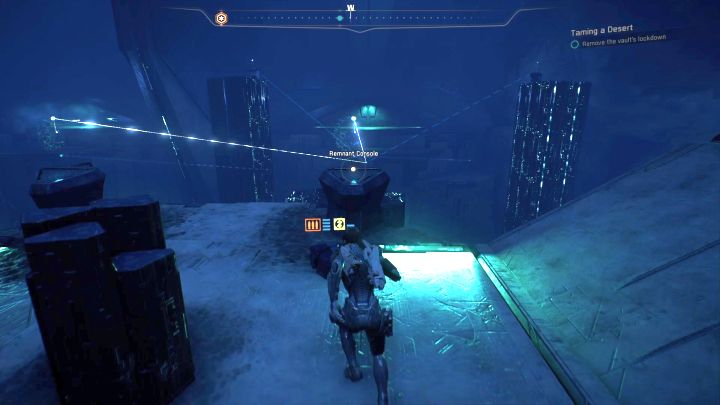
When you finally get rid of enemies, head westward, where there are two Remnant Consoles standing by the edge of the platform. Activate them both and wait for columns to emerge. Use those to get to the next two consoles - their location is indicated by the rays coming out from the consoles you have just activated. Reach the two objects, activate them and return to the first two consoles to interact with them again. More columns will emerge from underground - use them, heading west, in order to reach another door (remember to activate the newly emerged console on the back of the bridge you have just created!).
Fight your way through the corridor, which is filled with enemies, to find another console. Activate that one and use the columns that have just appeared in order to return to the area with two consoles. For now ignore the navpoint indicating the southern console and head east toward a mushroom, under which there is another Remnant Console. Ignore that one and run across the bridge to the other side.
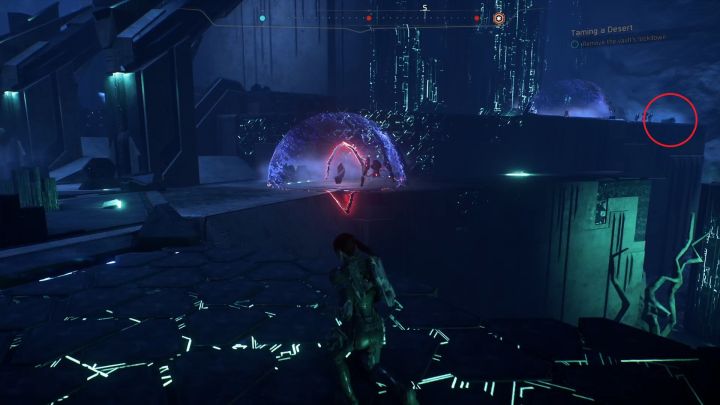
Deal with the enemies in this place, then head south from the bridge you have just walked across. Climb up the elevation and keep on going south until you get to another console - interact with that one in order to create part of a bridge, which you will soon need for getting into the vault's core. Head east and keep going that path up, while eliminating the Remnants on the way.
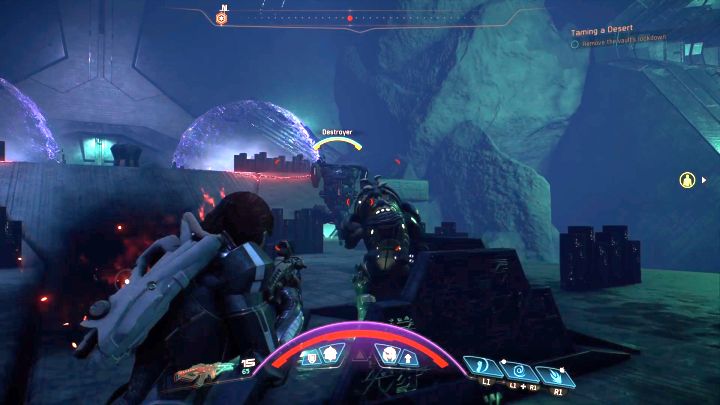
Soon you will get to the top of the path, where a lot of enemies await you, including a Remnant Destroyer. First, kill the weaker enemies in order to reduce the number of shots you will have to avoid, and then focus on the Destroyer. As usually, destroy turrets first, which the robot carries on its shoulders - this way you will significantly reduce its health as well as get rid of its main weapons. Then, finish off the enemy by targeting its body. Once you have dealt with the enemies, run up the ramp and interact with the Remnant Console before the door.
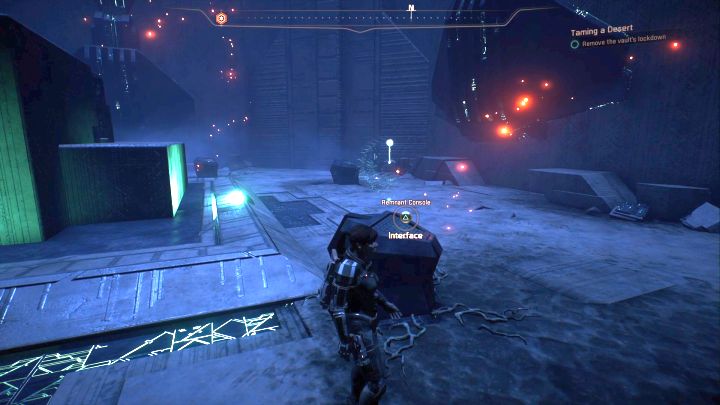
After going through the door you will get into a room with a lot of Remnant Consoles inside. These are related to another puzzle. In order to solve it you must activate the consoles in a specific order. Run around the room and find a console without a hexagonal object floating nearby. When you activate the console that matches the description you will have to look for another console like that one, and so on - that is until you activate them all. When you do that another Remnant Console will emerge from underground - activate that one too.
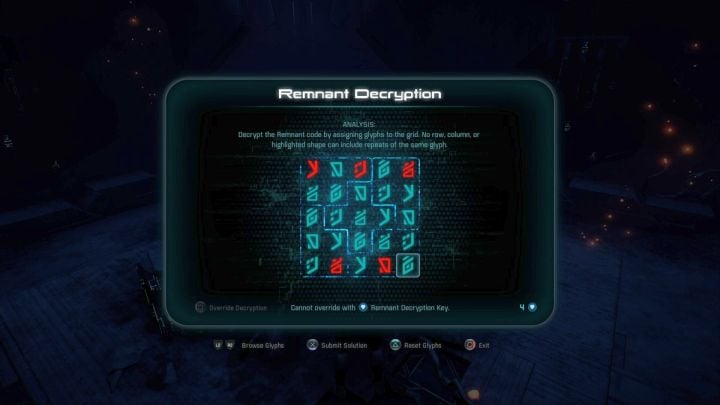
Now jump on the platform in the middle of the room and activate the console there. You will have to solve a Remnant Decryption puzzle. However, this one cannot be skipped - you must solve it yourself. The picture above presents the correct combination of symbols. Solving that will grant you 2 extra skill points. While still on the platform look at the force field on the west from your current position - you will find a secret box with items there, however, it will only become available when the vault evacuation phase begins.
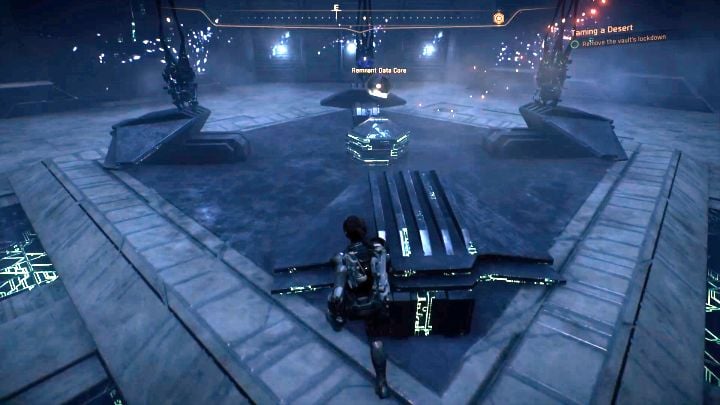
East from the platform where the Remnant Console puzzle was you will find another console. Activate it in order to open the entrance in the wall. Inside the next room there is a couple of objects to scan and an item to collect - namely, Remnant Data Core (this item is related to one of Peebee tasks). Collect and scan everything you can, after which go back to the previous room and head south. Your next objective is to travel to the navpoint, where the vault purification console is.
Escape the purification field and exit the vault
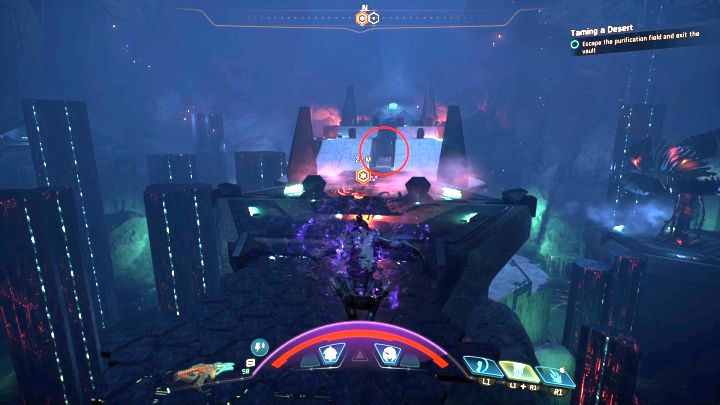
Kill enemies by the vault purification console and then activate it. As soon as the countdown starts keep running south and go between the two ramps leading upwards - the exact spot is marked in the picture above. Inside this narrow space there is a hidden treasure box. Collect the items and then head east.
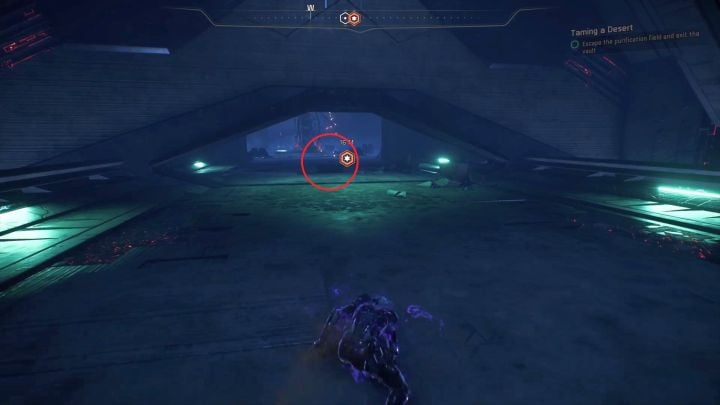
You must now reach the place where the Remnant Decryption puzzle was, specifically, the passage secured by a force field. Keep moving up eastward, walk past the place where you fought with the Remnant Destroyer and dash through the door. Now head west and take the passage which was previously blocked by a force field - you will find the second treasure box there. Collect the items and resume your escape. Activate the console pointed at by the navpoint in order to conclude the mission.
Note - Completing this assignment will increase Elaaden Viability by as much as 40%.
Rewards: XP, Andromeda Viability Points.
- Mass Effect: Andromeda Game Guide
- Mass Effect Andromeda: Walkthrough
- Mass Effect Andromeda: Heleus Assignments (Side quests)
- Mass Effect Andromeda: Elaaden
- Mass Effect Andromeda: Parlay with the Krogan
- Mass Effect Andromeda: Investigate Remnant Derelict on Elaaden
- Mass Effect Andromeda: Search for the Stolen Remnant Drive Core on Elaaden
- Mass Effect Andromeda: Aspirations
- Mass Effect Andromeda: The Flophouse on Elaaden
- Mass Effect Andromeda: Water Supply on Elaaden
- Mass Effect Andromeda: Dismantled
- Mass Effect Andromeda: Hard Luck
- Mass Effect Andromeda: Save Dr. Okeer's Krogan Research on Elaaden
- Mass Effect Andromeda: The Search for Ljeta on Elaaden
- Mass Effect Andromeda: Rising Tensions on Elaaden
- Mass Effect Andromeda: Taming a Desert on Elaaden
- Mass Effect Andromeda: Settling Elaaden
- Mass Effect Andromeda: Architect on Elaaden
- Mass Effect Andromeda: Out of Gas
- Mass Effect Andromeda: Other quests on Elaaden
- Mass Effect Andromeda: Elaaden
- Mass Effect Andromeda: Heleus Assignments (Side quests)
- Mass Effect Andromeda: Walkthrough
You are not permitted to copy any image, text or info from this page. This site is not associated with and/or endorsed by the developers and the publishers. All logos and images are copyrighted by their respective owners.
Copyright © 2000 - 2025 Webedia Polska SA for gamepressure.com, unofficial game guides, walkthroughs, secrets, game tips, maps & strategies for top games.
