Mass Effect Andromeda: Making An Impression
The guide for "Making An Impression" side quest from the game Mass Effect: Andromeda contains the full walkthrough for that quest. Here you can learn where to place the seismic hammers, how to lure out the Architect and defeat it.
How to unlock: Speak wiht Hainly Abrams [Eos].
Here you can find the guide for Making An Impression quest. This is one of the side quests in Heleus in Mass Effect: Andromeda game. You can complete this quest after establishing an outpost on Eos and improving the living conditions on the planet (the radiation disappears). In this quest you must find the reason for the seismic activity on the planet. You learn that behind them stands a powerful Remnant Architect that must be defeated by you.
- Unlocking the quest
- Place the first seismic hammer
- Place the second seismic hammer
- Place the third seismic hammer
- Defeat the Remnant Architect
Unlocking the quest

This quest can be unlocked after establishing the outpost on Eos AND after the improvement of the living conditions on the planet (the radiation disappears). When you meet those requirements you can meet Hainly Abrams in the outpost. Speak with her to receive the task in which you must deal with seismic activities on the planet by placing seismic hammers in the ground.
Place the first seismic hammer
The location where you must place the first hammer is rather close, west from the Eos outpost. When you get there you must defeat a small Remnant group and place the hammer where the game points you. When you do that, a new group of Remnant appears. You can either defeat them or leave this place.
Place the second seismic hammer

The second hammer must be placed south-west from the first one. When you get there you will come across a group of friendly people. Speak with one of the Scouts.
You can act in one of the two ways and both variants are excluding each other. If you want to finish the quest according to the will of the people from the Eos outpost then you must place the hammer where the water drill is (they will get access to it). However, if you want to be an ally to the newly met people then place the hammer where the gas drill is (this allows the scouts to trade with the outpost). This is not an important decision and it has no impact on the game. Regardless of your choice you must defeat or run away from the new Remnant group.
Place the third seismic hammer
The third seismic hammer must be placed near the second one, east from it. Before you do that you should save the game and activate the forward station. This will make the giant Remnant Architect appear. You must defeat him.
Defeat the Remnant Architect
Before you fight with the Architect you should prepare yourself:
- Save the game and activate the nearby forward station. When the fight starts you can go back to it and refill your supplies. It is especially useful because of the skills and powers used during this fight. Besides that you can also memorize the placement of regular supply chests and get to them if it is not dangerous.
- If you play on normal difficulty you shouldn't worry much about the selection of your team mates. However, if you play on higher difficulties then take those characters that specialize in Combat and Tech skills. Biotics won't be effective here.
- Long range weapons are useful in attacking the Architect. Melee attacks are difficult to do because of the size of this bot and the Architect can protect himself from them. You can use an assault or a sniper rifle. In addition to that, you should equip incendiary ammo that deals a lot more damage to the boss. Also, take the sticky grenades that you can throw at boss's weak points.

During the fight with the Architect try to avoid staying in the open field. Look for buildings, walls and other objects that can be used as a cover. But DO NOT try to complete the fight using only covers because some of Architect's attacks can hurt you even if you are behind a cover. Those are Architect's special attacks where the robot throws a bunch of grenades and sends a some sort of energy wave. Fortunately, both attacks are telegraphed by the boss so, unless you miss the moment, you have a lot of time to run from them (when you are in those situations try to move to other places on the map). If your character can use camouflage you can use it as a substitute for covers or as their complement.
During the fight you can give orders to your team mates. When you do that, be sure to point the Architect's limbs or head as the targets. If someone was knocked out by the Architect you can try to pick up that person but be sure to do that in between the boss's attacks so you want lose all of your health points when "reviving" your team mate.

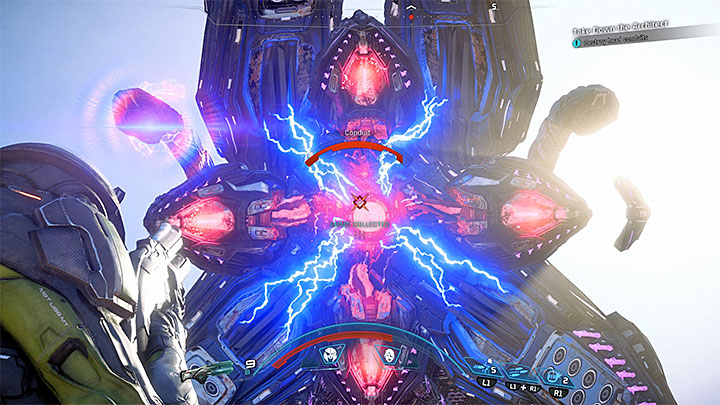
The default "weak" points on the Architect's body are his three limbs. Focus on attacking them and try to make precise shots so you won't waste your ammo and other supplies.

After dealing enough damage to the Architect's limbs you unlock the possibility of attacking the cables on his head. In this case use your best weapons and skills because by destroying the cables you will win the fight.

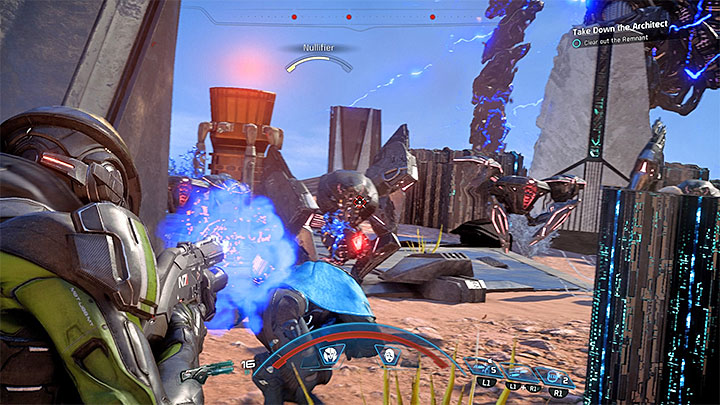
There are two ways in which the fight with the Architect is made more difficult. The first hindrance is when the boss summons smaller Remnant bots (the strongest enemy here are Nullifiers). When this happens you should stop attacking the Architect and take care of the rest of the Remnant. Warning - When you attack "the regular" Remnant remember to dodge the Architect's attacks, especially because he can use his most powerful abilities!
The second hindrance is that after destroying one of his limbs the Architect will start to withdraw. You don't have to use Nomad because the next fight takes place close to where the last was stopped.

As it was said earlier, in order to win you must deplete all health points from the Architect's head. When he falls to the ground run to his head and press the interaction button to establish the connection. This completes the battle and the quest.
Note - The Architect can be found orbiting next to Eos. You can approach it to gain Remnant Research Data.
Rewards for finishing the quest: XP, Andromeda Viability Points.
You are not permitted to copy any image, text or info from this page. This site is not associated with and/or endorsed by the developers and the publishers. All logos and images are copyrighted by their respective owners.
Copyright © 2000 - 2025 Webedia Polska SA for gamepressure.com, unofficial game guides, walkthroughs, secrets, game tips, maps & strategies for top games.
