Far Cry 6: We're Unjammin' - walkthrough
This page of the Far Cry 6 guide contains a walkthrough of the side quest We're Unjammin'. You will learn where to find all 11 disruptors in La Joya.
This page of the Far Cry 6 game guide contains the walkthrough for the Yaran story titled We're Unjammin', a side quest in El Este. Our walkthrough explains, among other things, where to find and sabotage all 11 jammers found in the La Joya sub-region of El Este.
- Rewards for completing the quest
- Unlocking the mission
- The map of McKay's jammers
- Disable all the McKay wave jammers
Rewards for completing the quest
- Gunpowder x1.
Unlocking the mission
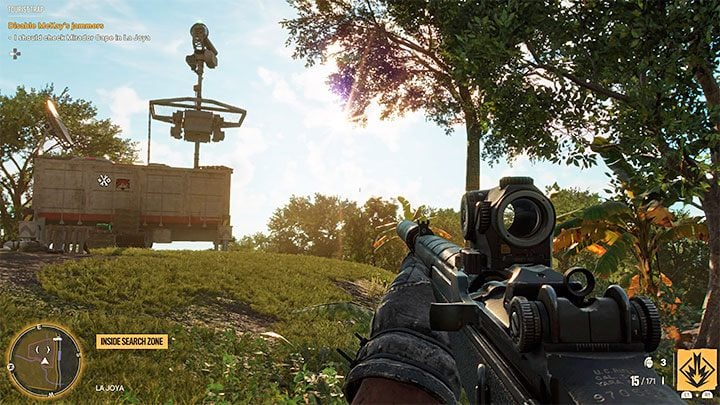
You unlock this side quest by completing the Tourist Trap operation (main mission). This quest requires you to sabotage one of the jammers found in El Este.
After the successful sabotage (reaching a red box on top of the device) you'll learn there's 10 more jammers to find and sabotage. Below you will find information on their location and ways to sabotage some of the more problematic jammers.
The map of McKay's jammers
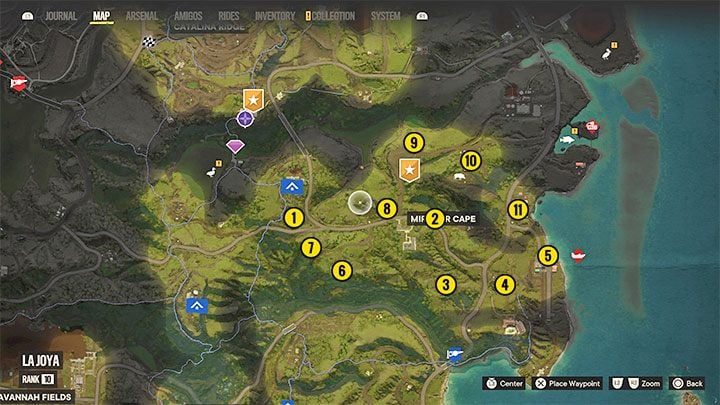
The quest description in your journal mentions 11 jammers to sabotage, but the one represented by Number 1 on the map was already sabotaged by you during the Tourist Trap operation. You must take care of the remaining 10 jammers in El Este's La Joya sub-region. You can reach them in any order.
The game doesn't initially show you the jammers' locations, they're marked only once you get close to them. The situation changes after sabotaging 7 jammers in total - the final 4 will be automatically detected and marked to let you easily reach them and complete the quest.
Disable all the McKay wave jammers
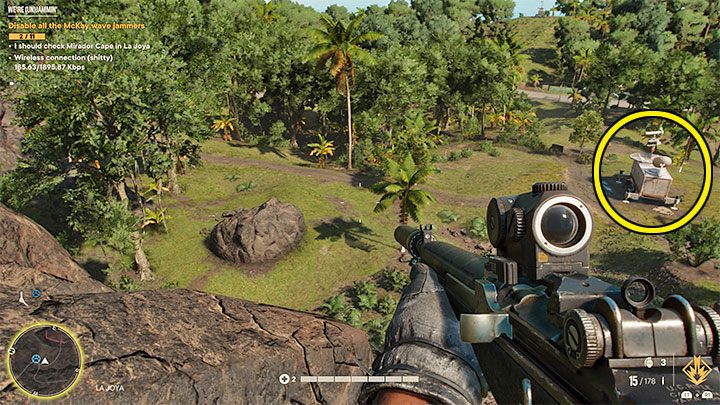
Below we've described some of the more problematic jammers. Most of them require the identical strategy - climbing a ladder / crates, reaching the jammer's red box and sabotaging it.
The jammer represented by number 3 on the map doesn't have any ladders or climbable objects nearby. You must climb up the nearby hill shown on the picture above. Jump of the edge, quickly use your wingsuit and then switch to the parachute. Glide carefully and land on the jammer's small roof.
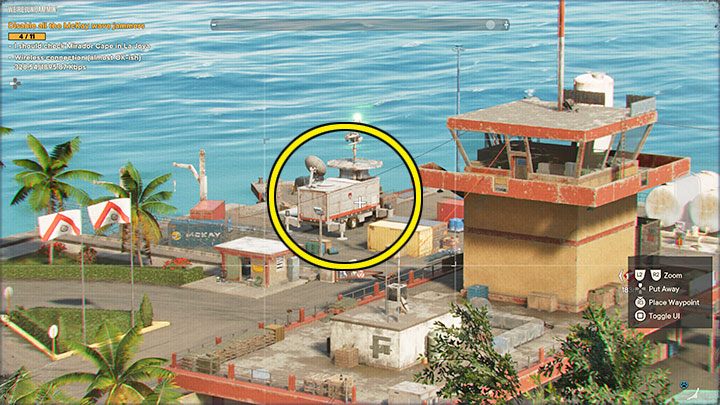
The jammer represented by number 5 on the map stands in the middle of an enemy base, but you don't need to eliminate all the soldiers to reach it. You can also try to sneak up to it from the side of the water.
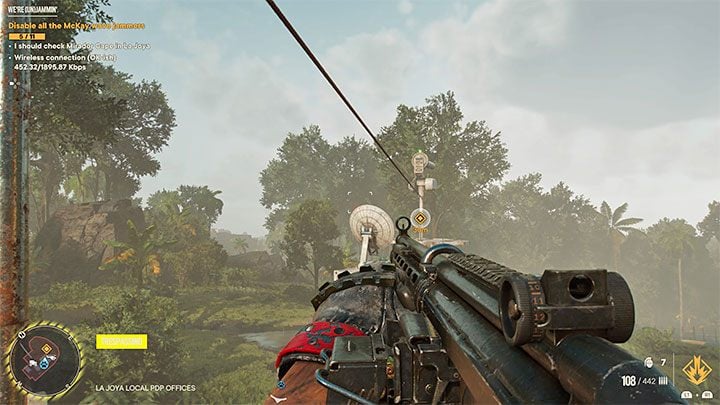
You can reach the jammer represented by number 6 on the map by climbing to the roof of the neighboring building and then sliding down a rope.
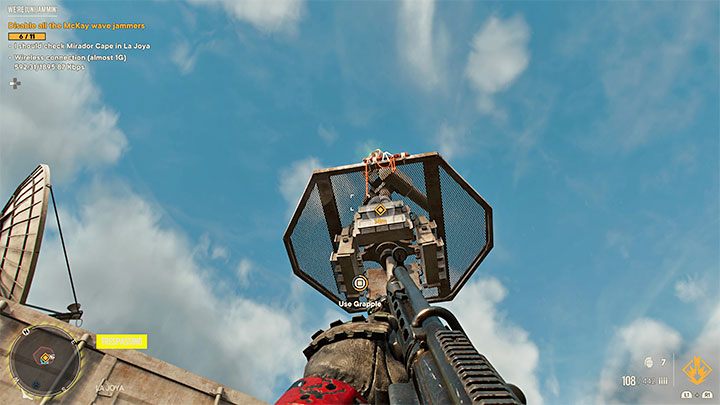
To reach the jammers represented by numbers 7 and 8 on the map you must stand under the upper balcony in a way that will allow you to use your grapple (as shown on the picture).
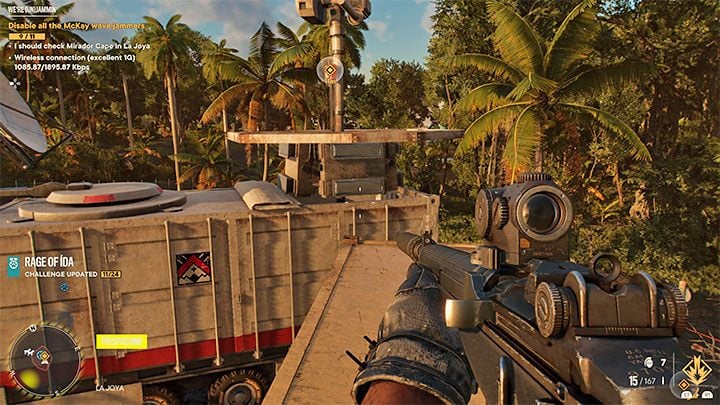
The jammer represented by number 10 on the map requires you to jump to it from a neighboring container (we've shown where to jump from on the picture).
Sabotaging all the jammers automatically completes the quest.
- Far Cry 6 Guide
- Far Cry 6: Walkthrough
- Far Cry 6: Yaran stories
- Far Cry 6: El Este Yaran stories
- Far Cry 6: Man's Best Enemy - walkthrough
- Far Cry 6: Pecking Orders - walkthrough
- Far Cry 6: Wingman - walkthrough description
- Far Cry 6: The First Love - walkthrough
- Far Cry 6: Undercover Stud - walkthrough
- Far Cry 6: Tricks of the Trade - walkthrough
- Far Cry 6: Everything to Lose - walkthrough
- Far Cry 6: Nothing to Hide - walkthrough
- Far Cry 6: We're Unjammin' - walkthrough
- Far Cry 6: Loose Ends - walkthrough
- Far Cry 6: The Seeds of Love - walkthrough
- Far Cry 6: El Este Yaran stories
- Far Cry 6: Yaran stories
- Far Cry 6: Walkthrough
You are not permitted to copy any image, text or info from this page. This site is not associated with and/or endorsed by the developers and the publishers. All logos and images are copyrighted by their respective owners.
Copyright © 2000 - 2025 Webedia Polska SA for gamepressure.com, unofficial game guides, walkthroughs, secrets, game tips, maps & strategies for top games.
