Dead Cells: Slumbering Sanctuary level
Last update:
The following chapter includes information on Slumbering Sanctuary in Dead Cells. Here, you can learn more about this location, threats and enemies that you can come across, see where you can go from here and what requirements you have to fulfill in order to do that.
- How to reach Slumbering Sanctuary?
- Characteristics of the location
- Enemies and other threats
- Further locations
How to reach Slumbering Sanctuary?
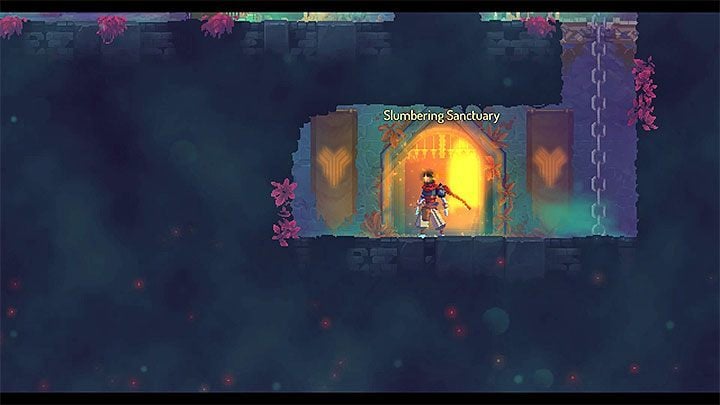
Slumbering Sanctuary can't be accessed right away. You can reach this location for the first time by using the entrance found in Insufferable Crypt where you faced Conjunctivius (the picture 1 shows an example of this passage).
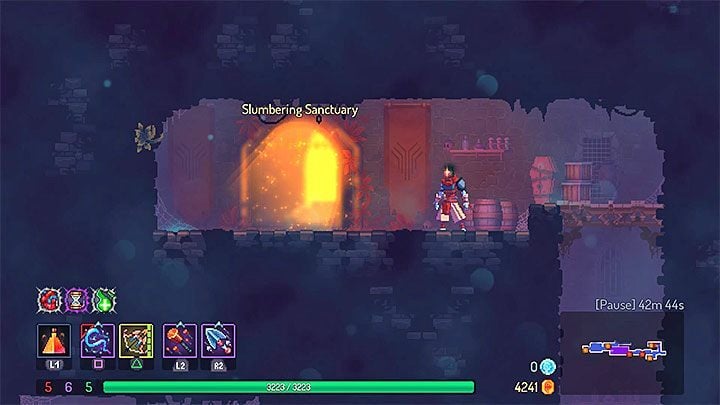
Once you get a Spider Rune in Slumbering Sanctuary, you can then use it to reach this location in an alternate way. Start with defeating The Concierge in The Black Bridge. Then, you must go to the safe zone (the one with a legendary forge). At the end of that zone you can find two exits. Go to the one that can be accessed by a vertical tunnel - bounce off of the walls to reach Slumbering Sanctuary (the picture 2 shows an example).
Characteristics of the location
Slumbering Sanctuary is one of the more challenging locations in the game. This is biome level 4 location - some of the monsters here can cause you a lot of problems if you are not careful enough or when your hero isn't equipped with better gear.
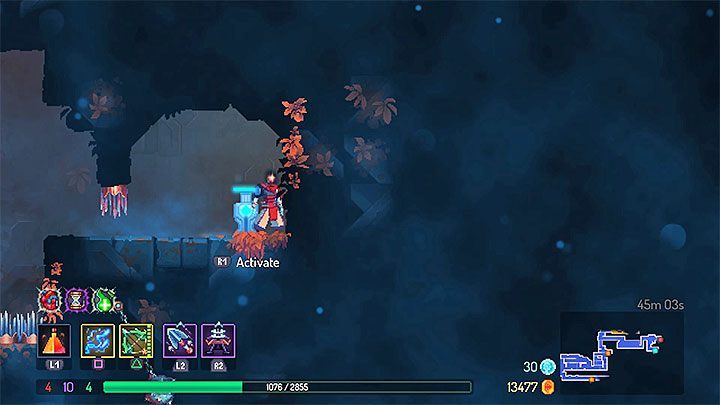
What distinguishes Slumbering Sanctuary from other locations is the way you move in it - your character travels between dimensions. You start in the "blue dimension" which allows you to explore only a part of this location. Your goal is to find a switch (example in the picture above) that will allow you to enter the "orange dimension". This changes a few things:
- You must go through the starting rooms again but they now have now and more powerful monsters. You might have seen them when you were in the blue dimension but at that time they were parts of the background.
- All gold passages are now unlocked. Visit all the rooms that were previously locked to get additional treasures. One of these "golden passages" leads to further parts of the sanctuary.
- You can now access one of the two available exits from this location.
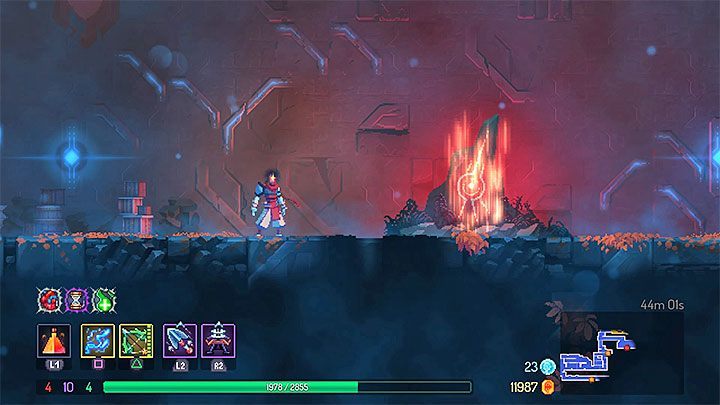
Besides regular enemies, you can also come across elite monsters. One of these elite monsters carries a Spider Rune - getting it is very important because it allows you to climb walls. The picture above shows a monster lair with this rune (a stronger version of a Caster) - the location of that lair is always random.
Enemies and other threats
The difficulty of the monsters present in Slumbering Sanctuary depends a lot on the dimension you are currently in. The "starting" blue dimension is easier. The orange dimension requires more patience (e.g. fights with Golems).
Note! The list below consists of monsters encountered on the normal difficulty level. Boss Stem Cells, received by defeating the final boss, unlock higher difficulties. After that you can come across new and more powerful versions of the monsters.
Appearance | Name | Description |
| Zombie | After detecting you this enemy bends and then leaps towards the hero. Touching the zombie deals you more damage. Quickly attack a Zombie if you are near this enemy. You can avoid his leap by jumping over the Zombie or by rolling under him. |
 | Masker | These unique enemies don't have any offensive attacks. Instead, they can create mist that makes nearby enemies almost invisible (you have to look very close to spot them). Killing a Masker removes the mist. However, you shouldn't rush towards him because he is almost always accompanied by other monsters. Creatures covered by his mist become visible for a brief moment when they attack - you can "provoke" them to use their attacks by, e.g. placing traps or shooting blindly with your ranged weapon. |
 | Caster | These monsters attack you from a distance by using energy balls. They aren't durable but they can run away when you get closer to them. You can solve this problem by using ranged weapons or by relying on traps and grenades. |
 | Catcher | Irritating monsters that can catch and pull your character towards them. You can dodge their attacks by jumping and rolling. However, using ranged weapons, grenades or traps is a much better idea. |
 | Golem | Very powerful creatures that can use a very problematic move that summons your hero near them. Keep that in mind and be ready to either fight at a close range (note - a Golem can also use a stun attack!) or be ready to run away from it. You can increase your chances by throwing traps. A Golem shouldn't attack them right away which means that your traps can have enough time to weaken this creature. |
| Grenadier | After bending (similarly to a Zombie) a Grenadier throws his grenade (note - a grenade goes through walls and floors!) that explodes after it hits the ground (you have a second to dodge it). Wait for a grenade to land and then move outside its explosion range. Use a dodge to get closer to the enemy in order to eliminate him before he attacks again. |
 | Kamikaze | Very dangerous flying creatures. They appear in their default resting position (you can see them attached to, e.g. a ceiling). They become active once you get closer to them. As the name suggests, a Kamikaze flies towards your character and then explodes. You can receive a lot of damage if you don't avoid this explosion fast enough. Kill these monsters with a melee or a ranged weapon (preferably with an electric whip that targets enemies automatically). |
 | Inquisitor | This enemy shoots projectiles that move in a certain direction ignoring walls, floors and other obstacles. Because of that you can have problems with avoiding these projectiles. This also means that you can get surprised by it. Try to always get closer to an Inquisitor and defeat him with melee weapons. |
 | Protector | A dummy that makes all enemies within its range invulnerable to physical attacks. To damage them you must either use elements or lure them away from a Protector. The best way to deal with this problem is to attack a dummy as fast as you can. Look for energy lines to find the enemy fast. |
Further locations
Below you can find the list of locations that can be accessed from Slumbering Sanctuary..
Name | Requirements |
Clock Tower | No restrictions. Move to the orange dimension and then search for the passage to that location. |
Forgotten Sepulcher | No restrictions. Move to the orange dimension and then search for the passage to that location. |
- Dead Cells Game Guide
- Dead Cells: Game Guide
- Dead Cells: Game world
- Dead Cells: The Prisoners' Quarters level
- Dead Cells: The Promenade of the Condemned leven
- Dead Cells: The Toxic Sewers level
- Dead Cells: The Ramparts level
- Dead Cells: The Ancient Sewers level
- Dead Cells: Prison Depths level
- Dead Cells: Ossuary level
- Dead Cells: The Black Bridge level
- Dead Cells: Insufferable Crypt level
- Dead Cells: Stilt Village level
- Dead Cells: Slumbering Sanctuary level
- Dead Cells: Graveyard level
- Dead Cells: Clock Tower level
- Dead Cells: Forgotten Sepulcher level
- Dead Cells: Clock Room level
- Dead Cells: High Peak Castle level
- Dead Cells: Throne Room level
- Dead Cells: Game world
- Dead Cells: Game Guide
You are not permitted to copy any image, text or info from this page. This site is not associated with and/or endorsed by the developers and the publishers. All logos and images are copyrighted by their respective owners.
Copyright © 2000 - 2025 Webedia Polska SA for gamepressure.com, unofficial game guides, walkthroughs, secrets, game tips, maps & strategies for top games.


