Uncharted 4: Chapter 8 The Grave of Henry Avery - walkthrough
This guide page for Uncharted 4 guide has a walkthrough for chapter 8 – The Grave of Henry Avery (the cemetery, finding the grave, the tomb puzzle).
This page of the Uncharted 4: A Thief's End guide has a walkthrough for chapter 8 - The Grave of Henry Avery. You will learn, e.g. how to reach the cemetery, how to sneak up on mercenaries, where to find the right grave, how to complete the puzzle with glowing points in the tomb, and how to reach the pirates' cave.
- Chapter 8 information
- Reaching the graveyard - part 1
- Encountering the first wave of enemies
- Reaching the graveyard - part 2
- Encountering more mercenaries
- Reaching the graveyard - part 3
- Finding Henry Avery's grave at the graveyard
- Searching the tomb
- Glowing points puzzle in the tomb
- Encountering the third group of mercenaries
- Reaching the large cross
- Encountering the forth group of mercenaries
- Reaching Pirates' Cave
Chapter 8 information
Chapter eight is one of the longest in Uncharted 4, and Nate and Sam are in for a lot of exploring, climbing and fighting. The most important location in this chapter is the graveyard where you find the mentioned grave and come across a large group of enemies. Look around as Nate can find 11 treasures and add three new entries to his journal.
Reaching the graveyard - part 1
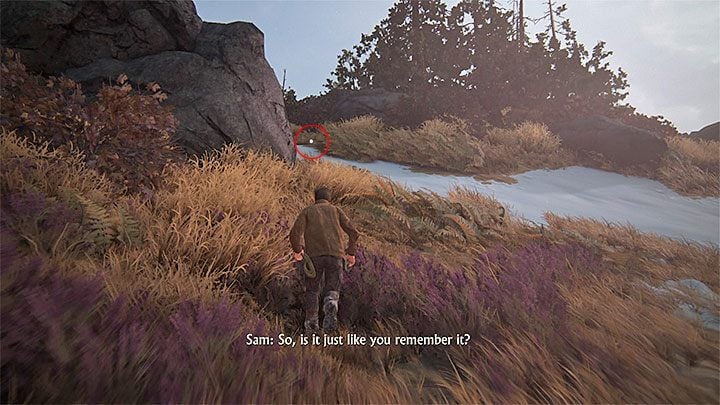
The chapter begins on a wide glade and you won't encounter any enemies for at least couple minutes. Head left and investigate all the rocks that you come across. You will find a treasure (Redware and Silver Jug Flask) in the location presented in the screenshot.
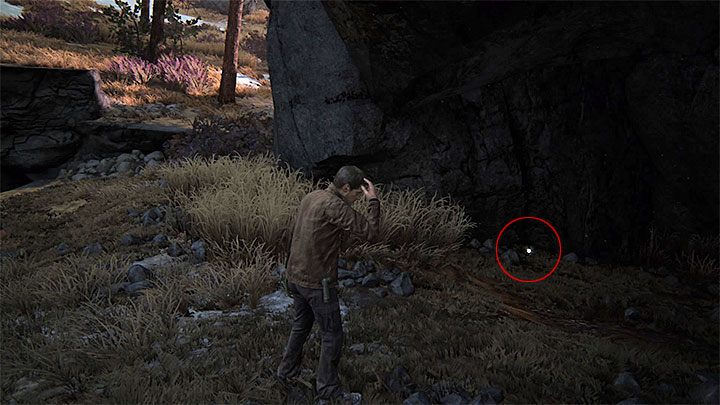
Move forward but head to the lower part of the glade, and proceed not far from the large cliff. Find the cave presented in the photo. Nathan will find another treasure (Bronze Boar) inside. There are no more hidden objects in this area, so waste no more time and head towards buildings visible in the distance. Slide down the scarp and head right.
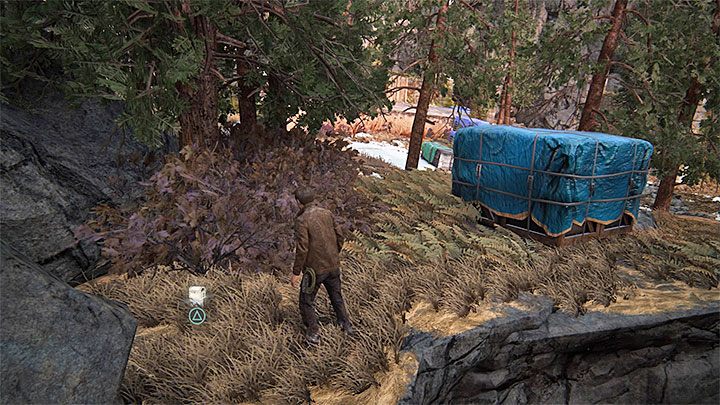
You will have to perform a sled run in straight line and grab stone shelves situated on the other side of the steep ground. You need to get to an interactive tap where Nate can use a grappling hook. Slide down the rope to reach a small campsite. Nate and Sam will be ambushed by several mercenaries, so take cover behind nearby crates. When you deal with your enemies, head left and soon you will reach a larger excavation. Before you begin exploring this area, get to a cliff located behind the ruins. Turn right and find bushes presented in the screenshot. Collect Carved Wood Kashkul.
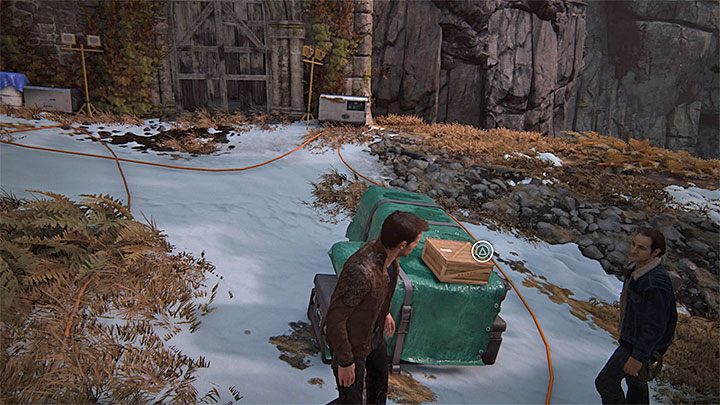
Get back to the excavation site and investigate its center to locate a chest with dynamite. Collect it and use it on a nearby wooden gate (hold R1 and aim). Search the new area once the explosion is over. You will find out that you need a large object to climb up.

Get back to the excavation site once again and explore the upper part. Locate the yellow container presented in the screenshot. You are supposed to push it towards the place where you need to climb up. Your path will be blocked by a wooden gate, so use the dynamite once again. You should take some more dynamite and only then push the container. You will have to stop for a moment when a large group of thugs appears in the area.
Encountering the first wave of enemies
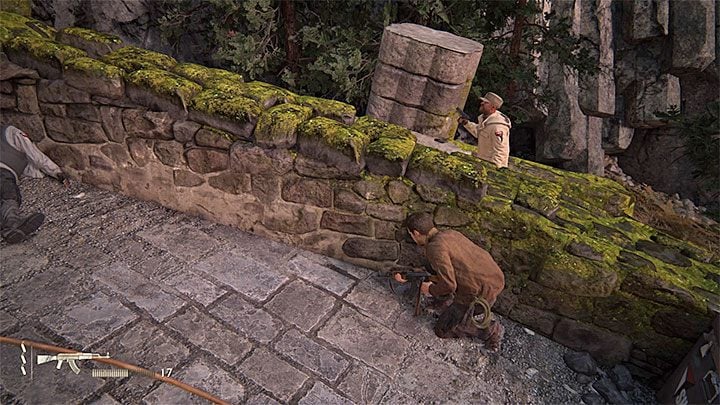
Don't even think that you will be able to move forward without eliminating your foes. However, you can try to take out some of them silently. The easiest targets are mercenaries located near the ruins, far away from the main group. This way, not only will you make the battle easier, but you also will obtain a better weapon (most likely AK-47).
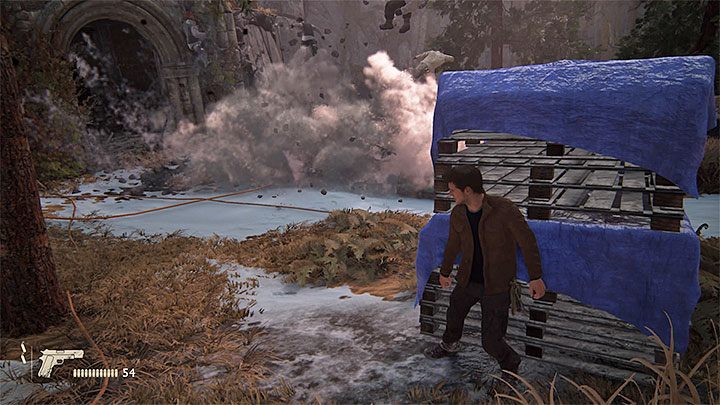
Begin combat by throwing dynamite at the remaining opponents (aim when there are 2-3 thugs next to each other). Take advantage of the spreading chaos and try to kill some mercenaries quickly. You should keep in mind that once Sam and Nate are spotted, more troops will come from the small campsite that you visited before (high rocks near the excavation). Few more enemies will come; they will be located higher than you, and will also be able to flank you. Use as many dynamite as you need, because you will be able to restock your supplies once the fight is over.
Reaching the graveyard - part 2
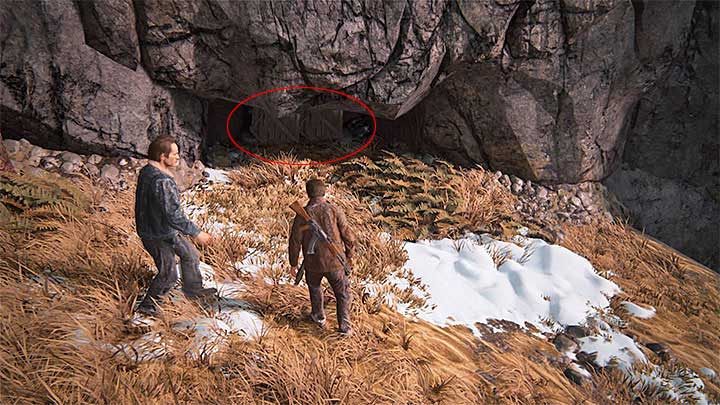
Get back to pushing the yellow container and take it to the place that you unlocked with dynamite. Get on the container and reach the upper shelf. Don't rush and explore the area presented in the screenshot. There is a small cave but the entrance will be blocked by a large crate. Use dynamite and investigate the cave to find another treasure (Carved Nut Bottle). You can now use your grappling hook on a nearby interactive tap. Jump when Nate is near a vertical wall with an interactive edge.
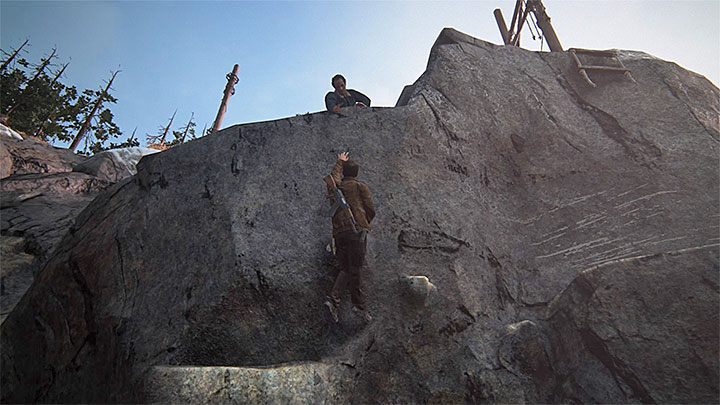
Move up and use the grappling hook again to reach the upper tap. Swing on your rope and jump to a small stone shelf. Locate a tree with the last interactive tap. Swing to another edge that Nate can grab. Reach the ladder and wait for Sam. Wait for him to get to the top, move left and grab his hand to climb up. Approach a steep wall and plan carefully your next step. During the final part of the slide, you will have to jump towards a vertical wall and grab an interactive edge. Once all this is over, head left and watch out for mercenaries patrolling the area.
Encountering more mercenaries
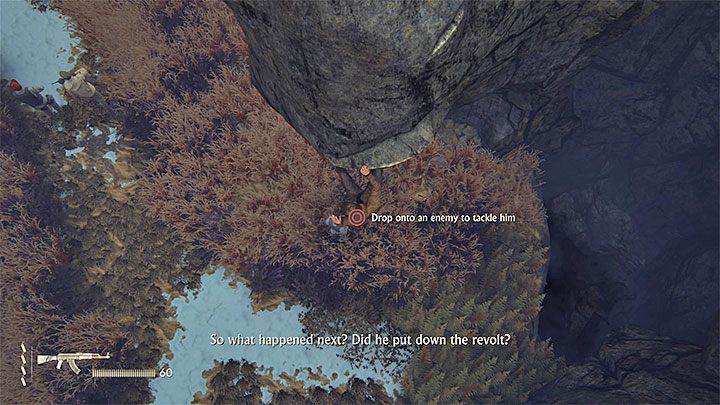
Three more thugs will soon appear under Nate. Don't attack them right away, because you can take them out in a very cunning way. Approach the last interactive edge and wait for one of your enemies to move right under your hero (see screenshot). Press circle to drop onto an enemy and tackle him. Wait for Sam to join you and approach the two remaining thugs. Use a sneak attack on the enemy on the right, and Sam will deal with the one on the left.
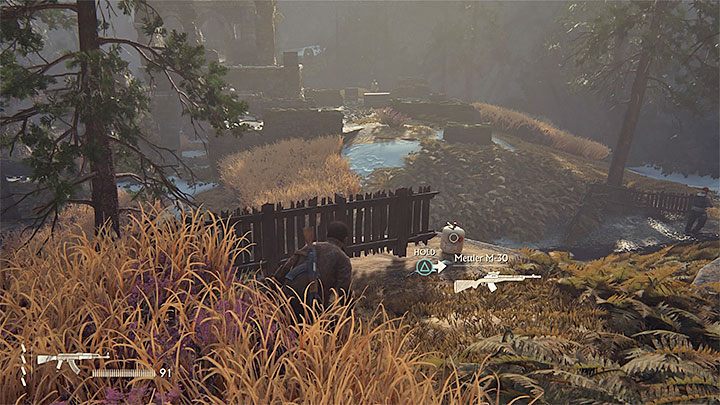
You can get to other ruins or explore the area mercenaries came from. Do the latter, and you will find Spezzotti 12 Gauge shotgun and some dynamite. Get to know with the surrounding area, and use long grass to sneak whenever it is possible. You can use your current weapon for the incoming battle, or reach to one of the stone shelves on the right. The presented screenshot shows location of Mettler M-30 sniper rifle. You can switch it with your current weapon if you like.
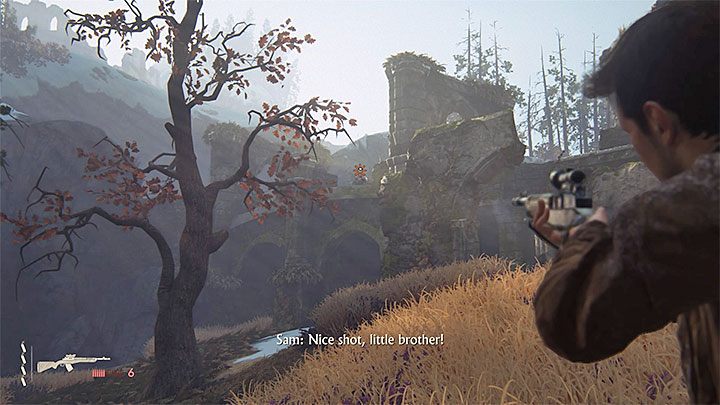
Taking out nearby enemies won't be easy due to lack of any real cover. Use wooden fence only if you really have to. We recommend one of two options: remain near the ruins and eliminate your foes with a good assault rifle or a shotgun, or take them down from a distance (e.g. from a place where you tackled your first opponent) with a powerful sniper rifle.
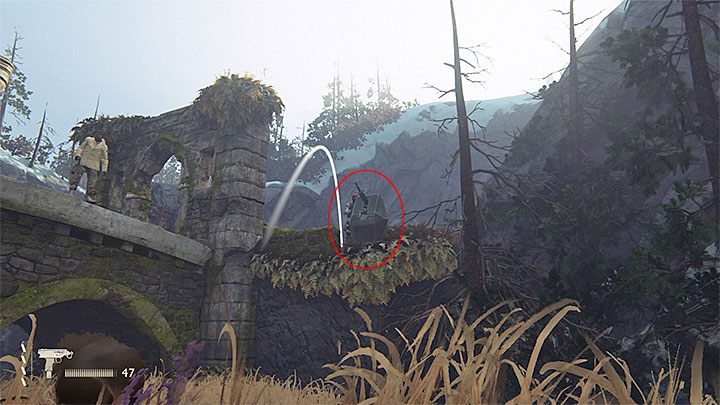
Apart from firearms, use dynamite to deal with small groups of foes who will try to hide. You can also aim for white containers with propane scattered all around the ruins. You also need to be careful and avoid heavy machine gun presented in the screenshot; it can kill you in a matter of seconds. You can eliminate its operator via accurate headshot (use your sniper rifle), or by throwing dynamite at him. When you deal with all your enemies, search their bodies and obtain a unique Barok .44 revolver (one shot will eliminate most of encountered foes).
Reaching the graveyard - part 3
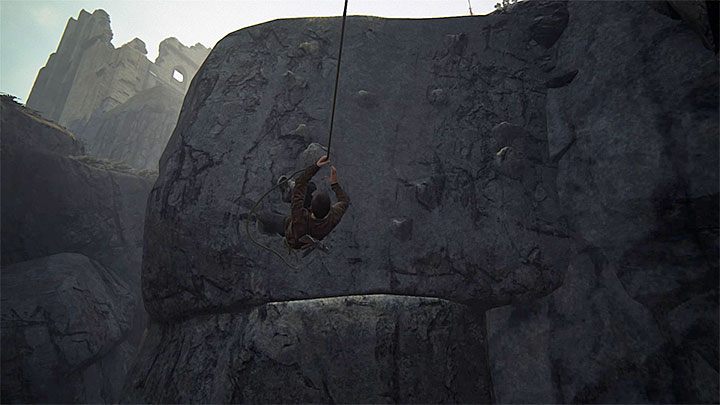
Climb to the higher part of the ruins, walk through them and move on. When you get to the cliff, grab nearby edges and use them to get to a small stone shelf. Use your grappling hook, turn Nate left and start swinging towards the vertical wall with prominent objects that your hero can hold on to. Slide down and carefully approach a group of enemies, which consists of three mercenaries.
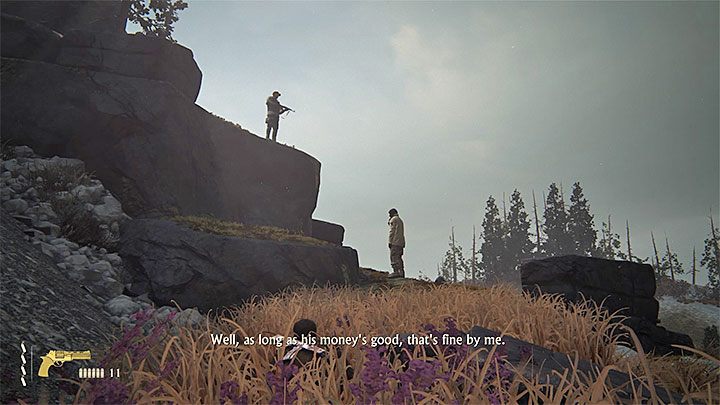
You can engage in a shoot-out but it will be more interesting to eliminate them silently. Approach the talking mercenaries, wait for them to split up, and the third thug to turn away. The soldier of fortune that is heading from where you just came, can be killed directly by you, or by Sam if you let him take control over the situation. Now, take out the one that is situated on the right edge of the cliff - just sneak up to him from behind and let him fall to his death.
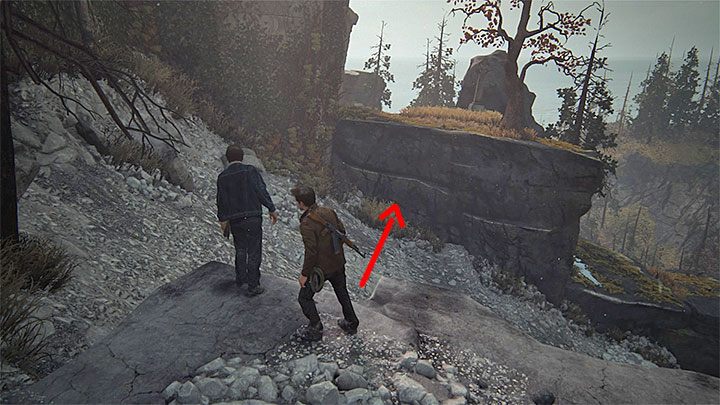
Kill your opponents, approach the scarp and slide down. Turn Nate towards a pendant pole. Climb it, jump on another one and climb on a higher wall. Reach another steep slope; slide down in straight line and grab an interactive edge presented in the screenshot. Move few steps forward and slide down some more. This time head slightly to the right and make sure that Nate does not fall into the abyss.
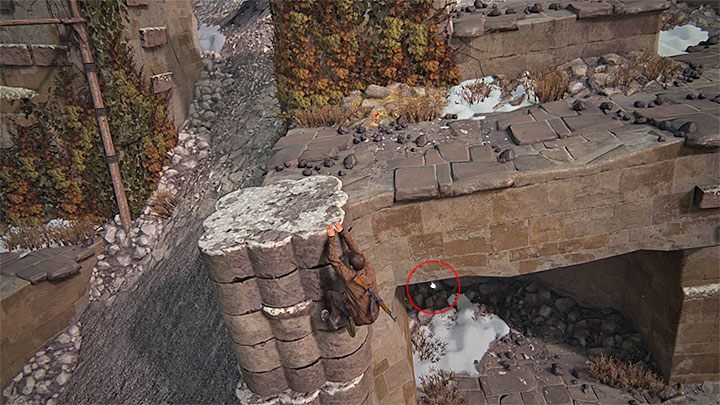
Climb up a concrete object (the one with a pendant wooden pole). You will have to swing and jump forward. Don't rush and carefully explore the area. Approach the edge of the ledge on which you landed, and pull yourself down. This way you will reach Travelling Inkwell with Seal presented in the screenshot. Collect the secret and head back up.
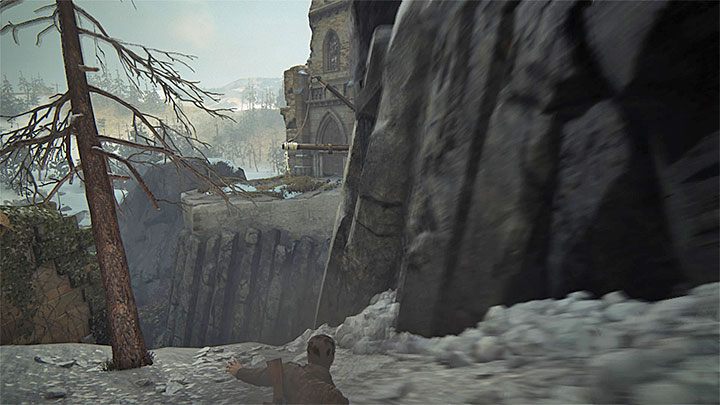
Move up a little bit, position yourself near the left scarp and aim at the pendant object (with interactive edges) while you slide down. Grab them and climb up to the very top. Jump towards a steep slope and continue sliding down. Finish it by landing on a small pole. Reach a higher ledge and move forward. Soon you will have to jump to two logs positioned in a horizontal way. Perform a jump towards the higher wall and get to the upper shelf. There is one more slide in front of you, and you will have to use your grappling hook this time. Swing on your rope and reach the safe spot.
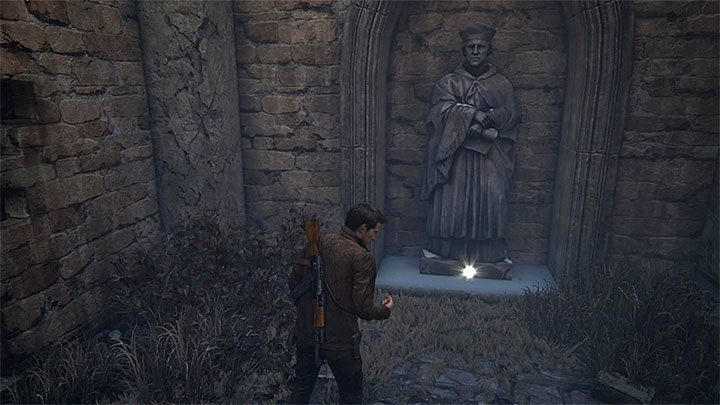
You will end up at a large gate but don't interact with it just yet. Investigate interactive edges on its left and climb up. You will get on walls above. A treasure (Carved Ivory Vanitas) has been hidden in the place presented in the screenshot. You can climb down and together with Sam open the graveyard gate.
Finding Henry Avery's grave at the graveyard
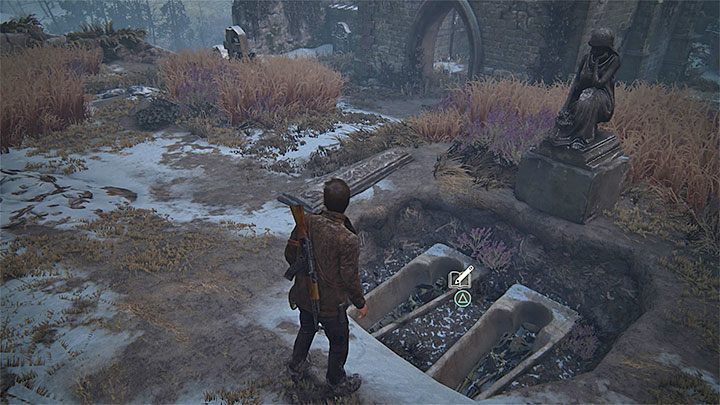
Enter the graveyard and open Nate's journal (touchpad) and access the previous page. You can check the note (press X) and learn about other tips that can help you find Avery's grave - you can recognize it by a skull, crossed swords, and dates of birth and death. Before you search for the grave, investigate the area on the left. You will come across a pit with two open graves. If you investigate them, you will unlock the first entry in your journal (one of the categories of secrets).
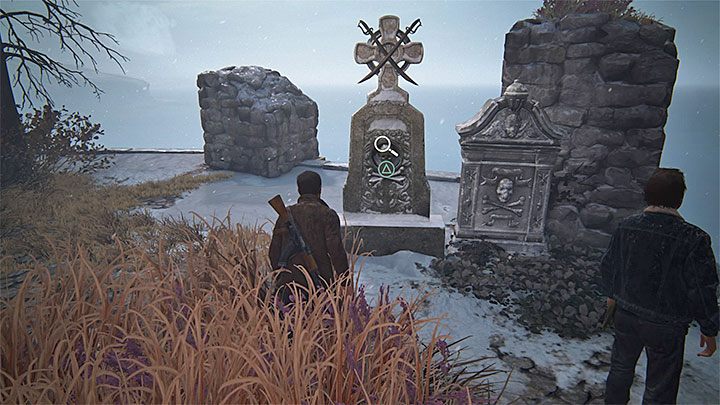
Get back to the main path and move forward. If you want, you can explore the graveyard and ruined objects scattered all around. There are no other treasures that you can collect here, but you will encounter some enemies, and it is recommended that you get to know the area by that time. Avery's grave is located on the other side of the graveyard (see screenshot). Investigate it to unlock the entrance to the tomb.
Searching the tomb
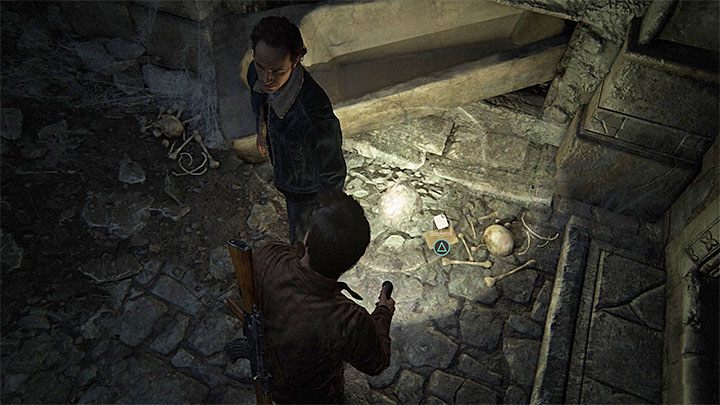
Walk downstairs and explore the tomb. When you reach the first bigger chamber, check the left corner (see screenshot) and collect a note (secret), which will be added to Drake's journal.
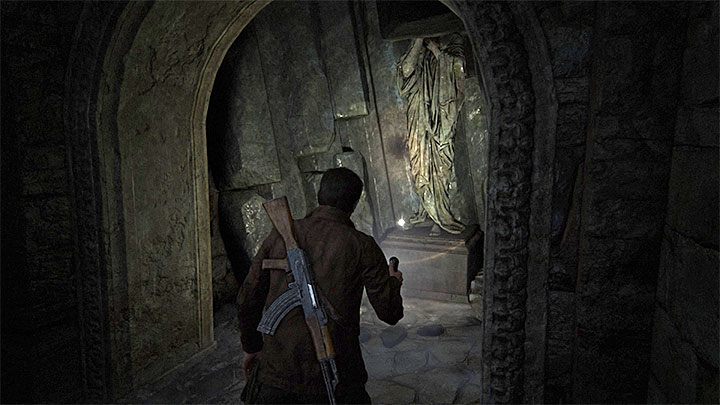
You will get to a much bigger chamber with three hanging crosses. Approach them and press triangle to investigate them carefully. This will grant you an optional conversation with Sam. When it is over, check the corridor on the left from the entrance. At the end of this corridor, there is a statue (see screenshot) with another treasure (Scottish Ha'penny)
Glowing points puzzle in the tomb
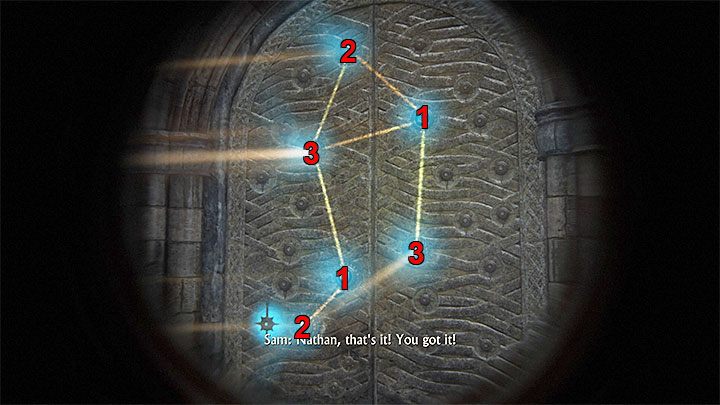
Get back to the crosses once again and ask Sam to light fire. Investigate the door behind the wall, and draw your attention to beams of lights falling on it. Interact with Sam to begin the second optional conversation and add the second entry to your journal. Approach the crosses and interact with the mechanism situated right under them. Your task is to point sparkling points at the correct crystals on the door. The presented screenshot shows how to solve the riddle, and this is what you have to do:
- Set the sparkling points on the left so that they will match crystals 1 from the picture
- Set the sparkling points in the middle so that they will match crystals 2 from the picture
- Set the sparkling points on the right so that they will match crystals 3 from the picture
Solve the puzzle and interact with the door to open it. Watch the cut scene and head for the exit.
Encountering the third group of mercenaries
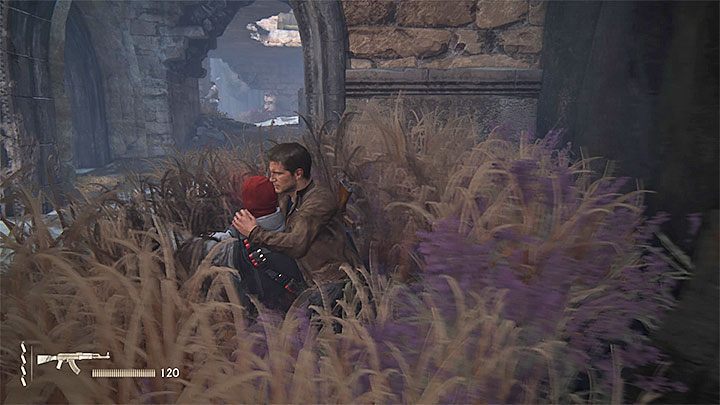
You will come across more mercenaries, right after you leave the tomb. If you took the time to study the terrain, it will be much easier to move around. Remain hidden for as long as you can, and perform sneak attacks to eliminate single enemies. Use long grass, or the very ruins (climb up and drop onto your foes).
Remember - If you want, you can try to sneak up to the main gate (without being spotted or attacking your foes) and unlock Ghost in the Cemetery trophy. We recommend that you play on Light difficulty level, as your enemies won't be easily alerted. This is especially important at the end, as Nate and Sam can be spotted during the process of opening the gate. For more tips, check chapter devoted to trophies.
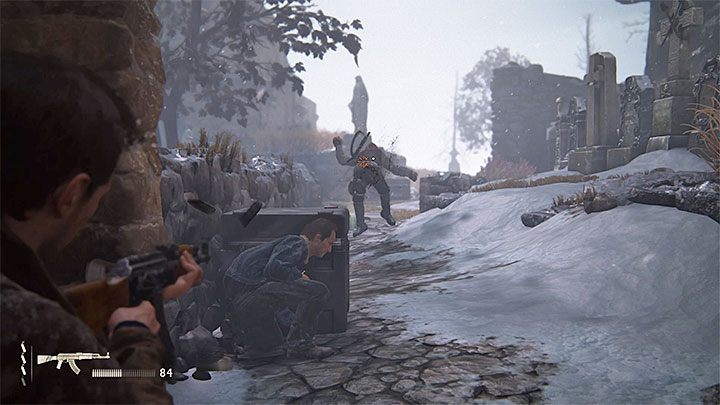
Once the battle starts, think carefully where you want to take your stand. If you have a shotgun, you can remain near the buildings and take down your foes from a close distance. Otherwise, you can go back to the locked gate that you used to get to the graveyard. Mercenaries will have a lot of problem to reach this place, but you need to remember that they may throw grenades at you.
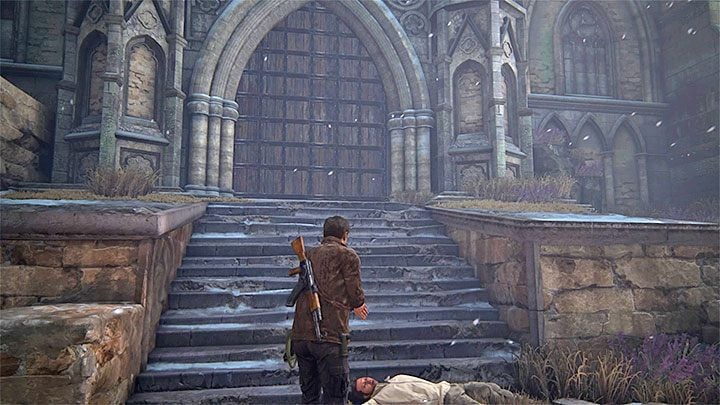
Deal with your enemies and locate the gate presented in the screenshot. You can find it behind the ruined buildings (if you are standing at the exit from the tomb, turn slightly left - it's in the distance). Nate won't be able to lift the gate by himself, so you need to wait for Sam.
Reaching the large cross
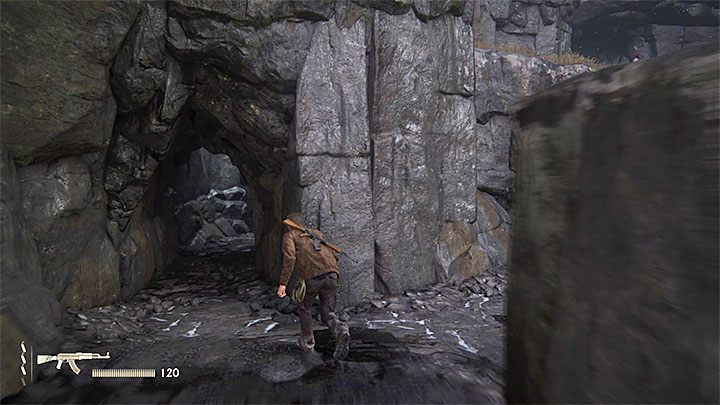
Turn left, walk downstairs and begin a march, during which Nate will update his journal with few more notes (they are not actual secrets) and make contact with Sully. Reach stone shelves and use your grappling hook. You will get to a place where three more mercenaries will be waiting for you. Leave them for now and find a passage to a cave on your left (see screenshot). Explore it and find a unique Flintlock pistol and another treasure (Slipjoint Clasp Knife).
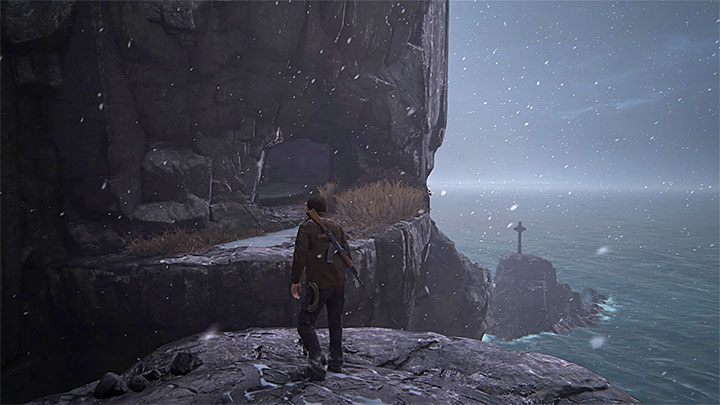
Exit the cave and only now focus on your enemies. Once again you can shoot them down or try to sneak up to them and eliminate them silently. If you decide on the latter option, take out two thugs from the lower shelves, and make sure to use long grass to your advantage. Perform the attack when the third opponent is looking away from your position (finish him last when he returns to this position). There is more climbing for you. For now, ignore Sam, who will place himself by a nearby ladder, and locate the stone shelf presented in the screenshot. Reach it and get into a small cave. There is a treasure (Pewter Singing Bird Box) on the barrels, on the left.
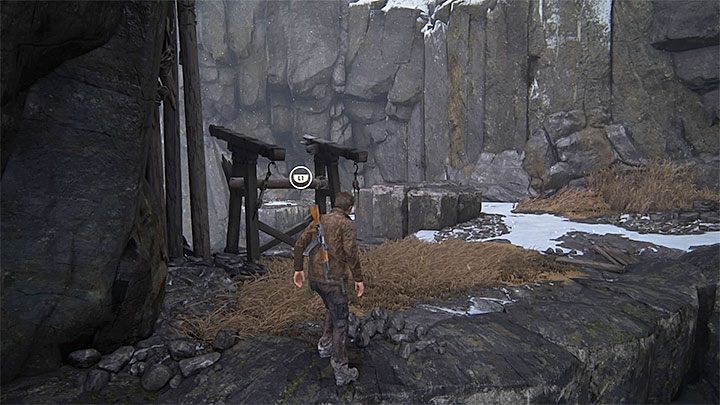
Only now get back to Sam and lift him, so that he can grab the ladder. Although Nate won't be able to repeat the same action, Sam will soon discover an interactive tap that can be combined with your grappling hook. Reach the shelf where Sam is located and use your grappling hook again. This time hold on to the tap, jump down and lower yourself as low as possible. Swing your rope and aim at the nearest interactive edge.
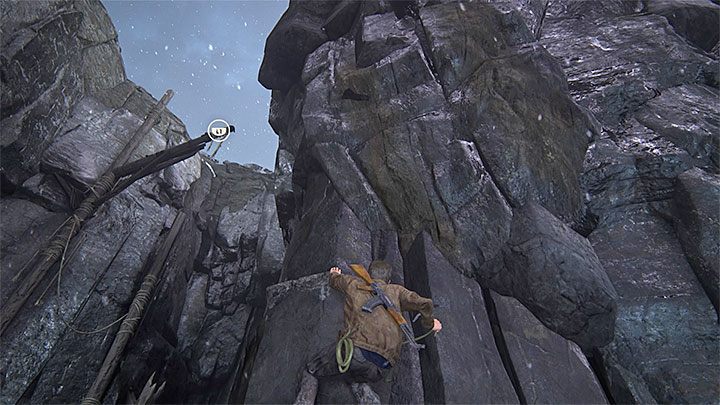
Move to the left and let go the edge to slide down the steep surface. Prepare yourself to press L1 and grab the left tap, before Nate falls to his death. Use the edges to climb up and locate another tap, above your hero. Use the grappling hook to pull yourself up a little bit, and only then swing your rope. Nate will have to jump over some sort of a barricade.
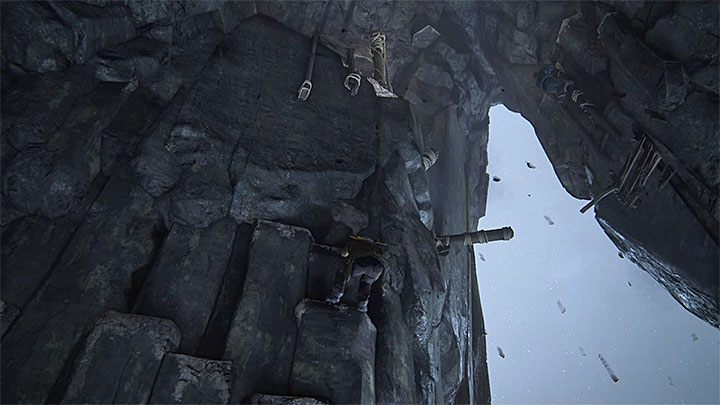
Be careful as you will have to start another slide down and reach the nearby interactive edges, right after you perform the jump. Move right and perform a small jump. Try to catch the upper ladder (you will fail to do that). Wait for Sam to cross the drawbridge and for it to collapse. A new tap will be revealed. Move right and reach the place where Sam will be waiting for you. Jump up to catch his hand and climb a large stone shelf with one of the crosses.
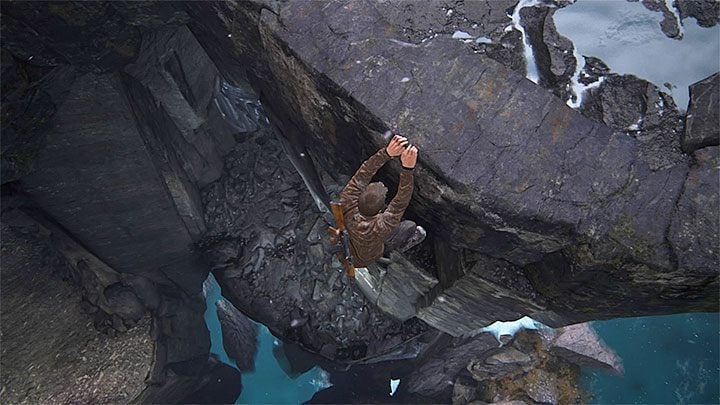
Take a look around the cross, and to be more specific, investigate edges of the stone shelf. In the place presented in the above picture, Nate will be able to lower himself down and continue to go down. Thus, you will be able to reach the lower shelf where another treasure (Tortoise Shell Snuff Box) is located (you could have seen it before, but it was unavailable to you). Get back to the top and pick the only available path. Use interactive edges and move closer to another campsite.
Encountering the forth group of mercenaries
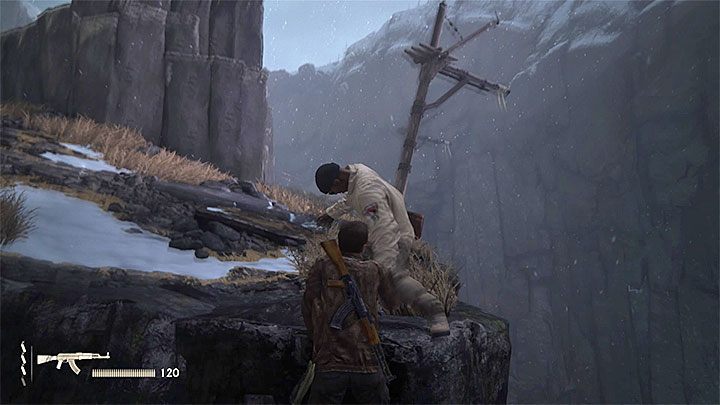
The key problem is that one of the mercenaries is a sharpshooter. Although the laser scope will reveal his location, it is best to stay hidden for as long as possible. You should start by sneaking up to the closest opponent who is directly in front of you. You can hang by the edge and pull him down. You may also investigate a small cave located right under this place. If you do, you will find a pistol and some dynamite.
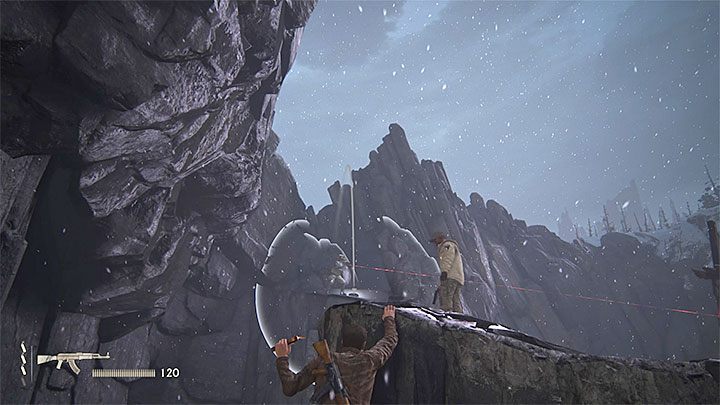
You may approach the main group of enemies on one of several ways, but the recommended solution is to stay in the left part of the area, and use an interactive tap to reach other shelves quickly. Then you can explore the upper or lower part of the location (hang on the edge or hide in long grass). Regardless of the method that you decide to use, the best way is to throw dynamite at the sniper to eliminate him for good.
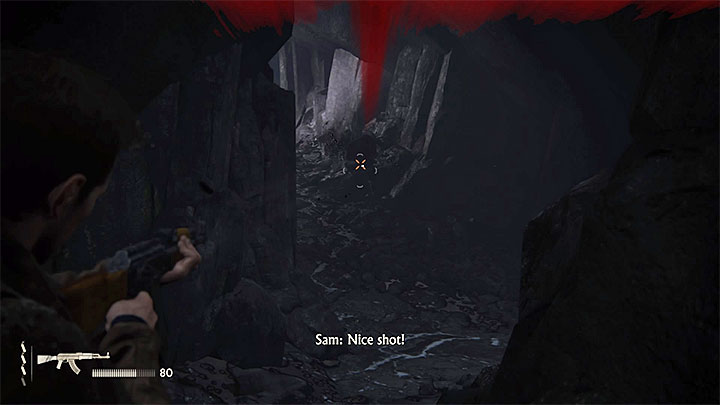
Once the battle starts, you may want to hide in the cave and make your stand there (especially when you play on one of the highest difficulty levels). Although there is a shotgun in it, you don't have to use it. Check which entrance is watched by Sam and head to the other one. Hide in the cave, after you deal with the majority of your foes.
Remember - one of the mercenaries has a Barok .44 revolver which you might have already collected. You may want to take it, because it will make the process of killing your opponents much easier.
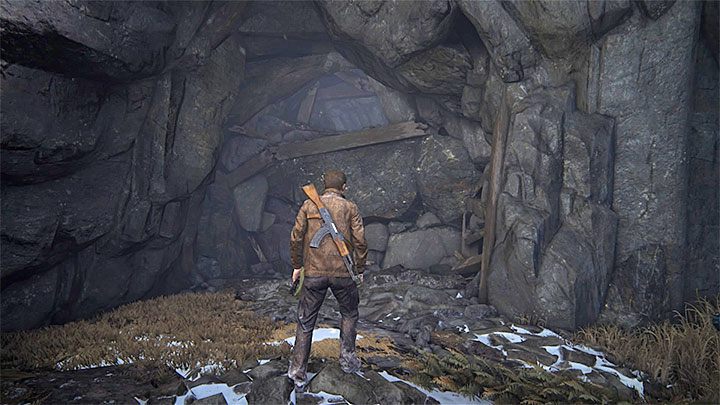
In order to leave this location, you need to locate a narrow passage (see screenshot) located on the right (bellow) of the stone shelf that was occupied by the sharpshooter. If you are good at sneaking, you can get to this place before you actually alert your opponents about your presence.
Reaching Pirates' Cave
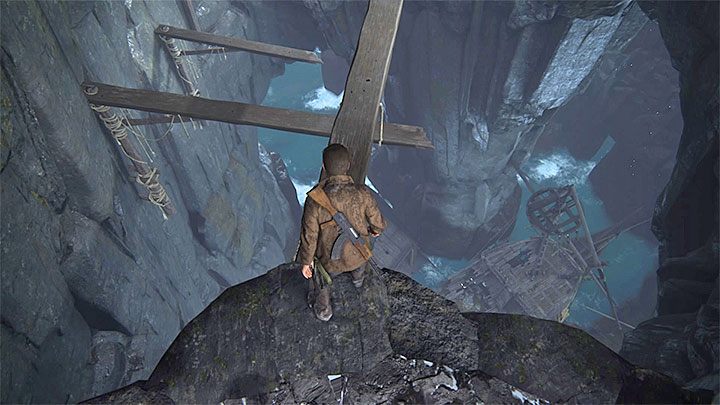
It won't take long before you have to ask Sam for help and unlock the partially blocked passage. Soon you will exit the small cave and begin to slide down (you will need to jump towards an interactive edge at the end). Use your grappling hook to reach a shelf above. You will get to a huge abyss, at the bottom of which is a shipwreck. You will get through this location via narrow wooden bars. Take your time not to fall down.
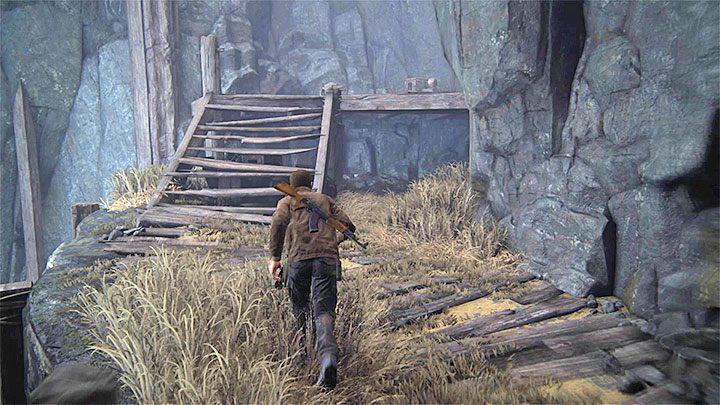
Once you get to the other side, wait for Nate to add new notes to his journal. Continue your journal until you get to stairs presented in the picture. Check the dark area under them to find the last remaining treasure (Persian Tailoring Scissors). The rest of your way shouldn't cause too much trouble. Nate will also contact Sully. Your objective is to find a locked door in pirates' cave. Use the switch on the right to activate them.
- Uncharted 4: A Thief's End Game Guide
- Uncharted 4: Game Guide
- Uncharted 4: Walkthrough
- Uncharted 4: List of all chapters
- Uncharted 4: Prologue - walkthrough
- Uncharted 4: Chapter 1 The Lure of Adventure - walkthrough
- Uncharted 4: Chapter 2 Infernal Place - walkthrough
- Uncharted 4: Chapter 3 The Malaysia Job - walkthrough
- Uncharted 4: Chapter 4 A Normal Life - walkthrough
- Uncharted 4: Chapter 5 Hector Alcazar - walkthrough
- Uncharted 4: Chapter 6 Once a Thief - walkthrough
- Uncharted 4: Chapter 7 Lights Out - walkthrough
- Uncharted 4: Chapter 8 The Grave of Henry Avery - walkthrough
- Uncharted 4: Chapter 9 Those Who Prove Worthy - walkthrough
- Uncharted 4: Chapter 10 The Twelve Towers - walkthrough
- Uncharted 4: Chapter 11 Hidden in Plain Sight - walkthrough
- Uncharted 4: Chapter 12 At Sea - walkthrough
- Uncharted 4: Chapter 13 Marooned - walkthrough
- Uncharted 4: Chapter 14 Join Me in Paradise - walkthrough
- Uncharted 4: Chapter 15 The Thieves of Libertalia - walkthrough
- Uncharted 4: Chapter 16 The Brothers Drake - walkthrough
- Uncharted 4: Chapter 17 For Better or Worse - walkthrough
- Uncharted 4: Chapter 18 New Devon - walkthrough
- Uncharted 4: Chapter 19 Avery's Descent - walkthrough
- Uncharted 4: Chapter 20 No Escape - walkthrough
- Uncharted 4: Chapter 21 Brother's Keeper - walkthrough
- Uncharted 4: Chapter 22 A Thief's End - walkthrough
- Uncharted 4: Epilogue - walkthrough
- Uncharted 4: Walkthrough
- Uncharted 4: Game Guide
You are not permitted to copy any image, text or info from this page. This site is not associated with and/or endorsed by the developers and the publishers. All logos and images are copyrighted by their respective owners.
Copyright © 2000 - 2025 Webedia Polska SA for gamepressure.com, unofficial game guides, walkthroughs, secrets, game tips, maps & strategies for top games.
