Uncharted 4: Chapter 12 At Sea - walkthrough
This page of the Uncharted 4 guide has a walkthrough for chapter 12 – At Sea (archipelago, pirates' hideout, steering wheel and spheres puzzle).
This page of the Uncharted 4: A Thief's End guide has a walkthrough for chapter 12 - At Sea. You will learn, e.g. how to discover all treasures and secrets of the archipelago, how to follow the arrows, where to find the pirates' hideout, and how to solve the steering wheel and spheres puzzle.
- Chapter 12 information
- Exploration of the archipelago
- Find traces of pirate presence
- Follow the arrows
- Find pirate hideout
- Explore the pirate hideout
- The puzzle with steering wheel and spheres (the second trial)
- Reach Avery's statue
Chapter 12 information
The twelfth chapter takes place on an archipelago that you can explore without worrying about any enemies. At first, you are granted a lot of freedom when it comes to exploration and it is a good idea to seize this opportunity to obtain treasures and other collectibles. The rest of the chapter is linear and the path leads you to the pirate hideout. Towards the end of the mission on the archipelago, you additionally will be required to solve a puzzle. There are quite a few collectibles to obtain in this chapter - 13 treasures, 6 journal entries, two notes and two optional conversations.
Exploration of the archipelago
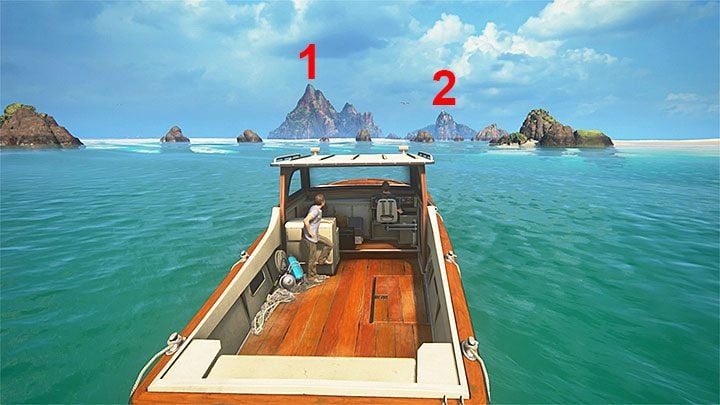
The archipelago is predominantly made up of two main isles marked in the above screenshot- 1 (the larger one) and 2 (the smaller one). The rest of the isles are not that important. The only exception is the islet where there is a ship wreck, to the left of isle 1 (to learn more, see the rest of the text). You are granted a wide freedom, as to whether you want to go to the pirate hideout straight away, or explore the archipelago thoroughly in the first place. If you opt for variant 1, see Find traces of pirate presence. Otherwise, remain in this part of the walkthrough.
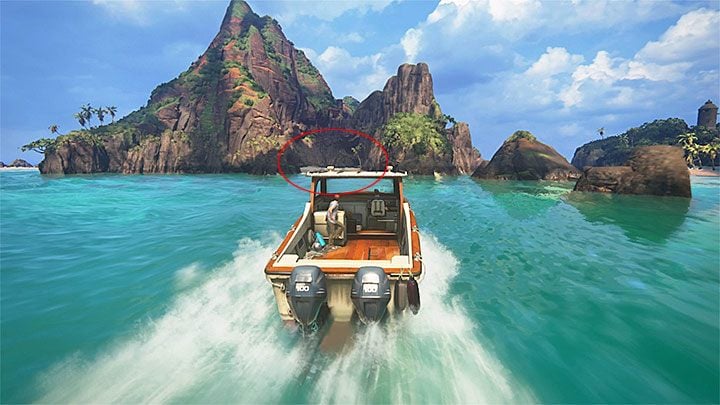
Head towards Isle 1. Steer around the projecting fragment of the beach and head towards the main isle in a straight line. Your destination is the small beach fragment shown in the above screenshot. Leave your boat here and start exploration of this part of the isle. On the left, there is a grave whose examining provides you with the first journal entry. Go right then and take a look into a small cavity where there is the first note. Return to the boat and start walking around the isle in the clockwise direction. You will get out on a bigger beach. Just like earlier, walk onto the ground and take a look around. Here, you find the first Treasure (Combination Lock Tobacco Box), by a destroyed crate.
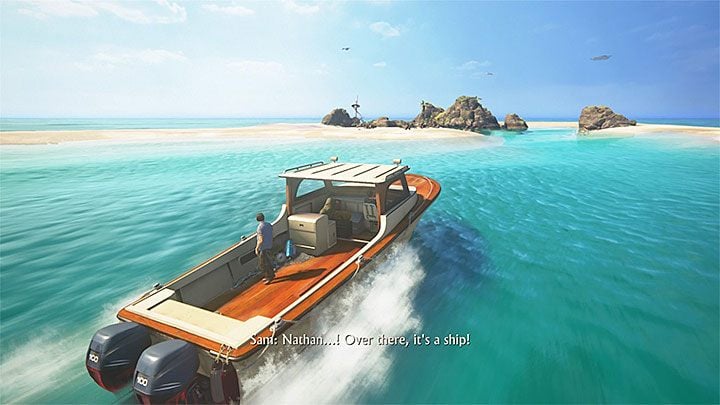
Now, turn your attention towards the islet mentioned above. It is to the left of isle 1 - it has been shown in the above screenshot. What you mainly find here is a ship wreck. Jump into the water near the sunken ship, thanks to which you obtain a trophy - Marco Polo Returns!. You can now explore the area. Near the crates on the beach, there is the second note. After you obtain it, come close to the wrecked ship and press Triangle button to obtain the second journal entry. Finally, jump into the water, swim closer to the ship and dive (pres Circle). Swim into the ship across the large hole. Thanks to this, you will find the second Treasure (Brass Pocketed Sundial).
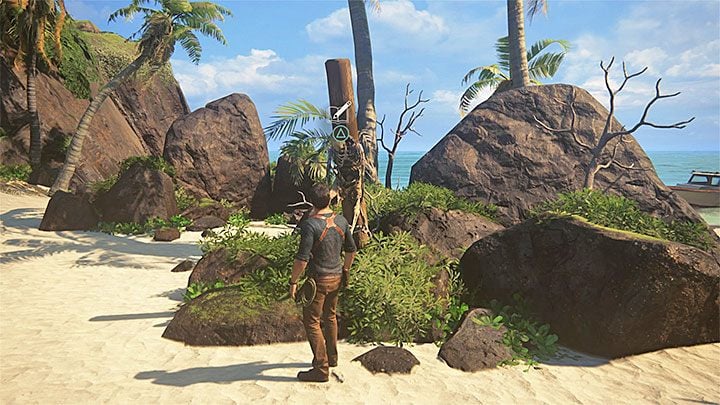
Return to your boat and steer towards isle 2. You have to reach the grassland in the center of the isle, near the tower on the hill (you will explore it a bit later). After you get there, take a look around to find the skeleton shown in the above screenshot. After you examine it, you will get the third journal entry. Right by the rocks, there is the third Treasure (Silver and Wood Tankard).
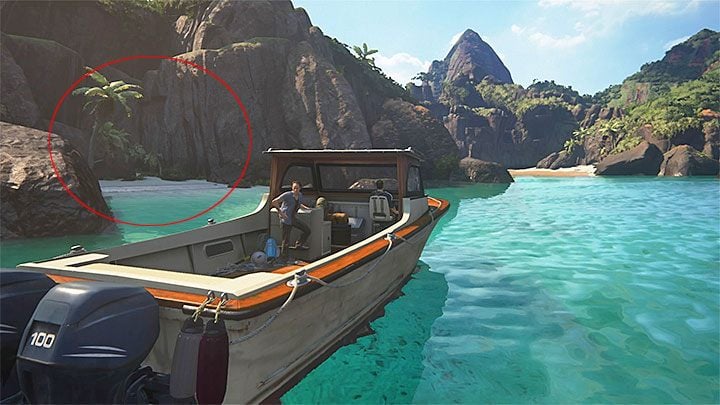
After you find the treasure, go to the nearby beach because there is a larger cave there, which is where you find the fourth Treasure (Persian and Silver Pen Box). That is not it, yet. Use the boat to steer around isle 2 on the right side and keep an eye out for a very small beach fragment shown in the above screenshot, Explore that area to find the fifth Treasure (Panamanian Pendant).
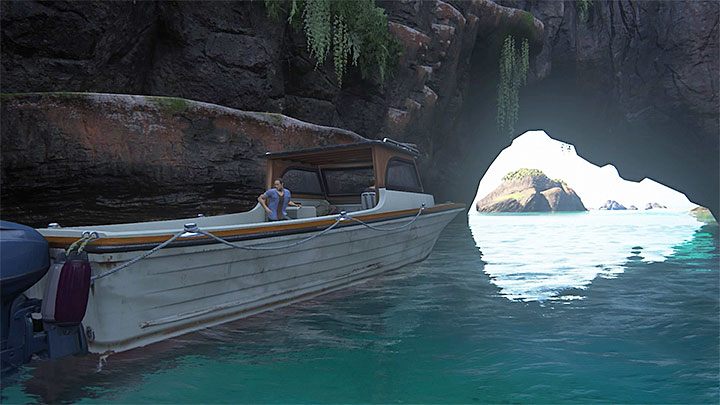
There is just one more "loose" collectible to be found. Return to your boat and steer it towards the back of isle 1. Keep going within close distance of the isle and keep an eye out for the interactive ledges shown in the above screenshot. Stop the boat there and climb onto the roof to reach them. Climb up and you will get a ledge with the sixth Treasure (Persian Leather Notebook Case).
Find traces of pirate presence
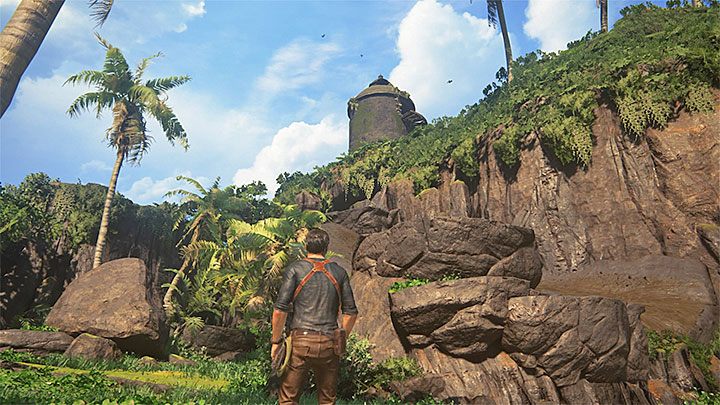
You can try and find pirate hideout right at the beginning of this chapter, or you can wait until you have sufficiently explored the entire archipelago and collected some of the treasures. You have to reach isle 2, i.e. the smaller one on the right. Leave the boat and reach a big grassland. Take interest in the tower shown in the above screenshot. Your objective now is to reach it and to do this, take the stairs that Sam can help you find.
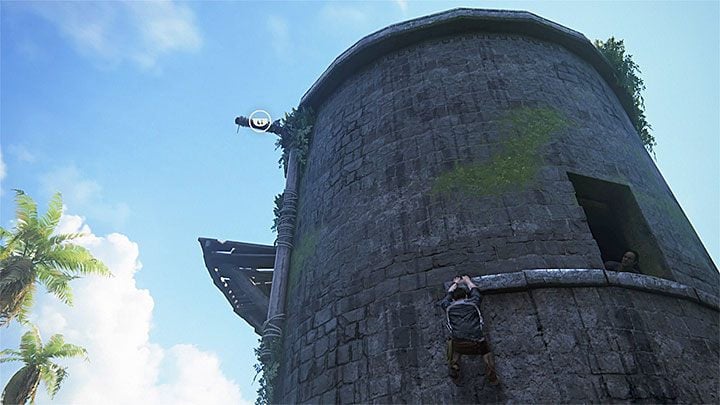
Follow the linear path, up to the tower. Enter and start climbing here to get to the top of the tower. Use ladders and jump towards ledges. Soon, you will have to jump across a window. Shimmy to the left over the ledge and use the grappling hook on the grappling point above. Pull up to reach the balcony above. Approach the arrow that you can see on the wall. Examine it to see a cutscene.
Follow the arrows
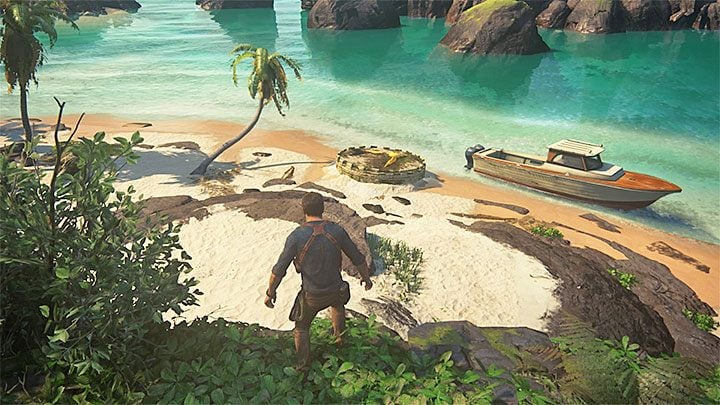
From now on, you will have to find big arrows that resemble compass needles and follow them. The first arrow is on the beach shown in the above screenshot. Before you reach there, you have to come down from the tower . To do this, use the zipline to come down. After you reach the arrow. Get on the board of your board and steer towards the shore of isle 1, where there is another arrow. You do not have to leave the boat. Instead, you can follow the arrow and take right turn at an angle of around 90 degrees.
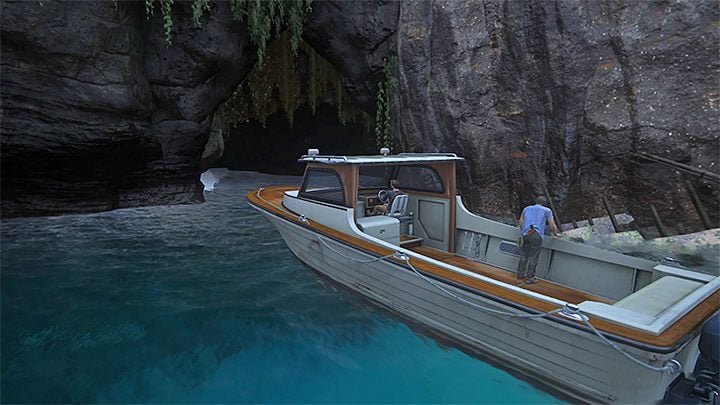
Reach the islet surrounded by 4 boulders and after you check out the next arrow, go left a little. The next arrows are underwater, which is why you have to start moving slower in order not to miss them. The arrows lead to the cave shown in the above screenshot on isle 1.
Find pirate hideout
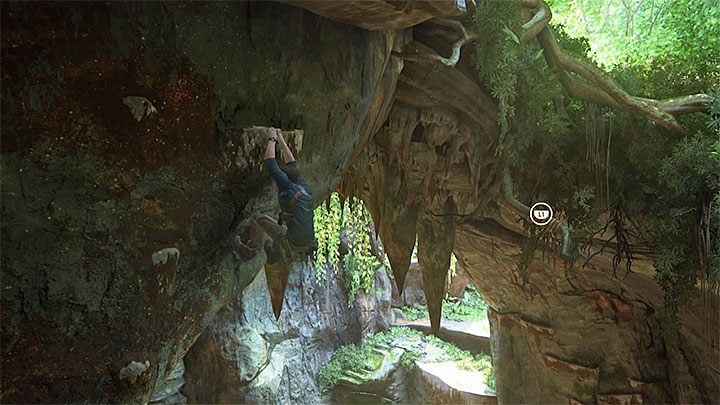
Find interactive ledges in the left part of the cave, stop the boat there, climb onto its roof and start climbing up the rock. Jump towards ledges above to get to the area where Nate can use the grapple. Take a swing on the rope, jump towards the ledges and move left to get to a stable one. Take several steps forward and note the ruins in the distance. Before you go there, examine the area on the right, because there is another Treasure (Deccani Bronze Spouted Bowl) there.
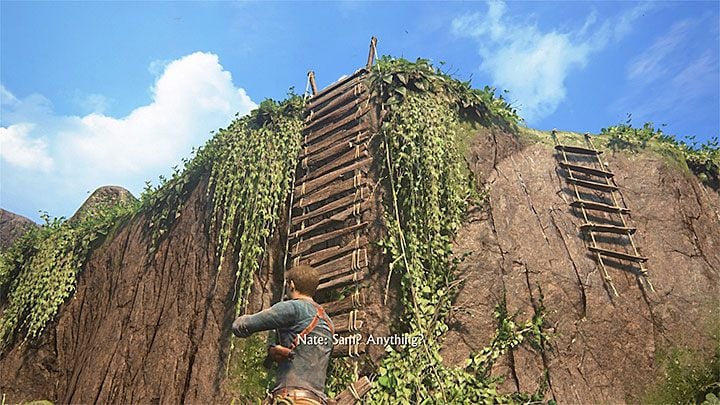
The main ruins entrance is covered with rubble, so you have to check the area on the left and, after you climb onto the ledge above, ask Sam to help you remove the planks covering the passage. Climb up and walk over the wooden beam. In the next area, approach the inaccessible ladder and press Triangle to give Sam a boost up. He will run over the bridge that collapses under his weight. As a result, you will have to split for the time being. Use the snapped bridge as a ladder and reach the ledge above. After you get there, jump over to the neighboring ledge and check out the dim area on the right, where there is another Treasure (Mughal Elephant Carving).
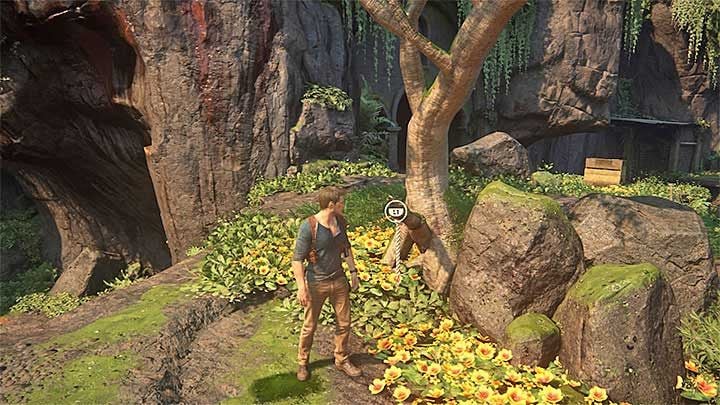
Climb onto the wooden ledge and jump towards planks projecting from the wall. Then, grab on to the neighboring ledge. Finish your climb towards the left ledge, thanks to which you will rejoin Sam. Follow him into the nearby viewpoint and wait for the icon signaling optional conversation appears above Sam's head. After the conversation, find the grappling point at the tree, shown in the above screenshot, Use grappling hook on it and jump down into the chasm.
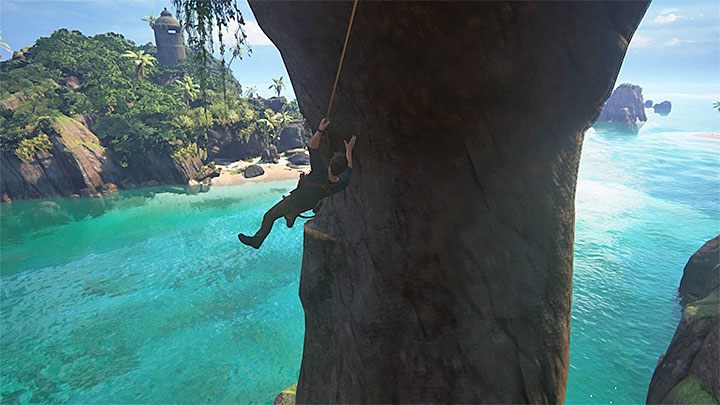
The next step is a bit problematic. You have to use the rope to reach the ledges shown in the above screenshot. They project directly under the rocks that Sam is standing on. Use the interactive ledges to reach a new grappling point and, after you attach the grappling hook to it, swing towards the ledges in the distance. Once there, climb up and then lean back to jump towards the ledge behind Nate's back. Again, use the grapple. Do not jump to any ledge, though. Instead, Start running along the side of the rock, left and right. You have to make Nate jump towards the ledges on the right.
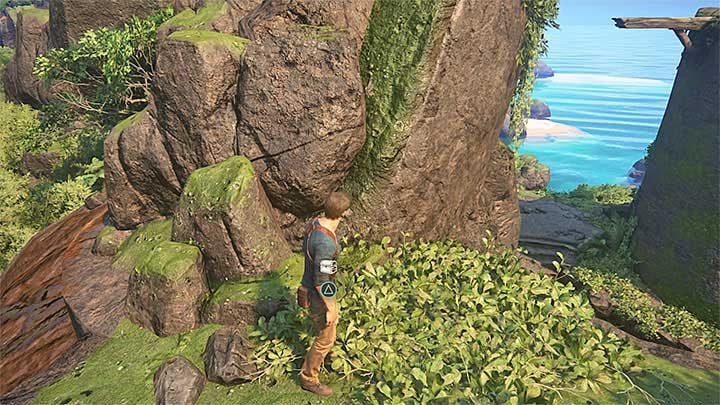
You will have to take another climb. As a result, you will get near a small ruined tower. Start by entering inside and taking a look around in the ground-level room. Thanks to this, you will find a Treasure (Ottoman Helmet). You now have to climb up to the top of the tower, which is not too complicated - make it over to its upper floor, jump across the window and finish your climb. Stand on the wooden beam projecting from the tower and use the grappling hook on the nearby grappling point. IT IS IMPORTANT that you do not swing too hard because you have to land on the nearby ledge right in front of a steep escarpment. After you do this, turn left and make it over onto the small ledge shown in the above screenshot, where there is a Treasure (Deccani Bronze Vase).
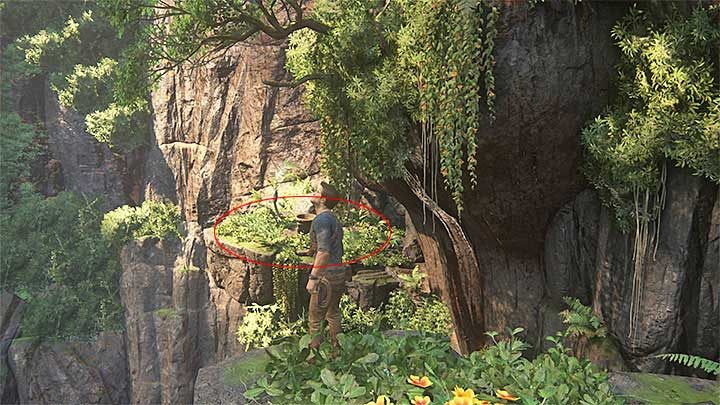
Only after that, slide down the muddy surface. After that, do not go straight ahead and go left instead. Take the path between the rocks. Climb over the ledges on the left. Your aim is to get to the area shown in the above screenshot. You have to jump towards the ledge in the distance and press L1 in mid-air, thanks to which you use the grapple. If you have done everything properly, you will reach the location of a Treasure (Strange Relic). After you collect it, return to the area where you have ended up after the mud slide. Walk to the left a little and you will find the pirate hideout.
Explore the pirate hideout
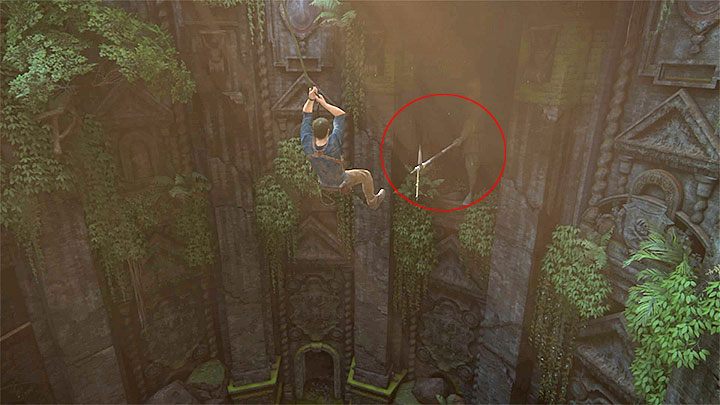
Approach the ruins with the statues. Jump down onto the ledge on the right below, approach the edge and unlock the fourth journal entry after the icon appears. Note that you can use the grappling hook on the spear that one of the statues is holding. After you do that, turn left on the rope and head for the next spear. Jump towards it and use grappling hook again. Pull up and reach the small ledge shown in the above screenshot (you have to take a swing first), because there is a Treasure (Hamsa Mythical Goose) there. After you obtain that item, use the grappling hook again and lower yourself to reach the lower part in the ruins.
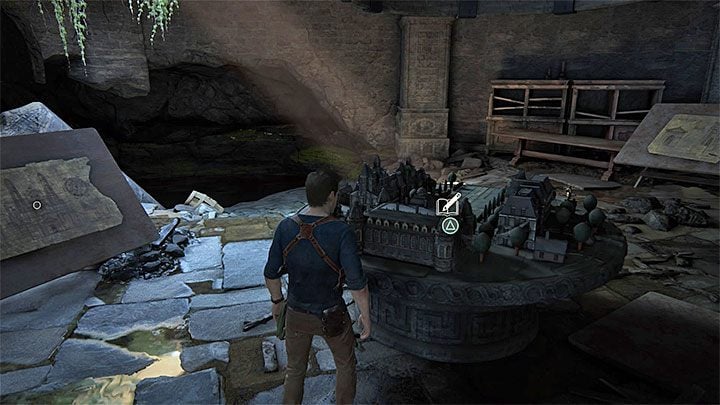
Do not yet cross the passage with the large statue that you can see in the distance. Instead, examine side rooms in the ruins. In one of them, there is a model and examining it grants you the fifth journal entry. After examining the model, examine the rest of the objects also -examine the statuette on the table with the model, two sketches and three paintings on the walls (the ones with captions under them). After you have done all of that, go to the flooded corridor and swim over to the neighboring chamber. Examine the table there and wait until the option to have the second optional conversation with Sam appears.
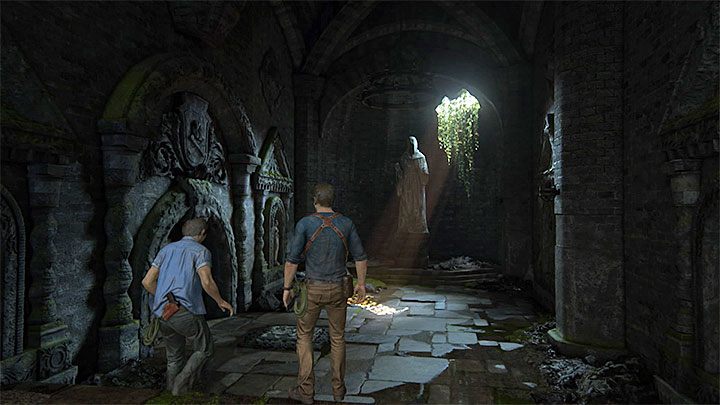
Remain in the chamber where there optional conversation took place and go into the corridor that you have not yet explored. While following the corridor, make it over onto the small ledge on the right, where there is the last Treasure (Pique Tortoise Shell Box). After you have explored the ruing thoroughly, walk into the passage shown in the above screenshot. In the next chamber, stand on the pressure plate and walk around the locked gate. This way, you will enter a larger room with another legitimate puzzle in it.
The puzzle with steering wheel and spheres (the second trial)
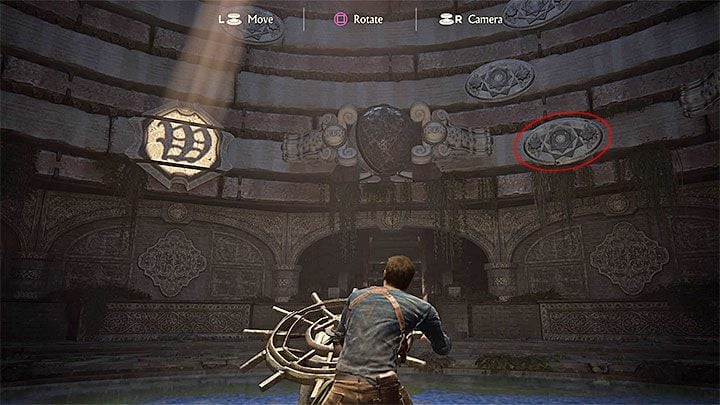
There are three parts to this puzzle. The first two are very similar to each other and the third one introduces an impediment. The aim of the puzzle is to place three appropriate symbols on the spheres (there can be several different symbols on each of the spheres), in the spots where light falls on the wall. You do this by moving the spheres to the left and to the right (by leaning the analog stick) and by rotating them. It is possible to rotate the spheres only after the sphere in question is on the pressure plate similar to the one that has been shown in the above screenshot. Only then can you rotate the sphere by pressing the Square button, which lets you pick the required symbol.
Note - you should rotate the spheres in turns, i.e. make sure that at any given moment, there is only one sphere on a pressure plate, thanks to which only this one is rotated for the correct symbol.

While trying to complete the first part of the puzzle, focus on the bottom row only (the two above will be inactive). Find the black sphere and move it to the spot where you can rotate it. Manipulate it to make its left half only to be shaded. The symbol that you need on that sphere has been shown in the above screenshot. Then, focus on the second sphere and start rotating it (rotate that sphere only, sphere 1 must not rotate) and find the W symbol on it.

After you do this, move both spheres into the lighted spots (the above screenshot). Thanks to this, you will have completed the first part of the puzzle.

In the second part of the puzzle, you have to manipulate the spheres in the middle row. Check the position of the lighted points to make sure where you want the spheres with three and one lines. Rotate them in appropriate way and move them into the spots of light. The solution has been shown in the above screenshot.
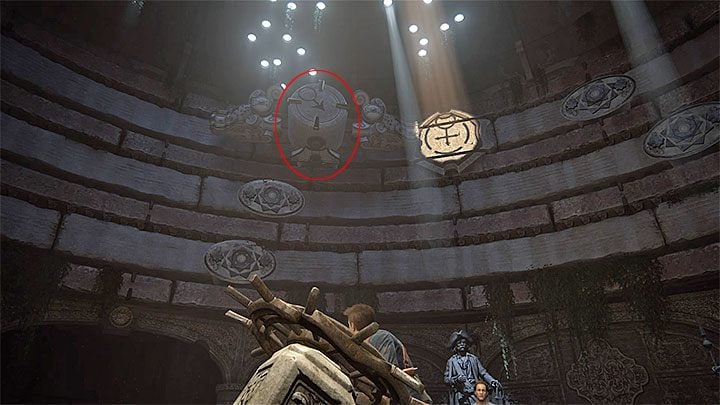
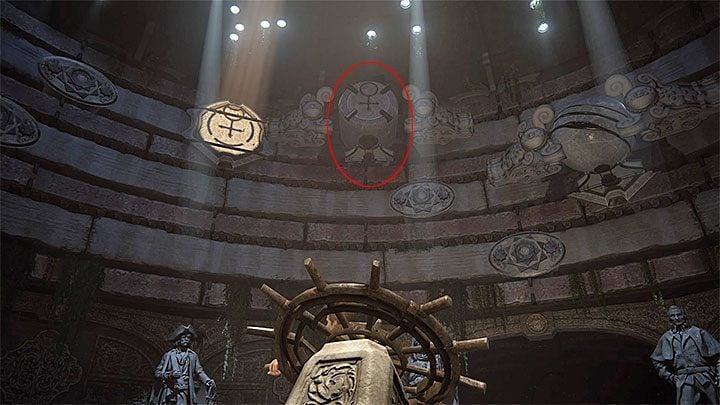
The third part of the puzzle introduces a major impediment, because symbols change not only while the spheres are rotated using the Square button, but also when they are moved left or right. Therefore, try to follow this walkthrough while taking successive steps. Thanks to this, you will not lose too much time trying to figure out the solution.
1) Look at the symbol with the masculine symbol (arrow) and move it to the pressure plate 1 shown in the above screenshot, to the left of the spot of light with the feminine symbol (the cross). Rotate the sphere with the masculine symbol four times.
2) Focus on the feminine symbol now (the cross) and move it to pressure plate 2 shown in the above screenshot, to the right with the light spot with the feminine symbol (the cross). Rotate the feminine symbol sphere twice.

If you have taken all of the steps correctly, Sam should speak (otherwise, reload the last checkpoint and try again). The last thing to do now is place both of the spheres in the spots of light (the above screenshot). After you watch the short cutscene, pull the lever to return to the surface.
Reach Avery's statue
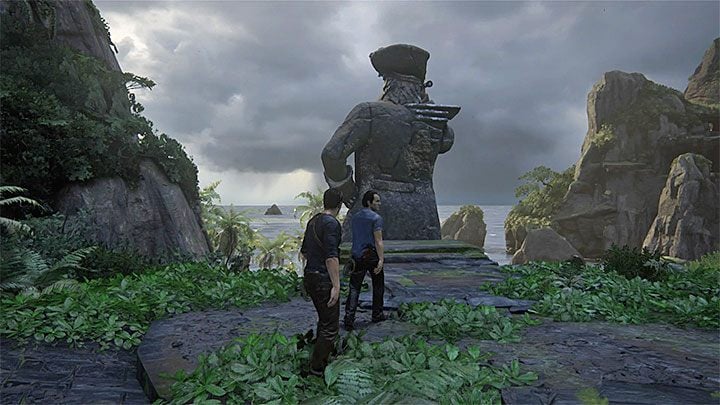
Avery's statue appeared on isle 2. Do not try to get there by jumping down into the water from the height. Instead, find the interactive statues and use them to reach the spot where you can zip down the line. After a while, you will return into the cave with the boat. Use it to reach isle 2 and go to the hill where Avery's statue is. Press Triangle after the examination icon appears, because this will unlock the sixth journal entry. Reach the back of the statue. You have to climb onto it and look through the scope. After a while, you will watch cutscenes that end this chapter.
- Uncharted 4: A Thief's End Game Guide
- Uncharted 4: Game Guide
- Uncharted 4: Walkthrough
- Uncharted 4: List of all chapters
- Uncharted 4: Prologue - walkthrough
- Uncharted 4: Chapter 1 The Lure of Adventure - walkthrough
- Uncharted 4: Chapter 2 Infernal Place - walkthrough
- Uncharted 4: Chapter 3 The Malaysia Job - walkthrough
- Uncharted 4: Chapter 4 A Normal Life - walkthrough
- Uncharted 4: Chapter 5 Hector Alcazar - walkthrough
- Uncharted 4: Chapter 6 Once a Thief - walkthrough
- Uncharted 4: Chapter 7 Lights Out - walkthrough
- Uncharted 4: Chapter 8 The Grave of Henry Avery - walkthrough
- Uncharted 4: Chapter 9 Those Who Prove Worthy - walkthrough
- Uncharted 4: Chapter 10 The Twelve Towers - walkthrough
- Uncharted 4: Chapter 11 Hidden in Plain Sight - walkthrough
- Uncharted 4: Chapter 12 At Sea - walkthrough
- Uncharted 4: Chapter 13 Marooned - walkthrough
- Uncharted 4: Chapter 14 Join Me in Paradise - walkthrough
- Uncharted 4: Chapter 15 The Thieves of Libertalia - walkthrough
- Uncharted 4: Chapter 16 The Brothers Drake - walkthrough
- Uncharted 4: Chapter 17 For Better or Worse - walkthrough
- Uncharted 4: Chapter 18 New Devon - walkthrough
- Uncharted 4: Chapter 19 Avery's Descent - walkthrough
- Uncharted 4: Chapter 20 No Escape - walkthrough
- Uncharted 4: Chapter 21 Brother's Keeper - walkthrough
- Uncharted 4: Chapter 22 A Thief's End - walkthrough
- Uncharted 4: Epilogue - walkthrough
- Uncharted 4: Walkthrough
- Uncharted 4: Game Guide
You are not permitted to copy any image, text or info from this page. This site is not associated with and/or endorsed by the developers and the publishers. All logos and images are copyrighted by their respective owners.
Copyright © 2000 - 2026 Webedia Polska SA for gamepressure.com, unofficial game guides, walkthroughs, secrets, game tips, maps & strategies for top games.
