Uncharted 4: Chapter 2 Infernal Place - walkthrough
This page of the Uncharted 4 guide has a walkthrough for chapter 2 – Infernal Place (fights in the prison, exploration, and the puzzle in Burnes's cell).
This page of the guide to Uncharted 4: A Thief's End has a walkthrough for chapter 2 - Infernal Place. You will learn, e.g. how to survive the fight in the prison, explore the abandoned section of the prison, how to solve the puzzle in Burnes's cell, win the fight in the laundry room and escape from the prison.
- Chapter 2 information
- The fight in the prison
- Exploring the abandoned prison
- The solution to the Burnes' cell puzzle
- Return to Vargas
- A brawl in the laundry
- Prison break
Chapter 2 information
This chapter is a lot longer than the previous one. The beginning and final parts of it take place in a functioning prison. However, the most important part is the middle one, which will take place in an abandoned Spanish prison, in search of traces of a grand treasure. During this section Drake can find the first two secrets - their locations are marked and described in this chapter.
The fight in the prison
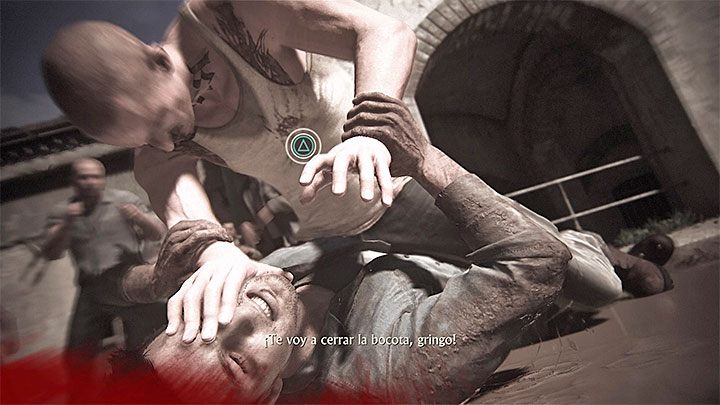
This chapter starts with a brawl with a prisoner named Gustavo. This is basically a tutorial mission on the subject of melee combat. Land your own blows by pressing the "Square" button, and use the "Triangle" button if the protagonist either gets caught by the enemy, or if he starts wrestling with him. Additionally, you can press the "Circle" button to perform rolls which are extremely useful when dodging hard to block attacks. When Nathan starts wrestling with Gustavo you must be prepared to press the buttons appearing on the screen correctly - otherwise the main character can even die. The encounter will be interrupted with the arrival of the prison warden named Vargas. After you regain control over the character, travel along the path designated by the guards. After quite a long march you will end up outside of the prison grounds. A conversation with Vargas will initiate, during which you will learn about his plan of exploring an abandoned Spanish prison.
Exploring the abandoned prison
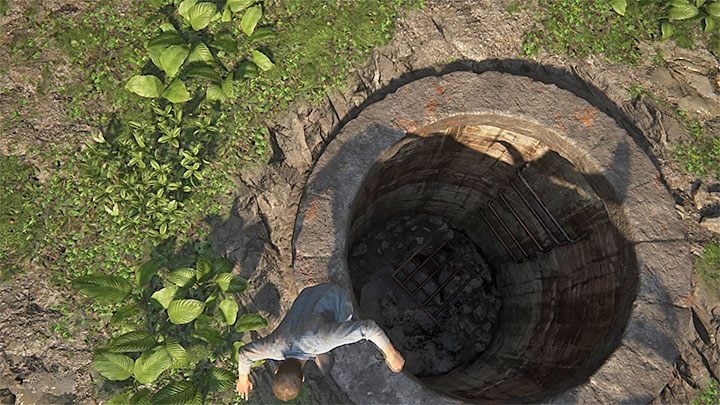
Move straight ahead. After the first jump Nathan will start sliding down a very steep and slippery ground. During it you need to direct him towards the left edge (otherwise he will fall into the abyss and die). After arriving in the new area, look for the dry well shown on the above screenshot. Jump into the said well and reach the other end of it. Examine a short, dark tunnel - there's the first treasure (Panamanian Cat Pendant) hidden here.
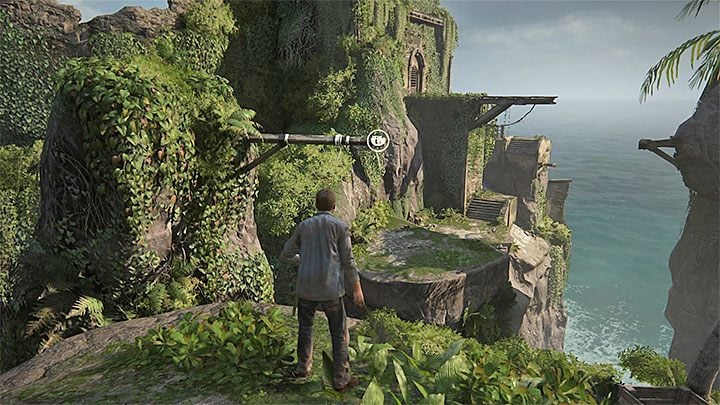
Get back to the surface and examine the covered area, which will reward you with a grappling hook. You can now approach a large box located here and push it towards a ledge located above the ground. After Nathan climbs on top of the box, he will be able to reach the mentioned ledge and continue the journey. Turn to the right and attach your grappling hook to the attachment point located there. Swing to gain momentum and perform a long jump towards the ledge located in the distance. A little further you will be forced to use the grappling hook again. After performing another jump grab onto the ledge and complete a rather trivial climbing section.
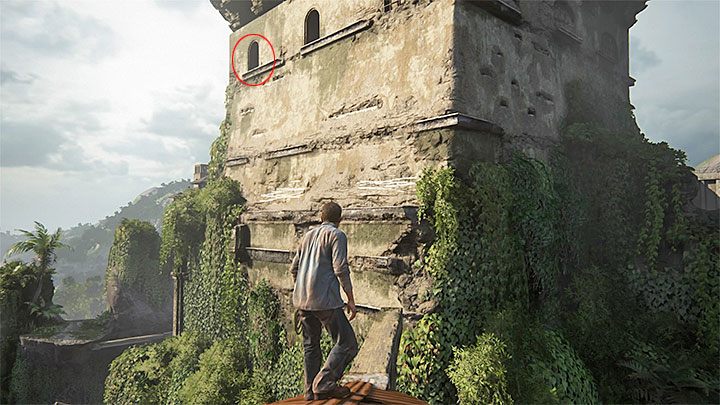
While in the new area, you must coordinate two different activities. After Nathan starts sliding down the uneven ground you need to press the L1 button to launch the grappling hook (do so before Nathan falls into the abyss). Swing back and forth to gain momentum and grab onto another interactive ledge. Climb upwards. After reaching solid ground stand near the outer wall of the smaller tower and finish this climbing section. You will soon reach the rusty roof of the building. Direct the camera towards the main tower, run across the concrete arm and perform a long jump. Head towards the shutter located in the upper left corner of the screen. Ignore the fragment of the wall that will soon crumble and fall of off the wall.
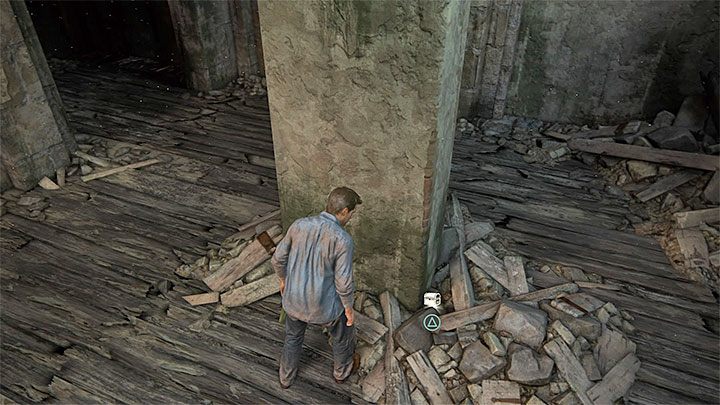
Go through the shutter, which will allow you to reach the inside of the tower for the first time. Head to the neighboring room and jump to the lower ground. Look around at the exact place as the one shown on the above screenshot. You should reach a second treasure (Navaja Folding Knife). There's also a letter nearby - you can reach it, but it's not rewarded in any way. Get back to the top and direct the camera towards the boarded up window. Press and hold the L1 button to grab onto the boards with the grappling hook. Tilt the analog stick down to tear the boards off. You can now head to the newly unlocked shutter and continue your climbing on the outer walls of the large tower. First move to the right. After passing the corner start jumping to the upper ledges. You should soon reach another shutters.
The solution to the Burnes' cell puzzle
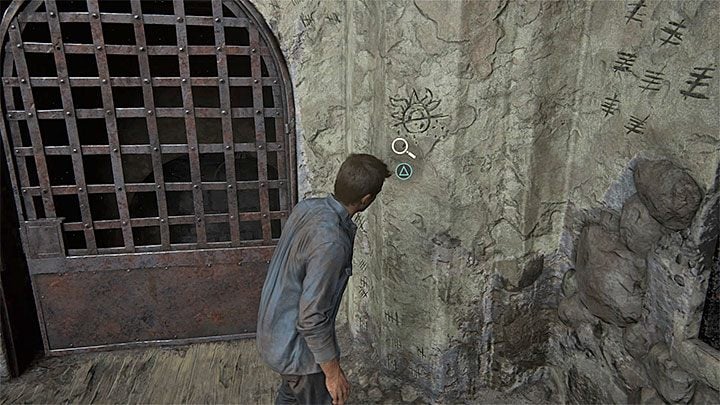
There's an easy puzzle to solve in Burnes' cell. It requires you to correctly read the symbols located on the walls. First things first, focus on the image shown on the above screenshot - it's located to the right from the closed exit from the cell.
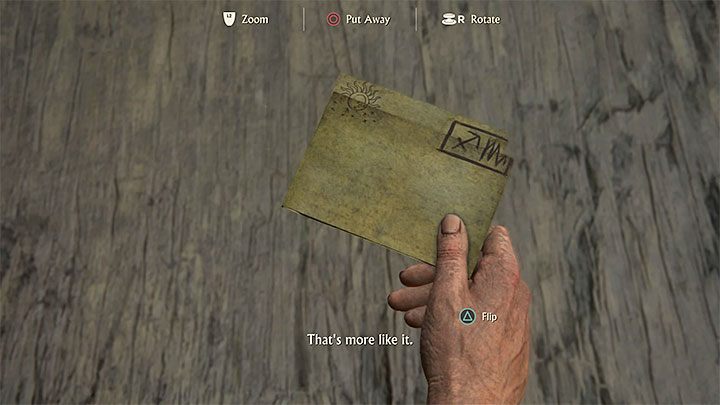
After Nate comments on the symbol you've just found, press the touchpad to open up the diary and read the letter. Press the triangle button to flip the letter. After listening to the protagonist's comment press the triangle button again. Afterwards, press the X button to fold the letter. This will allow Nathan to determine that there are two zodiac signs on the letter - Sagittarius and Scorpio.
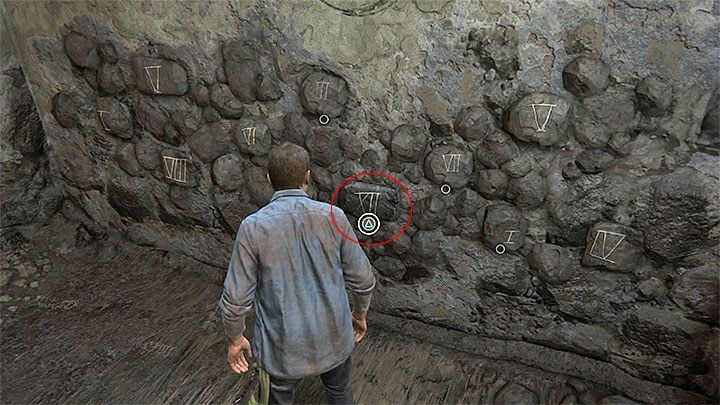
Search for the zodiac signs you've found on the letter inside of the cell. Thanks to that, you will be able to determine that Sagittarius is X, whereas Scorpio is II. After combining it you will receive the number "XII". You must know search for the interactive stone with the exact same number - the location of it can be seen on the above screenshot. Examine the stone and Nathan will acquire the treasure that was hidden in the stash.
Return to Vargas
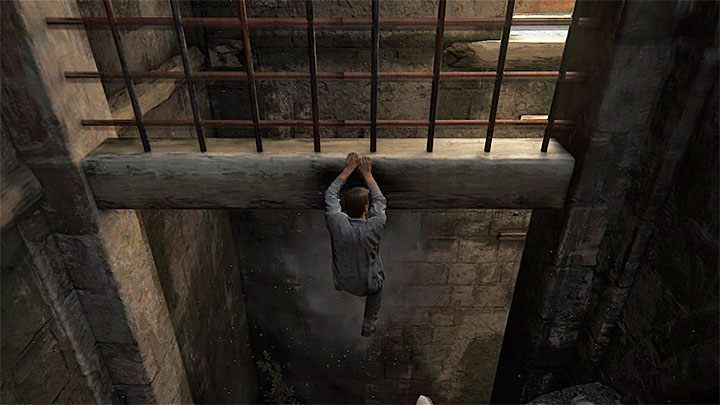
Approach the door and start pressing the Triangle button to open it. You must now travel to Vargas' location. Unfortunately, this will be quite a difficult task, as you have to get there by taking a different path then before. Use your grappling hook on the attachment point located above and start lowering yourself on the rope. After you let go of the rope, Nathan will start sliding down the steep ground. You must now perform a jump before you fall down and Nathan gets killed. Climb on top of the ledge and carefully cross the beams under the roof. You must lower yourself from one of those beams and perform the exact same maneuver as just a second ago - perform a jump during a slide.
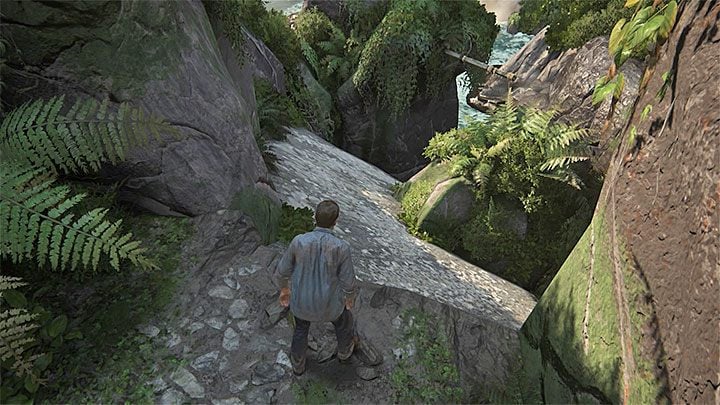
Approach the next gate and get through it just like you did before. You will now be under the clear sky. Perform a long jump towards the nearby narrow beams. Use them to cross to the left side. A little further you will be forced to slide down a steep slope, during which you must direct Nathan to the left and press the grappling hook button at the right moment. Swim back and forth to gain momentum, jump and continue climbing on the rocks. Do it unlit you reach a larger roof, with a partially open hatch on top of it. Jump inside to meet with Vargas again.
A brawl in the laundry

You will regain control over the character as soon as Gustavo and his fellow inmates appear. You now have to fight with the group of enemies. During the encounter try to use all the knowledge you've gained so far - attack enemies one by one and try to set yourself free (by pressing the Triangle button) whenever Nathan gets grabbed. If Nate has been severely injured, try to focus on dodging attacks (by pressing the Circle button), or get away from the assailants for a short time so that Nathan can regain some health. Sooner or later guards will appear in the laundry, ending the encounter.
Prison break
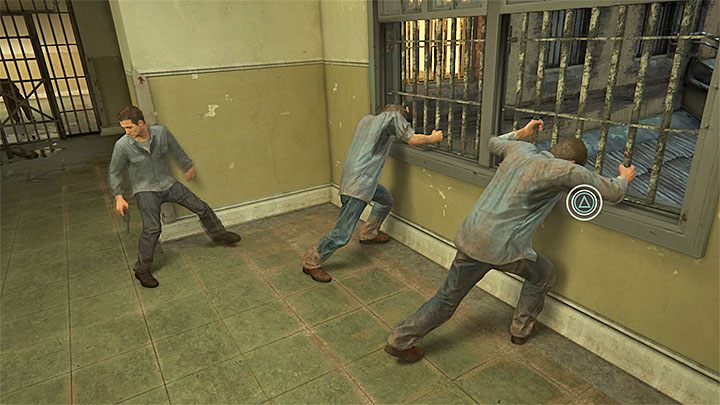
The prison break section starts as soon as Vargas gets shot. You must now follow Sam and Rafe. Don't stop for even a moment, as the protagonist is unarmed and wouldn't stand a chance against armed guards. Approach the shutter and help Sam open it. From this moment onwards you will be forced to perform numerous jumps and climb the objects you stumble upon. Follow the "leader" of the group so that you won't get lost. In the latter part of the section press the Triangle button - Nate will give Sam a leg-up.
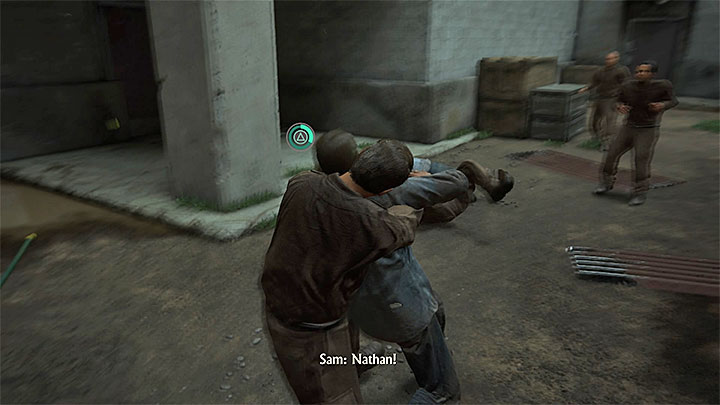
At some point during the escape Nate will fall down from the roof - it's pre-programmed and you won't be able to prevent it. Here you have to fight with a new group of enemies. Fortunately, Sam will assist you in this task. After the encounter ends, help Sam to move a heavy object and open the hatch leading to the ventilation shaft. Continue a very linear escape section and remember not to stop, as Nate will quickly die. After performing one of the longest jumps press the Triangle button to help Sam do the same. A very important cut-scene will initiate here. Afterwards, continue the march (don't try to jump down). Jump above the railing, run through the jungle and jump into the water. This will finish this chapter.
- Uncharted 4: A Thief's End Game Guide
- Uncharted 4: Game Guide
- Uncharted 4: Walkthrough
- Uncharted 4: List of all chapters
- Uncharted 4: Prologue - walkthrough
- Uncharted 4: Chapter 1 The Lure of Adventure - walkthrough
- Uncharted 4: Chapter 2 Infernal Place - walkthrough
- Uncharted 4: Chapter 3 The Malaysia Job - walkthrough
- Uncharted 4: Chapter 4 A Normal Life - walkthrough
- Uncharted 4: Chapter 5 Hector Alcazar - walkthrough
- Uncharted 4: Chapter 6 Once a Thief - walkthrough
- Uncharted 4: Chapter 7 Lights Out - walkthrough
- Uncharted 4: Chapter 8 The Grave of Henry Avery - walkthrough
- Uncharted 4: Chapter 9 Those Who Prove Worthy - walkthrough
- Uncharted 4: Chapter 10 The Twelve Towers - walkthrough
- Uncharted 4: Chapter 11 Hidden in Plain Sight - walkthrough
- Uncharted 4: Chapter 12 At Sea - walkthrough
- Uncharted 4: Chapter 13 Marooned - walkthrough
- Uncharted 4: Chapter 14 Join Me in Paradise - walkthrough
- Uncharted 4: Chapter 15 The Thieves of Libertalia - walkthrough
- Uncharted 4: Chapter 16 The Brothers Drake - walkthrough
- Uncharted 4: Chapter 17 For Better or Worse - walkthrough
- Uncharted 4: Chapter 18 New Devon - walkthrough
- Uncharted 4: Chapter 19 Avery's Descent - walkthrough
- Uncharted 4: Chapter 20 No Escape - walkthrough
- Uncharted 4: Chapter 21 Brother's Keeper - walkthrough
- Uncharted 4: Chapter 22 A Thief's End - walkthrough
- Uncharted 4: Epilogue - walkthrough
- Uncharted 4: Walkthrough
- Uncharted 4: Game Guide
You are not permitted to copy any image, text or info from this page. This site is not associated with and/or endorsed by the developers and the publishers. All logos and images are copyrighted by their respective owners.
Copyright © 2000 - 2026 Webedia Polska SA for gamepressure.com, unofficial game guides, walkthroughs, secrets, game tips, maps & strategies for top games.
