StarCraft 2 Wings of Liberty: Whispers of Doom (Achievements)
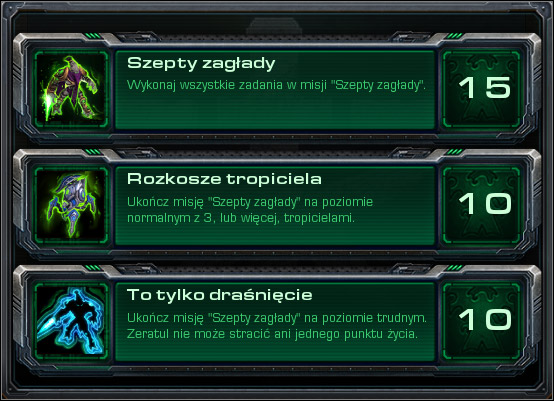
Whispers of Doom:
Bring Zeratul to the 3 Xel'Naga Shrines, Destroy the 3 Zerg Hatcheries, Escape To The Void Seeker, Zeratul Must Survive.
Stalker Delight:
First of all, you have to keep at least three Stalkers alive up to the moment when you have to return to the Void Seeker. It will start after reaching the third Shrine.

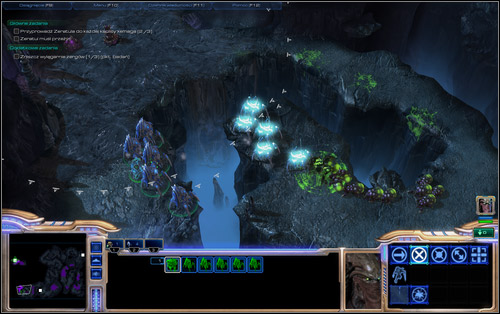
The risk of losing a Stalker is at that time quite high, as Zergs will keep on attacking and chasing you. The next obstacle are the rocks - don't try to destroy them, use Blink instead to gain an advantage over the Zergs. However be sure to do it while close to the barrier, as Blink has a limited range and you can land before the barrier instead of behind it. There will be three in total, with the third one needed to be destroyed (Blink won't have time to cool down). You can however use Blink to avoid the Spore Crawler and Spine Crawler, located right before the turn leading to the Void Seeker.
Merely a Flesh Wound:
Before attempting to complete this mission, I'd suggest firstly completing the mission on normal to get to know the level and the dangers waiting for you. Having that knowledge, basically all you have to do make sure not to make any mistake, keeping Zeratul's health above the demanded 300 (the cover can of course be damaged).
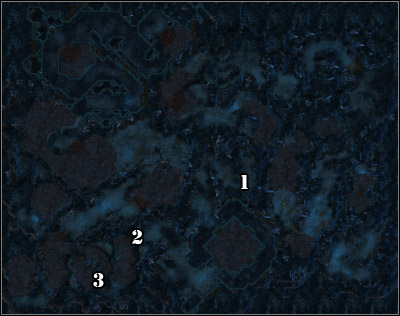
Wounded units will be healed once you visit a Shrine, so check out if Zeratul is okay before entering, as it can turn out you've completed the mission for nothing. The Protoss Hero can't be physically damaged even once, as even if you enter the Seeker at full health, you won't gain the Achievement if you've received any damage during the mission.

During your journey, you will face similar dangers to the ones mentioned in the description (normal level), however I'd like to warn you about some situations. In locations [1] and [2] you will have to face a powerful Ultralisk, which can seriously threaten not only Zeratul (use Void Prison on him), but also the Stalkers accompanying him. In the first location, he will be a part of the trap mentioned in the description and in the second he will come out of the ground once he sees the Stalkers.
At point number [3] you will meet Banelings, who will want to cover your units with their acid. Just as I've described it previously, get as close to the middle as possible to be able to shoot at them. However contrary to the description of the lower difficulty, the monsters won't be as easy to eliminate. Once they get close, teleport your whole team to where the Banelings were before. The survivors will go back - you should wait for them to get close enough and return to the middle. They won't stand a chance then.
Save often during the exploration of the map.
- StarCraft II: Wings of Liberty Game Guide
- StarCraft 2 Wings of Liberty: Game Guide
- StarCraft 2 Wings of Liberty: Prophesy missions
- StarCraft 2 Wings of Liberty: Whispers of Doom
- StarCraft 2 Wings of Liberty: Whispers of Doom (Achievements)
- StarCraft 2 Wings of Liberty: A Sinister Turn
- StarCraft 2 Wings of Liberty: A Sinister Turn (Achievements)
- StarCraft 2 Wings of Liberty: Echoes of the Future
- StarCraft 2 Wings of Liberty: Echoes of the Future (Achievements)
- StarCraft 2 Wings of Liberty: In Utter Darkness
- StarCraft 2 Wings of Liberty: In Utter Darkness (Achievements)
- StarCraft 2 Wings of Liberty: Prophesy missions
- StarCraft 2 Wings of Liberty: Game Guide
You are not permitted to copy any image, text or info from this page. This site is not associated with and/or endorsed by the developers and the publishers. All logos and images are copyrighted by their respective owners.
Copyright © 2000 - 2026 Webedia Polska SA for gamepressure.com, unofficial game guides, walkthroughs, secrets, game tips, maps & strategies for top games.
