Ghostwire Tokyo: After the End - walkthrough
This page of the guide to Ghostwire Tokyo contains a walkthrough of the After the End side quest - following Erika's trail, the battle of Shiromuku.
Last update:
On this page of the Ghostwire Tokyo guide, you will find a walkthrough of the After the End side quest. This page explains how to unlock the quest, how to find Erika's trail and follow it as well as how to win the intense encounter during which you face an elite Shiromuku enemy.
- Quest rewards
- Unlocking the quest
- Check out the specified location
- Follow the girl's psychic trail
- Defeat all enemies
- Check the area where the girl was sitting
Quest rewards

- 3000 Meika
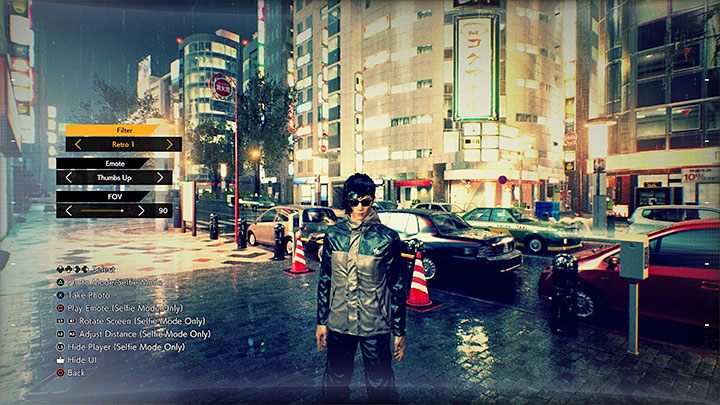
- Camera Filter: Retro 1 - you can use the new filters in photo mode
- about 500 spirits
Unlocking the quest

You unlock this mission early in Chapter 4, after using the payphone during the Giants main quest and talking to Rinko. A quest marker should automatically appear on the map.
The quest giver is Rinko herself. Head to the payphone near the small playground to learn about the side quest.
Check out the specified location

Go to the location marked with a small green circle. It's a small park - once you reach it Erika will appear for a moment by the big tree in the center.
Follow the girl's psychic trail

There's a glowing orb in the place Erika crouched in. Using spectral vision will show the girl's trail. You must now follow it.
The trail is quite long, taking you through such areas as one of the shops. You can encounter Visitors on the way but the trail moves relatively slowly, so you'll have plenty of time to dispose of them before you lose track of Erika (return to the green circle on the map if necessary).
Defeat all enemies

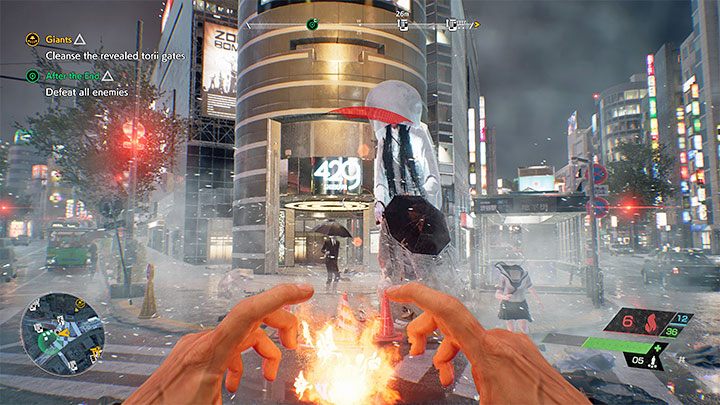
Eventually you'll reach a square, where a large group of Visitors will spawn. Apart from the regular enemies you'll also have to fight the gigantic Shiromuku. It's possible this could be your first encounter with this enemy.
Shiromuku primarily uses ice attacks. It can attack you from a distance or immobilize you (stay away from his AoE moves). Move constantly, keep a safe distance and remember to block. Strong elemental fire and water attacks should quickly expose Shiromuku's core, letting you rip it out.
Check the area where the girl was sitting

After the battle check the wall where you'll find a voice log (Blood and Succession). Finally use a payphone to talk to Rinko.
The quest described above is the first of three quests given to you by Rinko. The remaining ones are After the End 2 and After the End 3, described on separate pages of our walkthrough. You must complete them before finishing Chapter 4 of the campaign (point of no return). Otherwise they'll be cancelled and you'll only be able to finish them after completing the main story (doing so turns back time to right before the point of no return).
- Ghostwire Tokyo Guide
- Ghostwire Tokyo: Walkthrough
- Ghostwire Tokyo: Side missions
- Ghostwire Tokyo: Quests available from chapter 4
- Ghostwire Tokyo: Ushi no Kokumairi - walkthrough
- Ghostwire Tokyo: Kamaitachi - walkthrough
- Ghostwire Tokyo: After the End - walkthrough
- Ghostwire Tokyo: Nightmare Welling - walkthrough
- Ghostwire Tokyo: A Deadly Shadow - walkthrough
- Ghostwire Tokyo: Strung with a Curse - walkthrough
- Ghostwire Tokyo: Art Imitates Life - walkthrough
- Ghostwire Tokyo: Hide and Seek 2 - walkthrough
- Ghostwire Tokyo: Bloodthirsty Blossoms Mitake - walkthrough
- Ghostwire Tokyo: Old Wounds - walkthrough
- Ghostwire Tokyo: The Invisible Wanderer - walkthrough
- Ghostwire Tokyo: Hide and Seek 3 - walkthrough
- Ghostwire Tokyo: A Full House - walkthrough
- Ghostwire Tokyo: A Lost Dog - walkthrough
- Ghostwire Tokyo: Bloodthirsty Blossoms: Ginpei - walkthrough
- Ghostwire Tokyo: After the End 2 - walkthrough
- Ghostwire Tokyo: After the End 3 - walkthrough
- Ghostwire Tokyo: Quests available from chapter 4
- Ghostwire Tokyo: Side missions
- Ghostwire Tokyo: Walkthrough
You are not permitted to copy any image, text or info from this page. This site is not associated with and/or endorsed by the developers and the publishers. All logos and images are copyrighted by their respective owners.
Copyright © 2000 - 2025 Webedia Polska SA for gamepressure.com, unofficial game guides, walkthroughs, secrets, game tips, maps & strategies for top games.
