Dead Space Remake: List of all Weapon Upgrades
In Dead Space Remake you can find weapon upgrades. This page of the guide lists all 21 upgrades for 7 weapons - you will learn where they are hidden and what requirements you need to meet to reach these unique secrets.
In Dead Space Remake, weapons used by the hero can have upgrades installed that increase their statistics and power or add additional modes of operation - when it comes to the individual upgrades, locating and finding them works similarly to collecting secrets. On this page of the guide, we list all 21 weapon upgrades to be found throughout the game - each weapon can have up to 3 of them installed. We show the location of each upgrade and inform you of what requirements there may be to access them.
- Uploading found weapon upgrades
- Plasma Cutter #1 - Heat Accumulator
- Plasma Cutter #2 - Cartridge Rack
- Plasma Cutter #3 - Weighted Blades
- Pulse Rifle #1 - Kinetic Autoloader
- Pulse Rifle #2 - PCSI Custom Magazine
- Pulse Rifle #3 - High-Yield Grenades
- Ripper #1 - Angled Launcher
- Ripper #2 - Ricochet Tracer
- Ripper #3 - Carbon-Fiber Blades
- Flamethrower #1 - Gelified Hydrazine
- Flamethrower #2 - High-Pressure Nozzle
- Flamethrower #3 - Macroliter Fuel Tank
- Line Gun #1 - Ionized Capacitor
- Line Gun #2 - Precision Lasers
- Line Gun #3 - Photon Energizer
- Contact Beam #1 - Supersymmetry Tether
- Contact Beam #2 - Portable Heliotron
- Contact Beam #3 - Diffraction Module
- Force Gun #1 - Subsonic Oscillator
- Force Gun #2 - Suspension Module
- Force Gun #3 - Gravitic Amplifier
Uploading found weapon upgrades

In Dead Space Remake, each weapon (in all, 7 are available) can have up to 3 upgrades installed - this means there are 21 of them in total.
Found upgrades have to be delivered to a bench - once delivered, a message telling you that an upgrade has been unlocked will be displayed (example in the screenshot). Moreover, a new branch of the given weapon tree will appear - buying an upgrade requires you to spend a node for it (along with other upgrade slots that are required to unlock the chosen one).
Make sure to read the description of the upgrade, as it can help you understand how the upgrade works. An upgrade can, for example, modify the weapon's mode of operation (primary or alternative fire mode), making it more effective.
Plasma Cutter #1 - Heat Accumulator

This upgrade can be bought at the shop for 11,000 credits. It becomes available in the shop from Chapter 3.
Plasma Cutter #2 - Cartridge Rack

This upgrade can be found in the Ishimura Clinic room of the Medical Deck (this part of the ship is visited in Chapter 2). Isaac will enter this location right after detonating the bomb and destroying the barricade.
Plasma Cutter #3 - Weighted Blades
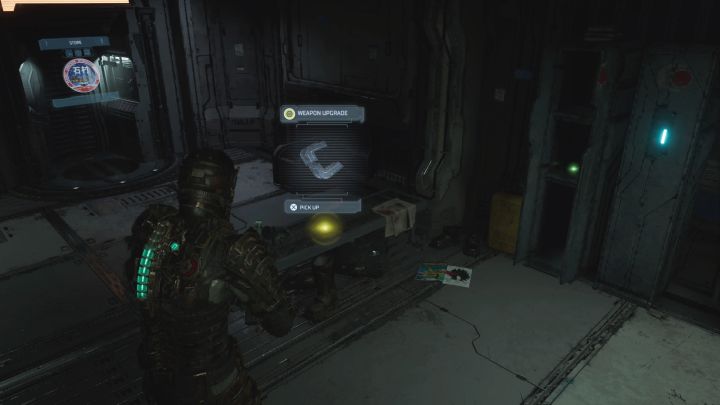
This upgrade is in the Maintenance Locker Room in Communication Hub, a location visited in Chapter 8. The locker room is a small room which is visited along the way to the Antenna.
Pulse Rifle #1 - Kinetic Autoloader
This upgrade can be bought at the shop for 11,000 credits. It becomes available in the shop from Chapter 3.
Pulse Rifle #2 - PCSI Custom Magazine


This upgrade can be found in Electrical Systems Storage room on level 1 of the Bridge, a location visited in the course of Chapter 4.
The room is locked by default. To get access to it, look around the room for a damaged shutter, use it to aim inside the room and use Kinesis to grab the crates. A door console will be revealed - you now need to destroy it by hitting it with a weapon. The room is now accessible - enter it and collect the upgrade.
Pulse Rifle #3 - High-Yield Grenades

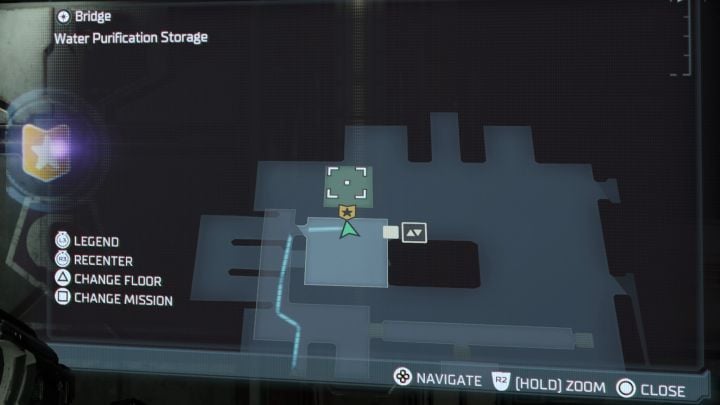
This upgrade is found in a locked Water Purification Storage room on level 5 of the Bridge. At first, you cannot get inside (Chapter 4), as the door requires the Master Security Override - to get it, you need to complete You Are Not Authorized side mission. Once you got the Override, simply return to the door. Explore the storage to find the weapon upgrade in one of the lockers.
Ripper #1 - Angled Launcher

This upgrade is in B. Andonov's office (B. Andonov - Flow Supervisor) on the Hydroponics deck (a location visited in Chapter 6) which is adjacent to the machines spraying the area. You can pass them on your way to Wheezer 01.
Ripper #2 - Ricochet Tracer
This upgrade can be bought at the shop for 11,000 credits. It will appear on the list after you find the Ripper weapon in Chapter 3.
Ripper #3 - Carbon-Fiber Blades


This upgrade can be found in the Machine Shop on level 4 of the Engineering Deck. At first (Chapter 3), the way to the upgrade is locked. The chest with the collectible requires a Master Override - you need to complete the You Are Not Authorized side mission and return to this place after creating the clearance.
Flamethrower #1 - Gelified Hydrazine
This upgrade can be bought at the shop for 11,000 credits. It becomes available in the menu once you find the Flamethrower, which happens in Chapter 3.
Flamethrower #2 - High-Pressure Nozzle

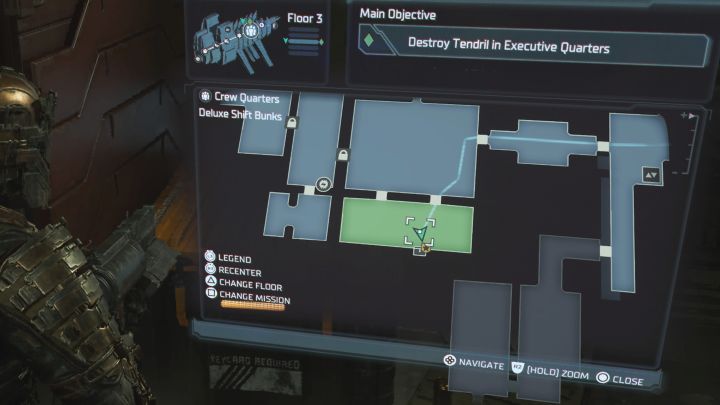
The High-Pressure Nozzle schematic is in the Crew Quarters location, which is visited in Chapter 10. Get to the point when you need to restore electricity to Deluxe Quarters. Your task is to find the power cell in the Deluxe Quiet Bunks room and deliver it to the red slot. Once the power is back, you can use the Circuit Breaker.
Go to the Deluxe Shift Bunks room. Inside, there is a chest requiring a Master Security Override to open - you have to complete the You Are Not Authorized side mission and once you got the Override, return to this area.
Flamethrower #3 - Macroliter Fuel Tank

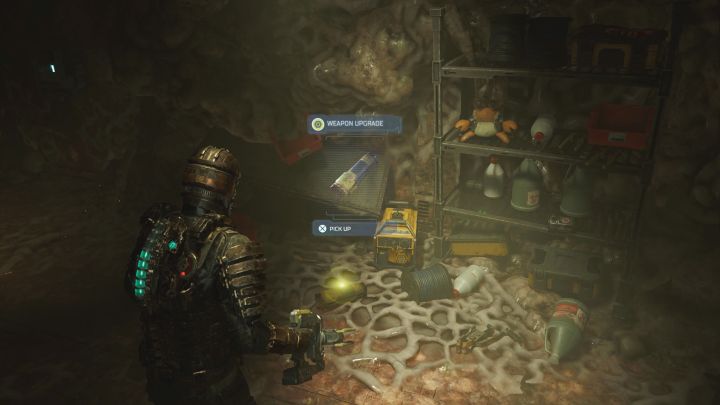
Secret Type: weapon upgrade
Location: the secret is in the Utility Room of the Mining Deck (location visited in Chapter 7). Utility Room neighbors the Equipment Maintenance Bay, but you can access it only after finding the S.O.S. Beacon.
On the way back, Isaac can turn Zero Gravity mode on. Once in zero g, fly to the lower room which was passed by earlier during the gondola ride. After landing on a small balcony, enter the room to find the upgrade.
Line Gun #1 - Ionized Capacitor
This upgrade can be bought at the shop for 11,000 credits. It will appear on the list once you find the Line Gun, which happens in Chapter 5.
Line Gun #2 - Precision Lasers


This schematic is in a corridor on level 1 of Hydroponics, right next to Hydroponics Central Hub. To be able to unlock the chest, you'll need master security override - to get it, you need to complete You Are Not Authorized side mission first. Once you have the clearance, return to this area.
Line Gun #3 - Photon Energizer


The upgrade is in the Lab Storage on the Medical Deck. You can access the room provided you have level 3 Security Clearance, so it will require some backtracking. Once inside the storage, take a look at the chest.
Contact Beam #1 - Supersymmetry Tether
This upgrade can be bought at the shop for 12,000 credits. You can find it on the store list after you find the Contact Beam weapon, which happens in Chapter 4.
Contact Beam #2 - Portable Heliotron


Look for a locked Bioprosthetics Locker Room on level 1 of Medical Deck. Initially, you can't get into it because the door requires a level 3 security clearance. Once you got the clearance after progressing enough in the main story, return to this location and collect the secret from the workbench.
Contact Beam #3 - Diffraction Module

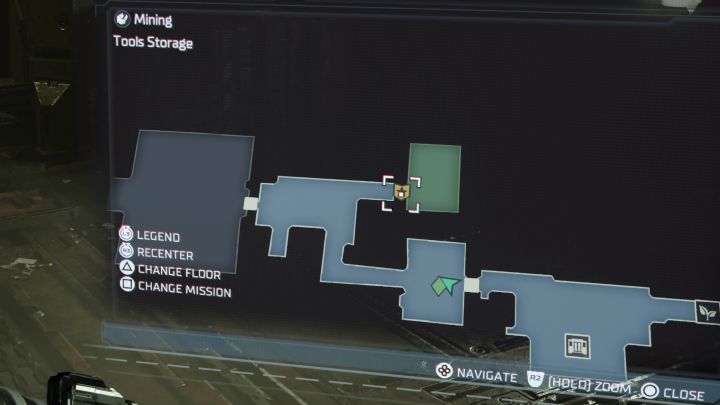
This upgrade is found in the Tools Storage room on level 6 of the Mining Deck. Start by using Kinesis to move the vertical containers blocking access to the door. There is a lock here that requires the Master Security Override - to get it, you need to complete the You Are Not Authorized side mission first. Once you have it, return to this area. After unlocking the storage, approach the chest to collect the upgrade (the chest has the highest security lock).
Force Gun #1 - Subsonic Oscillator
This upgrade can be bought at the shop for 12,000 credits. It will appear on the store list after you find the Force Gun, which happens in Chapter 6.
Force Gun #2 - Suspension Module

This one is found in Cargo Bay, a location visited in the initial part of Chapter 11. You'll find a chest that requires the Master Security Override in order to be unlocked - to get it, you need to complete the You Are Not Authorized side mission. Once you got the Override, return to the chest.
Force Gun #3 - Gravitic Amplifier

The upgrade is in the Guest Consultant's Suites on the Crew Deck (a location visited in Chapter 10). The location in question is also the scene for the final part of the Scientific Methods side mission - you can find a detailed walkthrough for this quest on a dedicated page of the guide. The room in question may be locked if you haven't advanced enough in Scientific Methods side quest.
- Dead Space Remake Guide
- Dead Space Remake: Game Guide
- Dead Space Remake: Secrets and Collectibles
- Dead Space Remake: List of all collectibles
- Dead Space Remake: Chapter 1 (New Arrivals) - list of secrets
- Dead Space Remake: Chapter 2 (Intensive Care) - list of secrets
- Dead Space Remake: Chapter 3 (Course Correction) - list of secrets
- Dead Space Remake: Chapter 4 (Obliteration Imminent) - list of secrets
- Dead Space Remake: Chapter 5 (Lethal Devotion) - list of secrets
- Dead Space Remake: Chapter 6 (Environmental Hazard) - list of secrets
- Dead Space Remake: Chapter 7 (Into the Void) - list of secrets
- Dead Space Remake: Chapter 8 (Search and Rescue) - list of secrets
- Dead Space Remake: Chapter 9 (Dead on Arrival) - list of secrets
- Dead Space Remake: Chapter 10 (End of Days) - list of secrets
- Dead Space Remake: Chapter 11 (Alternate Solutions) - list of secrets
- Dead Space Remake: Chapter 12 (Dead Space) - list of secrets
- Dead Space Remake: All suits (RIG) - list of secrets
- Dead Space Remake: Peng Treasure - location of the secret
- Dead Space Remake: Marker Fragments - list of secrets
- Dead Space Remake: List of all Schematics
- Dead Space Remake: List of all Weapon Upgrades
- Dead Space Remake: Secrets and Collectibles
- Dead Space Remake: Game Guide
You are not permitted to copy any image, text or info from this page. This site is not associated with and/or endorsed by the developers and the publishers. All logos and images are copyrighted by their respective owners.
Copyright © 2000 - 2025 Webedia Polska SA for gamepressure.com, unofficial game guides, walkthroughs, secrets, game tips, maps & strategies for top games.
