Divinity Original Sin 2: Dialogues
This page of the Divinity Orginal Sin 2 guide contains all the information regarding conducting conversations with encountered characters, merchants, or party members. You'll learn the basic rules as well as unique tricks and solutions for dialogues.
Most of the time, you'll learn about the plot from the dialogues. Having this in mind, you should compose the biggest and highly diversified team as you can, as every party member can conduct dialogues on his own. Aside from that, when choosing our interlocutor, you should bear in mind what is the chosen character's race, as certain races react differently to their interlocutors. It is not uncommon for a situation where a human attempting to begin a dialogue will be shot down, while the reptile from your team will easily be able to get some information.
Even if you led the conversation in a way which doesn't bores any fruit, you can always switch to a different character and attempt to try once again. If you suspect that for some reason you've played the conversation in a wrong way, and you've used all your party members, try to load a previously saved game and attempt to get a different result than the last time.
Below you can find some useful info about few matters important for the conversations.
Opportunities
While investigating different dialogue options, you can easily notice that the inconspicuous characters, which seemed to only be a part of the background, can give very useful information, and how much you can feel them out depends on you. You should always test every party member, and it may happen that choosing a different hero and dialogue option can lead the conversation to a completely different course, resulting in, e.g. a gift from the interlocutor.
Persuasion
Some tasks require influencing our interlocutor. Remember to always check which of the party members has the biggest chance for a successful outcome, and use all dialogue options with him. Keep in mind to avoid stealing from your interlocutor, or don't act in such a way that results in a negative attitude towards you, as this may completely put an end to your chances of a positive outcome.
Tags
Each person with determined tags can make use of a much greater number of dialogue options. These options are much emphasized, so you won't miss them. Before you use one of the dialogue options that are marked with a tag, you should get some inkling about who is your interlocutor, and whether using a tag will result in anything. This can be deducted by his clothes, character name, and his relation towards you. If tags don't foreshadow a positive outcome, you should use one of the default options.
Inside-party Dialogues
You'll have the opportunity to discuss the previous events as a party more than once. It can be a part of the controversial situations that the party was a witness of, or during the moment a decision has to be made.
In the first case, the dialogues are noncommittal, which mean that they don't influence the plot, but can influence the relations inside the party. When there are exclamation marks above our party members, it means that there was a situation that needs to be discussed. You can always just ignore this mechanics, but you should investigate what kinds of reactions are coming from the individual party members. You should especially watch out for every statement that may have a negative undertone when it comes to the interlocutor's race.
Aside from that, sometimes there are scripted events consisting of conversations between party members. These take place mostly regarding the story quests, when we have to decide about someone's fate or make a united stand in some situations. If all party members all on board, everything goes smoothly. The problems begin when some party members have a different say in the matter. This is one of the biggest challenges of a multiplayer playthrough.
Trade

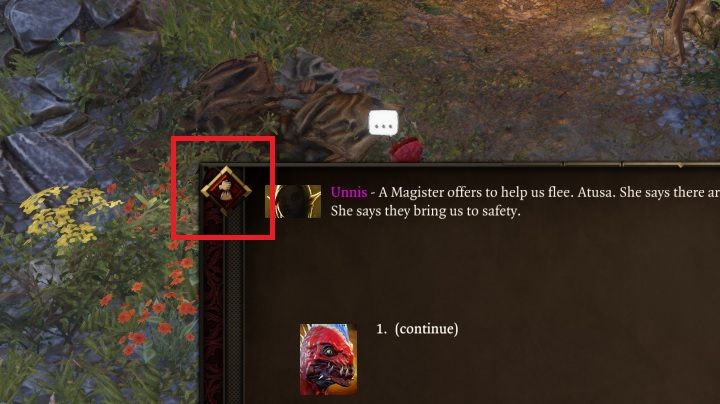
Take a good look on the screenshot above. If you see the icon marked on the screenshot once you begin the conversation, this means you can trade with this person. Each merchant has a large number of items available, but prices for the same items can differ significantly, so you should always visit few different merchants before you decide to spend some money or equipment items on something.
It should be mentioned that each successful transaction has a positive influence on overall relations with the merchant, and if you decide to stick to one vendor, with each next transaction he will offer you a better deal. Additionally, the chosen merchants allow you to repair your equipment, which is very useful if during the course of the game you didn't find the repair tools that allow for independent repairs.
You are not permitted to copy any image, text or info from this page. This site is not associated with and/or endorsed by the developers and the publishers. All logos and images are copyrighted by their respective owners.
Copyright © 2000 - 2025 Webedia Polska SA for gamepressure.com, unofficial game guides, walkthroughs, secrets, game tips, maps & strategies for top games.
