Shadow of the Erdtree Elden Ring Map
Shadow of the Erdtree: Other bosses
In addition to the powerful main bosses, the world of the Shadow of the Erdtree DLC is also populated by minor opponents. On this page of the guide, you'll find a list of all the minor bosses in Realm of Shadow, such as Ancient Dragon Man, Jagged Peak Drake and Fallingstar Beast.
The Land of Shadow in Shadow of the Erdtree DLC is inhabited by many minor bosses hidden in various corners of the map. This group includes enemies with a separate health bar at the bottom of the screen, who usually do not have a key role in the plot and are usually easier to defeat than the huge story bosses. On this page you will find a list of all this type of opponents along with their brief characteristics - these bosses are usually slightly stronger versions of regular opponents or fight similarly to other players.
- Ancient Dragon-Man
- Jagged Peak Drake
- Death Rite Bird
- Fallingstar Beast
- Demi-Human Queen
- Tree Sentinel
- Curseblade Labirith
- Demi-Human Swordmaster Onze
- Chief Bloodfiend
- Death Knight
- Lamenter
- Dancer of Ranah
- Rakshasa
- Red Bear
Ancient Dragon-Man
Related map marker: Ancient Dragon Man - Dragon's Pit @ Shadow of the Erdtree
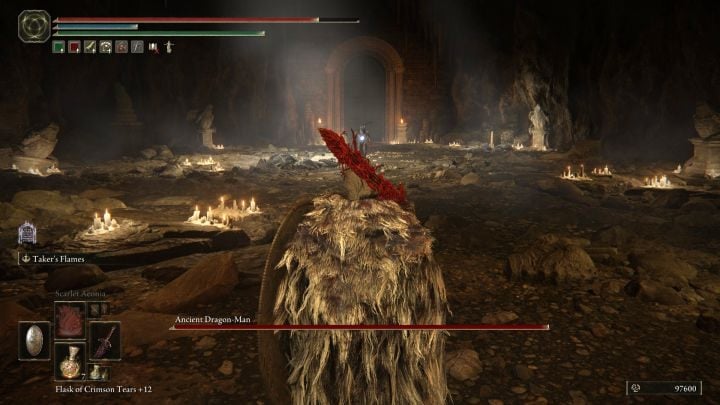
- Rewards: For defeating this mini-boss, you will receive 130,000 runes and the Dragon-Hunter's Great Katana.
The Ancient Dragon-Man lies deep in the Dragon's Pit. This boss takes a fairly standard form of a humanoid with a melee weapon. His standard attacks are telegraphed by specific animations, so you can easily predict the upcoming attack. However, the enemy moves quite quickly, performs a lot of dodges, and additionally heals, which may prove troublesome for slower characters. The Dragon-Man often performs jumping attacks, so beware of overhead slashes and dodge as soon as the boss jumps into the air. The opponent's special attack involves summoning a large dragon head, which will try to bite you. Its fangs reach quite far ahead, so be ready to dodge as soon as you see its reptilian head appear. The split second right after the mouth attack is a good moment to counterattack. His last move is firing a stream of magma. It leaves burning spots in the arena, but the attack itself is quite easy to avoid by moving away to a safe distance.
Jagged Peak Drake
Related map marker: Jagged Peak Drake #1 - Foot of the Jagged Peak @ Shadow of the Erdtree
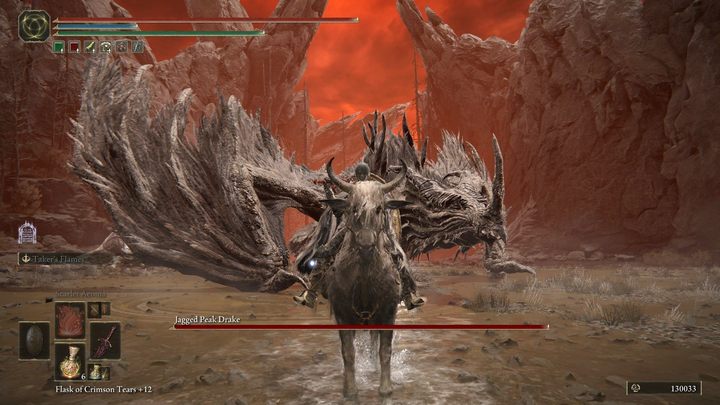
- Rewards: 90,000 or 120,000 runes (depending on which dragon you fight), Dragon Heart and Dragonscale Flesh.
In the Realm of Shadow, you'll encounter two opponents of this type: the first one in the lake on the route to Charo's Hidden Grave, and the second one near the Foot of the Jagged Peak area. The fight with this optional boss is not much different from fights with other dragons. We recommend you use Torrent as much as possible, which will increase your mobility and enable quick charges at the enemy. Attacks to the head, although more risky, can stagger the dragon, which will give you the opportunity to deliver a series of attacks. You can avoid fire breath by moving from side to side on your horse. Most body attacks (e.g. with tail) can be avoided by rolling at the right moment. If space allows, try to dodge towards the boss, which will reduce the distance to it and allow you to counterattack. The important thing you need to watch out for is the special lightning attack. When the Ancient Dragon-Man stands still and roars, quickly move away from him to avoid massive damage from the AOE attack.
You will encounter the dragon at the foot of Jagged Peak during a fight with another dragon (you will recognize the smaller reptile by the smaller health bar attached to the beast). Before you attack, let the dragons hurt each other, and during the fight, focus only on the "big" dragon.
Death Rite Bird
Related map marker: Death Rite Bird - Charo's Hidden Grave @ Shadow of the Erdtree

- Rewards: For defeating the bird you will receive 230,000 runes and Ashes of War: Ghostflame Call.
The Death Rite Bird in the Charo's Hidden Grave region is a returning boss , which you can read more about on the guide page How to beat Death Bird / Death Rite Bird?.
Fallingstar Beast
Related map marker: Fallingstar Beast - Scaduview @ Shadow of the Erdtree
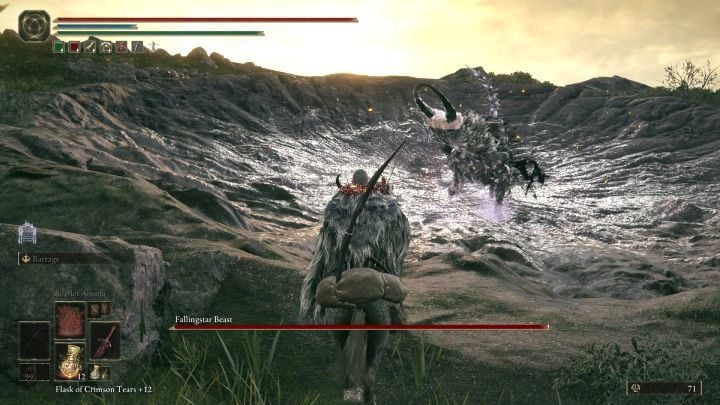
- Rewards: For defeating the beast, you will receive 170,000 runes and the Gravitational Missile spell.
The Fallingstar Beast in the Scaduview region is a well-known boss from the base game, which you can read more about on the guide page How to beat Fallingstar Beast?.
Demi-Human Queen Marigga
Related map marker: Demi-Human Queen Marigga - Cerulean Coast Canyons @ Shadow of the Erdtree
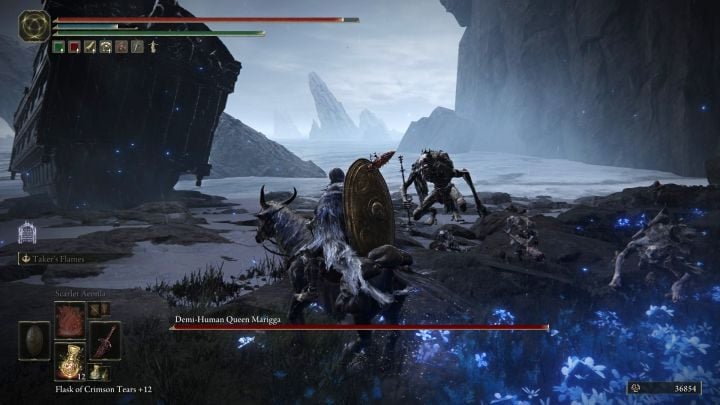
- Rewards: For defeating the Queen you will receive 100,000 runes and Star-Lined Sword.
Marigga is another named leader of the demi-humans, which you may recognize from the base game. It resides in the northwestern part of the Celurean Coast. More information about fighting this type of opponents can be found on the Demi-Human Queen - boss, how to defeat it? page.
Tree Sentinel
Related map marker: Tree Sentinel #2 - Scaduview @ Shadow of the Erdtree
Related map marker: Tree Sentinel #1 - Scaduview @ Shadow of the Erdtree
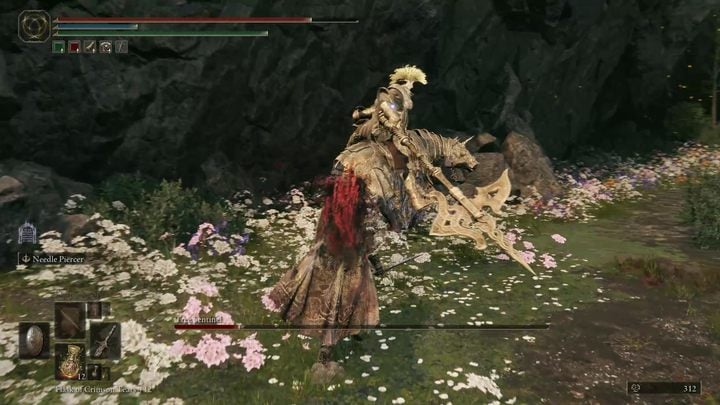
- Rewards: For defeating the Tree Sentinel, you will receive 120,000 runes and Blessing of Marika, a consumable item that will fully heal you.
The two Tree Sentinels you will encounter in the Scaduview region are bosses returning from the base game. You will learn more about them on a separate page of the guide, How to beat Tree Sentinel?.
Curseblade Labirith
Related map marker: Curseblade Labirith - Bonny Gaol @ Shadow of the Erdtree
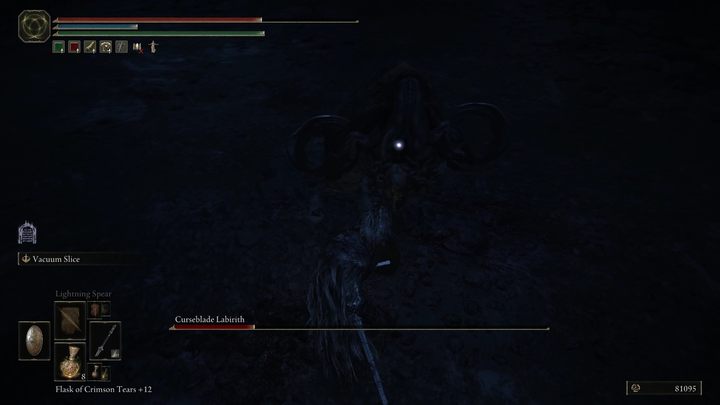
- Rewards: For defeating Labirith, you will receive 100,000 runes and Curseblade Meera spirit ashes.
Labirith can be found at the end of Bonny Gaol, a cave south of Bonny Village. The boss fights identically to the acrobatic opponents with chakrams, which you have probably encountered many times. The only difference is the arena - the room is dark, and the boss can use this darkness to turn into a shadow and attack by surprise. Keep your camera locked on the boss and be very careful when he disappears - he will soon reappear and attack. Beware of quick melee attacks and knive throws.
Demi-Human Swordmaster Onze
Related map marker: Demi-Human Swordmaster Onze - Belurat Gaol @ Shadow of the Erdtree
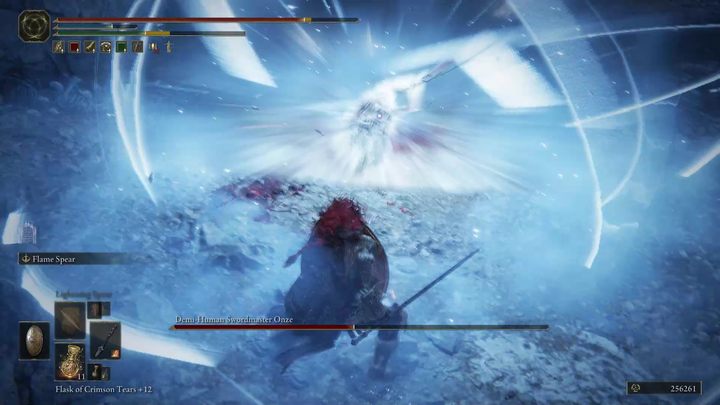
- Rewards: For defeating Onze, you will receive 80,000 runes and Demi-Human Swordsman Yosh spirit ashes.
The boss is located in Belurat Gaol, the entrance to which can be found at the eastern wall of the city. Onze is a small, but very agile and acrobatic opponent. He is very short, so it's easy to stagger him with a series of attacks and interrupt his blows - but be careful when he raises his sword and takes a blocking stance, as he may then parry you. Also look out for an air attack, an area slash around him, and a grab with left hand that has a surprisingly long range - dodge to the side.
Chief Bloodfiend
Related map marker: Chief Bloodfiend - Rivermouth Cave @ Shadow of the Erdtree
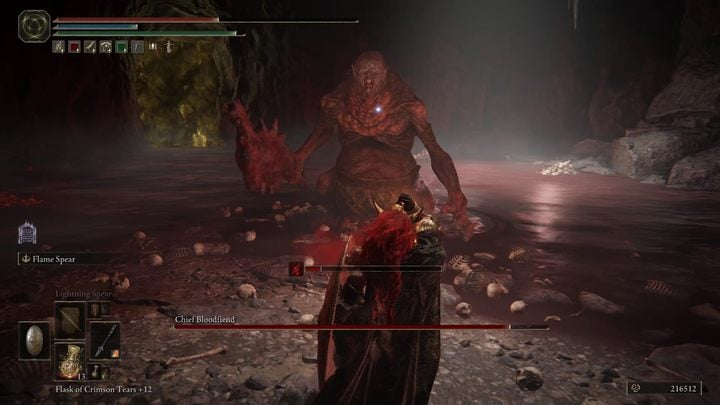
- Rewards: For defeating the boss you will receive 80,000 runes and Bloodfiend Hexer's Ashes.
The boss is located in Rivermouth Cave, the entrance to which can be found at the northern end of the Ellac River. He is a larger version of the club-wielding enemies you have encountered before. In addition to regular melee attacks, you must watch out for jumping attacks, a fiery claw, and blood spitting, which causes bleeding. Ranged attacks will be very useful during this fight - don't attack the boss in the middle of his combo, wait until he stops attacking.
Death Knight
Related map marker: Death Knight - Fog Rift Catacombs @ Shadow of the Erdtree
Related map marker: Death Knight - Scorpion River Catacombs @ Shadow of the Erdtree
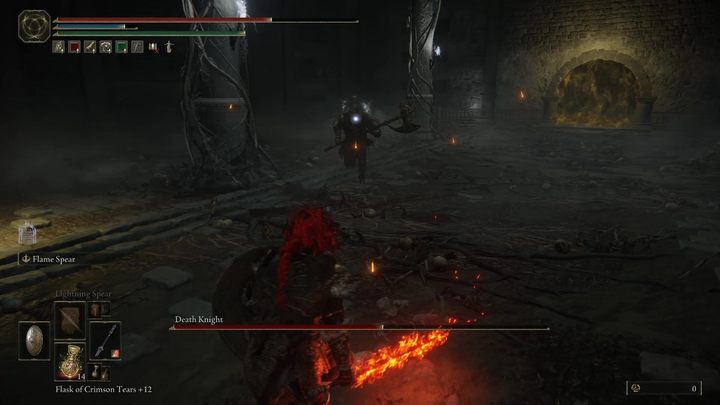
- Rewards: For defeating the knights you will receive 110,000 runes, Death Knight's Twin Axes and a Crimson Amber Medallion 3, or 130,000 runes, a Death Knight's Longhaft Ax and a Cerulean Amber Medallion 3.
The bosses can be found in the Fog Rift Catacombs and the Scorpion River Catacombs, both caves are located in the Ancient Ruins of Rauh. The first boss wields two axes, dealing a quick series of blows, the second one wields a halberd, dealing more powerful but slower blows. Apart from basic attacks, the bosses have identical skills: swinging an electrified ax (dodge or block), shooting lightning (hide behind one of the columns in the arena), and charging with a health-draining grab (the boss crouches, misty wings appear above him, and he throws himself in your direction - dodge to the side).
Lamenter
Related map marker: Lamenter - Lamenter's Gaol @ Shadow of the Erdtree
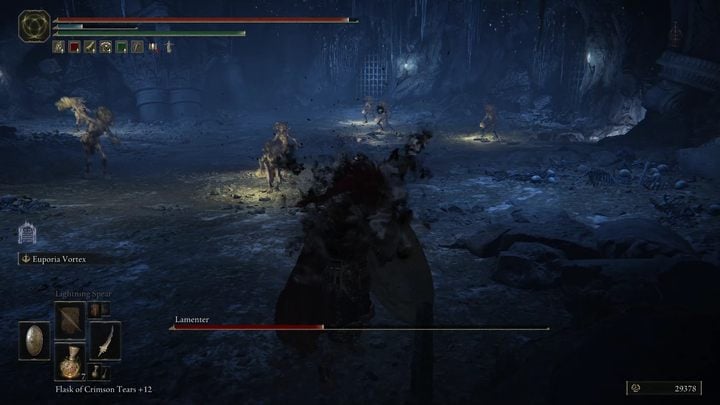
- Rewards: For defeating the Lamenter, you will receive 160,000 runes and the Lamenter's Mask - use it without wearing any attire and you will take the form of a Lamenter.
The boss can be found in Lamenter's Gaol, a cave in the Charo's Hidden Grave area. The enemy has several weak attacks - punches and magic missiles. His most dangerous attack is the headbutt, so keep an eye on that. After a while, the boss will disappear and summon seven clones. The clones die after one hit - get rid of them all or make sure you find and hit the real boss at least once. Failing to strike the boss before the clones vanish will result in each remaining clone transforming into a black cloud, which will swirl around you - seven such clouds will promptly kill you. Equipping yourself with weapons or skills that have large hitboxes is worthwhile, as it allows you to hit multiple clones with a single strike, such as a halberd or a great sword.
Dancer of Ranah
Related map marker: Dancer of Ranah - Southern Nameless Mausoleum @ Shadow of the Erdtree

- Rewards: For defeating the Dancer, you will receive 80,000 runes, the Dancing Blade of Ranah, and the Dancer's Outfit Set.
The boss can be found in the Southern Nameless Mausoleum, on a small island on the Cerulean Coast, which you can reach by passing through an underground cave. The boss fights with two swords, using long combinations of blows. Her stature is low, so it's easy to stagger her and interrupt her attacks. Beware of air attacks - if you hit the Dancer while she is in the air, you can knock her to the ground before she attacks. The boss can also shoot a wave of flames at you if you move away, which you have to dodge.
Rakshasa
Related map marker: Rakshasa - Eastern Nameless Mausoleum @ Shadow of the Erdtree
Related map marker: Rakshasa's Great Katana - Eastern Mausoleum @ Shadow of the Erdtree
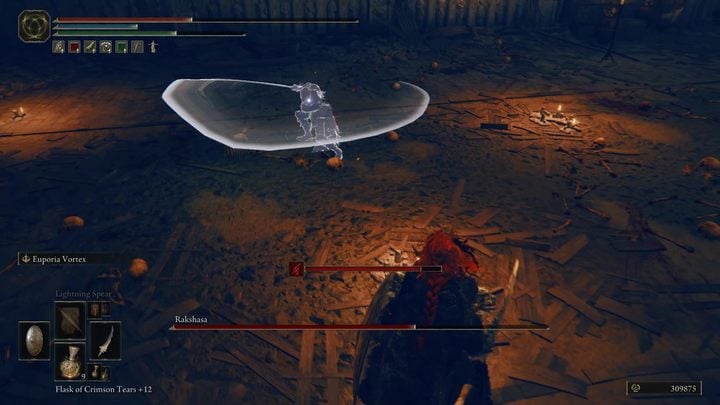
- Rewards: For defeating Rakshasa you will receive 90,000 runes, Rakshasa's Great Katana, and Rakshasa's Armor Set.
The boss can be found in the Nameless Eastern Mausoleum, at the top of the waterfall south of the Cathedral of Manus Metyr. The boss fights with a two-handed katana and is very aggressive - he also wears heavy armor, which makes it difficult to interrupt his attacks. Attack him only after he finishes his combos, and watch out for bleeding - heal yourself before the bleeding bar fills up. The boss's special attack is to step on his feet and swing his sword in front of him - move away from him and wait until he stops. Moving away will keep you safe as this attack inflicts significant damage but has limited range.
Red Bear
Related map marker: Red Bear - Northern Nameless Mausoleum @ Shadow of the Erdtree
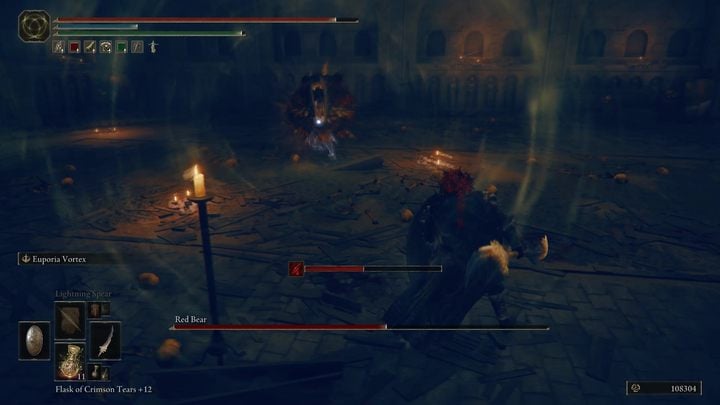
- Rewards: For defeating this boss you'll receive 80,000 runes, a Red Bear's Claw, and an Iron Rivet Armor Set.
The boss can be found in the Nameless Northern Mausoleum, on a hill east of the Temple Town Ruins - you can get there by jumping with the spiritspring. The boss fights with a long series of attacks with his claws - he wears light armor, which makes it easy to interrupt his attacks. His attacks have a very short range and you can avoid them by sprinting backward, then counterattack when the boss calms down. Watch out for the roar attack - you need to move away or block it with a shield.

You are not permitted to copy any image, text or info from this page. This site is not associated with and/or endorsed by the Bandai Namco Entertainment or FromSoftware. All logos and images are copyrighted by their respective owners.
Copyright © 2000 - 2025 Webedia Polska SA for gamepressure.com, unofficial game guides, walkthroughs, secrets, game tips, maps & strategies for top games.