Cold as the Grave | Borderlands 3 Walkthrough
On this page of our guide to Borderlands 3 you will find a description of Cold as the Grave main mission. This is a long and demanding quest. Its main objective is gaining access to the vault on Eden-6. This means that you have to defeat as many as two fully fledged bosses - Aurelia and a huge beast called The Graveward.
Return to Knotty Peak in Floodmoor Basin and meet with Wainwright. Then move to the town of Reliance to talk to Clay. Follow Clay and wait until the path to the new Blackbarrel Cellars location is unlocked. You'll move to the basement of the mansion.
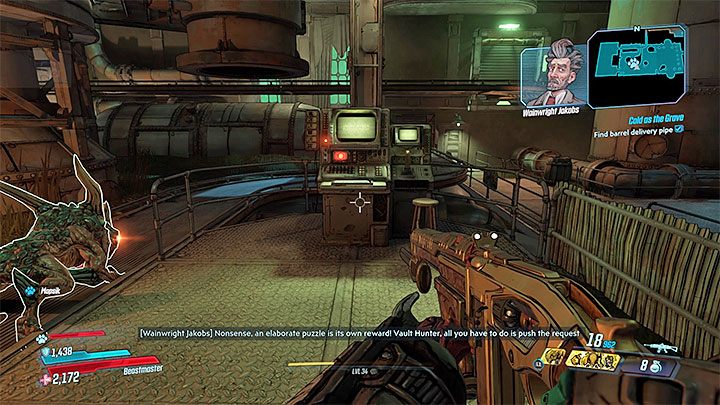
Moving through cellars (basement) is mostly linear, but you can still look around for collectibles or chests with loot on the way. The first big battle will begin at Gunpowder Mill location. Watch out for stronger Badass Psycho opponents here. It is worth noting that you can shoot some pipes and thus lead to the appearance of flames. They can damage enemies passing through them (as well as the main hero, so be careful). After the battle, find the console shown in the picture in the room.
Press the console's button three times. After the unsuccessful attempt 1 listen to the dialogue, and after the unsuccessful attempt 2 start fighting new opponents - the most serious threat will be the Badass Hog. It is best to leave it for the end and run around the room while attacking at the same time.
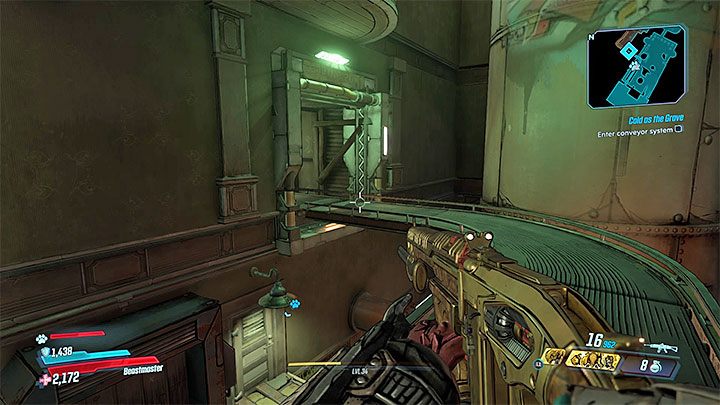
Pressing the button for the third time will be successful. The barrel will appear on the conveyor lane. Shoot it to destroy it and find the Vault Key Fragment on the ground. Stay on the conveyor lane and go to the exit by using it (check the above picture). This way you will reach the location of Forgotten Halls.
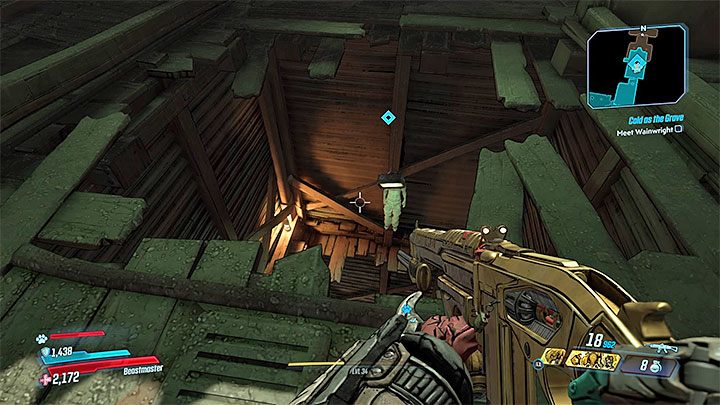
Break through next basement areas. Stop when you get to a hole in the floor from the picture above. Before you jump in the hole, pick up ammunition from the surrounding crates. Unfortunately, there are no slot machines in the area. Soon after jumping into the hole, the duel with the first boss of this quest - Aurelia , will start.
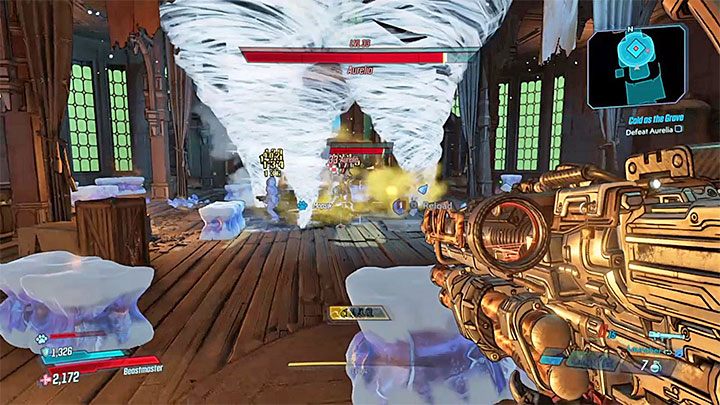
Aurelia uses several types of ranged attacks. The most unusual of them is an ice tornado - she can create multiple of them. Try to be more aware of your surroundings and keep away from them. If you are sucked into a tornado, you will lose your shield and a portion of your health. You will also become an easy target for a short time.
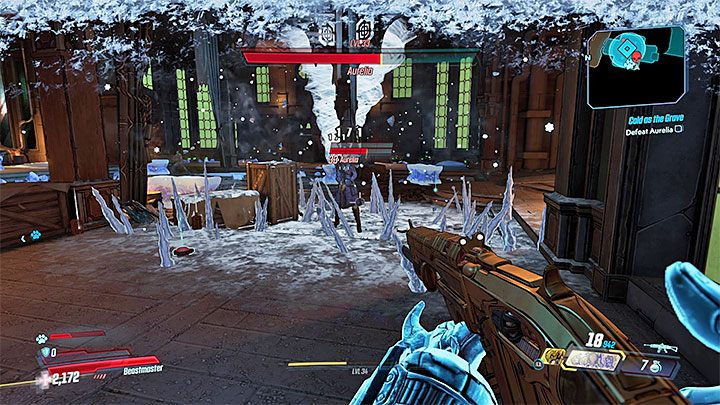
Aurelia's three most common melee attacks:
- Jump combined with a ground pound. Spikes will appear around the place where she landed.
- Standing on an ice column and firing from above.
- A ball of ice, which explodes into multiple small pieces.
Each of these attacks deals Cryo damage. Try to run or jump to the sides to make Aurelia's attacks miss more often. Also, in case of bombing, move away quickly to a safe distance.
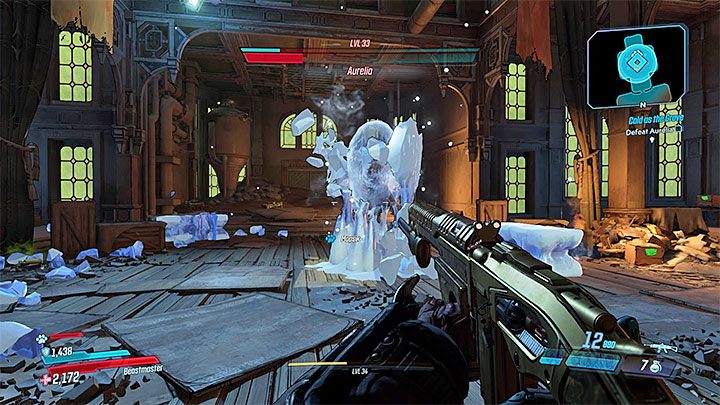
At certain moments of the battle, Aurelia will surround herself with ice and start to regenerate her blue shield bar. React quickly and shoot the ice to break through to Aurelia and stop the regeneration process. Otherwise, the boss fight will take you longer to win.
There are also regular opponents. Ignore them and shoot only when your hero is in the Fight for Your Life state - killing minions will grant you Second Wind. Upon defeat, Aurelia will leave behind credits, eridium and random loot.
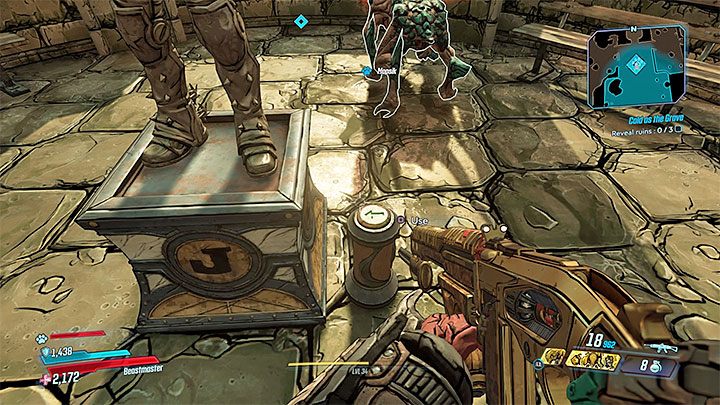
Talk to Hammerlock and then open the door leading to the Estate Gardens. In gardens, apart from fighting new enemies, there are three trivial puzzles to solve - after reaching each statue, press the button at its base (example in the picture). Listen to the recordings every time and perform a melee attack on the statue. You do not need to match the appearance of the statue to the information from the recording, because it will be done automatically for you.
Two more statues are located in the areas on the left and on the right. In the Observatory Grotto you will meet different varieties of Jabber monsters, and in the Neglected Solarium greenhouse different bandits (watch out for a strong opponent Tink Tank on your way back - it's worth taking care of his vanguards first).

Return to where you struck the first statue of Jakobs. Go to a round tank and interact with a protruding device. Using it will open a bridge leading to the location of The Floating Tomb.
Go straight ahead to get to the Altar of the Guardians. Talk to Tannis and give her a fragment of Aurelia's key. Be sure to use the local slot machines, because you have a tough fight ahead of you. It is worth to be as well prepared as possible. For the battle with the second main boss of this mission we recommend to take the assault rifle and SMG pistol. These weapons are the most effective. Try to equip your hero with a shield with the largest capacity.
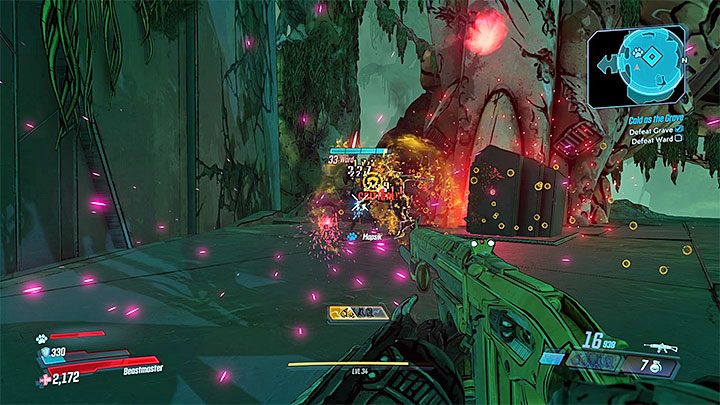
Take the Vault Key and place it on the surrounding pedestal. After a while there will be two mini-bosses - Grave and Ward. These are not very demanding Guardians. Attack them one at a time, as it will take you some time to deprive their blue energy bars.
Don't use the ammo for best weapons during this battle. This is just an introduction to the main fight. Only when guards are dead will the Graveward boss appear. In our opinion, the battle with this beast will be easier than the battle with Rampager from the planet Promethea. The lower part of Graveward's body is stationary. Also, due to its size, the beast's attacks are slow. Avoiding them should be easier, especially because each one of them is clearly telegraphed by the boss. They will also be used throughout the entire fight.
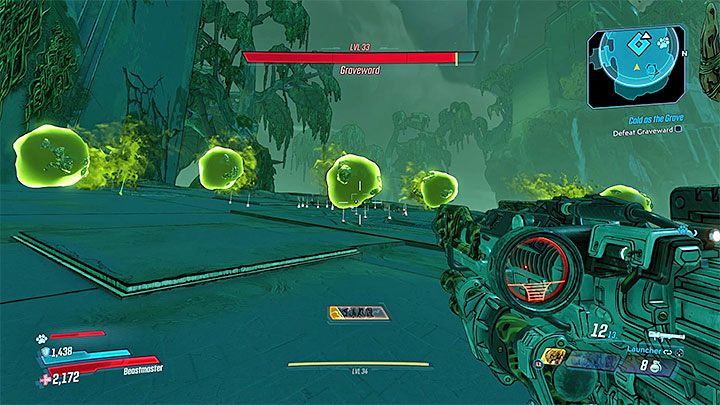
Graveward is able to temporarily tilt the arena, causing the hero to slide. You can either stop by yourself or fall into a pit in the arena. Try to leave it by climbing one of the edges near the pit. While tilting the arena, the boss will also shoot green projectiles. Try to run or stop between them to avoid Corrosive damage.
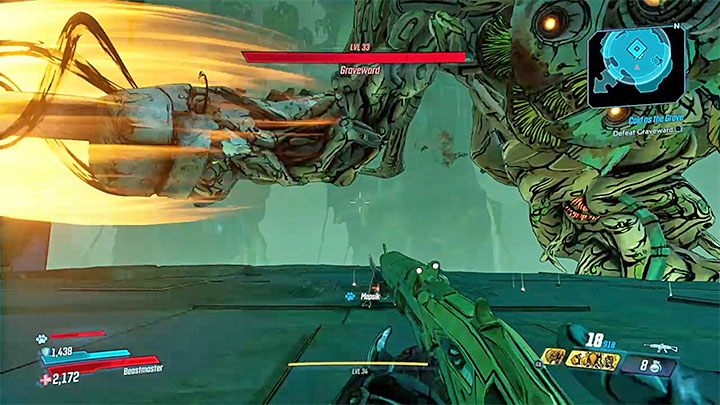
Other strong attacks of this boss are:
- Swinging one of the upper limbs.
- Hitting the wall.
- Hitting the ground.
All these attacks are clearly telegraphed by the beast. Try to quickly move to a safe place before the boss starts to perform one of these attacks. Also, avoid staying in the spot where one of these attacks will land. If you get hit, you will receive a lot of elemental damage.
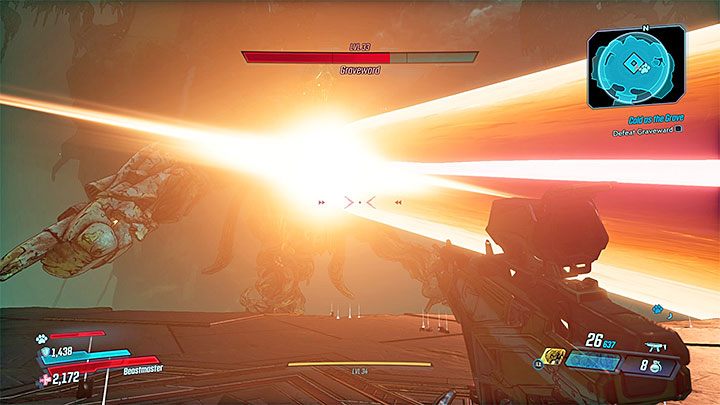
Graveward can also start spitting green acid - this is by far the easiest attack to avoid. Step back to stand as far away from Graveward as possible to get out of his reach. Do this and will not get any damage from the acid.
When Graveward loses 1/3 of the health bar, he will start shooting a laser. The attacks when the boss rotates his head slowly while shooting the laser are much harder to avoid. You can try to retreat to the back of the arena, go in the same direction in which the laser moves or get as close to the boss as possible to be beneath the beam. Always try to also leave the area attacked by the laser because that place will be on fire.
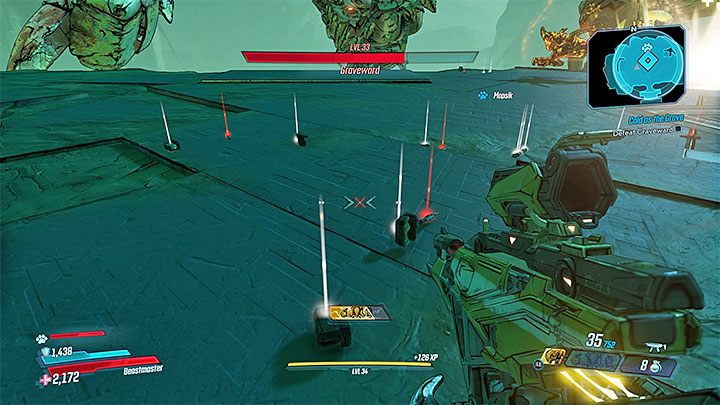
At certain points of the fight, the boss will receive reinforcements. Try to kill them immediately - they drop ammunition. There aren't any supply chests in the arena, so you need to rely solely on loot left by enemies, or just switch between weapons.
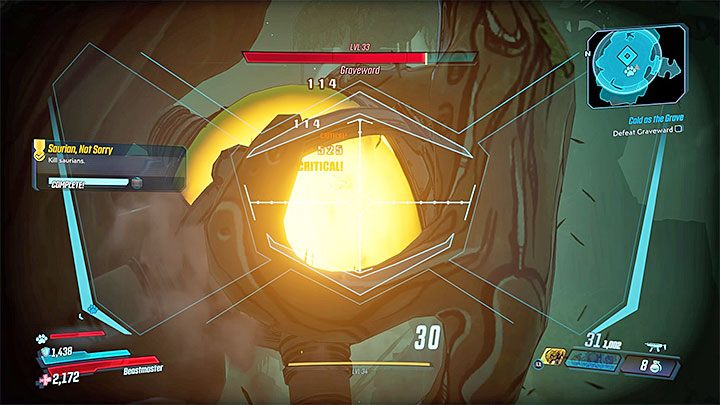
The boss can be attacked from the very start of the battle, but Graveward also has yellow weak points on the body. The default ones are the small dots on his head and chest. Larger weak points are revealed after some of the boss's attacks. They can be located on:
- The ends of the upper limbs after Graveward hits a wall or the ground - example in figure 1
- The pulsing dot on the Graveward's forehead after he gets temporarily stunned - example in figure 2
Always try to attack the weak spots with the best weapons, as all your attacks will deal critical damage. Weapons with good accuracy (including those equipped with a scope) and with the ability to fire continuously are very useful here.
In this phase of the battle, Graveward won't surprise you with anything new. He will keep using familiar attacks and receive reinforcements. Use every opportunity to get critical hits, as well as to replenish ammunition to the most effective weapons. The defeated boss will drop tons of credits, eridium and rare equipment.
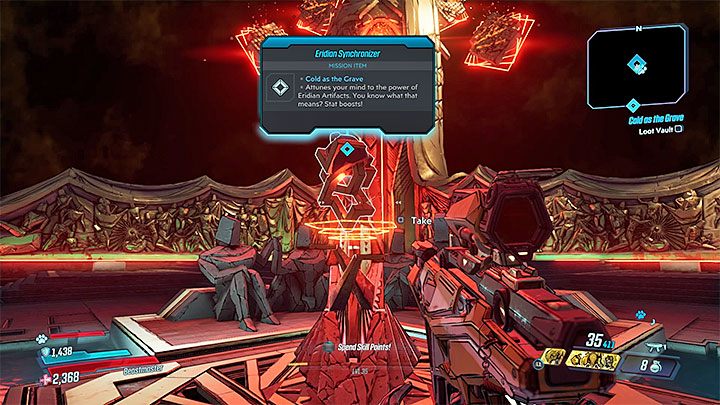
Shortly after Graveward was killed, there will appear a portal to the vault on Eden-6 - Vault of the Graveward. In the new location, reach the pedestal and take the Eridian Synchronizer artifact from it. There are also crates with a rare loot in the area.
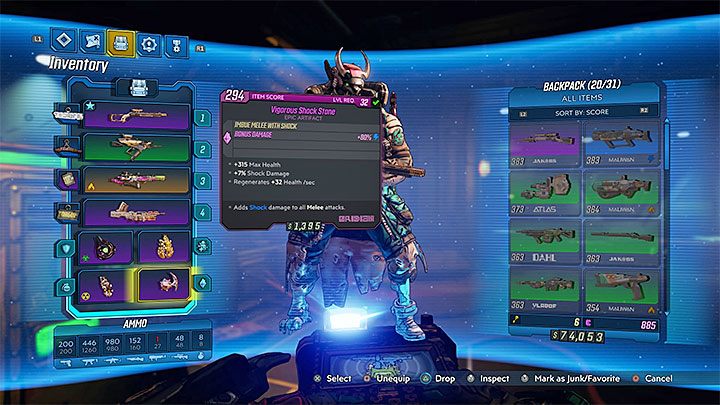
From now on, your character can use the artifacts. It is very likely that you have already found some artifacts while completing this mission. You can place any of them in the active slot of your inventory and use the passive bonuses it offers to enhance your stats.
Go to the exit of the vault. Return to the hall where you fought with the boss. Tannis will be kidnapped and disappear. Move aboard Sanctuary and meet with Lilith on the Captain's Bridge. The mission will end. You will get xp and credits as a reward. The next Blood Drive mission will begin.
You are not permitted to copy any image, text or info from this page. This site is not associated with and/or endorsed by the 2K Games or Gearbox Software. All logos and images are copyrighted by their respective owners.
Copyright © 2000 - 2025 Webedia Polska SA for gamepressure.com, unofficial game guides, walkthroughs, secrets, game tips, maps & strategies for top games.
