Torment Tides of Numenera: How to escape the Miel Avest Sanctuary?
Miel Avest Sanctuary is visited during the game's main storyline. While at first the location will be populated exclusively by friendly NPCs, it will eventually come under attack by Sorrow, which is something you can neither prevent nor avoid. Escape from the sanctuary can be tricky, especially if up to now your party fought with tongue rather than sword. Below, you'll find a description of the section, together with hints on how to escape Sorrow's attack on Miel Avest. The full description of this encounter can be found on the page dedicated to walkthrough of the main quest The Sanctuary of Miel Avest.

Now, BEFORE you focus on completing this section, you need to note some VERY IMPORTANT points:
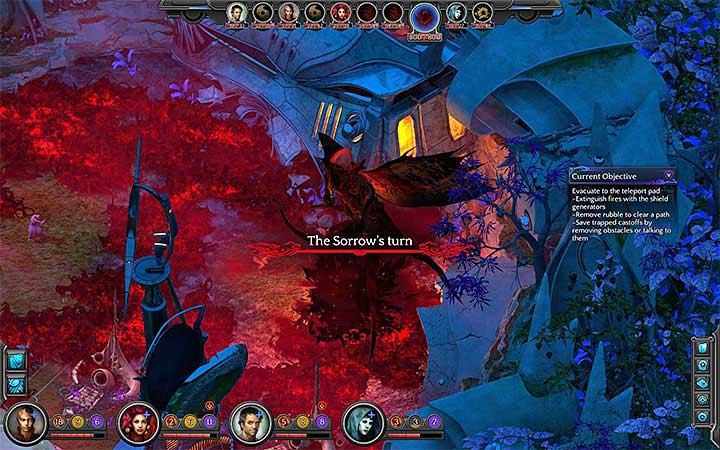
- Don't even think of battling Sorrow's creatures, even if your party is all about combat. It is impossible to win this fight by conventional means, as the rules simply won't allow it. This becomes much more apparent once the Sorrow appears on the map. She'll be able to easily kill your characters (or any characters for that matter), and she'll be invulnerable even to your strongest attacks.
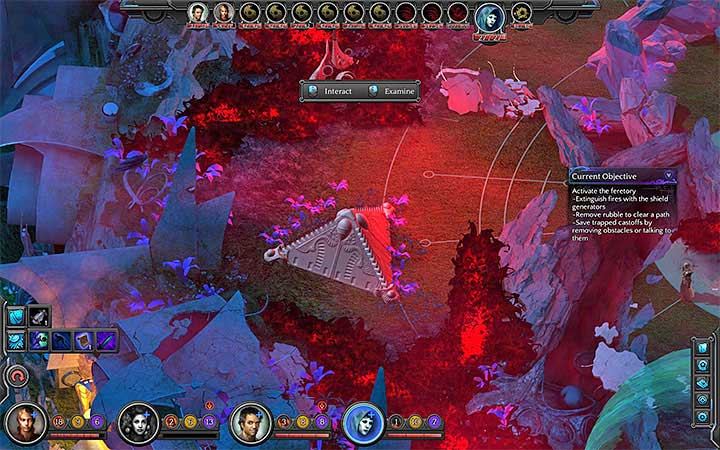
- Despite the game suggesting that you'll need to reach the teleporter platform (which is soon destroyed), you should head straight for the feretory (M14.15), shown on the picture above.
- Most of the map is burning and many roads are blocked. This means that the feretory needs to by reached via a long and convoluted route. On the way do everything you can to avoid Sorrow's flames, as they will damage your characters. You can douse some of the flames by using shield generators (each needs to be activated) and make your way by breaking through barricades.
- Do not try to rescue "throwaway" castoffs, as your party may run out of time. As an exception, you may try saving some of the more important NPCs (namely those, you've interacted with earlier).
- Sorrow will be constantly summoning new monsters to her aid. While it is possible to defeat some of them, diverting too much attention to them is a mistake. Their supply is endless and your time is not. Engage them only if they're blocking your progress.
- If your party is the type that wouldn't hold its own even in a bar brawl, you can try to sneak your way out. You can also try to use some defensive skills that will confuse or slow down Sorrow's monsters.
- Head for the feretory with your ENTIRE PARTY, as you may have to disable some of its protections, and the skills of your companions will come in handy. What's more, your main character must reach the pyramid, as they are the only character capable of activating it.

When escaping sanctuary, keep away from the eastern portion of the map, as that's where Sorrow (M4.13) will appear after a few turns. Do not try to fight her, as all attempts to do so will be futile. What's more, the Sorrow is able to automatically kill all characters in her vicinity.
A glimpse of hope will come as Aadiriis decides to sacrifice her life to distract Sorrow and enable you to escape (no matter what dialogue option you choose, you'll be unable to change her mind). Don't think you're safe now, though. It will take Sorrow about three turns to kill Asdiriis; you need to use the time her sacrifice bought you to reach the feretory.

As it's been already said, you cannot reach your destination traveling in a straight line. Instead, first head for the barricade located west of Sorrow's spawn point (M4.14). Use character skills to get rid of the rubble and then head for the feretory (M4.15).
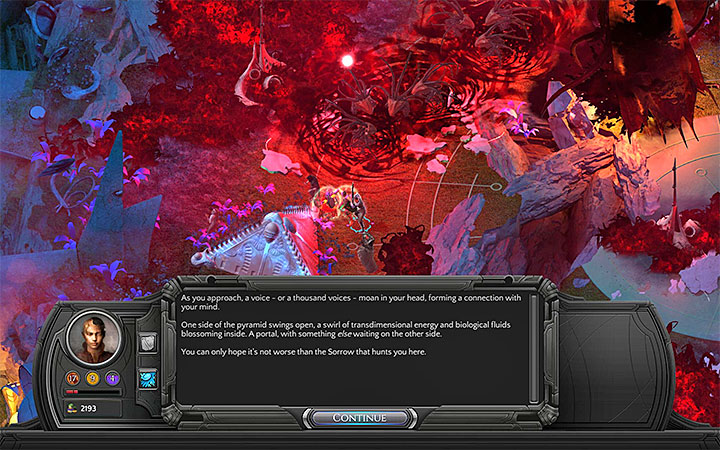
There is some critical information you need to know about the feretory - it cannot be used outright to escape the location. First, it needs to be disarmed. You can do it by either have your party members execute THREE different actions, or have your main character use the Tidal Affinity skill. What's more, your main character needs to be the last character to touch the pyramid. Only then will the encounter end, and you'll be given 100 XP.
- Torment: Tides of Numenera Game Guide
- Torment Tides of Numenera: Strategy Guide
- Torment Tides of Numenera: Puzzles and additional activities
- Torment Tides of Numenera: How to win the duel with Aidan Sitabo (Cliff's Edge)?
- Torment Tides of Numenera: How to solve the clock puzzle?
- Torment Tides of Numenera: How to solve the dome puzzle?
- Torment Tides of Numenera: How to solve the pyramid puzzle (Order of Truth)?
- Torment Tides of Numenera: Where can you rest for free in Sagus Cliffs?
- Torment Tides of Numenera: Where to find Aligern and Callistege if they leave the team?
- Torment Tides of Numenera: Who is the serial killer in Sagus Cliffs and whom can he murder?
- Torment Tides of Numenera: Where can you find all the copies of the Ghostly Woman (Fifth Eye Tavern)?
- Torment Tides of Numenera: How to craft the Shadow Ring?
- Torment Tides of Numenera: Meeting the Silver Orphans in Sagus Cliffs
- Torment Tides of Numenera: List of access codes to unique tombs in Necropolis
- Torment Tides of Numenera: How to escape the Miel Avest Sanctuary?
- Torment Tides of Numenera: Can you die permanently?
- Torment Tides of Numenera: Where do I find the Murden treasure room and how do I get inside?
- Torment Tides of Numenera: How to reach the Trade Post and Ascension in Bloom?
- Torment Tides of Numenera: How to defeat the Waits-for-prey construct in the Bloom?
- Torment Tides of Numenera: Where to obtain the scalpel for opening Maws in Bloom?
- Torment Tides of Numenera: How to pass through the Nethermost Cavity in the Bloom and reach the Heart Interior?
- Torment Tides of Numenera: How to solve the Stasis Chamber puzzle (Broken Fathom)?
- Torment Tides of Numenera: All Merecasters
- Torment Tides of Numenera: Puzzles and additional activities
- Torment Tides of Numenera: Strategy Guide
You are not permitted to copy any image, text or info from this page. This site is not associated with and/or endorsed by the developers and the publishers. All logos and images are copyrighted by their respective owners.
Copyright © 2000 - 2026 Webedia Polska SA for gamepressure.com, unofficial game guides, walkthroughs, secrets, game tips, maps & strategies for top games.
