Silent Hill 2 Remake: How to open the safe in apartment 206?
You will encounter the first mandatory puzzle in Silent Hill 2 Remake in the Wood Side Apartments. On this page of the guide we described how to guess the combination to the safe in the locked apartment.
The first mandatory puzzle in Silent Hill 2 Remake is located in the Wood Side Apartments, the second main location in the game. While exploring the apartment building, you will come across apartment 206, whose walls are covered in writing. In the middle of the room there is a locked safe with the key to the exit door of the apartment. On this guide page we describe how to solve the puzzle and discover the combination to the safe.
Each puzzle in the game has three variants depending on the chosen level of puzzle difficulty. You choose it at the beginning of the game and you cannot change it later. The puzzle below was solved on the recommended, normal difficulty level.
About the puzzle
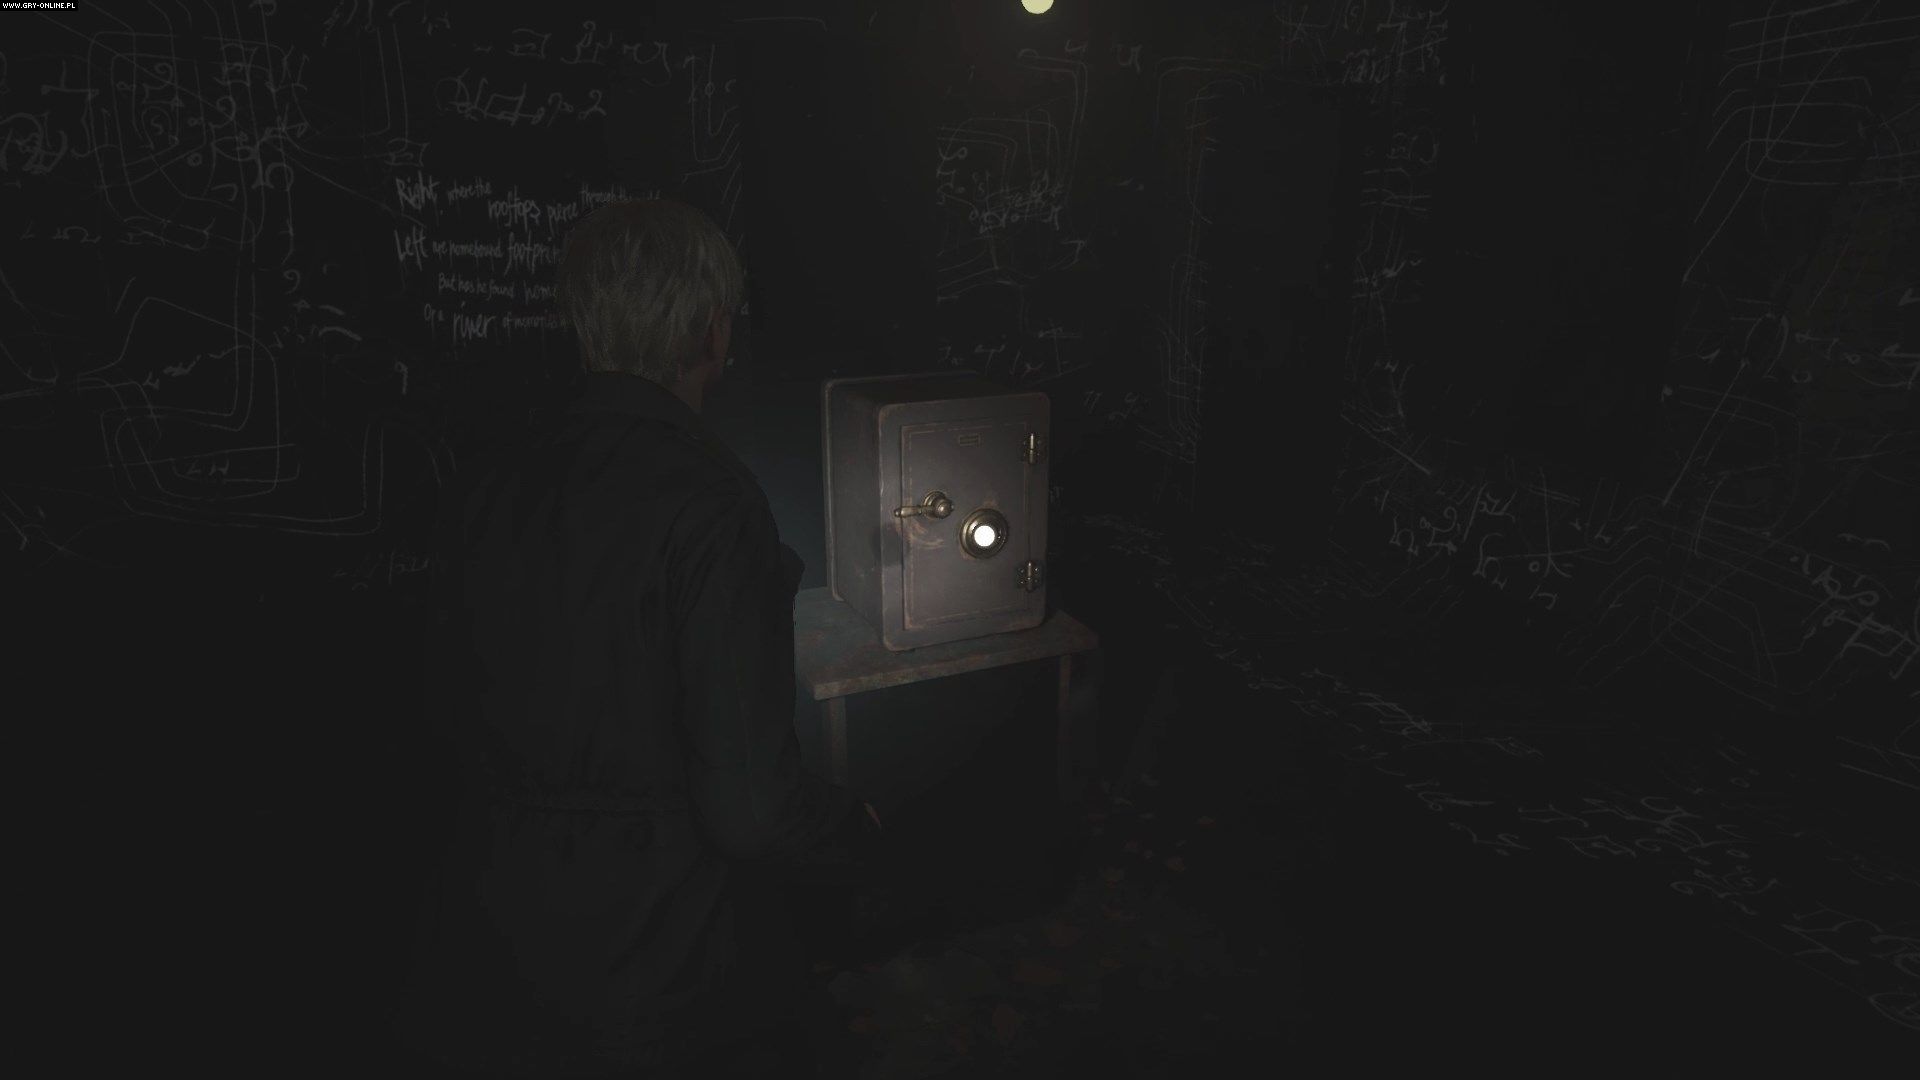
To solve the puzzle, you must open the safe located in the center of the room. You need a code for this, which consists of three digits. You cannot leave the room until you solve the puzzle, but don't worry. Everything you need is here.
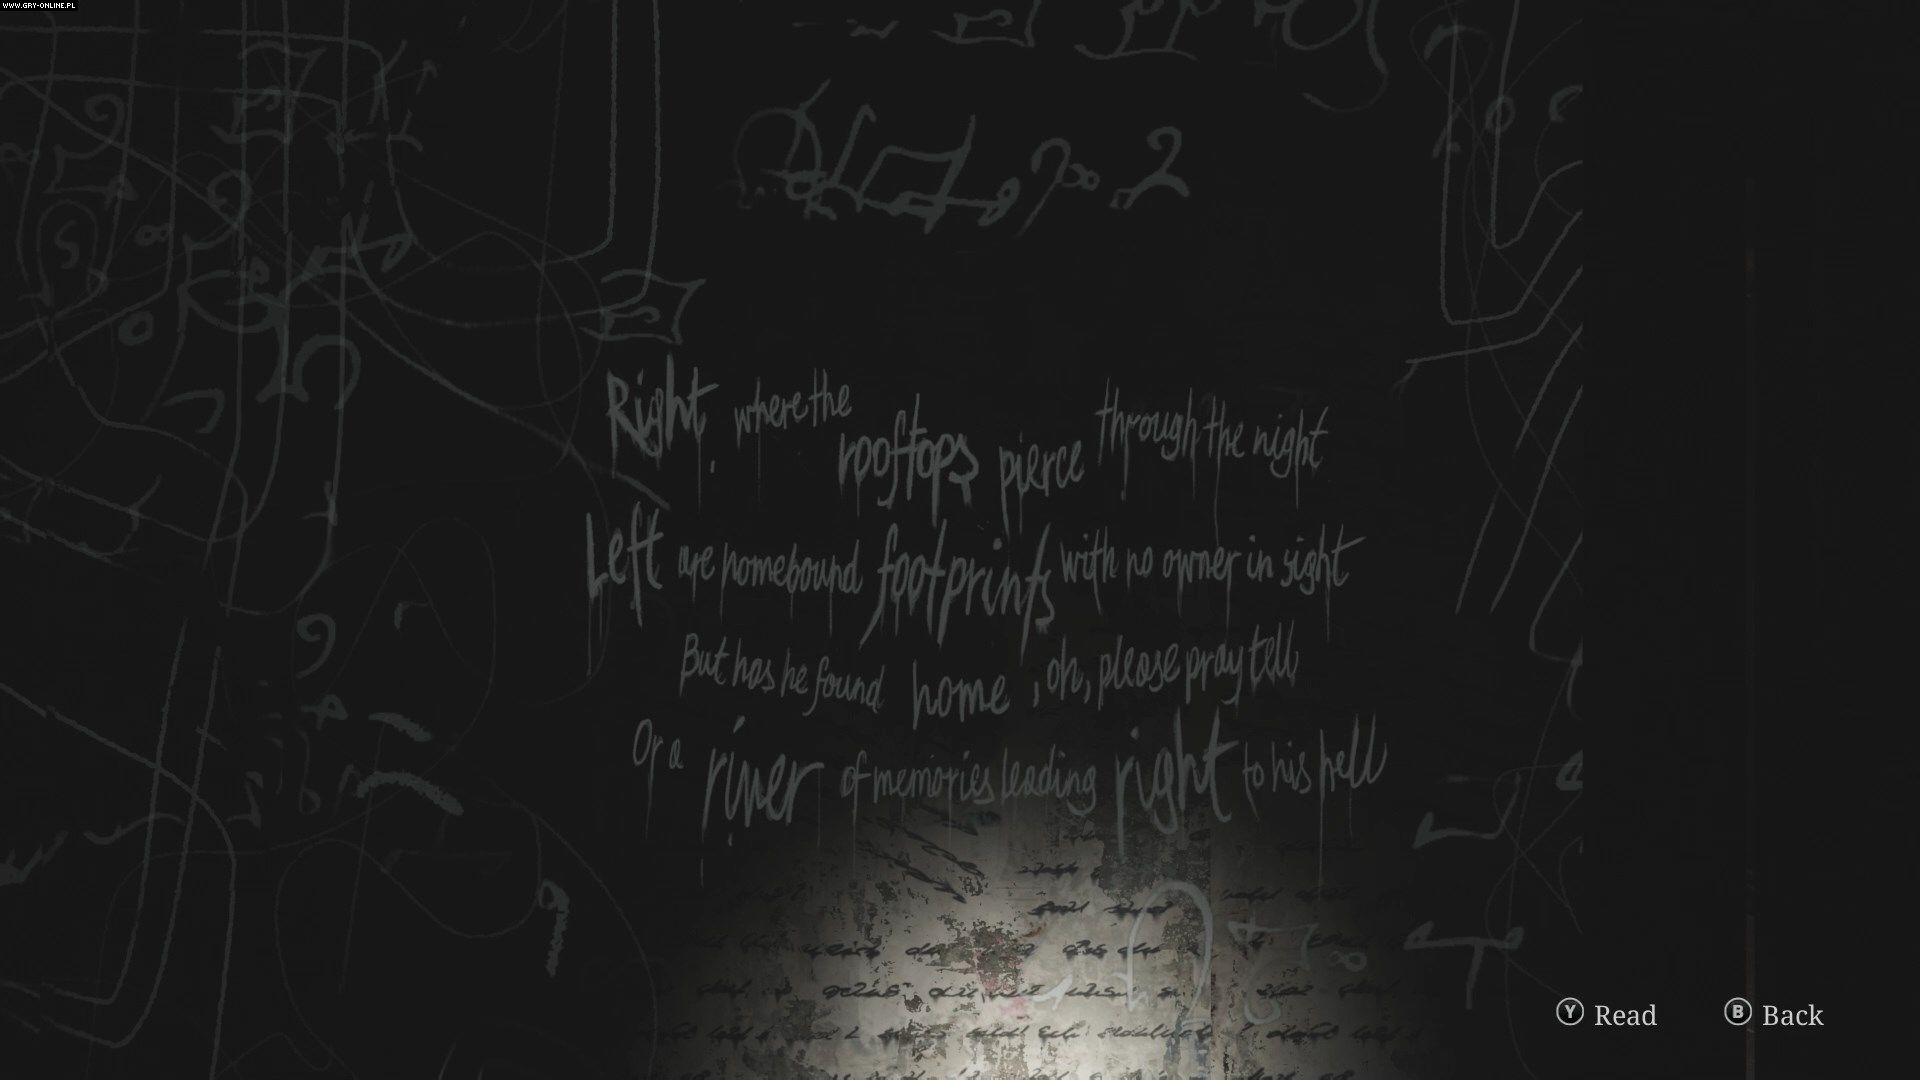
There is a short poem on the wall right next to the crack through which you entered the apartment. This is the solution to the puzzle. Most of the poem has no meaning, but the words that give you the solution are larger. Left and right indicate the direction the safe dial should turn, while the remaining words refer to the drawings on the walls.
How to get the combination to the safe?
The walls of the room are filled with inscriptions, numbers, and drawings. These drawings correspond to enlarged words of the poem. There is a digit next to each of them. The numbers in the corresponding drawings are the combination numbers for the safe, the direction given next to them is the direction in which the dial should be turned, and the order of the words in the line indicates the order of the numbers.
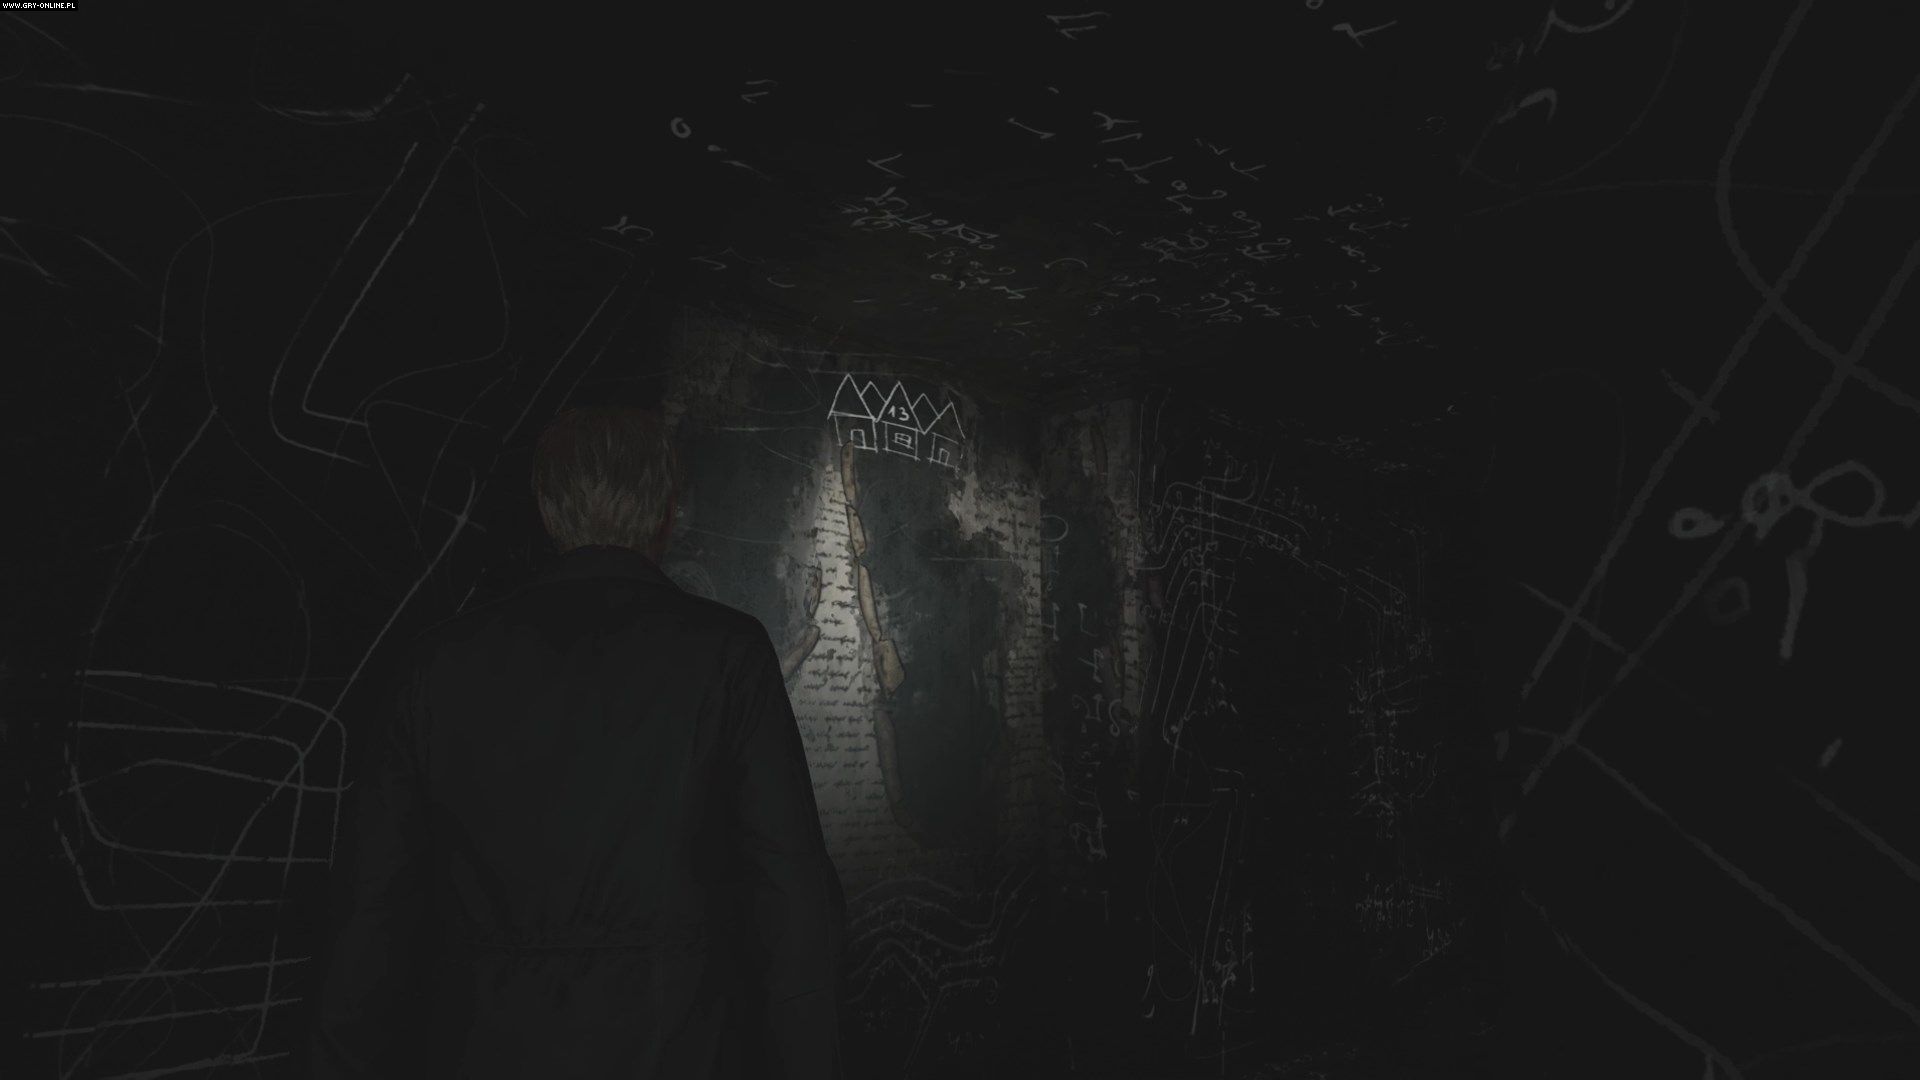
The first drawing in order are roofs, near the ceiling in the corridor leading to the locked exit doors. The direction is right and the number is 13.
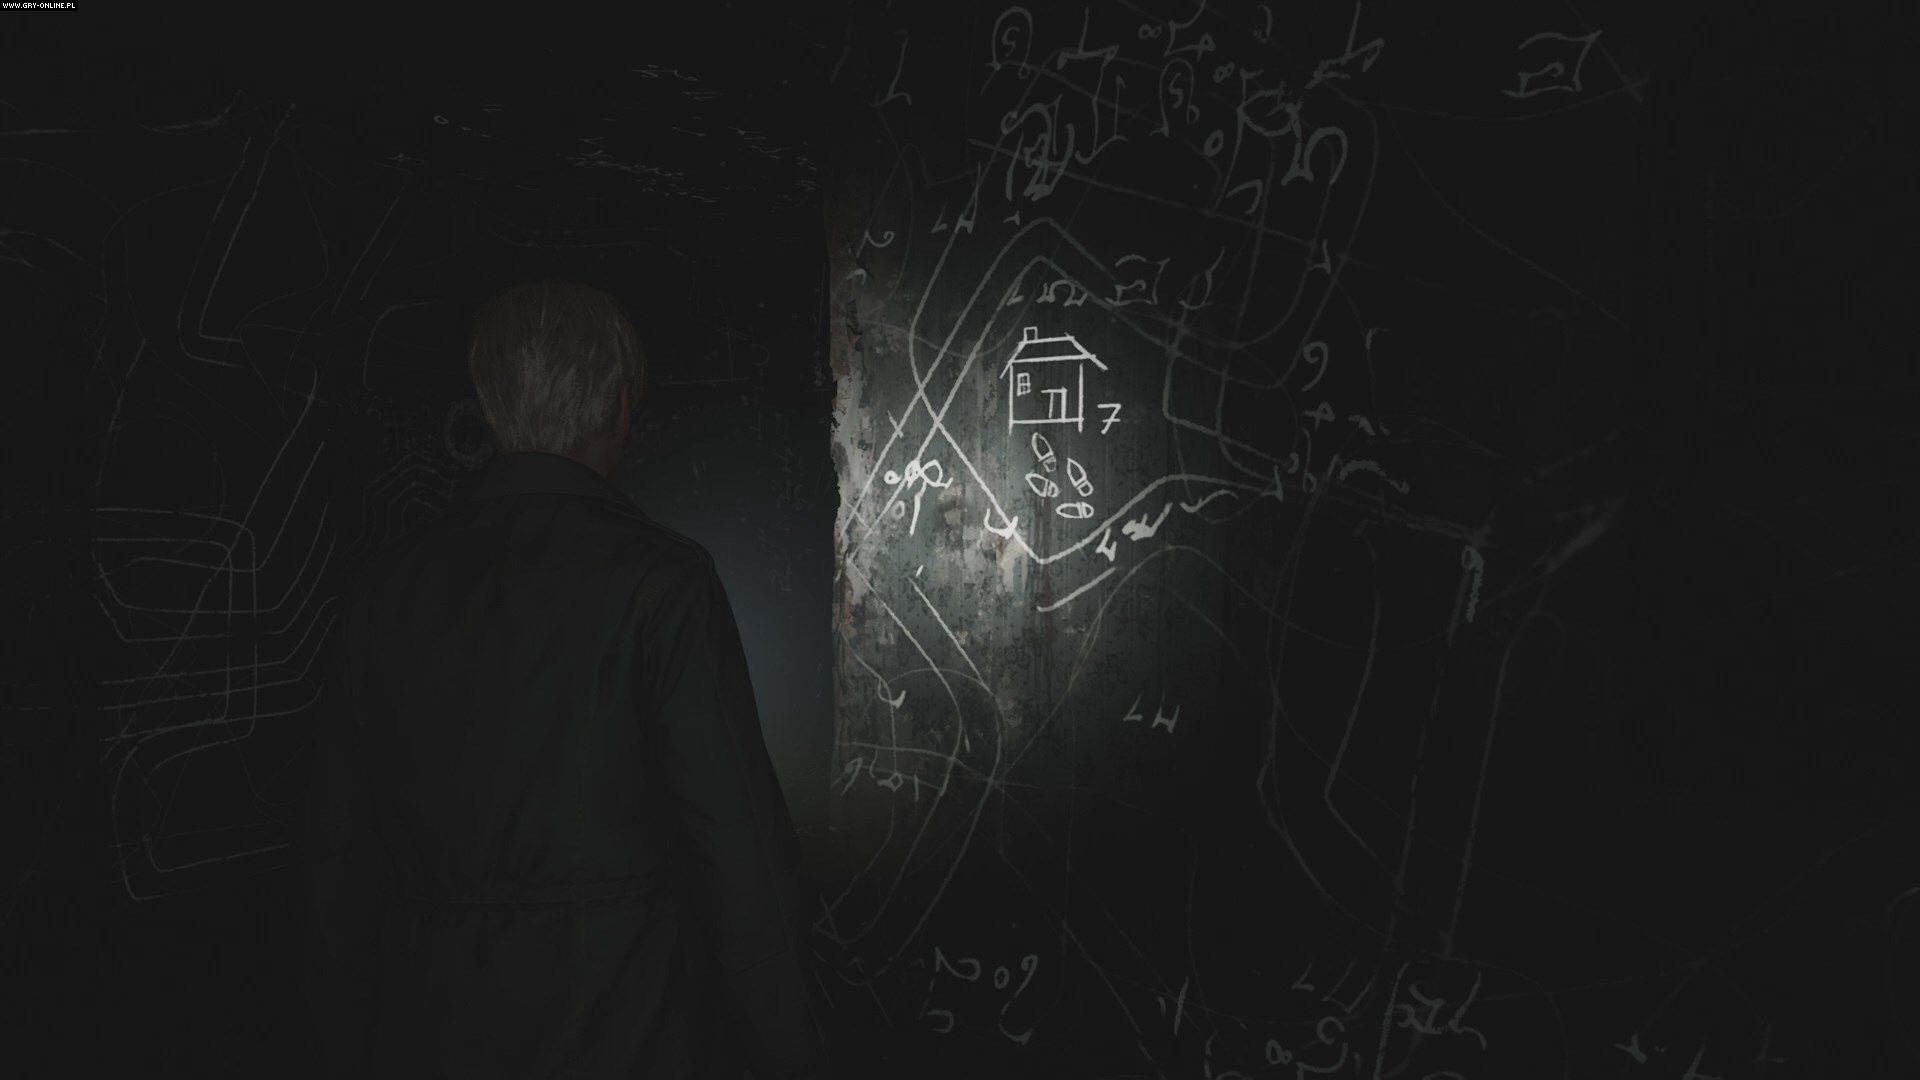
The second drawing in order is footprints, on the wall to the right of the poem. The direction is left and the number is 7.
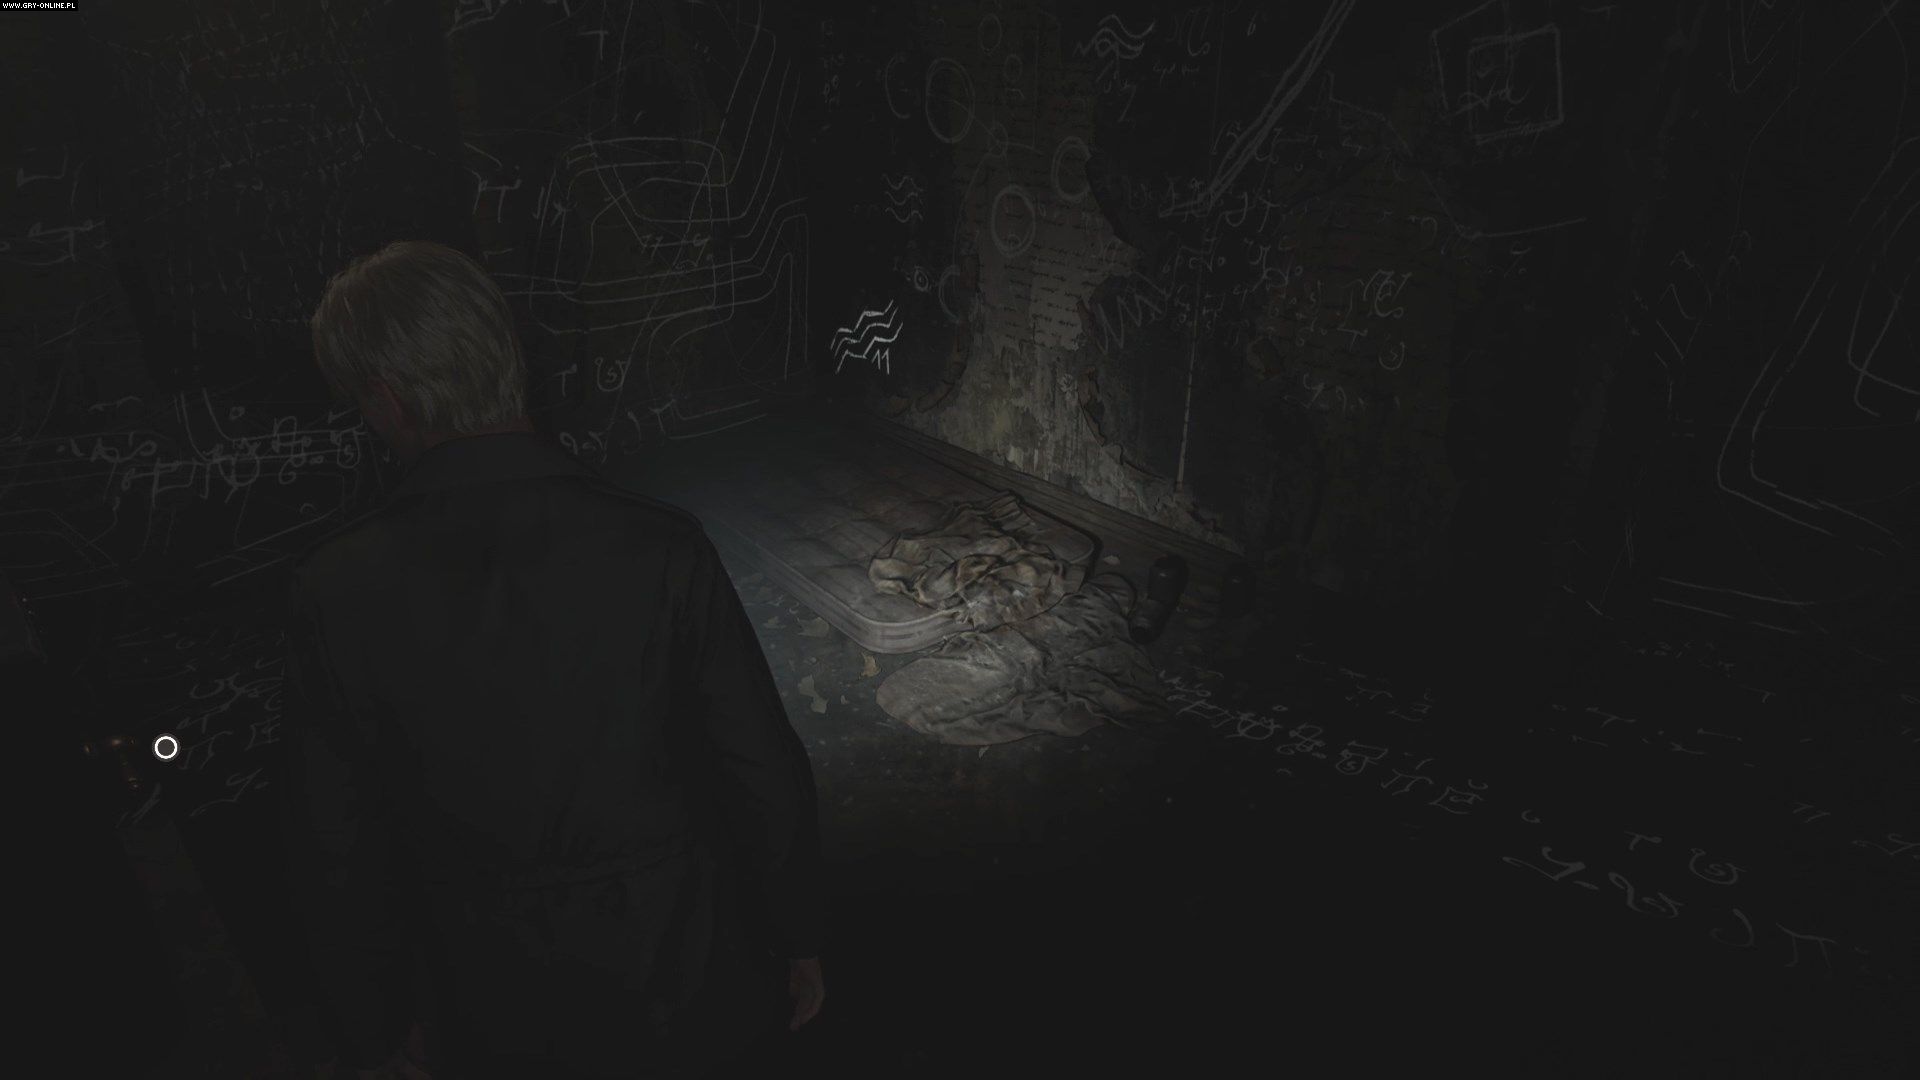
The third drawing in order is a river, located at the bottom corner of the wall opposite the poem. The direction is right and the number is 11.
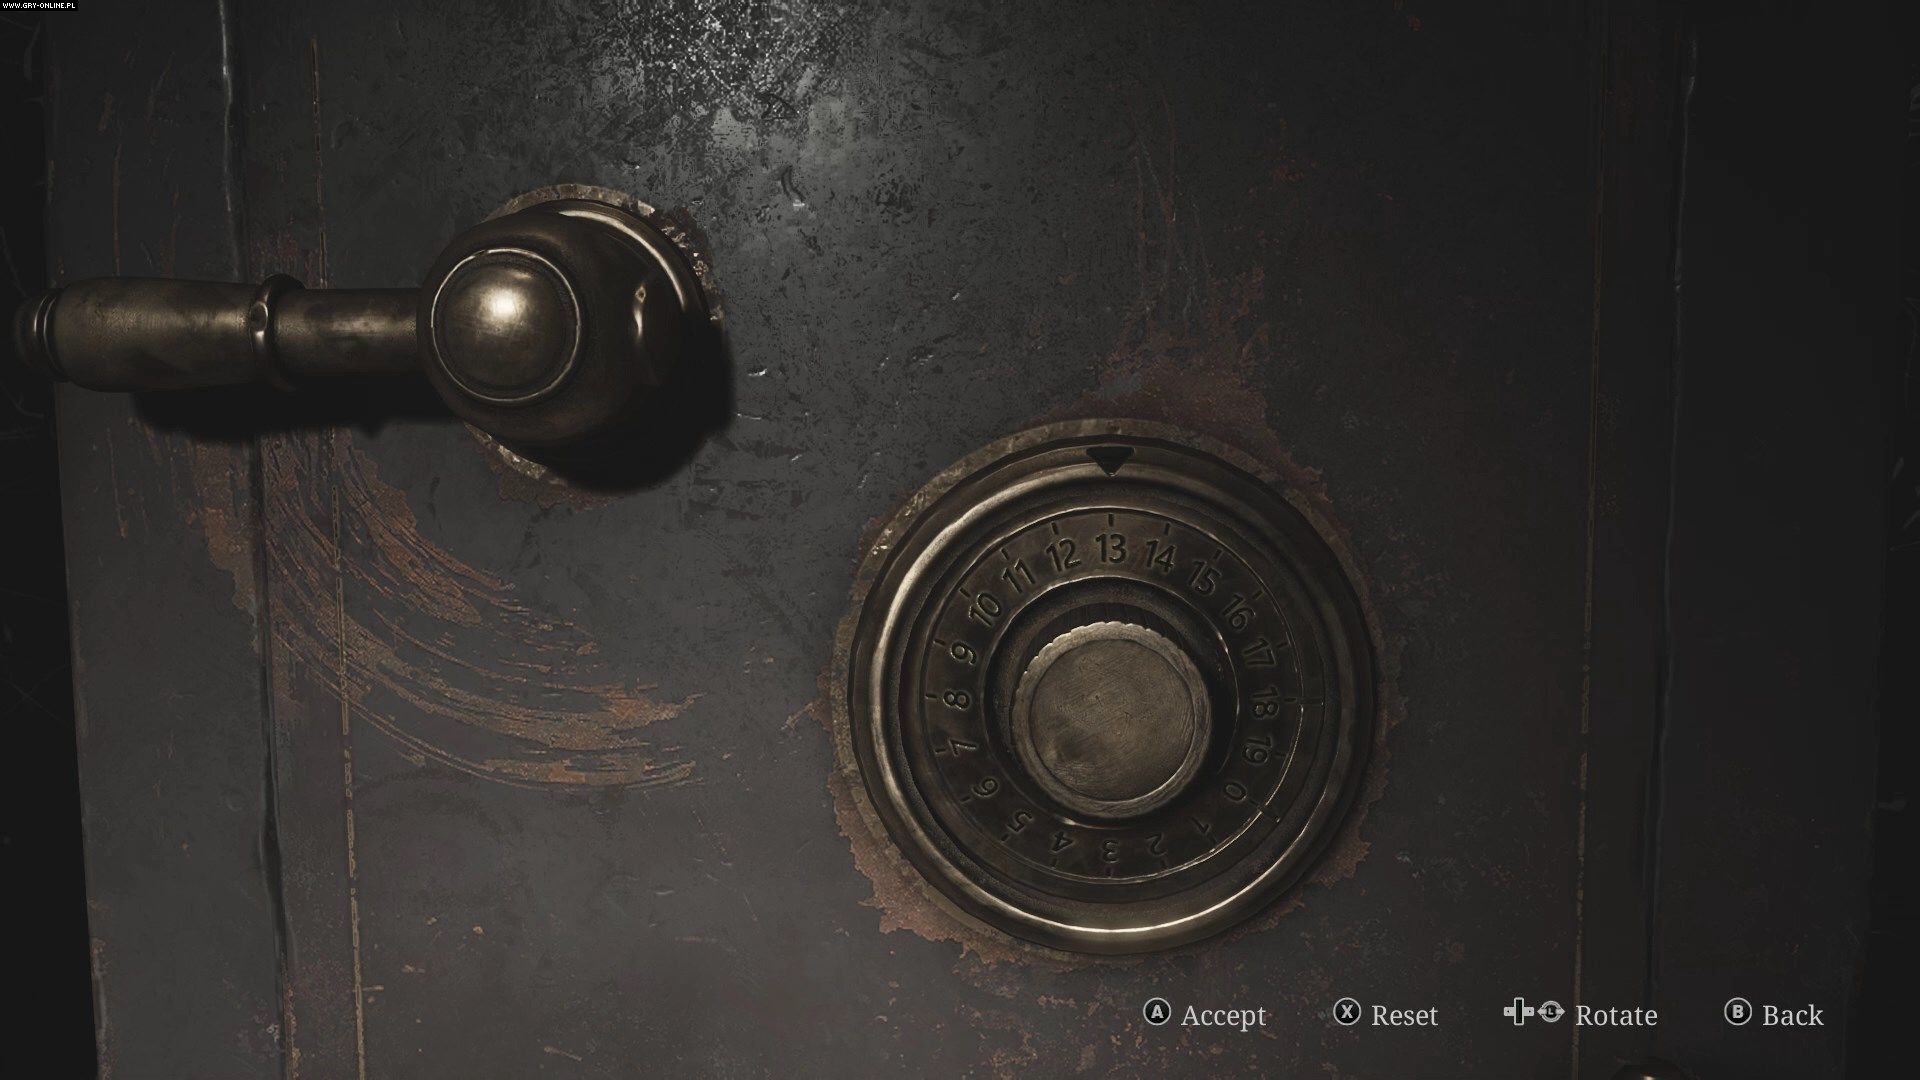
Once you have discovered all the numbers, you can open the safe. Interact with it and do the following steps:
- Move the safe dial to the right to number 13 and confirm your choice.
- Move the safe dial to the left to number 7 and confirm your choice.
- Move the safe dial to the right to number 11 and confirm your choice.
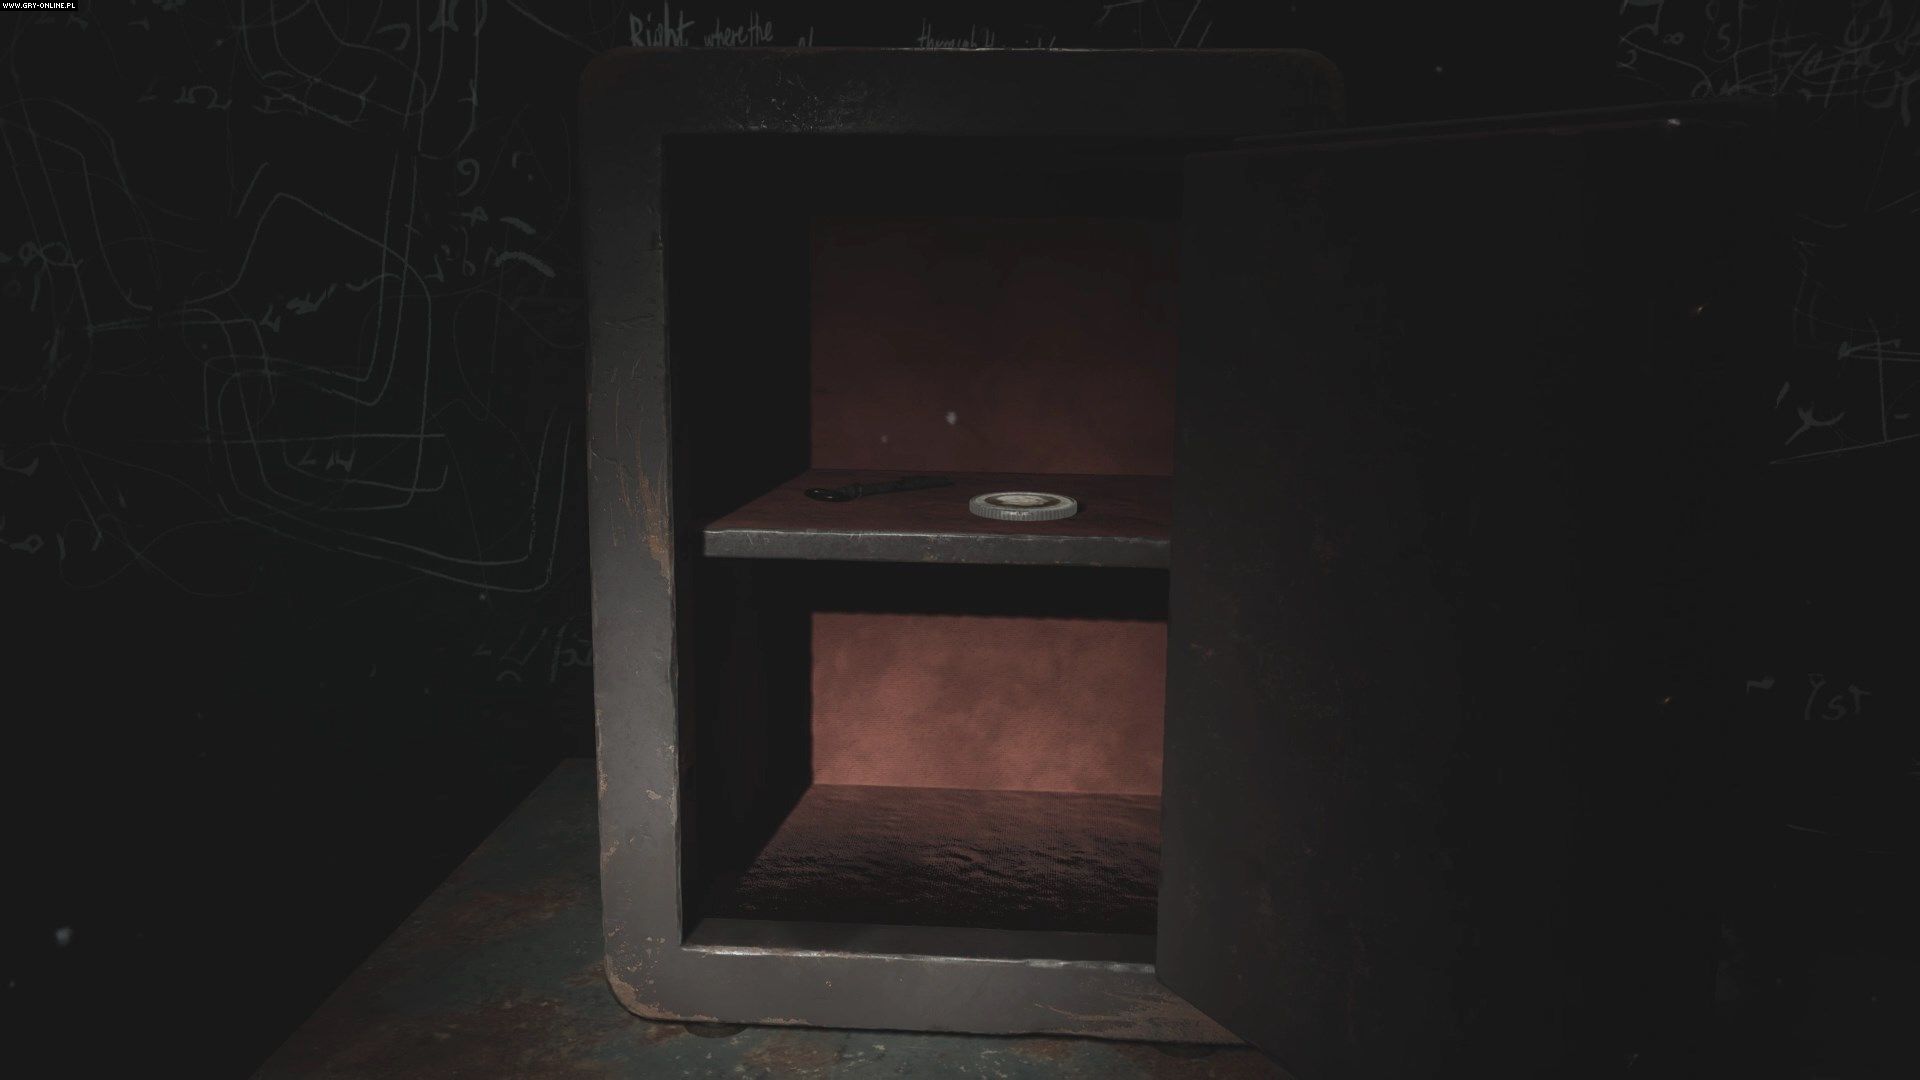
In this way, you will open the safe. Inside you will find the key to the exit door and a coin, which will be useful later for the next puzzle. You can find solutions to the remaining puzzles in the game on a separate guide page.

- Silent Hill 2 Remake Guide
- Silent Hill 2 Remake: Game Guide
- Silent Hill 2 Remake: Puzzles
- Silent Hill 2 Remake: All puzzles
- Silent Hill 2 Remake: How to solve jukebox puzzle?
- Silent Hill 2 Remake: How to open the safe in apartment 206?
- Silent Hill 2 Remake: How to open the desk in the reception at Wood Side Apartments?
- Silent Hill 2 Remake: How to solve moth puzzle?
- Silent Hill 2 Remake: How to open the safe in the director's office at Brookhaven Hospital?
- Silent Hill 2 Remake: How to win the Trick or Treat game show?
- Silent Hill 2 Remake: How to choose the innocent convict in Toluca prison?
- Silent Hill 2 Remake: How to turn on the music box in the Lakeview Hotel?
- Silent Hill 2 Remake: Puzzles
- Silent Hill 2 Remake: Game Guide
You are not permitted to copy any image, text or info from this page. This site is not associated with and/or endorsed by the developers and the publishers. All logos and images are copyrighted by their respective owners.
Copyright © 2000 - 2025 Webedia Polska SA for gamepressure.com, unofficial game guides, walkthroughs, secrets, game tips, maps & strategies for top games.