NieR Automata: Chapter 3, Route B - walkthrough
NieR Automata: on this page you will find walkthrough for the 3rd chapter of Route B - The Desert
On this page of our NieR Automata guide you will find a walkthrough describing the unique events in Chapter 3of Route B, during which you play as 9S. The walkthrough lists all of Route B's new content that appears in the Desert and during the Adam boss fight.
Route B's Chapter 3 is very similar to Chapter 3 in Route A. The only information on this page are differences and new features you'll encounter while playing through Route B. Remaining info about this chapter and its main objectives can be found by reading Route A's Chapter 3 walkthrough.
Desert Zone

The path to the desert is located in the same place as before (once again, it requires talking to Jackass). Traversing the desert itself shouldn't feature any surprises either. Try to remember the possiblity of hacking hostile machines. This new ability is especially useful while battling big groups of enemies, as detonating a hacked machine may weaken the foes standing nearby.
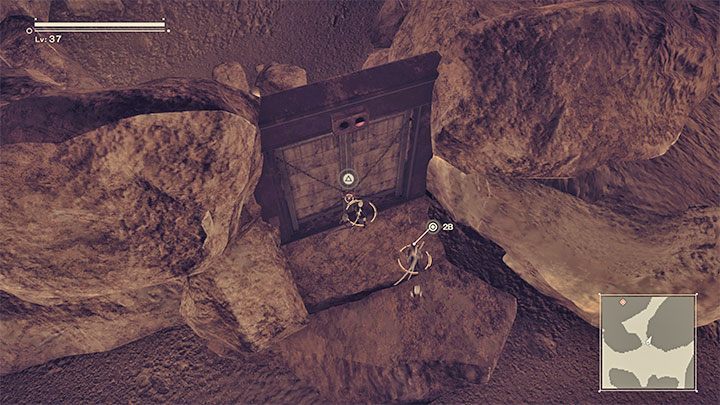
In the first (smallest) desert area you can explore the optional underground caves area. There you'll find a locked gate (picture above) that can be hacked open. One of the items found in the newly unlocked area behind the gate is the unique Cruel Blood Oath weapon.

In the desert's largest area you can also use the scanner (one of Pod's programs) in the place marked on the picture. There you will find a buried treasure in the form of a shining object. It's a unique Phoenix Lance weapon.
Just like in Route A you must eliminate the groups of machines in the main area of the desert and then follow the escaping machine to the Desert Housing area.
Desert Housing

As you get close to the buried residential complex, you will experience one of Route B's unique features for the first time - additional cutscenes. They allow you to gain a new perspective on the already known events and to learn more about the game's main characters.
Near Desert Housing you may notice a gold tank. Encounters with similar elite enemies are described in more detail on the Gold enemies - what are they? page. In short - gold machines are very durable, but hacking is incredibly helpful when fighting them. Successfully eliminating gold enemies can result in rare and valuable loot.
Going through the Desert Housing itself is identical to Route A and leads to Adam.
Adam Boss Fight - playing as 9S

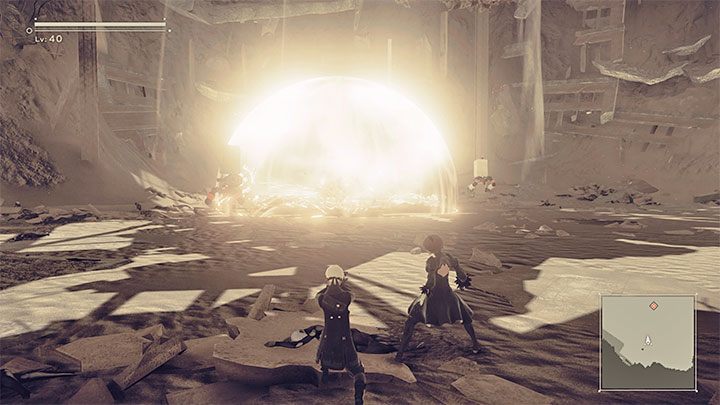
Identically to Path A, you will need to fight regular machines for a while before Adam joins the battle. Remember that successfully hacked machines can be detonated, damaging the foes around them.
While dueling Adam, aside from attacking normally, you can also try to hack the boss himself. The easiest way to do so is locking the camera onto him before holding the Triangle button.

You need to be aware that the mini-games will be more demanding if you try to hack Adam. Failing a minigame results in a loss of health when regaining control of 9S. The reward, however, is worth the risk. A successful hack can quickly weaken the boss. You obviously shouldn't count on defeating Adam immediately with a single hack, but you'll deal serious damage each time you succeed.
Escaping from the Desert Housing complex and the return trip to the Resistance Camp is unchanged from Route A. The next main objective, the amusement park, also remains identical. Said objective is part of Chapter 4.
- NieR Automata Guide
- NieR Automata: Walkthrough
- NieR Automata: Route B
- NieR Automata: Chapter 1, Route B - walkthrough
- NieR Automata: Chapter 2, Route B - walkthrough
- NieR Automata: Chapter 3, Route B - walkthrough
- NieR Automata: Chapter 4, Route B - walkthrough
- NieR Automata: Chapter 5, Route B - walkthrough
- NieR Automata: Chapter 6, Route B - walkthrough
- NieR Automata: Chapter 7, Route B - walkthrough
- NieR Automata: Chapter 8, Route B - walkthrough
- NieR Automata: Chapter 9, Route B - walkthrough
- NieR Automata: Chapter 10, End B, Route B - walkthrough
- NieR Automata: Route B
- NieR Automata: Walkthrough
You are not permitted to copy any image, text or info from this page. This site is not associated with and/or endorsed by the developers and the publishers. All logos and images are copyrighted by their respective owners.
Copyright © 2000 - 2025 Webedia Polska SA for gamepressure.com, unofficial game guides, walkthroughs, secrets, game tips, maps & strategies for top games.
