Final Fantasy XV: General information and how to unlock dungeons
Menace Beneath Lucis is the name of the quest, which, in turn, unlocks a series of other quests. Those are associated with end-game dungeons, accessible from some of the "regular" ones you've already visited. Inside you will find dozens of rooms filled with powerful enemies and items and a boss awaiting you at their deepest parts. Those dungeons are one of the most difficult challenges in the entire game - especially those located beneath Steyliff Grove and Costlemark Tower. However, visiting them is extremely profitable, as you can find valuable treasures there. In this chapter you will find short descriptions of every "menace dungeon" in the game, coupled with enemies and items that can be found inside of them.
- Unlocking
- General information about the dungeons
- Information about treasures hidden in the dungeons
- General tips
Unlocking
First things first, you have to unlock access to the quest, as well as find the associated dungeons. To unlock the quest you have to:
- Finish the main storyline (complete all chapters);
- Clear 4 dungeons - Crestholm Channels, Balouve Mines, Costlemark Tower and Daurell Caverns. You can find their descriptions and walkthroughs in the "Optional dungeons" section.

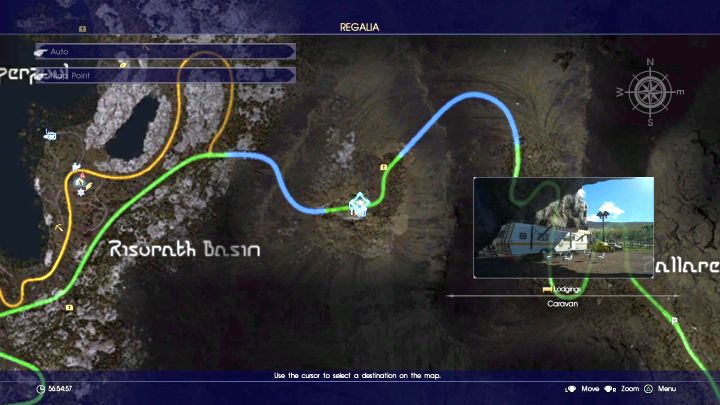
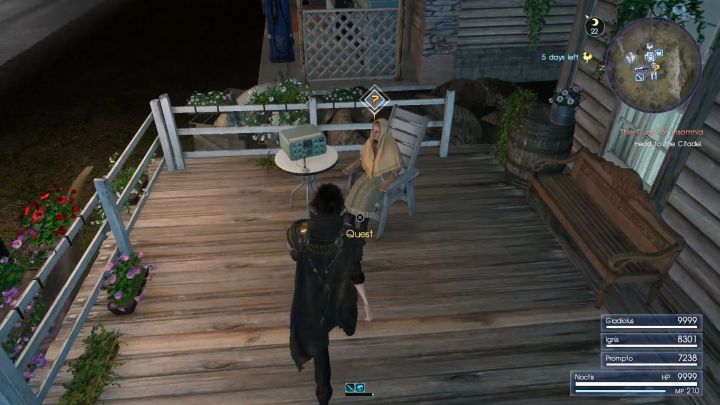
Afterwards, you have to head to Meldacio Hunter HQ and find Ezma, one of the NPCs located there. She can be found on terrace of one of the houses - the exact location can be seen on the above screenshot. During the conversation you will learn about the dungeons you're looking for and 8 new markers will appear on the world map. Completing all of those quests will reward you with a special medal - the item can be used to craft a Maxicast spell.

The entrances to the Menace dungeons are located, in most cases, at the end of a given dungeon. The entrances themselves are gates with seals - you've stumbled upon at least once during the main storyline. You will be able to break the seals and open the gates once you've spoken to Ezma - she will give you the necessary key.
General information about the dungeons

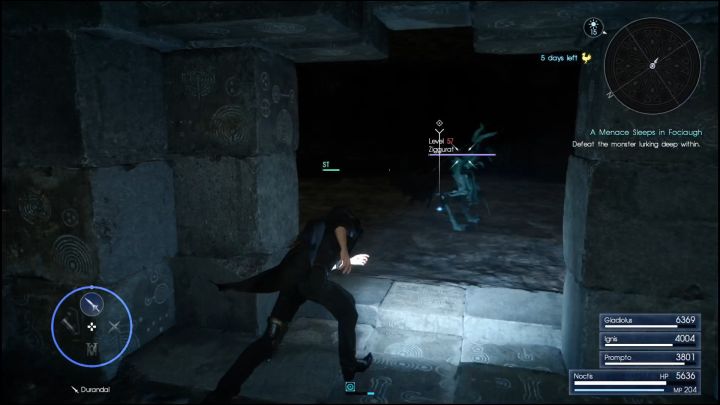
Each dungeon from the Menace group is divided into dozens of identical rooms, inside of which you will find a specific enemy (or a group of them - but always of single type) and a random item. What is more, after each 10 rooms (in most cases) you will enter a room with a camp area inside, allowing you to set up a camp and rest. You can ignore them when visiting easier Menace dungeons, but you should never skip the chance to set up a camp when inside of the harder ones - completing them without resting is practically impossible. Stock up on cooking ingredients before venturing inside.
Additionally, from time to time you will run into rooms with multiple paths - only one is correct, the remaining ones lead to a dead end, but allow you to collect additional items. In this guide you will find information about those "forks" - thanks to that you will be able to take the shortest route to the boss, or visit every single room inside of those dungeons if you're after every item.
There are 8 Menace dungeons in the game, located inside:
- Keycatrich Trench
- Glacial Grotto
- Fociaugh Hollows
- Daurell Caverns
- Balouve Mines
- Steyliff Grove
- Crestholm Channels
- Costlemark Tower
Information about treasures hidden in the dungeons
You should keep in mind a number of things associated with treasures found in Menace dungeons that can be found in further chapters of this guide:
- Numbers in tables aren't associated with the order in which you can find them in the dungeon - those are there only to make the tables easier to read.
- Items listed in the table are the ones that can be found in the dungeon. It doesn't mean, however, that you'll find all of them inside - only some.
- If you want to collect all of the items listed in the table, you will have to visit the dungeon more than once.
- There's no "ultimate order of finding items" - aside from some of them, most of the items are randomly generated.
- Unique items, such as weapons, can be found only once - during the next visit you will acquire one of the random items from the table. Don't worry though - there's no chance to miss any of them, as the unique items are always located in the main rooms, not in the branching ones.
- Multiple items listed in a single row show places in which you can find different items. There's a fixed percentage chance to find a specific item and getting one of them will prevent you from collecting another - unless the item can be found in a different room (row of the table).
General tips
Some tips that might prove useful:
- Level up your party slightly, especially when you're planning on visiting the more difficult dungeons. The enemies you run into there are dangerous to a party consisting of 99 characters - there's no point in going there when your party is around level 60, as the enemies will quickly defeat them all.
- Stock up on ingredients used in cooking, as well as curative items. Some of the Menace dungeons are really long (Steyliff Grove is the record-holder, with 100 rooms inside!), forcing you to high quantities of them.
- When it comes to cooking recipes, dishes increasing crit chance (such as Gold Tail Soup, or Marrowshroom Chowder) are the best to cook. Critical hits deal more damage and allow you to quickly refill your Armiger bar.
- Acquire all of the legendary weapons, especially the Zwill Crossblades. The ultimate pair of daggers will allow you to deal huge damage, which is crucial as there are enemies with hundreds of thousands of health points in those dungeons.
- Almost all of the enemies you run into are vulnerable to Light. Weapons imbued with that parameter are extremely effective here.
- Remember to prepare spells before venturing inside. Some of the enemies are extremely resistant or even completely immune to physical attacks and can be taken out only with spells.
- Final Fantasy XV Game Guide
- Final Fantasy XV: Game Guide
- Final Fantasy XV: Menace Beneath Lucis - end-game dungeons
- Final Fantasy XV: General information and how to unlock dungeons
- Final Fantasy XV: A Menace Sleeps in Keycatrich
- Final Fantasy XV: A Menace Sleeps in the Grotto
- Final Fantasy XV: A Menace Sleeps in Fociaugh
- Final Fantasy XV: A Menace Sleeps in Daurell
- Final Fantasy XV: A Menace Sleeps in Balouve
- Final Fantasy XV: A Menace Sleeps in Steyliff
- Final Fantasy XV: A Menace Sleeps in Crestholm
- Final Fantasy XV: A Menace Sleeps in Costlemark
- Final Fantasy XV: Menace Beneath Lucis - end-game dungeons
- Final Fantasy XV: Game Guide
You are not permitted to copy any image, text or info from this page. This site is not associated with and/or endorsed by the developers and the publishers. All logos and images are copyrighted by their respective owners.
Copyright © 2000 - 2025 Webedia Polska SA for gamepressure.com, unofficial game guides, walkthroughs, secrets, game tips, maps & strategies for top games.
