Destiny: The Sword of Crota

Recommended level: 7 lvl (Normal)/11 lvl (Hard)
Team: 1-3 players
You start this mission in the Archer's Line. Summon your speeder and head towards the mission marker, which will take you to the part of the Moon called the Hellmouth. Ride around the hole there, avoid fighting the random groups of enemies, until you reach the location that is your first destination.
Face the Swarm Prince

The first of the four princes
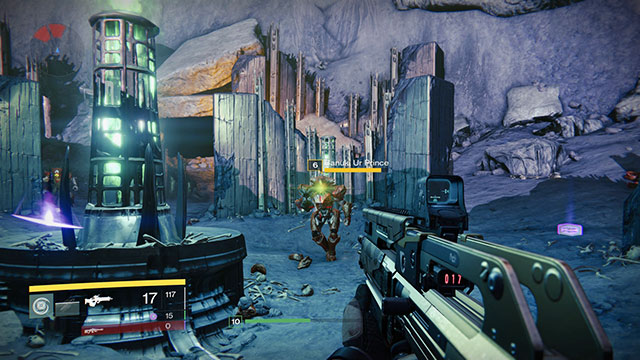
Here, you will encounter a small group of Acolytes and a Knight that are occupying the ruins of the alien race. Deal with them, which will result in the fight against the first one of the Hive's princes - Banuk, Ur Prince. It is a typical knight with a grenade launcher, only tougher. Also, he has quite a company of the Acolytes, which you should deal with in the first place.
After you defeat the first prince, head towards the mission marker, which will take you to another Hive fortress. Kill the small group of the Acolytes here, who are guarding the entrance and do the same with the 3 Knights with grenade launchers, lurking behind the main door. Head deeper into the complex.
Locate the Sword

After a short walk, you will get into another Darkness Zone and stumble across another group of the Acolytes commanded by the Knight with a grenade launcher. Clear the path and follow the bone corridor towards the next room.
Inside, you will be jumped by the charging Thralls and a Cursed Thrall. Eliminate them from afar and walk deeper into the hall to deal with the army of Acolytes and a levitating Wizard. There are quite a few enemies so, it is best to jump onto one of the passages that provide better cover, and conduct your fire from there to eliminate all of the Acolytes, and finally the Wizard.

After you have cleared the area, approach the glowing sword that levitates close to the massive chain. Yep, soon you will be swinging the beauty around and slash the enemies. As soon as you obtain the sword, enemy Thralls will start coming from across the room. Chop them with two different moves, with the sword: quick, light slashes that can be combined (PS3/PS4: R1, X360/XOne: RB) and the powerful single slashes that deal damage to all the nearby enemies (PS3/PS4: R2, X360/XOne: RT). The latter attack can also be launched in mid-jump and the former allows you to combine slashes in mid air.
After you defeat the first wave of Thralls, a group of Acolytes will jump out of the water, followed by another wave of Thralls, this time they emerge from the passages on both sides of the pond. Only after you deal with the marauders the battle proper commences.
Kill Swarm Princes

Your objective is to defeat the three Hive princes, who appear one-by-one, accompanied by small groups of Acolytes. The first one is Garok, Xol Prince. All of the bosses behave in the same way and fight using the swords similar to yours. You can defeat them with the blade that you have obtained, or with the regular weapons. The sword deals considerable damage to them, but the opponents are not passive, as you slash and dice them and they attack also, with attacks that can kill you with 3-4 blows. If you decide to fight with the sword, the best technique to attack the bosses is with the quick slashes, after which you jump onto the higher floor, when the opponent hits you twice. Regenerate your health and repeat. However, if you choose to fight with firearms, throw the sword away (it returns to its initial location), attack the opponents at a distance and jump between the individual floors which will allow you to keep a safe distance.
After you defeat the first boss, another one jumps out of the water- Dakoor, Yul Prince. Clear the battlefield of the pesky Acolytes, and deal with the second prince, with the method of your choice. Repeat the entire process with the third and the fourth prince called Merok, Eir Prince. After his death, the sword is destroyed and countdown until the end of the mission starts.
Reward: Armor Upgrade, +2000 XP (Normal)/+2400 XP (Hard)
You are not permitted to copy any image, text or info from this page. This site is not associated with and/or endorsed by the developers and the publishers. All logos and images are copyrighted by their respective owners.
Copyright © 2000 - 2025 Webedia Polska SA for gamepressure.com, unofficial game guides, walkthroughs, secrets, game tips, maps & strategies for top games.
