Days Gone: Encampments - general information
This page in our guide to Days Gone focuses on encampments. Here, you will learn how do they work and why you should visit them.
- What are the encampments in Days Gone?
- How many encampments are in the game?
- Credits, points and Trust levels
- Which encampments should I support?
- Things you can do in an encampment
What are the encampments in Days Gone?

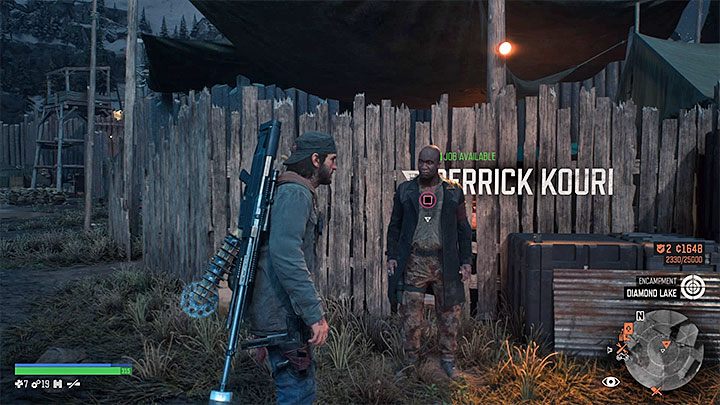
The encampments found in Days Gone are unique locations on the map. Their most important feature is that Deacon is completely safe inside them. When you enter a camp, you won't be attacked by Freakers or bandits. The only exceptions are some of the story missions during which you may have to, e.g. fight inside a camp. After that, everything will go back to normal.
You can go back to discovered camps on foot, by driving your bike or using the fast travel option. Approach one of the gates to get inside a camp (provided you have discovered a particular camp during the main storyline).
The main reason to return to encampments is to either complete or start a new mission. Deacon can also, e.g. refill his supplies, upgrade the bike or get a new weapon.
How many encampments are in the game?
There are five main encampments in Days Gone. These camps are:
- Copeland's Camp (Cascade region)
- Hot Springs (Belknap region)
- Iron Mike's (Lost Lake region)
- Diamond Lake (Crater Lake region)
- Wizard Island (Crater Lake region)
Check other pages in our guide to learn more about these camps. If you have problems with reaching any of these encampments, make more progress in the main storyline. This will also unlock access to other parts of the map.
Besides the main five encampments, Deacon can also go back to O'Leary Mountain Safehouse. This location is surrounded by a fence - you won't find any enemies here. This place serves as your starting hideout (it is used by both Deacon and Boozer). However, you can still go back here in the later parts of the game.
Credits, points and Trust levels

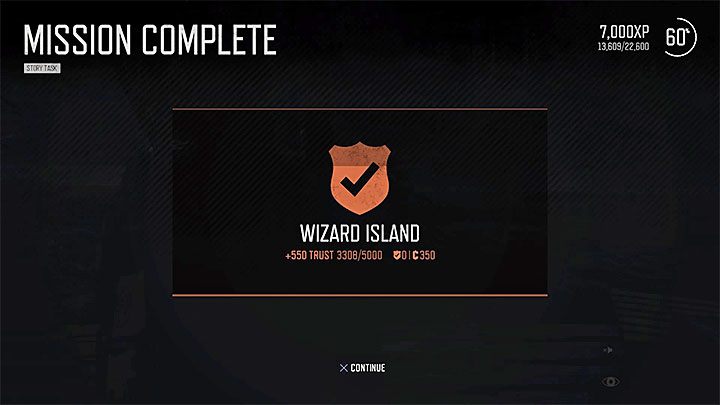
In Days Gone, credits and Trust points are closely related to the encampments. Credits and Trust points are counted for each camp separately. Every mission in Days Gone is related to one of the encampments (usually, you will do a mission for the camp in the same region in which you got the mission). When you complete a mission, the game will show you a screen where you can learn how many credits and Trust points you got for a particular encampment. The example presented in the picture above shows that we got credits and Trust points for Wizard Island camp.
Credits and Trust points can also be acquired in different ways, e.g. by delivering supplies to a particular encampment. Deacon can bring Freakers ears, meat from wild animals, and plants. Your reward depends on what you gave to the dwellers of a particular camp. For example, an ear received from an "elite" type of Freaker like Breaker is worth more credits and Trust points than an ear from a Newt.
Highlight a given camp on the map or open the inventory menu to check how many credits and Trust points you have.

You can spend credits on various items but only in the particular camp. The most important things you can get for them are new weapons, weapon modifications (e.g. increased clip size), bike upgrades, or consumables. The last category includes ammunition, supresors, medkits or grenades.
Trust points work similarly to experience points. You need to gather a specific amount of them to reach a new Trust Level in a particular encampment:
- You need 5,000 points to reach Trust level 1.
- You need 12,500 points to reach Trust level 2.
- You need 25,000 points to reach Trust level 3.
The main reason to reach new Trust levels is to unlock new items sold by the merchants. At first, the majority of the items will be marked with a locker icon - the game informs you about the required Trust level. The picture above shows an example of a bike engine upgrade requiring Trust level 2.
Which encampments should I support?
You don't have to worry about which encampment you should help first. Try to complete every side quest - those unlocked during exploration and received from the leaders of the encampments. Remember, these quests are "assigned" to each of the camps.
You have more freedom in delivering various items, e.g. Freakers' ears, meat, and plants. Bring bounties and goods to a specific camp to level up the Trust faster.
- At the beginning of the game, you will be able to visit two camps - Copeland's Camp and Hot Springs. Bring bounties and supplies to Copeland's Camp if you want to unlock bike upgrades faster. Hot Springs offers new weapons.
- Iron Mike's Camp is the only encampment in the central part of the map. This camp is connected to missions and side activities found in two different regions (Lost Lake and Iron Butte) meaning that you will be able to increase your Trust fast.
- Crater Lake, a region that you visit in the later portion of the game, has two camps - Diamond Lake and Wizard Island. Bring bounties and supplies to Diamond Lake if you want to unlock the best bike upgrades faster. Wizard Island offers the best weapons.
Things you can do in an encampment

Deacon can do the following things in each of the camps:
- Save the game and change the time of day. Go to the bed marked with a special icon. Save the game by standing next to it. Interact with the bed to change the time of day - from daytime to night and vice-versa.
- Visit a merchant. You can buy new weapons, ammunition, weapon upgrades (e.g. suppressors or a bigger clip), and consumables (e.g. medkits, fragmentation or stun grenades). Each merchant sells different weapons. Also, many of the items require you to reach a specific Trust level in that particular camp. Besides that, you can also access a weapon locker to switch your weapons.
- Visit a person who buys Freakers' ears. You can get these ears by defeating Freakers - Deacon picks them up automatically. Each ear is worth a specific amount of credits and Trust points. Try to sell them in bulk.
- Visit a cook. Each encampment has a kitchen. Go there to sell meat and plants. Each of these items is worth a specific amount of credits and Trust points. You can keep Herbs, Berries, and Mushrooms - you need these crafting materials to make cocktails. Sell them only when you don't use cocktails or you have full supplies.
- Visit a mechanic. Each one of them offers three options - filling up the gas tank, repairing the bike, and retrieving your bike after losing or leaving it somewhere on the map. Of course, every service costs money. Also, some of the mechanics can sell bike parts. You can get modifications that improve your bike's performance or you can purchase items that will change your bike's appearance (e.g. a new shape for your headlight or a special paint scheme). Some modifications will require a specific Trust level.
- Meet up with a camp leader. That person can have a new side quest for Deacon (they will contact you through the radio beforehand). Meet with a camp leader to discuss the mission's details. After that, you will be able to start it.
- Look for collectibles. Usually, they are placed near important NPCs, inside buildings and tents. Check the World Atlas chapter to learn the locations of every secret found inside the encampments.
You are not permitted to copy any image, text or info from this page. This site is not associated with and/or endorsed by the developers and the publishers. All logos and images are copyrighted by their respective owners.
Copyright © 2000 - 2025 Webedia Polska SA for gamepressure.com, unofficial game guides, walkthroughs, secrets, game tips, maps & strategies for top games.
