Immortals Fenyx Rising: Chests (War's Den) - map, list
Last update:
This page of the Immortals Fenyx Rising game guide contains a map depicting the location of all the chest types (normal, epic, guarded and night) in the War's Den region.
In this region you will find 12 normal chests, 8 guarded chests, 2 night chests and 17 epic chests. Normal chests usually contain crystals and fruits/mushrooms, while other, more unique chests can yield new weapons and armour, as well as skins for the aforementioned equipment.
- Normal chest - the small Lyre challenge [1]
- Normal chest - the top of the tower [2]
- Normal chest - the cave depths [3]
- Normal chest - the campsite [4]
- Normal chest - the small Lyre challenge [5]
- Normal chest - the small Lyre challenge [6]
- Normal chest - the ruined fort [7]
- Normal chest - the puzzle at the fort [8]
- Normal chest - the top of the fort [9]
- Normal chest - inside the fort [10, 11, 12]
- Guarded chest - the soldiers [1]
- Guarded chest - Minotaur [2]
- Guarded chest - Cerberus [3]
- Guarded chest - Cerberus and the soldiers [4]
- Guarded chest - Harpies, Gorgons and Cerberus [5]
- Guarded chest - Minotaur and Hekatonchires [6]
- Guarded chest - the laser trap [7]
- Guarded chest - Hekatonchires, Minotaur and the soldiers [8]
- Night chest - a fight and a puzzle [1]
- Night chest - Hekatonchires [2]
- Epic chest - the caves [1]
- Epic chest - the torch puzzle [2]
- Epic chest - the closed building [3]
- Epic chest - the time challenge [4]
- Epic chest - the crate throw [5]
- Epic chest - the labyrinth behind closed walls [6]
- Epic chest - the crate and boulder [7]
- Epic chest - the Harpy cliff [8]
- Epic chest - the lever by the water [9]
- Epic chest - the shooting puzzle [10]
- Epic chest - the collapsed bridge [11]
- Epic chest - the fort [12]
- Epic chest - the fort [13]
- Epic chest - the sunken building [14]
- Epic chest - the shooting challenge [15]
- Epic chest - hitting the target [16]
- Epic chest - the top of the room [17]
Normal chest - the small Lyre challenge [1]
A normal chest is located near the small Lyre challenge. In order to reach this chest, you must complete the small Lyre challenge by lighting the torches in the correct order. The torches are arranged in a 3x3 layout. Light the bottom left one first, then the middle left one. Then upper right and middle right. This will cause the red barrier to disperse and you'll be able to open the chest.
Normal chest - the top of the tower [2]
A normal chest is located at the top of the tower. All you have to do is climb up and open the chest.
Normal chest - the cave depths [3]
You will find the chest near the depths which contain some distinctive red smoke within. To find the chest, you will need to jump down, then spread your wings and fly towards a small cave.
Normal chest - the campsite [4]
Not far from the campsite, near the wall, you will find another chest. It is not difficult to find, but watch out for enemies that might appear nearby.
Normal chest - the small Lyre challenge [5]
Obtaining this chest requires a bit more time and effort, so we provided a walkthrough on how to get this particular box on a separate page of the guide.
Normal chest - the small Lyre challenge [6]
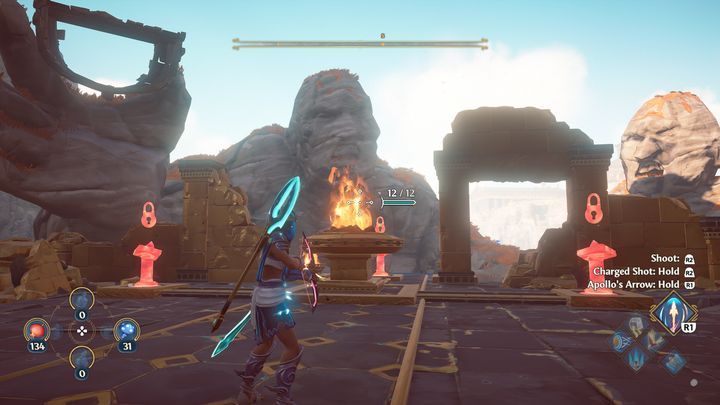
Again, the chest is found at the small Lyre challenge. Your task is to set fire to the three torches located behind the statues of giants. After setting them on fire, activate the 3 buttons and then head inside to open the chest.
Normal chest - the ruined fort [7]
The chest is located right in the middle of a ruined fort. Just climb up a bit and go inside.
Normal chest - the puzzle at the fort [8]
Go inside the fort. Then jump on the objects on the left and step on the platform. The red barrier will disappear behind you. Summon the crate. Jump down, step on the platform, then throw the crate to the left. Next, destroy the section of the wall in front of the entrance. Afterwards, climb upwards, grab the crate, step once more on the platform and throw the crate, this time to the right side. Once the gate is open, head inside and get the chest.
Normal chest - the top of the fort [9]
The chest is at the top of the fort, so you'll simply have to climb up. Make sure to drink some potions if you don't have enough stamina.
Normal chest - inside the fort [10, 11, 12]
Three chests are located side by side, in the same room. The first one is on the left, the second on the right, and third behind the throne. You will also gain access to these chests during one of the main quests, as you will encounter your brother there.
Guarded chest - the soldiers [1]
The chest is mainly guarded by a large number of soldiers. It would be difficult to sneak up on them, so it's better to focus on area of effect attacks.
Guarded chest - Minotaur [2]
The chest is protected by a small number of soldiers and a Minotaur, who is the more significant threat. Dispose of the soldiers first, so you can then fight the Minotaur one-on-one.
Guarded chest - Cerberus [3]
This chest is guarded by Cerberus. Defeating it will allow you to unlock the chest.
Guarded chest - Cerberus and the soldiers [4]
The chest is, once again, protected by a Cerberus. This one, however, is also supported by a group of small soldiers. It's a good idea to sneak attack the Cerberus and then dispose of the soldiers using an axe and other area attacks.
Guarded chest - Harpies, Gorgons and Cerberus [5]
This location is defended by many types of opponents. There is a Cerberus, two gorgons, several harpies and even a large soldier. The best way to dispose of the enemies is to lure them to the same place and attack them all at once using area attacks.
Guarded chest - Minotaur and Hekatonchires [6]
This chest is protected by both a Minotaur and a Hekatonchires. The Minotaur is much easier to defeat, so it's best to finish him off first by attempting to fight him one-on-one.
Guarded chest - the laser trap [7]
This chest unlocks once you've defeated all the opponents in the laser arena. Here you will encounter, among others, a Hekatonchires and several soldiers of varying sizes. To make this fight easier, consider upgrading a Godly Power that deals area of effect damage.
Guarded chest - Hekatonchires, Minotaur and the soldiers [8]
As before, Godly Powers will be useful to defeat opponents as quickly as possible. Additionally, you can perform a sneak attack on the Hekatonchires.
Night chest - a fight and a puzzle [1]
The night chest, as in previous cases, is guarded by enemies at night. After you defeat them, you still have to solve a platform puzzle. Start from the bottom left, then head top right and mark two of the platforms, and at the very end head top left.
Night chest - Hekatonchires [2]
The second night chest is as well protected as the previous one. You will have to defeat a variety of enemies, including a Cerberus, a Hekatonchires and some soldiers. However, this time you won't have to solve any puzzles.
Epic chest - the caves [1]
Go to the point indicated on the map. Head inside the small cavern on the right side of the water. You will spot the symbols of a bow and helmet on the wall. Start with the platform with the helmet symbol, and then head in the direction indicated by the bow symbols. Remember to initially head one space up from the platform with the helmet. After completing the puzzle, activate the switch.
You will find a second cave to the left. All you have to do is jump up through the hole to drop the crate onto the platform. Next, you should step on the other platform. Once there, use the Herakles's Strength to drag the crate onto the second platform and leave it there. Dodge the lasers and flip the switch. Feel free to open the chest at this point.
Epic chest - the torch puzzle [2]
Once you reach the destination, aim Apollo's Arrows towards the torches and light them. Point them in the direction of the lasers. You will need to light the torches in a specific order, starting with the torch that's closest to you, in the middle. Then target the one on the far right and leave the torch high up in the middle for last. That'll deactivate the lasers and you will be able to head inside.
Epic chest - the closed building [3]
All you have to do is head to the indicated point on the map. Once you arrive, place stones to the left and right on the platforms bearing the symbol of a feather. It's a good idea to jump onto the platform while holding the stone and then drop it there. Once they are placed, you can open the chest.
Epic chest - the time challenge [4]
You need to head towards the marker. Near the chest, there are sunken walls and you will find a lever attached to one of them. Activate it, and then quickly reach the gust of wind using the power of flight. Once there, activate the double jump and wings to fly to the chest and open it.
Epic chest - the crate throw [5]
Once you get there, use your axe to destroy the wall and reveal the two crates behind it. Then grab one of them and head to the platform. The red barrier in front of you will disappear, you have to throw the crate through it. You ought to charge the throw well and aim high, so that the crate reaches its destination. Once you have managed it, go get the chest.
Epic chest - the labyrinth behind closed walls [6]
To unlock this chest, you must use the Herakles's Strength to move the crates onto the platforms with the feather symbol. You also have to keep moving from one side to the other to be able to see the crates through the bars. Once all the crates are located on the proper platforms, the red barrier by the chest will disappear.
Epic chest - the crate and boulder [7]
Head to the indicated place, move the crate towards the red barrier, then walk onto the platform. This will make the red barrier disappear. Remain on the platform and use Herakles's Strength to throw a stone as hard as possible at the crate to make it fall down. Then open the chest.
Epic chest - the Harpy cliff [8]
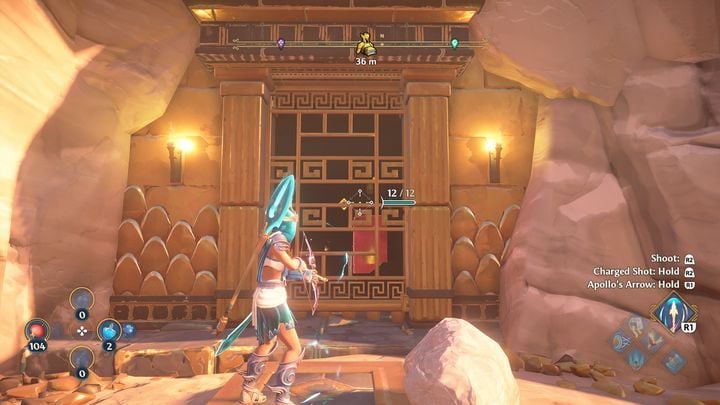
Once you're at the cliff, jump to the lower level, close to a pack of harpies. There you will find a cave, the entrance to which is sealed. Shoot at the two targets that are within the cave.

Then, as you head inside, step on the platform and from there use Athena's Dash to quickly reach the chest's location.
Epic chest - the lever by the water [9]
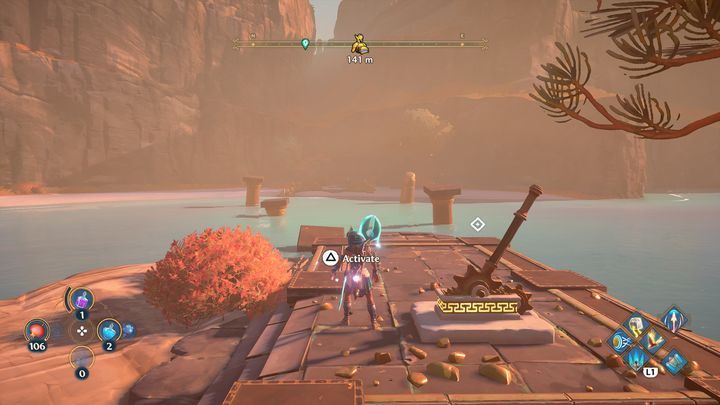
Near the water, there are pillars submerged in water. You will find a lever on the outermost pillar. Once you activate it, you will only have a few seconds to rush straight ahead, reach the land and then enter the chest's location. Activate the lever and, instead of climbing up the pillars, do a double jump and fly towards the land. This method will get you there more quickly. Then head towards the chest.
Epic chest - the shooting puzzle [10]
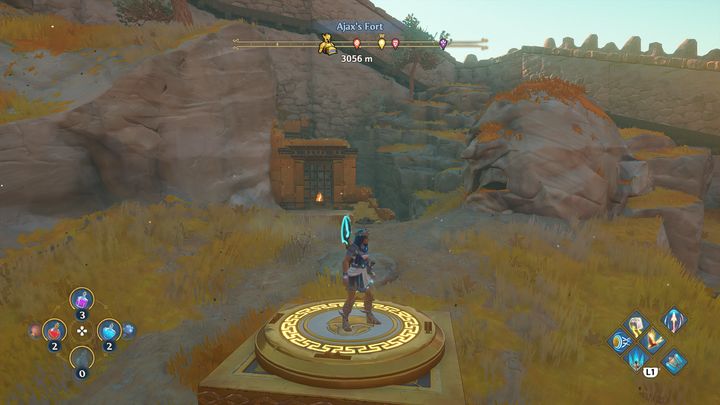
Head to the indicated place and step on the platform with the helmet symbol. This should cause the red barrier protecting the fire to disappear. Light an arrow with the fire, then point it towards the unlit torch.
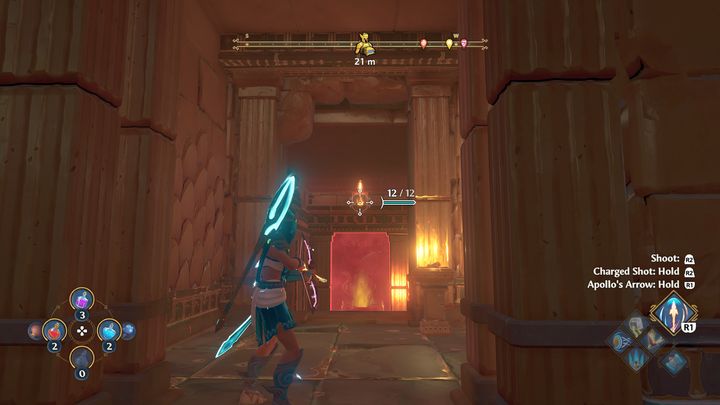
Light two torches this way. Then go inside the building and destroy the wall. Inside, you'll see a flame above you. Aim your arrow in its direction. Now you will start a mini obstacle course. You will have to maneuver the arrow well, so that it does not hit the wall. Once you reach the end, you will find the third torch. After you light it, open the chest.
Epic chest - the collapsed bridge [11]
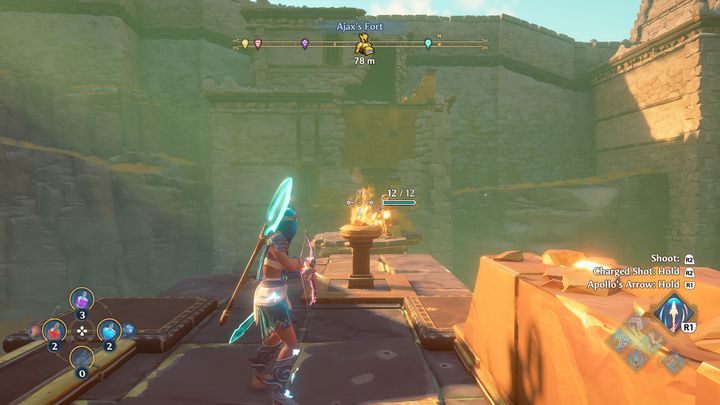
Go to the other end of the collapsed bridge. From there, direct an arrow into the fire and light the two torches located at the other side of the collapsed bridge. Once you do that, the red barrier will be gone and you will be able to head through it to open the chest.
Epic chest - the fort [12]

Go to the point indicated on the map above. There you will find a room blocked by red barriers. At the entrance, there is a crate. Throw it on the top floor. The red barrier will stop the crate. Then activate the lever and quickly run inside. However, be careful on the stairs, because activating the lever will also cause lasers to appear. Instead of jumping over them, hop on the white stones with the fire pits and run inside.

Then, while inside, head to the top floor. Activate the lever from there and bring the crate inside, placing it on one of the platforms. Step on the second platform yourself and the door will open. Next, use Athena's Dash to quickly get inside the room. If you're having difficulties with this, make use of the nearby stones.
Epic chest - the fort [13]
Go to the indicated place. Once inside the building, walk onto the platform at the bottom and pick up the crate. Then turn to the entrance and throw the crate to the top. After it's thrown, go upstairs. You will find a platform and, once again, you will have to step on it. Pick up the crate while on the platform and throw it towards the red barrier that has disappeared. Once the crate has been thrown, head to its location. Use Herakles's Strength to move the crate and place it on the barrier.
Once the crate is on the barrier, activate the lever to make it fall down. Your goal is to drop the crate to the very bottom to put it on the platform marked with the feather symbol.
Epic chest - the sunken building [14]
This epic chest is located in a sunken building. Go to the indicated place and dive into the water. At the very bottom, there is a hole through which you can get inside the sunken building and open the chest.
Epic chest - the shooting challenge [15]
To access the chest, you need to pull a lever and light 3 torches. Start by pulling the one in the center, then the second one on the right, and finally the third one on the left. Once that's done, run to the chest and open it.
Epic chest - hitting the target [16]
The chest is located near the fort, close to the walls, in the middle of a closed room. You will have to step on two platforms, near each side of the building. Stepping on them disables a particular red barrier. Aim Apollo's Arrows in that direction to hit the target. Once it's done, you will be able to enter the room.
Epic chest - the top of the room [17]
Go to the point indicated on the map. Enter the room that you find there. There's a lever inside. Activate it to disable the lasers located above to the right. Quickly climb up and step on the platform. Then shoot the target in front of you.
Now jump up ahead of you. Once there, pull the lever and head towards the lasers. Ahead, you will encounter another object which you have to climb. You'll find one more platform there. Step on it and aim your arrow at the second target. Once you hit it, you'll find the chest at the very top.
You are not permitted to copy any image, text or info from this page. This site is not associated with and/or endorsed by the developers and the publishers. All logos and images are copyrighted by their respective owners.
Copyright © 2000 - 2026 Webedia Polska SA for gamepressure.com, unofficial game guides, walkthroughs, secrets, game tips, maps & strategies for top games.
