Yiazmat (rank VIII) | Extraordinary hunt notices
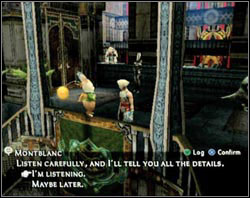
 | You'll get the opportunity of fighting Yiazmat after you complete every other assignment there is and defeat Hell Wyrm (see the "Bosses not connected with the plot" section). The petitioner is Montblanc along with his whole family. He tells you a story of the most horrifying beast that ever existed and says that if anyone can defeat it you're the one. |
 |  |
Yiazmat | About 50 000 000 HP | Resistant to Libra, Vulnerable to Dark | Rake, White Breath, Stone Breath, Death Strike, Cyclone, Growing Threat, Protect, Shell, Haste, Bravery, Faith, Regen, Reflect |
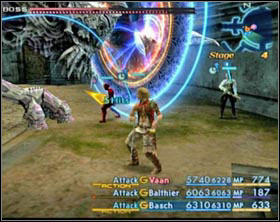
This monster, like Hell Wyrm, has two life bars, but unlike that Wyrm his life bars decrease in appalling... slow matter. He can be found in area called Colosseum at Ridorana Cataract.
His attacks are very powerful (but not as much as Omega's) and additionally may cause Death. The enemy also knows how to use White Breath, which deals Ice damage to everyone exactly in front of him and it may also cause Stop. There's also Stone Breath, which also deals damage to everyone in front, but instead of stopping may cause Petrify.
If he can't reach you he will attack with the use of Death Strike (unless you are beyond his eyeshot). He often uses this attack after Cyclone to deal with the survivors. The Cyclone itself is a very powerful attack which deals damage to everyone in Colosseum and may cause Sap on them.
After you have dealt with about half of his HP his defense raises, and when they reach the critical level he uses Growing Threat - his attacks become faster and if you move away a little bit too far he'll start to regenerate in alarming matter.
For this battle you'll need two Yagyu Darkblade (or eventually Orochi), Fomalhaut with Dark Shot, Genji Gloves, 5x Bubble Belt, Sage's Ring. During this fight you'll be using the Decoy/Reverse trick again.
Give ninja swords to two of your heroes. The one with Yagyu should also have Genji Gloves. To the second one give Bubble Belt. Fomalhout and Sage's Ring should be given to the mage. Give Bubble Belts to every one in reserve too. Before the fight make sure that you have plenty of Chronos Tears in stock because you'll surely make use of them.
Gambit setup at the beginning:
Hero I (with Yagyu) | Hero II | Hero III |
Ally: Any ---> Arise | Ally: Any ---> Arise | Ally: Any ---> Arise |
Self ---> Bravery | Ally: Hero I ---> Reverse | Ally: Hero I ---> Decoy |
Self ---> Berserk | Ally: Any ---> Chronos Tear | Ally: Any ---> Chronos Tear |
Ally: Hero I ---> Stona | Ally: Hero I ---> Stona | |
Ally: Hero III ---> Esuna | Ally: Hero II ---> Esuna | |
Ally: Hero III ---> Curaga | Ally: Hero II ---> Curaga | |
Self: MP < 10% ---> Charge | Self: MP < 10% ---> Charge | |
Foe: Nearest ---> Attack | Foe: Nearest ---> Attack |
This setup will be enough at the beginning, but it won't be enough when the enemy becomes stronger and faster. Later on I recommend such setup:
Hero I | Hero II | Hero III |
Ally: Any ---> Arise | Ally: Any ---> Arise | Ally: Hero I ---> Reverse |
Self ---> Bravery | Self ---> Bravery | Ally: Hero II ---> Reverse |
Self --> Decoy | Self ---> Decoy | Ally: Any ---> Arise |
Self ---> Berserk | Self ---> Berserk | Ally: Any ---> Chronos Tear |
Ally: Hero I ---> Stona | ||
Ally: Hero II ---> Stona | ||
Self: MP < 10% ---> Charge | ||
Foe: Nearest ---> Attack |
Additionally give a Bubble Belt to the character that had Genji Gloves.
At first, when you're hurt, you can hide in corridors around the arena - Yiazmat will start buffing himself when you do that. After you're done just cast Dispel on him.
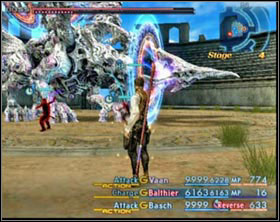
When Yiazmat's HP reaches critical level don't even think about that solution. As soon as he loses you from his eyeshot he starts regenerating like mad. From now on you have to deal with all difficulties in the middle of Colloseum, with Yiazmat breathing down your neck.
From now on you'll also have to start using the characters in reserve. You'd do best switching their gambits off so you had better control over their actions. You'll use their help:
- when everyone from the main party dies - bring up only one character, revive a character from the main party and place this one in reserve again,
- when the mage dies and the other two characters are under berserk - bring up someone from the reserve instead of that mage, revive him and switch with him again,
- when the mage will be under the effect of Stop - just like the situation with dead mage.
After you have used one of the backup team members heal him.
 |  |
With such setup you should handle him pretty well. After annihilating him go to Montblanc for your reward.
Bounty: 30 000 gil, Godslayer's Badge (1g)
You are not permitted to copy any image, text or info from this page. This site is not associated with and/or endorsed by the Square Enix or Square Enix. All logos and images are copyrighted by their respective owners.
Copyright © 2000 - 2025 Webedia Polska SA for gamepressure.com, unofficial game guides, walkthroughs, secrets, game tips, maps & strategies for top games.
