Final Fantasy XII: Barheim Passage

2 - boss: Mimic Queen
Name | Level | HP | Weakness | Drops (price) | Steal (price) |
Battery Mimic | ~7 | ~520 | Ice | Eye drops** Alarm Clock** Iron Scraps (185g) | Iron Scraps (185g) Storm stone (35g) |
Tiny Mimic | 7-8 | 211-217 | Wind | Iron scraps (185g) Eye Drops** Storm Stone (35g) | Earth Stone (35g) Iron Scraps (185g) |
Mimic | ~7 | ~334 | Wind | Earth stone (35g) | 20 gil |
Steeling | 6-7 | 282-298 | Earth | Eye drops** Bat fang (105g) | Wind Stone (35g) |
Seeker | ~7 | ~551 | Earth | Crooked Fang (287g) | Wind Stone (35g) Taurus gem (150g) |
Flan | ~6 | ~280 | Fire | Green Liquid (206g), Water Stone (35g), Caramel (276g) | Gold needle** Water stone (35g), Caramel (276g) |
Bomb | 6-7 | 317-332 | Water | Bomb Ashes (200g) | Fire Stone (35g) |
Suriander | 8-9 | 410-430 | Ice | Horn (120g) | Antidote** Storm Stone (35g) |
Zombie*** | 7-8 | 277-286 | Holy | Foul Flesh (143g) Antidote** 2 gil Dark stone (35g) | Foul Flesh (143g) Dark stone (35g) Kilimweave Shirt* ** |
Spectre*** | 8-9 | 402-408 | Holy | Dark stone (35g) Glass Jewel (115g) | Dark stone (35g) Dark Mote* ** |
*Rare; ** It's better not to sell this; *** They appear when power level is low enough
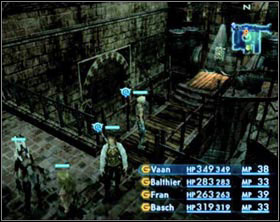 Timeworn Device
| 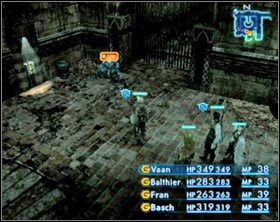 Starting from the left side: Gate Switchboard, Burrogh, gate.
|
Go straight on. In the small room on your left you'll find some treasures then use the Timeworn Device and pick: "Press the switch". Go downstairs and talk to Burrogh. He'll give you a Tube Fuse (you may make small shopping by the way, it's worth to buy a new armor and weapon). Get back to the Timeworn Device (now it's called Power Relay) and install the Tube Fuse in it. Save your progress go downstairs and open the gate by using the Gate Switchboard. Go ahead.
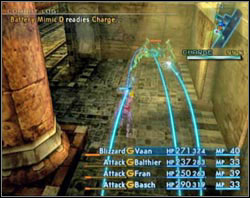 | The gauge under the mini map shows the level of power. Battery mimics drain it. If the power level drops too much different monsters begin to appear quite frequently. To avoid such situation you have to destroy mimics. After killing one about 25% of energy is restored. When energy level drops under 50% different monsters start to appear from time to time and when the power level drops under 30% you'll be attacked virtually constantly. But to say the truth it's pretty hard to let the power level drop so low. |
In this room get rid of the mimic fast and then take out the zombie. Run downstairs and destroy Tiny mimics along the way. Downstairs destroy next Battery Mimic. Collect every treasure in here and continue to the next room. The places where mimics drain energy are marked on your in-game map.
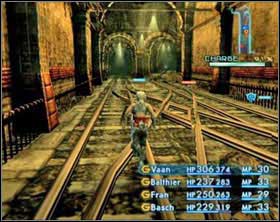 | 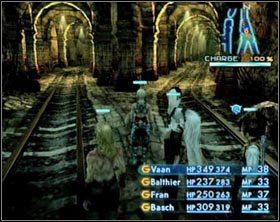 |
Here you can see two mimics - one is already draining the energy and the other is searching for a right spot. Destroy them both. If the searching one escaped you on the first fork [screen 1] you'll have to go right, if you took him out earlier just go left. On the next fork [screen 2] first pick the path leading right. A mimic will pass you by. It may hit you once and then run away. Follow it - it will hide in the second corridor and start draining the power. Get rid of him, get back to the fork and go right once more. On the next fork go left (in the corridor leading right you'll find only a random treasure and a map). Follow the tunnel. On the station destroy a mimic and enter a chamber. There destroy two more mimics and get back on the rails.
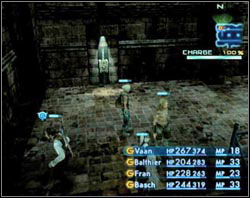 | Run to the next part of the tunnel. There run straight ahead in the direction of a big gate. Just in front of the gate will be a mimic - destroy it. Now go left and find a switch opening the gate. Press it and get back to the gate. In the next part of the tunnel save your progress and continue forth. From now on you may encounter an ordinary mimic disguised as a treasure box. Run towards the next save crystal. Don't forget collecting the treasures along the way - beside the camouflaged mimics there are still the real treasures. |
Use this crystal to save your progress and continue to the next, round hall. Next boss fight awaits you.
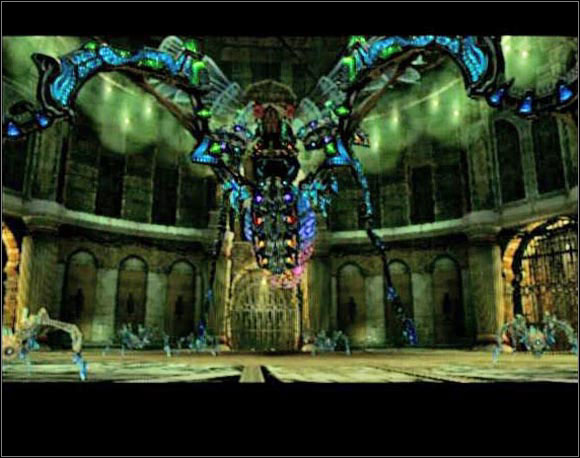
Mimic Queen | Level 10 | 4073 HP | Weakness: Ice | Attacks: Spawn, Breath of Life, Thunder, Shockstorm, Ground shaker. |
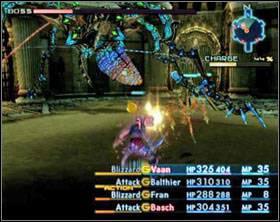 |  |
This boss, to say the truth, is really weak. Two characters should know how to use blizzard (e.g. Vaan and Fran), Bash is really strong in the close range and Balthier uses a potion from time to time. First and foremost - concentrate on the boss itself. Don not care about its offspring - they do not care about you and just as they born the run to a nearest wall to drain energy. They'll start attacking you when there's no energy left for them to drain, but when it comes to that the battle will be long over.
Its attacks beside the ordinary one are:
- Spawn - it gives life to another of its offspring,
- Breath of Life - regenerates a bit of its own life,
- Thunder - magical attack with the element of thunder aimed at one of your heroes. It's easily eliminated just by hitting the enemy with mage masher and applying a silence status on it,
- Shockstorm/Ground Shaker - attacks that cause damage to all heroes using the element of Thunder/Ground.
After the fight you find yourself on Dalmasca Estersand. Save your progress and get back to Rabanastre.
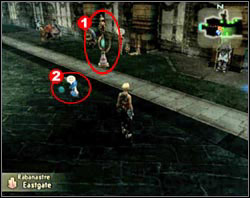 | From now on you may move around Rabanastre through Moogling. All you need to do is to find a post like this one (1), talk to a moogle walking nearby (2) and pick a location where you want to move. This service is completely free. |
In Rabanastre it's worth to visit the Centurio HQ first - you'll get small bonuses for defeating the flan gang (150g), Firemane (200g) and Mimic Queen (300g). Now run to Migelo's shop, then to Old Dalan's place in Lowtown and to Balzac - you'll find the last one somewhere in the middle between south entrance and the north one, on the west side of Lowtown in North sprawl.
Now run to the Sandsea, go upstairs, leave the sandsea and run to Aerodrome.
![Go inside and talk with Balthier [screen] - Barheim Passage | Part I - Part I - Final Fantasy XII Game Guide](/finalfantasy12/gfx/word/1735821453.jpg) | Go inside and talk with Balthier [screen]. You won't be able to get back to Rabanastre for a long time so Balthier wants to make sure that you're really ready. Choose: "I'm ready" and "I'm really ready". |
- Final Fantasy XII Game Guide
- Final Fantasy XII: Game Guide
- Final Fantasy XII: Part I
- Final Fantasy XII: Rabanastre
- Final Fantasy XII: Dalmasca Estersand
- Final Fantasy XII: Rabanastre - again
- Final Fantasy XII: Giza Plains
- Final Fantasy XII: Garamsythe Waterway
- Final Fantasy XII: Royal Palace
- Final Fantasy XII: Garamsythe Waterway - again
- Final Fantasy XII: Nalbina Fortress - dungeons
- Final Fantasy XII: Barheim Passage
- Final Fantasy XII: Bhujerba
- Final Fantasy XII: Lhusu Mines
- Final Fantasy XII: Bhujerba - again
- Final Fantasy XII: Dreadnought Leviathan
- Final Fantasy XII: Ogir-Yensa Sandsea
- Final Fantasy XII: Nam-Yensa Sandsea
- Final Fantasy XII: The Tomb of Raithwall
- Final Fantasy XII: Part I
- Final Fantasy XII: Game Guide
You are not permitted to copy any image, text or info from this page. This site is not associated with and/or endorsed by the developers and the publishers. All logos and images are copyrighted by their respective owners.
Copyright © 2000 - 2025 Webedia Polska SA for gamepressure.com, unofficial game guides, walkthroughs, secrets, game tips, maps & strategies for top games.
