Final Fantasy XII: Feywood

Name | Level | HP | Weakness | Drops (price) | Steal (price) |
Golem | 42-43 | 11310-11550 | Wind | Quality Lumber (1127g) | Quality Lumber (1127g) |
Deadly Nightshade | 39-41 | 3167-3647 | Water | Fire Crystal (160g), Succulent Fruit (363g) | Fire Crystal (160g), Succulent Fruit (363g) |
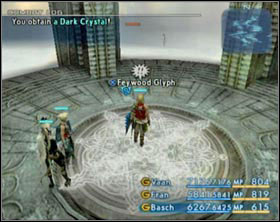
Tartarus | 38-40 | 3619-4259 | Holy | X-potion**, Libra gem (150g), Chronos Tear**, Prime Pelt (1124g), Dark Crystal (160g) | Libra gem (150g), Power Vest*, Prime Pelt (1124g), Dark Crystal (160g) |
Cerberus | ~39 | ~4739 | Water | Prime Pelt (1124g), Hell-gates Flame* (1584) | Prime Pelt (1124g), Fire Crystal (160g) |
Mirror Knight | 40-42 | 5202-5842 | Earth | Wind Crystal (160g), Windslicer Pinion (1148g), Mirror Scale (1952g), Mirror Mail*, Aries Gem (150g) | Wind Crystal (160g), Aries Gem (150g), X-potion** |
Mu | ~40 | ~3167 | Water | Fire Crystal (160g), Eye-drops**, Moondust (1975g)* | Blood Wool (871g), Aries Gem (150g) |
Preying Mantis | 43-44 | 7465-7705 | Holy | Insect Husk (680g), Dark Crystal (160g), Cancer Gem (150g), Sickle-Blade (1878g)* | Dark Crystal (160g), Cancer Gem (150g), Bowline Sash* |
Basilisk | 42-43 | 5429-5749 | Thunder | Ice Crystal (160g), Chronos Tear**, Serpent Eye* (1440g) | Antidote**, 80 gil |
Behemoth | 42-44 | 10026-10860 | Ice | Storm Crystal (160g), Prime Tanned Hide (1372g) | Storm Crystal (160g), Gemini Gem (150g), Prime Tanned Hide (1372) Giant's Helmet* |
Giruveganus | 46-47 | 13006-13686 | Holy | Prime Tanned Hide (1372g), Broken Greataxe (1762g)* | Prime Tanned Hide (1372g), Broken Greataxe (1762g)* |
Holy Elemental | 25 | 14830 | Dark | Holy Stone (35g), Holy Magicite (80g), Holy Crystal (160g), Feystone (1000g)* | Holy Magicite (80g), Holy Crystal (160g), Feystone (1000g)* |
Mandragora Prince | 50-51 | 5879-6119 | Fire | Screamroot (1350g), Four-leaf Clover (1969g) | Screamroot (1350g), Four-leaf Clover (1969g) |
Alraune King | 50-51 | 5879-6119 | Wind | Screamroot (1350g), Gimble Stalk (1647g) | Screamroot (1350g), Gimble Stalk (1647g) |
Onion Queen | 50-51 | 5879-6119 | Earth | Screamroot (1350g), Onion (2010g) | Wind Crystal (160g), Screamroot (1350g), Onion (2010g) |
Pumpkin Star | 50-51 | 5879-6119 | Ice | Traitors Bow, Screamroot (1350g), Jack-o'-Lantern (1888g) | Water Crystal (160g), Screamroot (1350g), Jack-o'-Lantern (1888g) |
Topstalk | 50-51 | 5879-6119 | Water | Fire Crystal (160g), Echo Herbs**, Screamroot (1350g), Tomato Stalk (966g) | Screamroot (1350g), Tomato Stalk (966g) |
*Rare; ** It's better not to sell this;
The last five mobs appear on the Ice Field of Clearsight after you defeat everything there and on The Edge of Reason as well. Also they appear after you visit Giruvegan - not earlier.
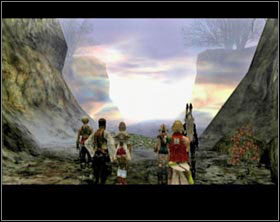
There are to ways to get to Feywood - through Golmore Jungle or through Paramina Rift. In Feywood go south to the area with save crystal. You'll see there a thick mist which blocks the path. Simply approach it to make it disappear (it's here only in case you got here before to plot).
 Mist
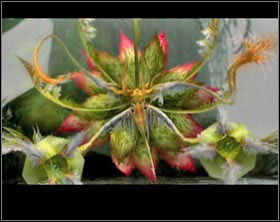
|  Rafflesia
|
In the next area you'll have to face a boss, so I recommend saving the game and get ready for the fight. Cast protect, shell and haste on your party and berserk on one of you dmg dealers. Touch the crystal to replenish you strength and run to the next area.
Rafflesia, Malboro lvl 40-41 | About 68 000 HP, Malboro: 4902-5022 | Resistant to Libra, Malboro are vulnerable to Wind | Syphon, Nectar Volley, Pollen Dance, Cry for Help |
During this battle your MP will be slowly drained and, if that's not enough, Rafflesia will drain it also with the help of Syphon. But it really doesn't have too diverse attacks. It uses Nectar Volley which deals damage to everyone in front, Pollen Dance which causes different bad status effects and Cry for Help, which summons malboros to it's aid. When they appear it's better to take care of them first. They are also a good source of mana - as soon as they appear use Syphon on them (because Rafflesia is immune to Syphon).
For defeating this enemy you'll get 1800 gil from Montblanc.
After the battle keep going south till you reach a quite vast area.
 | ![To get to the next area youll have to activate 3 out of 4 portals [screen 1] (see the map above) - Feywood | Part III - Part III - Final Fantasy XII Game Guide](/finalfantasy12/gfx/word/1741730109.jpg) |
To get to the next area you'll have to activate 3 out of 4 portals [screen 1] (see the map above). If you don't do this and still try to go to the next area you'll land in the same area again. In the next level you'll have to activate 4 out of 4 portals. Go westward from the last one till you see a giant gate [screen 2]. Approach it, read instructions, summon Belias, approach the gate again and open it.

You are not permitted to copy any image, text or info from this page. This site is not associated with and/or endorsed by the developers and the publishers. All logos and images are copyrighted by their respective owners.
Copyright © 2000 - 2025 Webedia Polska SA for gamepressure.com, unofficial game guides, walkthroughs, secrets, game tips, maps & strategies for top games.
