Star Wars Jedi Survivor: Locate Rayvis on the Shattered Moon
On this mission in the Star Wars Jedi Survivor game, you will return to the destroyed moon to deal with Rayvis. Along the way, you will have to solve a puzzle and pass several arcade sections.
Last update:
On this guide page to Star Wars Jedi Survivor, you will find a walkthrough of the story mission Locate Rayvis on the Shattered Moon. You will learn how to pass the challenging arcade sections, solve the puzzle with the Orb Amplifier, and get to Rayvis.
Locate Rayvis on the Shattered Moon
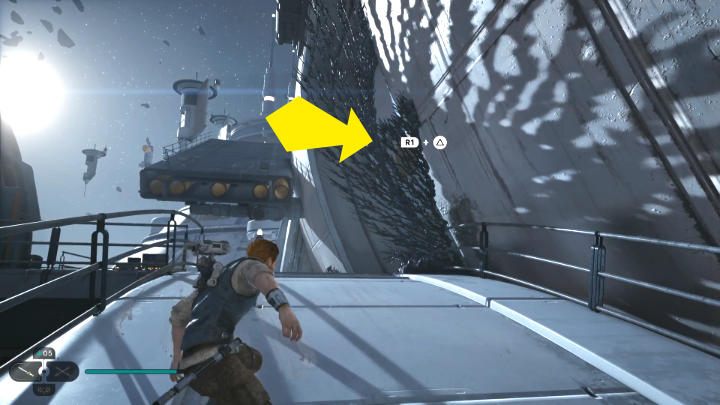
After landing on the Shattered Moon, go down to the Meditation Point and use the fast travel - move near the main mission marker. Go up the ramp and, using the Force, open the passage on the right.
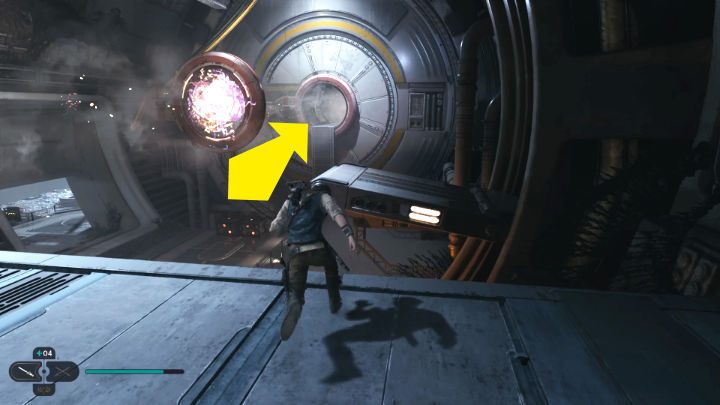
Using the rope, jump to a higher level, wait for the laser to turn off, and then jump to the other side of the room. Wait for the right moment and jump onto the moving platform when the laser switches off and immediately jump to the bars. Then, enter the laser tunnel when it is inactive and run to the second room, where you will go through another arcade sequence.
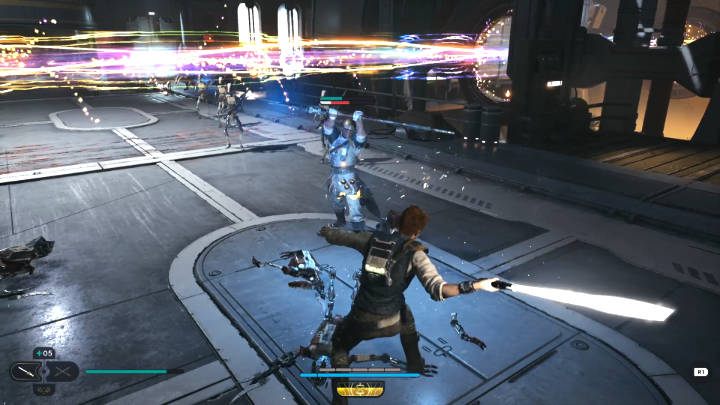
You will reach a room where you will meet a numerous enemy squad. You can use the laser during combat, as it damages all targets within its range.
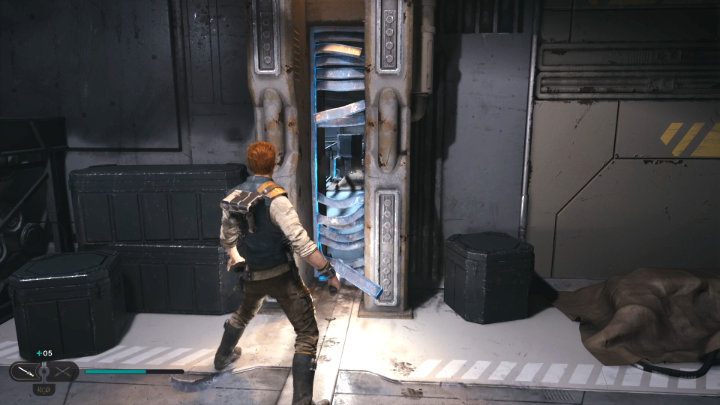
You will have to go through the consecutive arcade sections. Going through another tunnel with a laser beam, you will eventually reach a small room on the left. Destroy the narrow obstacle to move on. Eventually you will reach a meditation point.
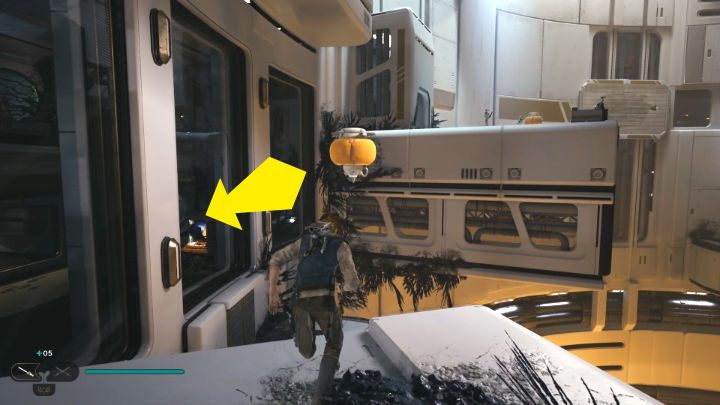
Go to the terrace, jump into the room on the left, and defeat several opponents.
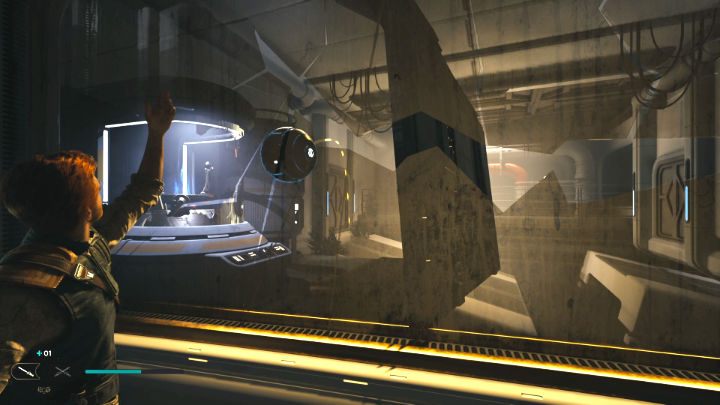
Use the Force to grab the Orb you find in the space on the other side of the glass. Then, push it toward the wall on the left so it starts rolling down the platform.
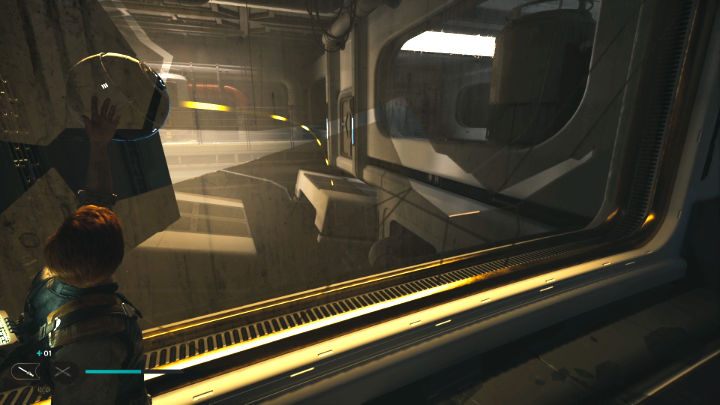
Move slightly to the right and catch the Orb with the Force before it falls into the abyss. Position the character in a way that allows you to push the Orb to roll down the platform on the right.
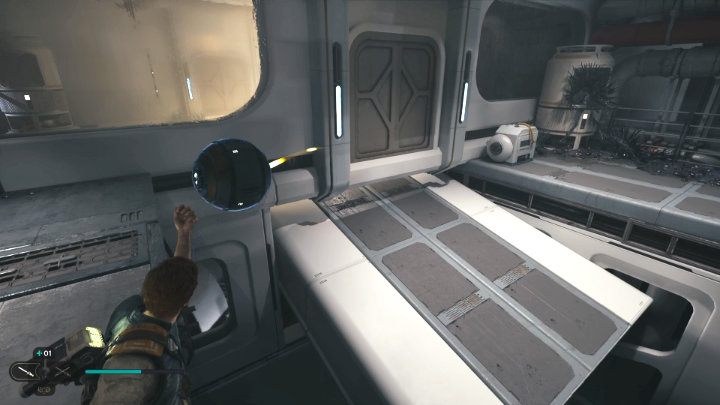
Immediately run to the room on the other side of the door and try to catch the Orb before it falls into the abyss.
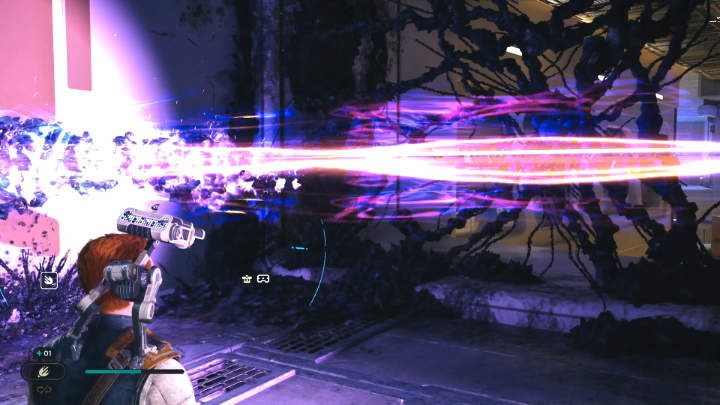
Place it in the amplifier to activate the laser. Using the BD-1 ability, create a line of matter leading from the obstacle to the laser beam to open the passage.

Interact with the workbench in the round room to trigger a cutscene, during which you will receive an Upgraded Ascension Cable.
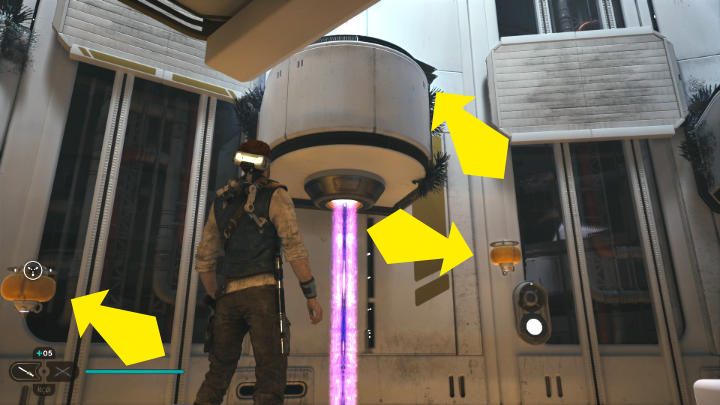
From now on, you can grab balloons in the air and bounce off them to get to previously inaccessible places. When you reach the spot shown in the picture above, bounce off the balloon on the left to get to the one on the right, from which you can bounce toward the wall on the left and jump higher.
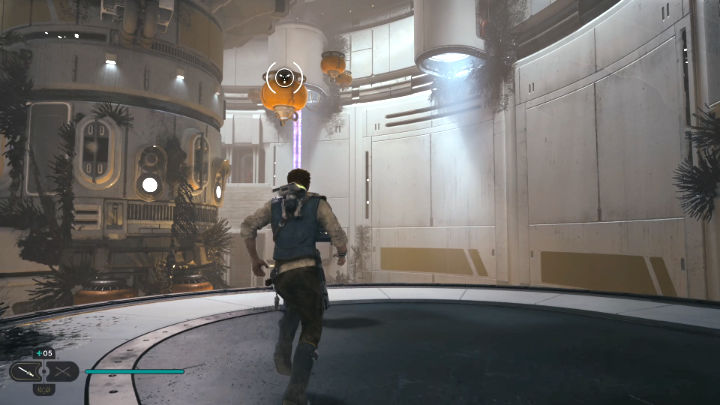
Use the console to activate the balloons, then jump between them to get to the tower, where you will fight against a boss.
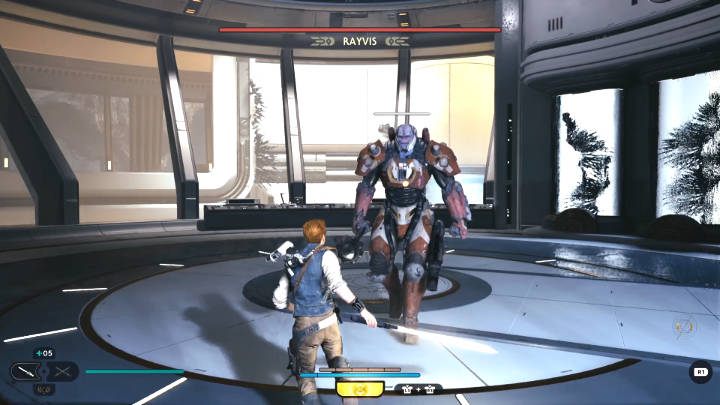
Another boss you encounter in the Star Wars Jedi Survivor game is Rayvis. The fight against this opponent is divided into two phases. Rayvis is a formidable opponent, especially on higher difficulty levels, so we advise playing defensively, blocking regular attacks (as often as your block bar will allow you to do) to interrupt the boss' attack. Watch out for red attacks - dodge them and deliver a blow when the opponent stands still.
The fight against this enemy is described in detail on a separate page of this guide: How to defeat Rayvis in the Republic Research Laboratory.
- Star Wars Jedi Survivor guide
- Star Wars Jedi Survivor: Game Guide
- Star Wars Jedi Survivor: Walkthorugh
- Star Wars Jedi Survivor: List of all main quests
- Star Wars Jedi Survivor: Coruscant - walkthrough
- Star Wars Jedi Survivor: Find Greez
- Star Wars Jedi Survivor: Find Gyro Module
- Star Wars Jedi Survivor: The Forest Array
- Star Wars Jedi Survivor: Meet Cere on Jedha
- Star Wars Jedi Survivor: Research Tanalor
- Star Wars Jedi Survivor: Reach Pilgrim's Sanctuary
- Star Wars Jedi Survivor: Locate Brother Armias
- Star Wars Jedi Survivor: Bring Contact Codes to Cere
- Star Wars Jedi Survivor: Rescue Zee from the Lucrehulk.
- Star Wars Jedi Survivor: Locate Rayvis on the Shattered Moon
- Star Wars Jedi Survivor: Confront Dagan at the Koboh Observatory
- Star Wars Jedi Survivor: Bring Compass to Cordova on Jedha
- Star Wars Jedi Survivor: Locate Bode
- Star Wars Jedi Survivor: Align Arrays at Koboh Control Center
- Star Wars Jedi Survivor: Confront Bode on Tanalorr
- Star Wars Jedi Survivor: Walkthorugh
- Star Wars Jedi Survivor: Game Guide
You are not permitted to copy any image, text or info from this page. This site is not associated with and/or endorsed by the developers and the publishers. All logos and images are copyrighted by their respective owners.
Copyright © 2000 - 2025 Webedia Polska SA for gamepressure.com, unofficial game guides, walkthroughs, secrets, game tips, maps & strategies for top games.
