Star Wars Jedi Survivor: All Force Tears
Rifts of the Force are important secrets from the game Star Wars Jedi Survivor. In the guide is a list of all 15 Power Rifts. You will learn how to reach them, how to pass their challenges and how to earn free skill points.
Last update:
Force Tears are one of the categories of collectibles in Jedi Survivor - there are as many as 15 of them in the game. On this page of our guide, we list all of them, show the exact locations of the Tears, as well as explain and help in completing the associated challenges.
- Tear #1 - Fractured Malice
- Tear #2 - Fractured Resolve
- Tear #3 - Fractured Tradition
- Tear #4 - Fractured Determination
- Tear #5 - Fractured Dexterity
- Tear #6 - Fractured Cunning
- Tear #7 - Fractured Endurance
- Tear #8 - Fractured Burden
- Tear #9 - Fractured Agility
- Tear #10 - Fractured Momentum
- Tear #11 - Fractured Delusion
- Tear #12 - Fractured Duality
- Tear #13 - Fractured History
- Tear #14 - Fractured Punishment
- Tear #15 - Fractured Power
- Force Tears - general info
Tear #1 - Fractured Malice
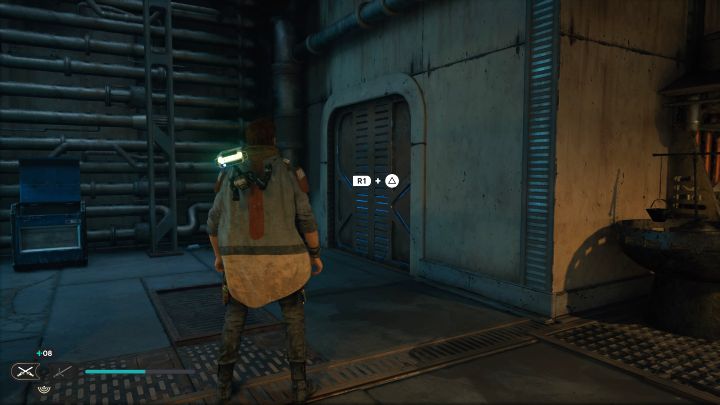
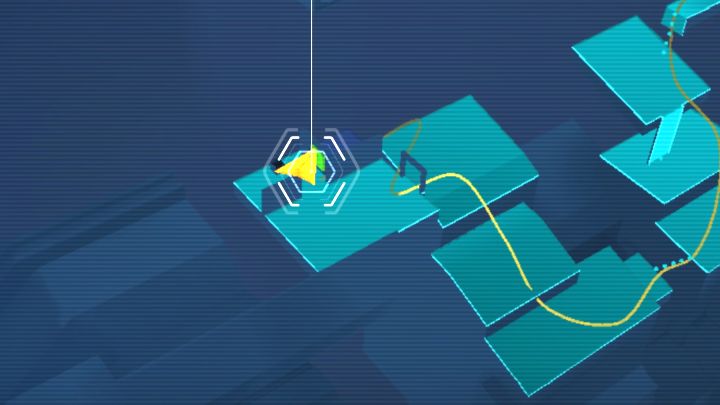
Location: Coruscant - Rooftops
Description: Tear #1 is in a small room encountered at the beginning of the rooftops section. This tear can only be completed after learning Force Lift and unlocking Coruscant as a destination. Force Lift the gate to find the Tear.
This challenge is very difficult, as you need to defeat 2 Rancors in one fight. This means double the challenge (if one Rancor wasn't enough) and to survive you need to react instantly to dangerous attacks coming from both beasts. Above all, avoid grabbing attacks that can get you killed instantly. Attack and eliminate the beasts one by one. Before activating the Tear, you can lower the difficulty level, which results in lower strength and less health of the opponents.
Tear #2 - Fractured Resolve
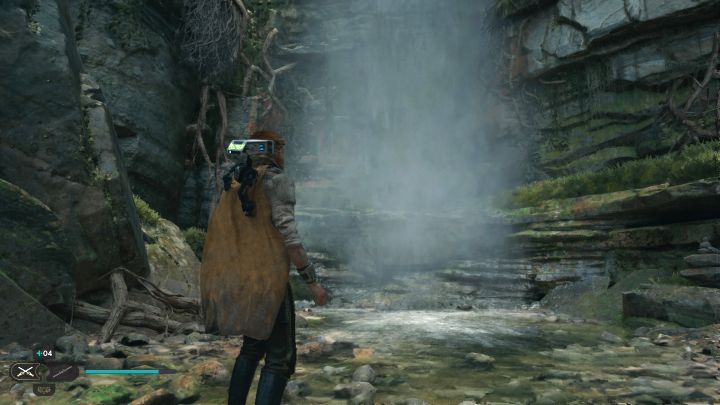
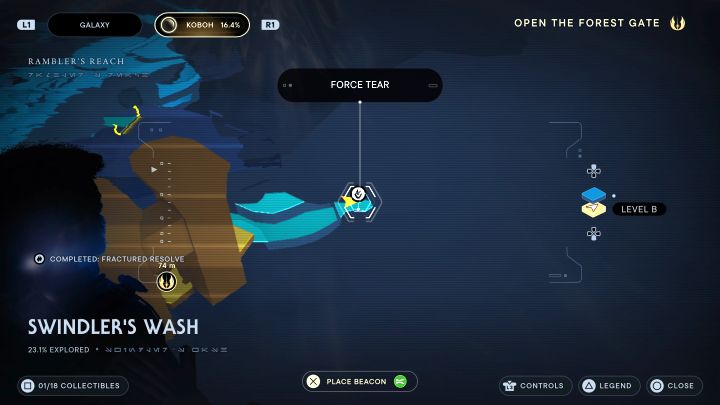
Location: Koboh - Swindler's Wash
Description: Once in this region, follow the riverbed. Eventually you will reach a waterfall and the Tear is behind it.
The challenge takes a form of a obstacle course, where the safe path changes with each jump. Play it safe - there is no time limit that forces you to rush the course. If necessary, change the incoming wave to a safe one (jump) and wait for it to pass Cal.
Tear #3 - Fractured Tradition
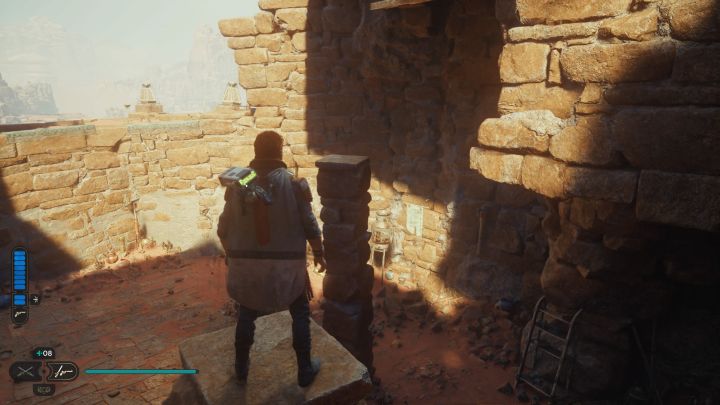
Location: Jedha - Monastery Walls
Description: Start at the meditation point. You need to get to the leftmost part of the ruins, grab a hitch while sliding down a steep slope and jump from column to column (screenshot).
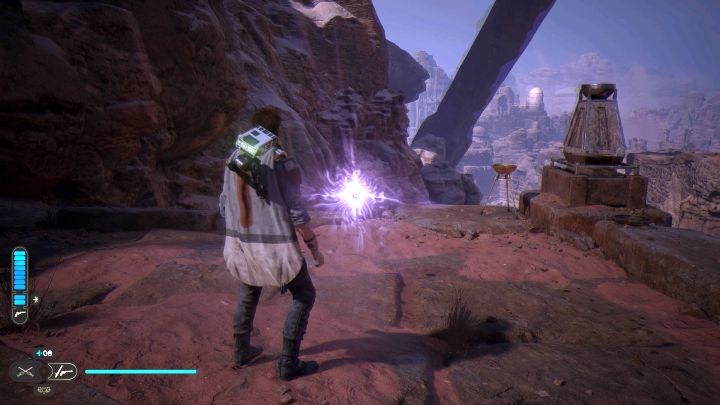
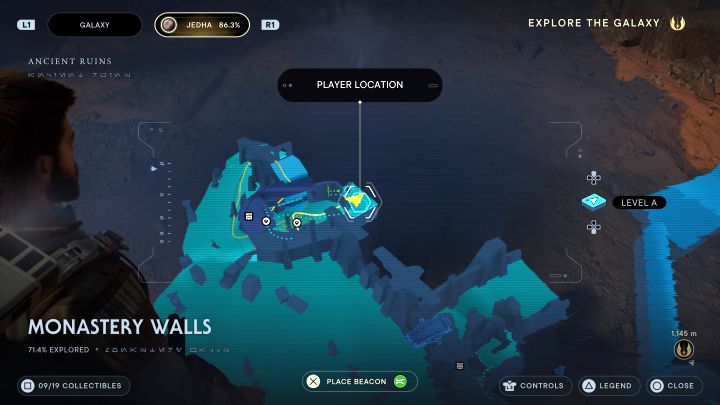
You will eventually reach an upper shelf in the ruins and this is where you find the Tear.
The challenge of Tear #3 involves defeating a group of enemies while using Single stance - you cannot change to other stances throughout the duration of the challenge. Fortunately, you won't have to face any elite enemies here, but remember to avoid red attacks and use parry.
Tear #4 - Fractured Determination
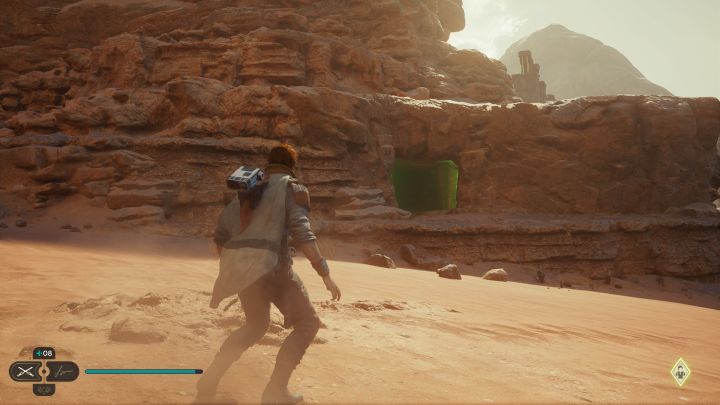
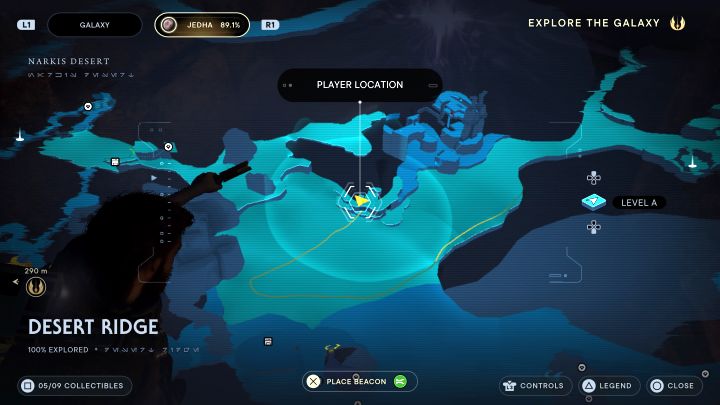
Location: Jedha - Desert Ridge
Description: Start with finding the green gate hidden in the rock formations - to be able to get to the other side of it, you need to unlock Merrin's Charm in the main story. The Tear itself is in a small cave.
The challenge involves completing a difficult obstacle course in which you need to air dash through series of green gates (some of them are moving) and perform wall runs. Keep in mind that your moves' cooldowns are replenished with each passing of a green gate, so you can use jumps and dashes almost infinitely. There are some resting spots along the way. Use the break and wait for the gates to align well or for the electric traps to move away.
Tear #5 - Fractured Dexterity
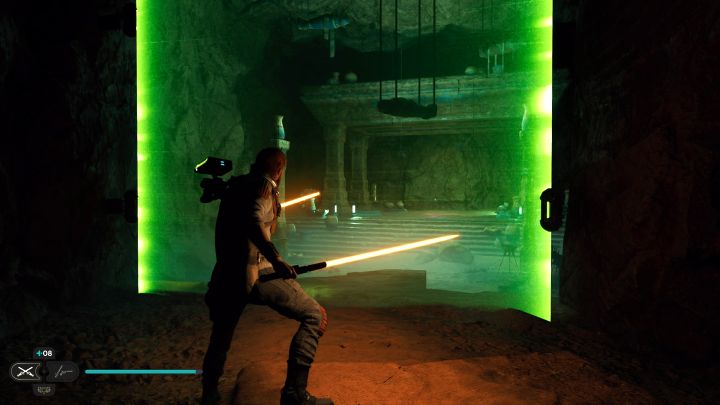
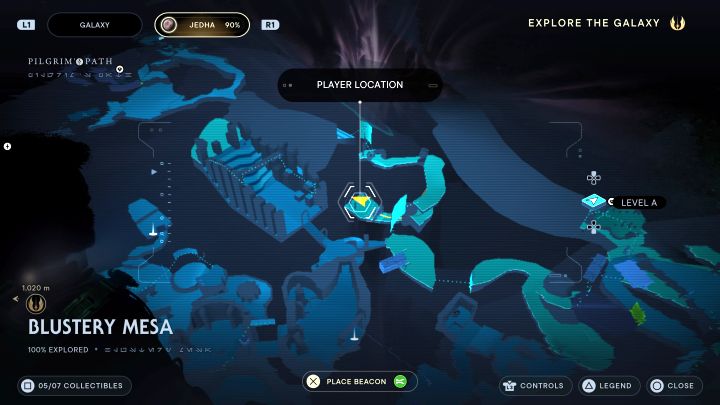
Location: Jedha - Blustery Mesa
Description: Not far from the border with Trailhead Pantheon, you'll find a location with strong wind gusts and an area suitable for a wall run. Reach the lower corridors to find a green gate (to be able to get to the other side of it, you need to progress in the main story enough to get Merrin's Charm). After getting past the gate, you'll find yourself in a crypt with the Tear.
The challenge involves defeating a group of enemies while using Dual Wield stance - you cannot change the stance throughout the duration of the challenge. There will be more incoming opponents, but they will only appear after defeating all or most of the current group. Finally, you'll have to face a slightly stronger beast.
Tear #6 - Fractured Cunning
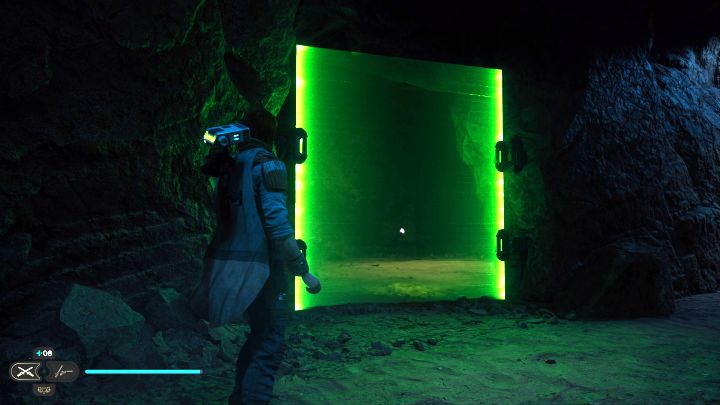
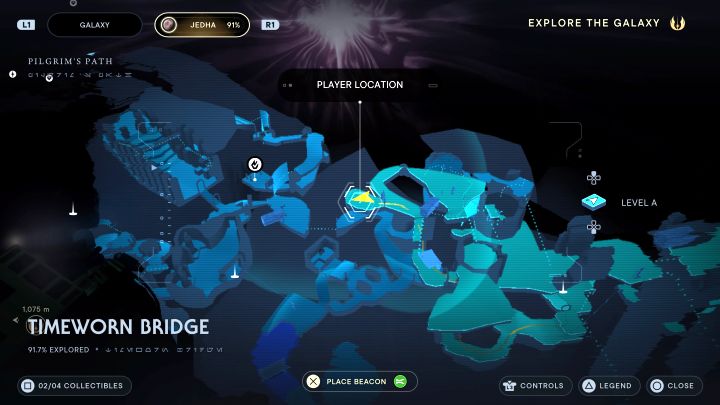
Location: Jedha - Timeworn Bridge
Description: Start from the meditation point, then proceed to the main climbing path. Along the way, you should encounter a green gate (to be able to get to the other side of it, you need to progress in the main story enough to get Merrin's Charm). The Tear is on the other side of a laser gate.
The challenge requires defeating a group of opponents while using Blaster stance - you have to stay with this stance throughout the duration of the challenge. There will be more incoming opponents, but they will only appear after defeating all or most of the current group. Fortunately, no elite enemies will enter the scene.
Tear #7 - Fractured Endurance
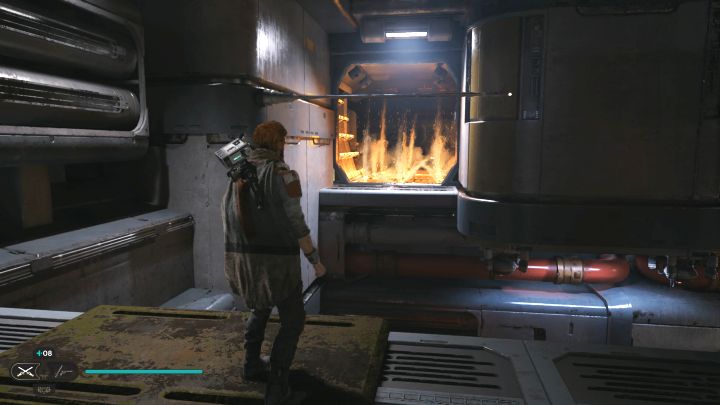
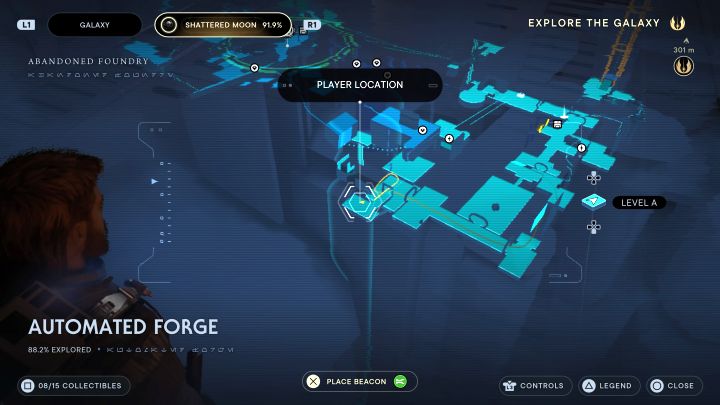
Location: Destroyed Moon - Automated Forge
Description: After reaching the forge, go to the room where you've fought Magnaguard. In the next room go with the climb (and avoid traps along the way) or grab the rope if you've unlocked the shortcut earlier. In the area from screenshot 1, you need to grab the bar and avoid the final traps. You will reach the room with the Tear.
The challenge sees you destroy 150 battle droids. Consider using Double Bladed stance to dispatch opponents more efficiently. Make sure to reflect blaster shots and in the further part of the battle, avoid grenades by staying out of their blast range.
Tear #8 - Fractured Burden
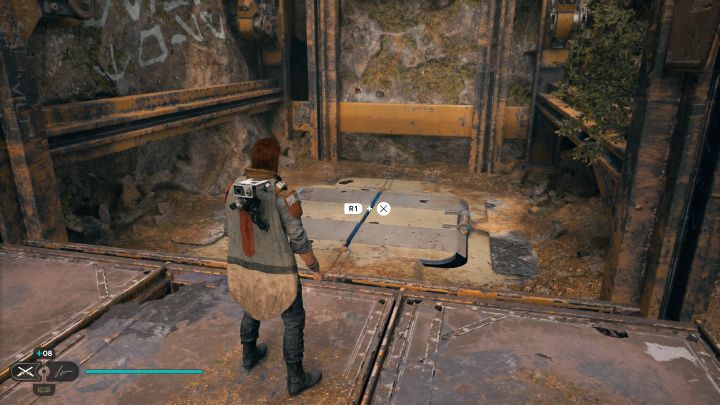
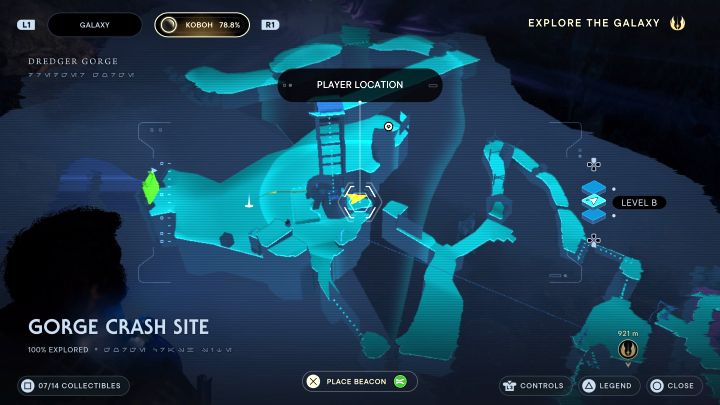
Location: Koboh - Gorge Crash Site
Description: Start at the meditation point and look for an elevator. Enter the lift and jump out of it right away so it rides up empty. In the place where the elevator was, you can use Force Slam but only if you've unlocked this power in the main storyline. Jump down to the lower area - the Tear is there.
The challenge involves defeating 3 minibosses, and these are more powerful variants of beasts that you've had the opportunity to encounter during exploration. Defeat the enemies one by one, but watch out for attacks from remaining opponents. Also, watch out for red attacks which come in different versions, as you're facing beasts of different kinds.
Tear #9 - Fractured Agility
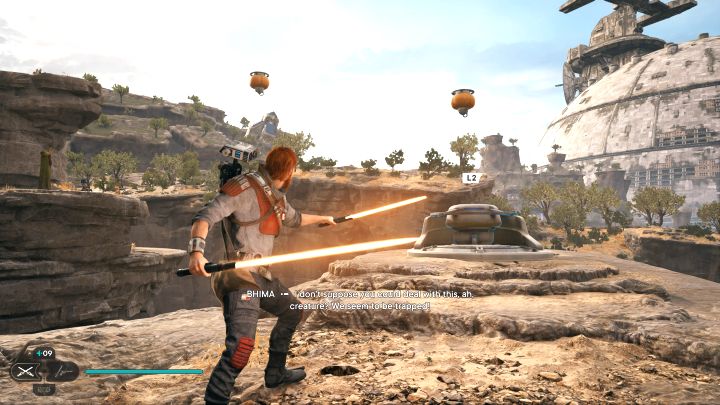
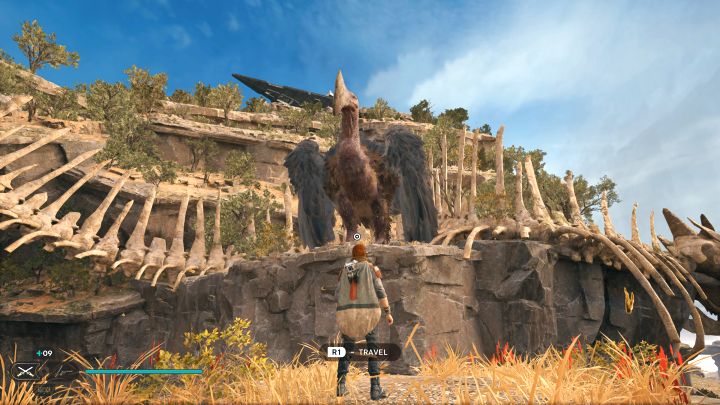
Location: Koboh - Derelict Dam
Description: The path to this Tear leads through an optional Boiling Bluff region. Use Nekko to reach one of the upper shelves. There you'll find an interactive station (screenshot 1). Take the balloon and place it above Cal. You can now grab it and use it to catapult yourself to the next balloons. To be able to perform that action, you need to have upgraded Ascension Cable, which is unlocked after enough progress in the main storyline.
Finally, Cal will land on a shelf before a large bird who you had freed earlier. Interact with the bird - it will take Cal to a different location.
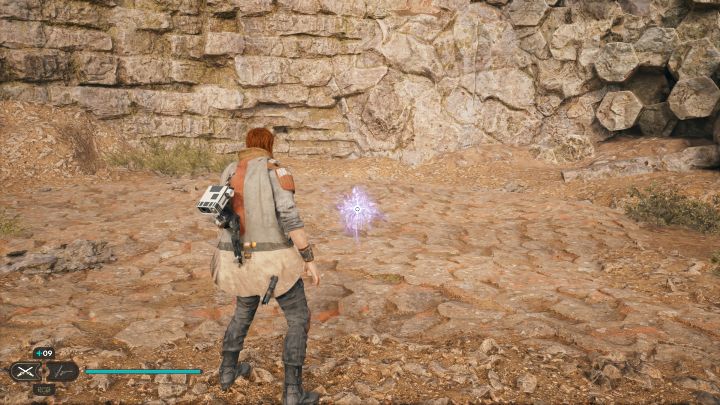
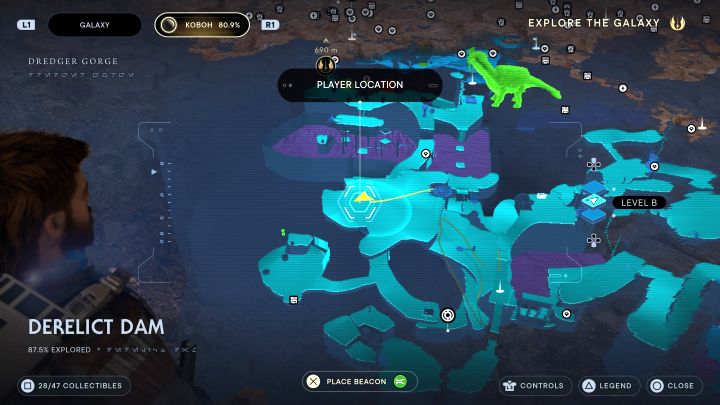
You'll find yourself on the highest shelves of the Derelict Dam region (while you're at it, you can optionally unlock a shortcut - an elevator). Look around the area to find the Tear.
The challenge of this Tear involves completing a difficult obstacle course which requires placing balloons, attaching to them, and performing wall runs. You must avoid touching red barriers and other obstacles. Repeat the challenge until you have it mastered. Remember that when on a balloon, you can hold the button to delay and plan the direction of the catapulting before making the jump.
Tear #10 - Fractured Momentum
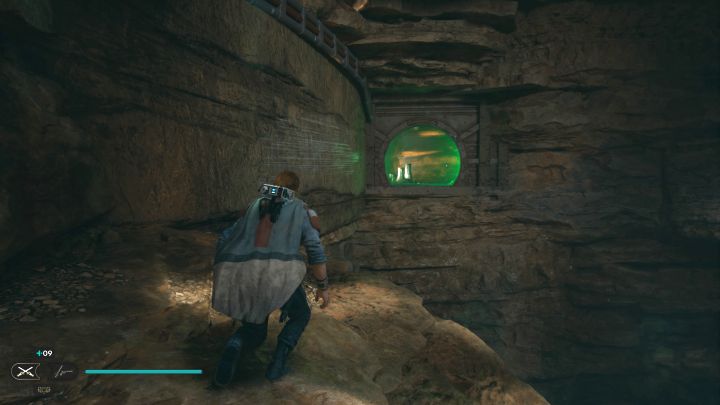
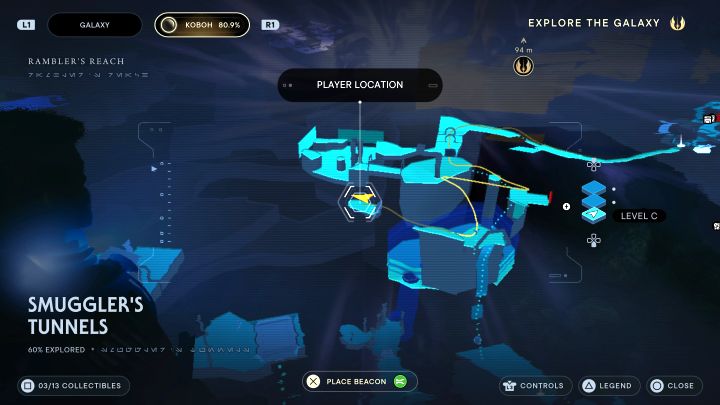
Location: Koboh - Smuggler's Tunnels
Description: Start at the cantina meditation point and choose the path to Smuggler's Tunnels. Along the way through this region, you will need to get past a green gate 2 times and this requires Merrin's Charm, an item obtained in the course of the main storyline. The second green gate is reached through a wall run. Look for the Tear on the other side.
The challenge of this Tear involves completing a difficult obstacle course during which you'll pass green barriers (sometimes in mid-air) and grab ropes. Watch out for traps and red barriers. Remember, also, that your moves' cooldowns are replenished after each passing of a green barrier, so you can fire your jumps and dashes right away again.
Tear #11 - Fractured Delusion
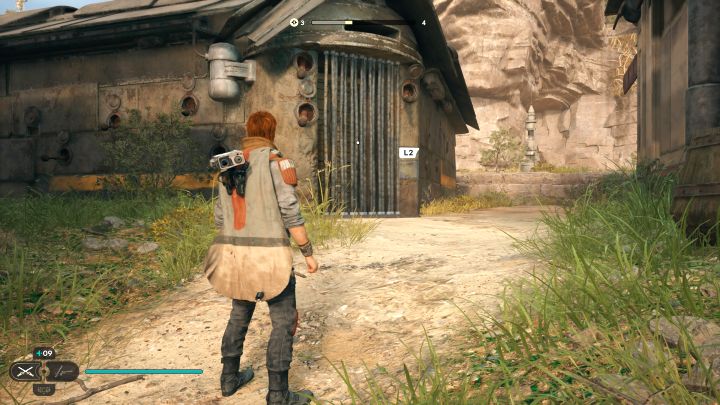
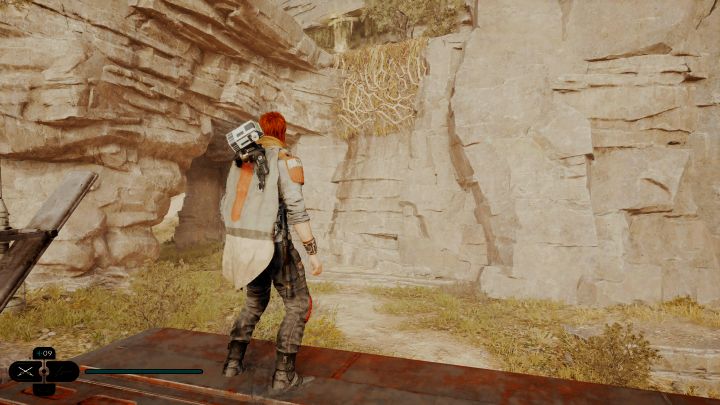
Location: Koboh - Hunter's Quarry
Description: Getting to this Tear requires some preparation. Start at Rambler's Reach Outpost and find a locked building (screenshot 1). You have to open it by using Force Pull, BD-1 hacking, Force Slam (power obtained in the course of the story), and Merrin's Charm. When you'll finally get past the door, you'll find Soont Madas inside. Talk to him and use Mind Control on him (choose any dialogue option you like). Get to the basement and investigate the corpse. When attempting to get back upstairs, Soont Madas will attack Cal. You have to defeat him - this is also a first encounter with a new type of opponent.
Back at Rambler's Reach Outspost, you need to climb to the roof of Doma's store. Proceed to the climbable wall from screenshot 2.
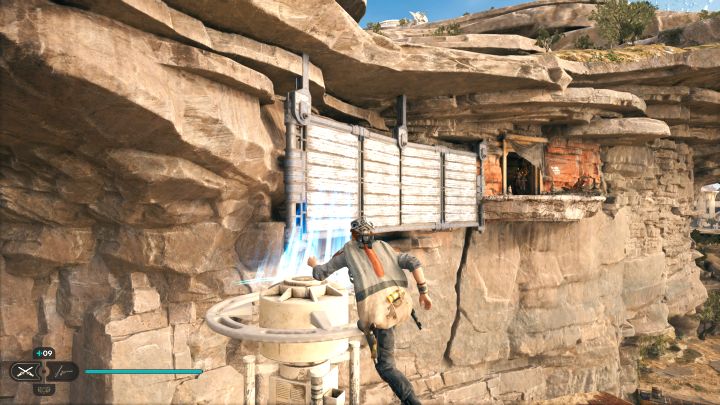
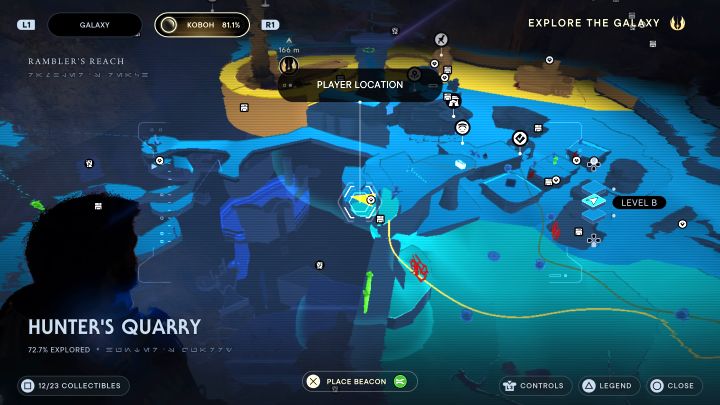
You will find yourself high above the Hunter's Quarry region. There are interactive balloons here and you can reach them provided you have upgraded Ascension Cable which is unlocked with enough progress in the main storyline. Reach the balloon shown in screenshot 1 - catapult, perform a wall run and reach a small cave that contains the Tear.
The challenge itself is simple and involves defeating a group of opponents. There will be more incoming opponents, but they will only appear after defeating all or most of the current group.
Tear #12 - Fractured Duality
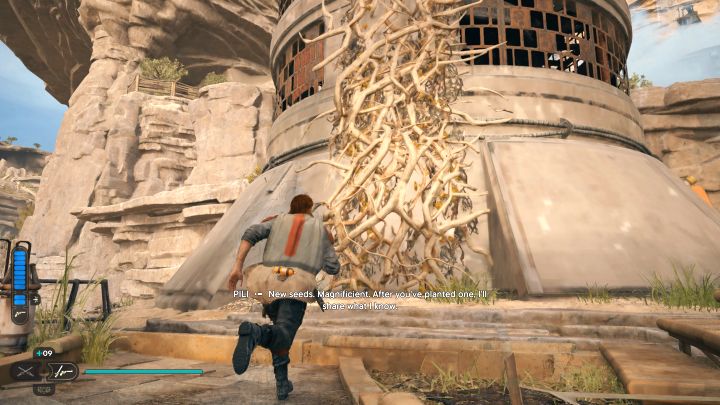
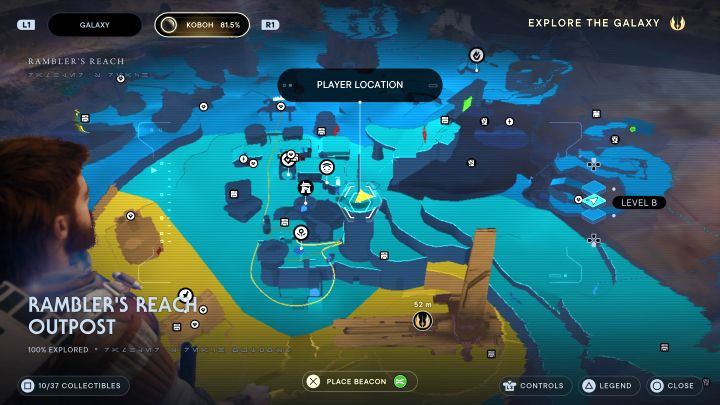
Location: Koboh - Rambler's Reach Outpost
Description: Get to the garden on the cantina's roof. There is a tower next to it and you can climb up the wall shown in screenshot 1. Make your way to the top of the tower - there you'll find the Tear.
The challenge involves defeating a group of opponents using Double Bladed stance - you have to stay with the same stance throughout the whole fight or the challenge will be failed. Make sure to deflect shots from heavy cannons with your lightsaber, and watch out for red attacks from droids.
Tear #13 - Fractured History
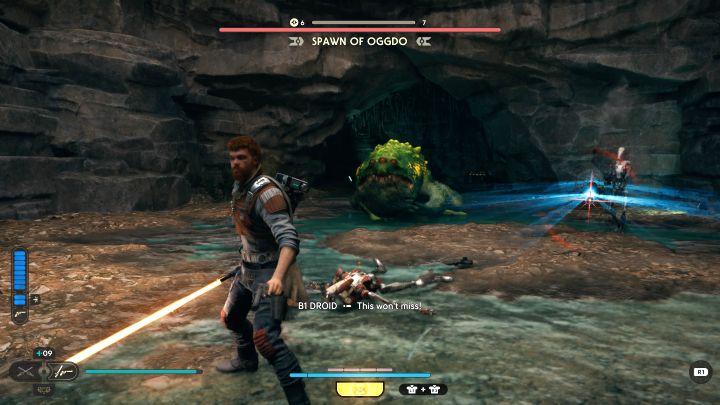
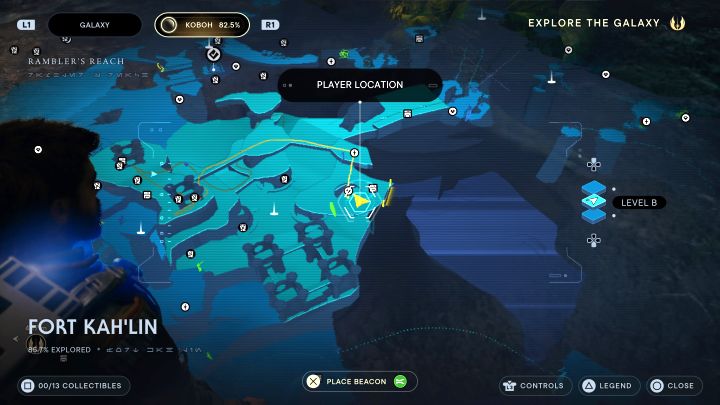
Location: Koboh - Rambler's Reach Outpost
Description: the path to this Tear leads through an optional Fort Kah'lin region. Reach its upper levels and enter the arena where you need to face Spawn of Oggdo boss.
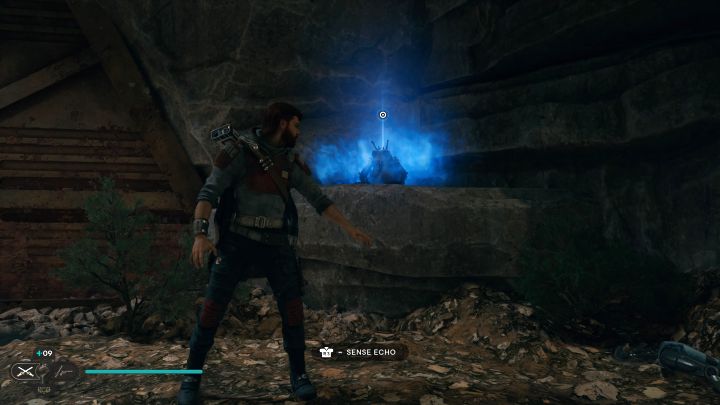
After defeating the boss, you need to perform 2 interactions:
- Investigate the echo of the first small oggdo encountered in the same area i.e. the boss's lair (screenshot 1).
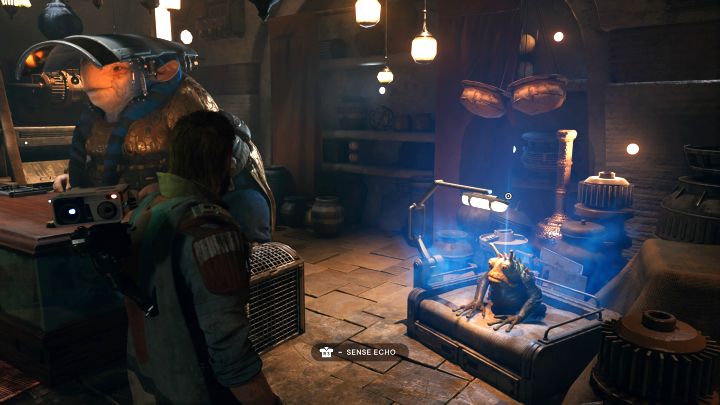
- Investigate the echo of the second small oggdo encountered in Doma's shop in Rambler's Reach Outpost (screenshot 2). The blue glow will appear only if you've investigated the first oggdo.
With the second oggdo investigated, the Tear will appear in Doma's store. Your task in this challenge will be to defeat a pair of Oggdos. The fight is very challenging, as you need to watch out and react to attacks from two enemies at the same time. Above all, watch out for red attacks which are grabbing attempts that when successful result in massive damage received. Attack and eliminate the beasts one by one. Before activating the Tear, you can lower the difficulty level, which results in lower strength and less health of the opponents.
Tear #14 - Fractured Punishment
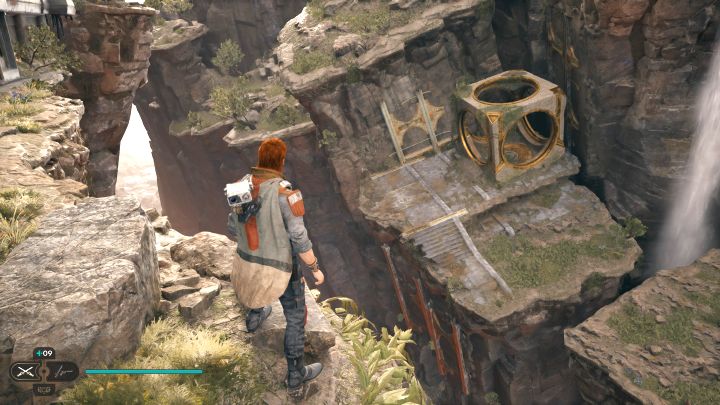
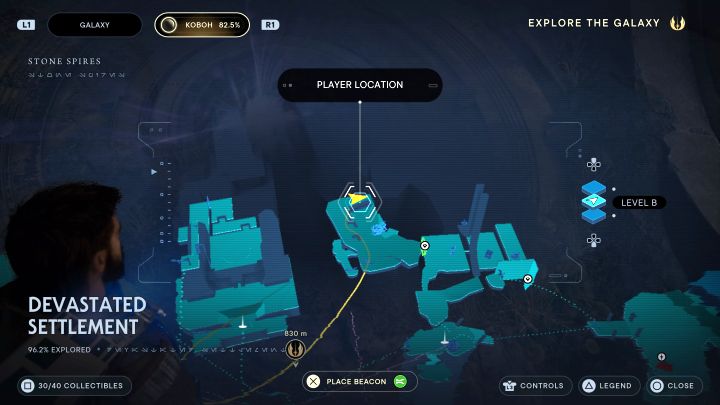
Location: Koboh - Devastated Settlement
Description: Start by reaching Grand Courtyard meditation point (this point is unlocked with progress in the main story) located on the highest floor of Devastated Settlement. Examine the shelves next to the meditation point, and you should see a large cube (screenshot 1). The Tear is inside it, and you can reach it by using a relter.
The associated challenge is rather simple - you need to defeat a group of beasts. Fortunately, there aren't any elite monsters here, but remember to avoid red attacks.
Tear #15 - Fractured Power
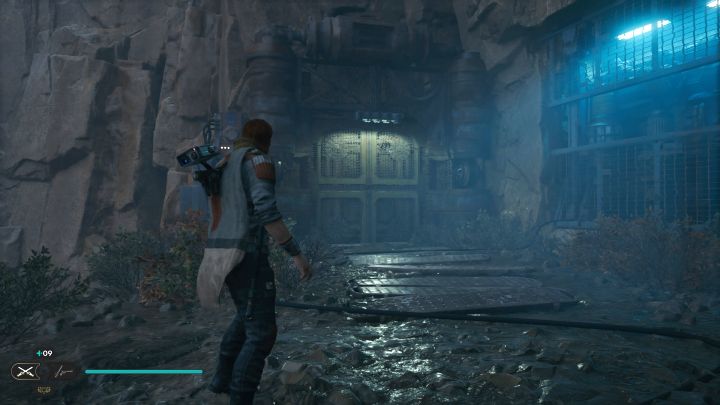
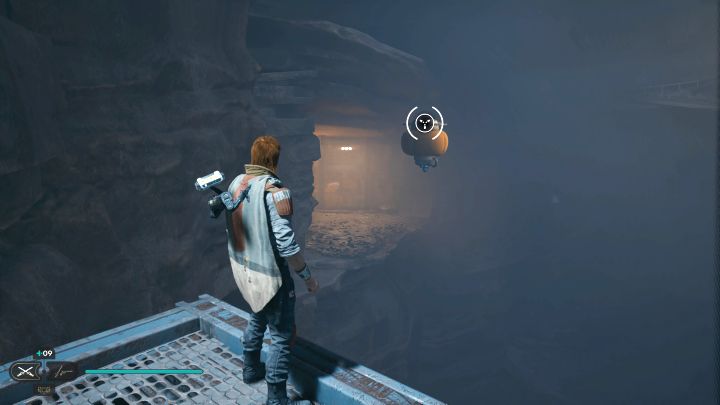
Location: Koboh - Marl Cavern
Description: The path to this Tear leads through the Fogged Expanse region. Either complete a longer climb and reach the main entrance to the cave (screenshot 1) or use the shortcut next to the meditation point if you've unlocked it earlier.
Inside the cave, you'll need to do some wall runs and reach the balloon (screenshot 2). For this you need upgraded Ascension Cable which is unlocked with enough progress in the main storyline.
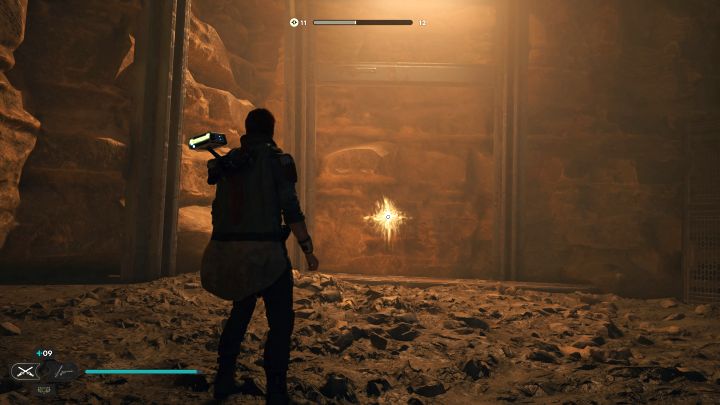
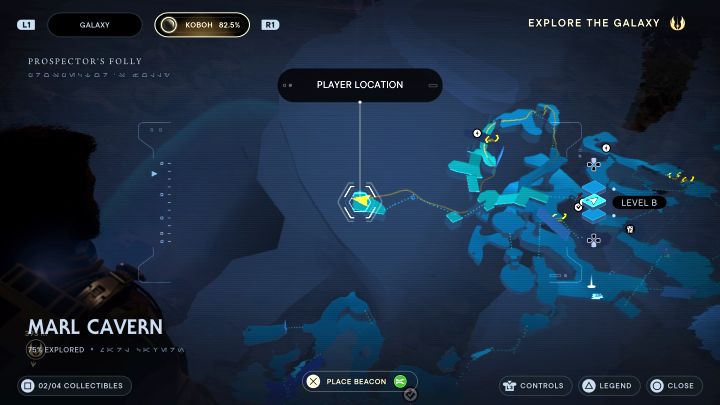
Catapult yourself from the balloon in the direction of the shelf.
The challenge of this Tear involves defeating a group of opponents using Crossguard stance - you cannot change to other stances throughout the duration of the challenge or it will be failed. There will be more incoming opponents, but they will only appear after defeating all or most of the current group. Finally, there are 2 larger beasts to defeat, but they are not full-fledged bosses.
Force Tears - general info
In all, there are 15 Force Tears to find and complete in Jedi Survivor. This is one of the most important categories of collectibles, and there is a unique challenge associated with each Tear. It can be a combat challenge that involves defeating bosses or groups of enemies, or an obstacle course.
Completing a Tear is rewarded with 1 Skill Point. Moreover, for completing all 15, you'll unlock a gold trophy - Blood, Sweat, and Tears.
Reaching and completing Tears may require certain gadgets or abilities e.g. upgraded Ascension Cable, Merrin's Charm, or Force Slam ability. It is best to wait with completing them until the main story is completed.
You are not permitted to copy any image, text or info from this page. This site is not associated with and/or endorsed by the developers and the publishers. All logos and images are copyrighted by their respective owners.
Copyright © 2000 - 2025 Webedia Polska SA for gamepressure.com, unofficial game guides, walkthroughs, secrets, game tips, maps & strategies for top games.
