Resident Evil 3: Starting Tips
On this page of our guide to Resident Evil 3 Remake you can find a valuable set of starting tips. You can treat this section as a survival guide that explains and reminds you of some of the most important features and mechanics of Resident Evil game series. This knowledge will help you avoid death during encounters with Nemesis. Also, you will learn how to run away from zombies and other Umbrella mutants or when you should attack them.
If you're looking for a solution to a specific puzzle or have a problem during some stage of the game, please refer to our Walkthrough section or Secrets section.
For example, if you can't open a safe or a locker, the Secrets and Collectibles section will help you.
- Save your supplies - you don't have to attack everyone
- Don't try to kill Nemesis - he is immortal
- Regularly save your game
- Only store important items in your inventory and try to increase its capacity
- Often check your map
- Don't wait too long to heal your character
- Use objects of the environment to weaken the monsters
- Kill lying zombies with a knife
- Remember to dodge a lot
- Don't ignore the mechanics of crafting (combining items)
- Watch out for lying zombies - they can suddenly attack you
- Keep a safe distance from zombies with parasites on their heads
- Grenades are very helpful in stunning or weakening monsters
Save your supplies - you don't have to attack everyone

Resident Evil 3 is a survival horror. This means that the most important part of the game is to survive. The controlled characters don't have to take part in all encounters or battles with zombies. Taking part in non-mandatory battles consumes your supplies (remember that defeated monsters don't drop any loot) and exposes your character to the risk of losing health points.
Whenever possible, the best solution is to avoid unnecessary confrontation. It's easy when you're fighting ordinary zombies in some outdoor location - you can often avoid them without problems. In other cases, look for opportunities to temporarily stop the monsters (for example, knock them to the ground, stun them, electrocute and paralyze them). By doing so, all hostile creatures will be unable to reach our beloved characters.
Don't try to kill Nemesis - he is immortal
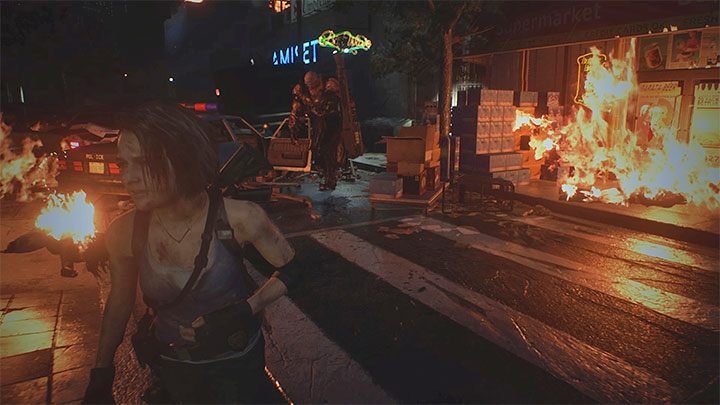
After encountering Nemesis for the first time you will most probably want to destroy him and smash him into little pieces - however, this ambitious will fail. Nemesis is temporarily indestructible and can only be defeated in story-related boss fights.
The best way to behave after encountering Nemesis is to run away or temporarily slow down the mutant. Choose the latter option if you have failed to escape the monster, that is, after Nemesis has caught up Jill. We recommend using a shotgun and frag grenades - these attacks should be enough to force Nemesis to kneel. The beast will not chase the heroine until it regains its full strength. More information about Nemesis can be found on the separate page of our guide.
Regularly save your game

It is worth remembering this from the very beginning of the game. The game creates auto-saves, but these may not be sufficient if, for example, you have used up too much supplies and the game has made an auto-save.
Frequently return to typewriters located in safe rooms. You can create manual saves without any restrictions. We recommend to use all available save slots. This will make it easier for you to return to a specific moment in the game, if necessary.
Only store important items in your inventory and try to increase its capacity

The character's inventory is very limited at the beginning of the game. In case of Jill it only has 8 slots available and you also have to reckon with the fact that some larger items (mainly weapons - shotgun, assault rifle and grenade launcher) take up to 2 slots of free space. As a result, skillful inventory management becomes very important aspect of the game. For the purposes of standard Raccoon City exploration, try to take 1-2 weapons with you, not too much ammunition and 1 healing item. The point is to have as many free slots as possible to carry new items.
Store all unnecessary items in the storage chest. Fortunately, their inventory is shared, so you don't always have to return to the same chest. Also, search for hip bags - each of them increases the inventory by 2 slots. We have described their locations on a separate page of our guide - How to increase inventory capacity?.
Often check your map
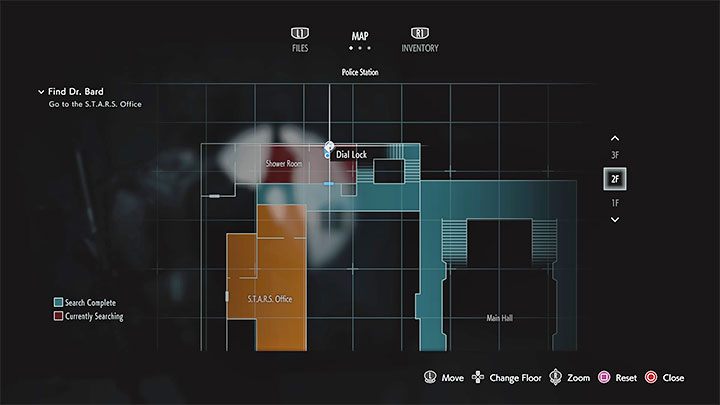
Using a map can be very helpful in Resident Evil 3 because it has a number of useful applications. First of all, it allows you to check if you have already visited all the places and if you have found the whole loot from a particular location. Areas with collected loot (except for collectibles) are marked in blue.
Map allows you to quickly find blocked passages and closed containers. This is especially useful if you've found, for example, a lock pick that allows you to open all yellow padlocks. For more information on how to use the map check the Map and colors - what do they mean? section of our guide.
Don't wait too long to heal your character
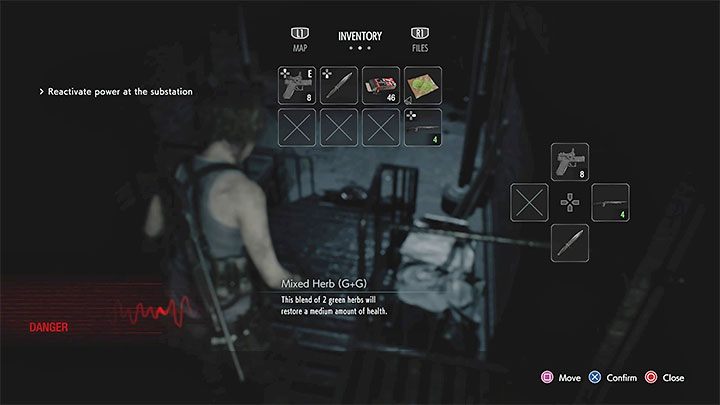
In Resident Evil 3 there is no health bar on the screen which shows the hero's current health level. However, it is particularly easy to check health status in the inventory - green indicates good health, orange indicates medium-level injuries and red informs you that your character is in critical condition. Try to respond to these warnings and use all available healing items or herbs. An injured character moves more slowly and may die as a result of a single attack by a strong monster or even a single zombie bite.
By the way, it is worth noting that by default there is no self-healing or auto-regeneration mechanism in the game. The exception is the low difficulty level. If you play on the easiest level of difficulty then your character will regenerate to some extent. If you are looking for more information about this topic, please check a separate page of our guide entitled Healing characters.
Use objects of the environment to weaken the monsters
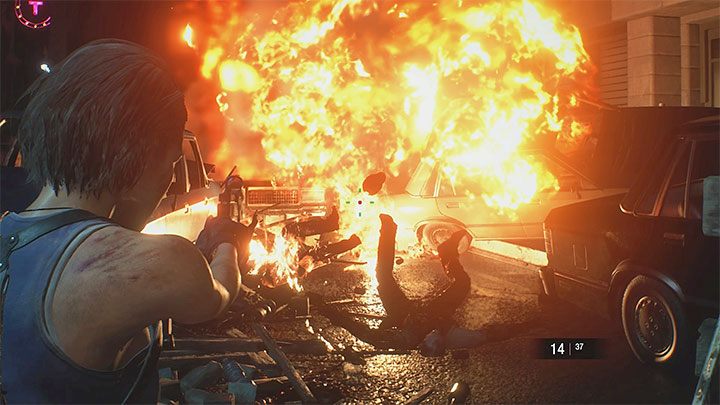
Most objects in the area are indestructible, but there are exceptions to this rule. The following objects will help you defeat or weaken all enemies (like zombies or even more powerful mutants):
- Red Barrels - shot at them to make them explode. It is always worth to wait with a shot until a monster or a group of zombies will be standing near the barrel.
- Generators - damaging a generator will electrocute and stun all monsters that are standing nearby. You can use this to pass them by or to launch more attacks when they are in a defenseless state. Green light indicates that a generator has been recharged and can be used again. Therefore, you can shoot at the exact same generator but you have to wait until it's fully recharged.
Kill lying zombies with a knife

This is an excellent ammo-saving technique, which can be especially useful when playing at higher levels of difficulty, where large stocks of ammunition are more difficult to obtain.
Equip a knife as soon as you have knocked down a zombie to the ground by using your firearm. But don't overdo it (with the number of knife attacks), because a wounded zombie can suddenly attack your hero even when it's lying down on the ground. After performing several strikes with your knife, jump back if necessary, and prepare to resume the firearm attacks.
Remember to dodge a lot

This is one of the most important new RE3 game mechanics, which allows you to dodge enemy attacks and avoid getting hurt in close combat. You can dodge a claw attack or zombie bites.
You must press the attack button at the perfect moment, that is, just before the controlled character is going to be hit, caught or bitten. If you've made a successful dodge (jump), then you'll gain a few seconds of slow motion (bullet time) - it's a great opportunity for a quick counter-attack. For example, to kill a monster with a headshot. You can find out more about how to evade correctly on a separate of our guide - Dodge - how to do it?.
Don't ignore the mechanics of crafting (combining items)

Crafting in Resident Evil 3 is very simple and very helpful - you can make ammunition for weapons and stronger healing items. This feature is available from the very beginning of the game - no additional tools or recipes are required.
Try to develop a habit of collecting as much crafting materials as possible during the exploration of the game world. Even if you don't need them at the moment, you can always put them in your item chest. You will find a complete set of information on a separate page of our guide - Crafting.
Watch out for lying zombies - they can suddenly attack you
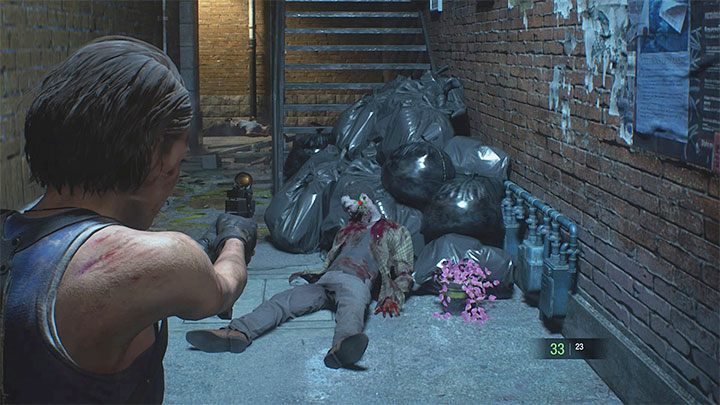
In some locations you may meet sleeping and lying zombies - they may attack you by surprise after you get close enough to them. You can prepare for this type of situation in two ways - to fire a single gunshot at the zombies you encounter or be ready to jump back quickly.
A similar situation may also occur during normal zombie fights - knocking the monster down to the ground doesn't mean that its dead (the exception is when zombie's head has exploded). Use your knife to check the current condition of fallen enemy. This way you can save some ammo.
Keep a safe distance from zombies with parasites on their heads

Zombies with parasites attached to their heads can be encountered in later stages of the game. These are just ordinary zombies that have been infected by Nemesis. The most important advice is to keep these monsters at a distance. That's because they are able to attack with a large tentacle which deals lots of damage from a fairly long distance. Don't allow them to approach the controlled character, as they may also try to grab the hero's head and cause fatal injuries.
If you attack this type of zombie then you have to aim at the parasite. If a zombie falls over, run quickly to it and continue attacking the parasite with a firearm or knife. Keep doing this until the parasite is "detached" from the host.
Grenades are very helpful in stunning or weakening monsters
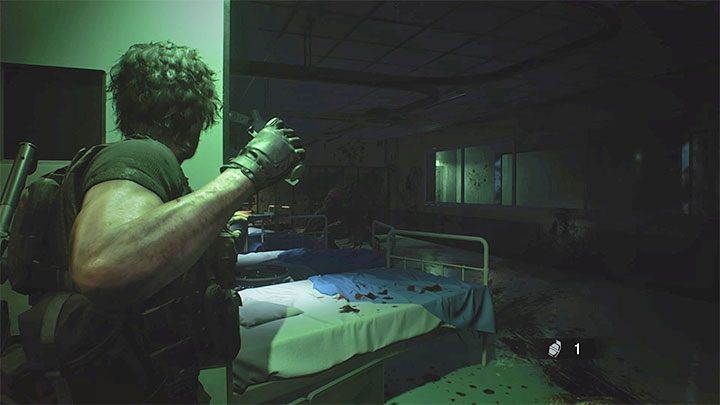
In Resident Evil 3, you can find two main types of grenades:
- Frag Grenades - these are primarily used to force Nemesis to kneel. However, they can also be useful when you have to fight against powerful monsters and when you have been surrounded by lots of zombies.
- Flash Grenades - they work perfectly when you have to defeat monsters like Licker and Hunter Beta. The thrown grenade is able to temporarily blind the mutant and expose it to further attacks launched by the hero.
We recommend to save all grenade types for more difficult battles and encounters with powerful foes. Unfortunately, you can't find too many of them during the game. Also, grenades cannot be created by using crafting.
You are not permitted to copy any image, text or info from this page. This site is not associated with and/or endorsed by the developers and the publishers. All logos and images are copyrighted by their respective owners.
Copyright © 2000 - 2025 Webedia Polska SA for gamepressure.com, unofficial game guides, walkthroughs, secrets, game tips, maps & strategies for top games.
