Resident Evil 3: Downtown - second visit walkthrough
This page of the guide to Resident Evil 3 Remake has a walkthrough for the second visit to Raccoon City's downtown. Jill returns to the Central Raccoon City area after restoring power. Nemesis will chase you here - read our guide to learn how to avoid his attacks. Jill needs to make the trains work again.
- Bring the trains online in the subway office
- Return to the Subway Station
- Lure the creature away from the subway station
Bring the trains online in the subway office
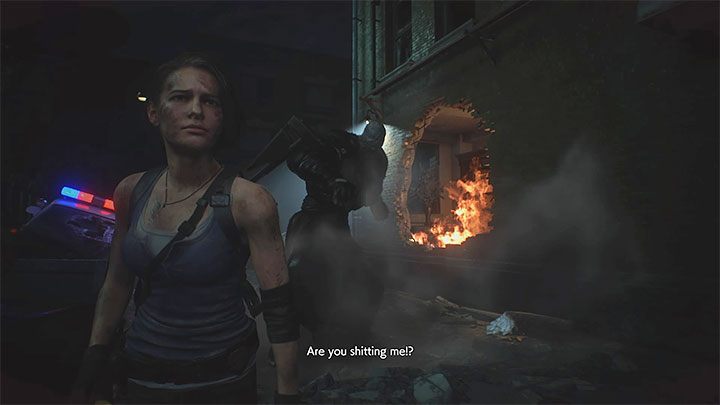
Don't forget to save the game and prepare yourself before you decide to leave the Subway Power Substation. Shortly after returning to the downtown area, Nemesis will break through one of the walls. He will try to prevent the protagonist from reaching the Kite Bros Railway building.

Here are some general tips on how to avoid Nemesis:
- You can't defeat Nemesis; you can only slow him down. Unfortunately, Nemesis can easily catch up with Jill. When this happens, use the shotgun or grenades to weaken and stop Nemesis for a moment. He won't pursue Jill for some time.
- Avoid Nemesis' melee attacks by keeping a safe distance and dodging.
- Nemesis can grab Jill with his tentacles. If you get pulled, get up and move away from the monster as quickly as possible. Otherwise, the mutant will attack you.
- Weakened Nemesis can "drop" a case. Be sure to pick them up - they contain valuable loot. The first case should contain a weapon upgrade
- Zombies may appear while you are running away from Nemesis. They can appear even in those locations you have "cleared" earlier. If you don't want to risk Nemesis catching up with Jill, attack and knock down only those zombies in your way.
The complete information about Nemesis can be found on Nemesis - the main antagonist page.

The picture above shows possible escape routes marked with red lines.
- You start at point 1, which is the gate connecting Subway Power Substation with downtown.
- You have to reach point 2, the Subway Office - the Kite Bros Railway building.
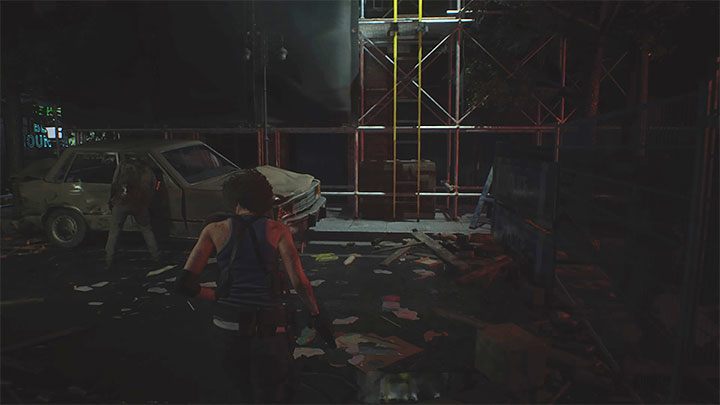
There is more than one path leading to the destination. You have to choose the route after you leave the garage:
- You can stay on the main street and run through the Donut Shop.
- You can use the ladder on the main street, but it is only possible if you have dropped it earlier. This will make it easier to run across the roof and through the building with a safe.
Along the way, you will pass two places with typewriters - use them. These places are the garage and the Donut Shop.

The destination is the control room in the west part of the Subway Office. You have to solve a puzzle to bring trains online. Go to the central control panel and interact with it. Your job is to manipulate the knobs on the left side of the screen. You must correctly select the abbreviated station names and numbers.
Final solution of the puzzle is shown in the screenshot above. The correct values are:
- RE - 01 (abbreviation of Redstone Street)
- FA - 02 (abbreviation of Faust Avenue)
- RA - 03 (abbreviation of Raccoon Central)
- SA - 02 (abbreviation of Saint Michael's Clock Tower)
- FO - 01 (abbreviation of Fox Park Station)
When all stations are correctly set, press the ENTER button.
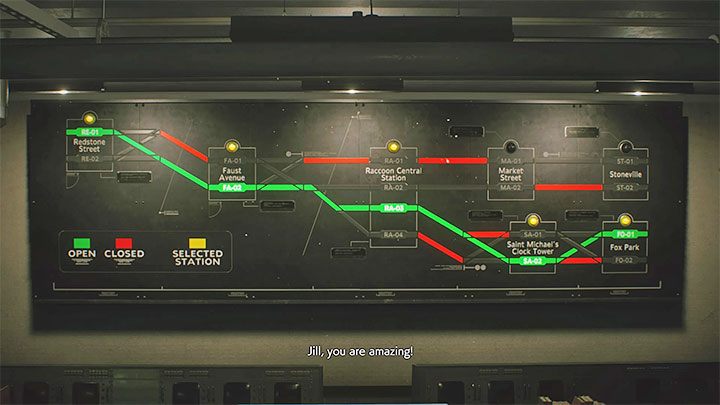
The solution is shown in the picture above. If you have chosen the correct stations and their numbers, you will get a new call. Head to the metro station where Mikhail and Carlos are staying.
Return to the Subway Station

Be careful when you leave the room -you will have your first encounter with a zombie with a parasite on its head. This is a regular zombie who has been infected by Nemesis - this enemy is more dangerous.
Zombies with a parasite can attack at a distance with tentacles - try to shoot them from as far away as possible and aim at the parasite when it "opens up". After the zombie falls to the ground, you can quickly run past it or run to it and kill the parasite (you can also do this with the knife).

Stop at the Donut Shop and save your progress. Nemesis should reappear soon after leaving the store - he will infect another zombie.
We recommend using the same tactics as before - use the shotgun or grenades to temporarily stop Nemesis from chasing you. There is a chance that Nemesis may leave behind another large suitcase after getting down on one knee - it should contain a second upgrade for Jill's gun.
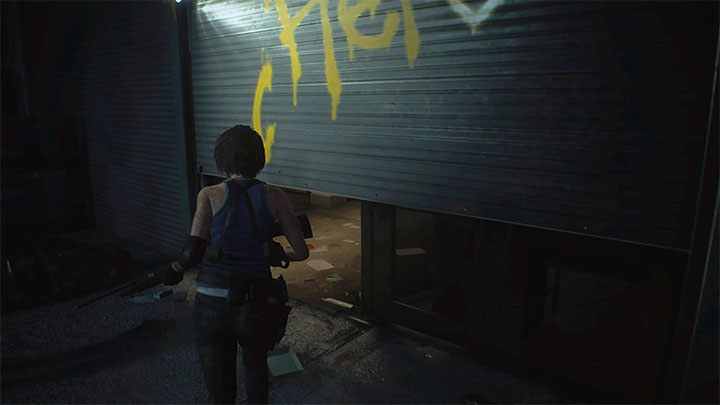
Follow the familiar route to the Redstone Street Station. Expect new zombies to appear along the way - we recommend attacking only those standing in your way. Squeeze under the partially raised gate, go down the stairs and watch a cut-scene.
Lure the creature away from the subway station
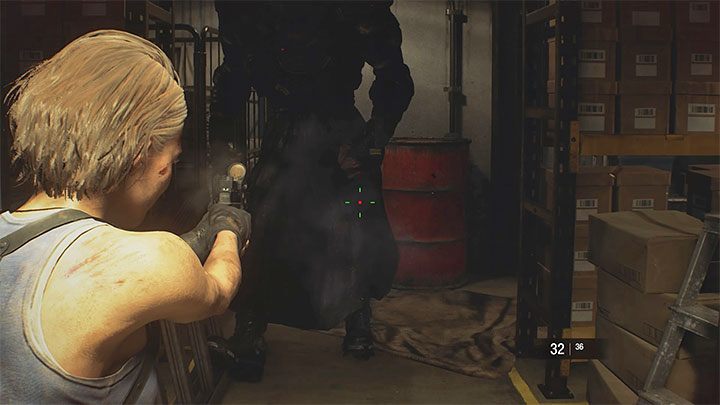
You are back at the Redstone Street Station - Nemesis will chase you again. Along the way, you can find a healing spray. Pick it up and don't stop anywhere else.
The linear corridors will lead you to the warehouse. You can easily stop Nemesis here by shooting at the red barrel when the monster is standing next to it.

To escape the warehouse, find the yellow grid shown in the picture above. You have to kick it a few times to unlock the entrance to the vent shaft. It leads to the sewers - Nemesis will stop chasing you for now.
- Resident Evil 3 Guide
- Resident Evil 3: Walkthrough
- Resident Evil 3: Story walkthrough
- Resident Evil 3: Jills apartment and escape walkthrough
- Resident Evil 3: Metro station walkthrough
- Resident Evil 3: Downtown walkthrough
- Resident Evil 3: Substation walkthrough
- Resident Evil 3: Downtown - second visit walkthrough
- Resident Evil 3: Sewers walkthrough
- Resident Evil 3: Demolition site walkthrough
- Resident Evil 3: Downtown - third visit walkthrough
- Resident Evil 3: Police station walkthrough
- Resident Evil 3: Subway Tunnels and Clock Tower Plaza walkthrough
- Resident Evil 3: Hospital - Carlos walkthrough
- Resident Evil 3: Hospital - Jill walkthrough
- Resident Evil 3: Underground Storage walkthrough
- Resident Evil 3: NEST 2 walkthrough
- Resident Evil 3: Final duel with Nemesis walkthrough
- Resident Evil 3: Story walkthrough
- Resident Evil 3: Walkthrough
You are not permitted to copy any image, text or info from this page. This site is not associated with and/or endorsed by the developers and the publishers. All logos and images are copyrighted by their respective owners.
Copyright © 2000 - 2025 Webedia Polska SA for gamepressure.com, unofficial game guides, walkthroughs, secrets, game tips, maps & strategies for top games.
