Crash Bandicoot N. Sane Trilogy: The Lab
Secrets:
- Yellow Gem - Destroy all 36 chests and finish the level without dying.
- Bonus round: Tawna - Collect 3 tokens with her likeness.
Walkthrough:
This is the last stage of those that are based on exploring area and avoiding traps. Sadly, completing it and getting the Yellow Gem isn't easy because many of the traps that are here require a perfect timing of your actions that are done one after another. Especially the moment with the sliding floor that can finish you off suddenly.
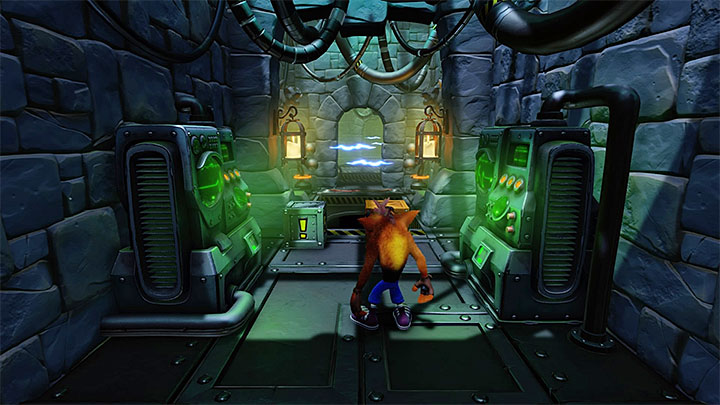
Start by hitting the metal chest. Interacting with chests with exclamation marks is necessary in this stage because this allows you to unlock passages and neutralize traps (the missing parts of floors). You must know that you have a limited amount of time to cross a path and the mechanisms from the exclamation mark chests will go back to their initial state.
A token with Tawna likeness can be found in the first wooden chest. Also, from now on you must avoid electric discharges but you are already familiar with this type of traps. Continue your journey and find Tawna's second token. You must be careful in the place presented in the picture because after hitting the exclamation mark chest you must wait a moment until you can avoid electrical discharges. The same must be done in a few other places that are later in this level.
In one of the next areas you can encounter jumping blobs for the first time. You can eliminate them by jumping on them or by using the Spin attack. You can also try to avoid them. Remember that you shouldn't stay in one place for too long because new monsters will respawn in the places of the avoided or eliminated ones. Soon, you reach a room with a lot of chests. You must be careful here because one of them is a TNT chest. Try to not detonate it accidentally and when a countdown starts you must move away from the chest.
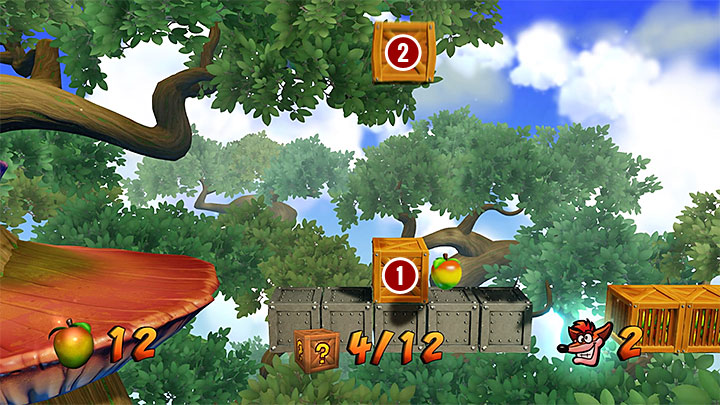
After a few moments you reach a chest with Tawna's third token and a portal that teleports Crash to a bonus round. During this round you must destroy 12 chests but doing it is very complicated. Notice the section with two chests with arrows facing up. You must bounce off of the lower chest (marked by the number 1 in the picture above), when you are in the air you must avoid the upper chest (marked by the number 2 in the picture) and then bounce off of it to fly even higher (out of the screen). Destroy two invisible chests and only after that you can go to the place where you can end this bonus round (when you are on your way you can destroy the chests above the chasm - those with apples requires you to land five times on them).
In one of the next rooms you come across a scientist that uses gloves that can electrocute Crash. Confronting him is not worth it (the Spin attack can push this character back). Instead, you should use the fact that the scientist is slow so you can get past him by jumping.
The following rooms contain easy to dodge traps so you shouldn't have any problems. Continue walking until you reach a room with a scientist that throws phials. Eliminate him and activate new checkpoint.
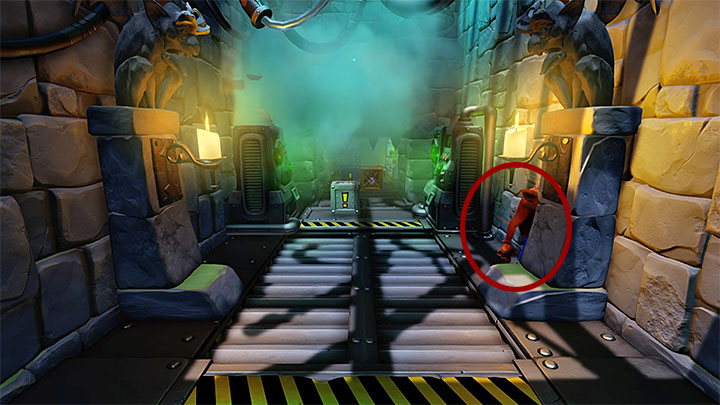
In the new room you can find a lot of explosive chests and in addition to that you must watch out for sliding floor that can be avoided by running close to one of the walls. Jump on one of the chests to start a countdown and then return to the place close to the wall, marked on the picture, and wait for a detonation.
Move forward and avoid a scientist with electrified gloves again. After jumping on a new ledge you must hit both chests and enter inside. Here, you must avoid electrical discharges and blobs, the best way to deal with them is to jump above them. After leaving this room you must take two additional lives from the nearby chests.
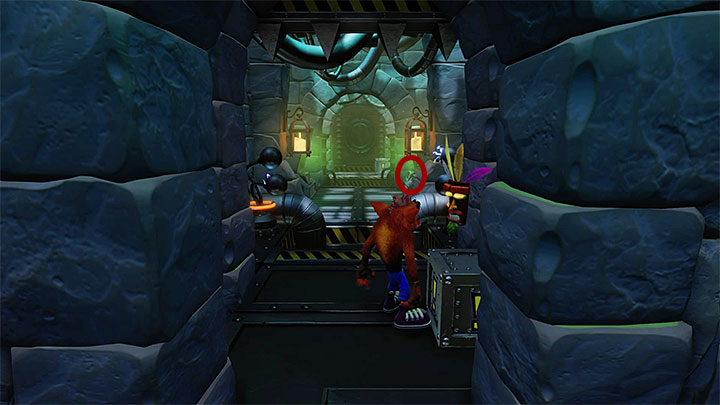
Hitting the exclamation mark chest opens a passage to a new room presented in the picture above. Don't be in a hurry with entering it because this place contains more difficult traps to avoid. You must watch out for sliding floor and electrical discharges. Take some time to learn the order in which the traps are activated. Then, you can try to run to the other side of the room in one run or you can hide in the right niche marked on the picture and wait until the floor is solid again so you can finish your run the the exit from this room.
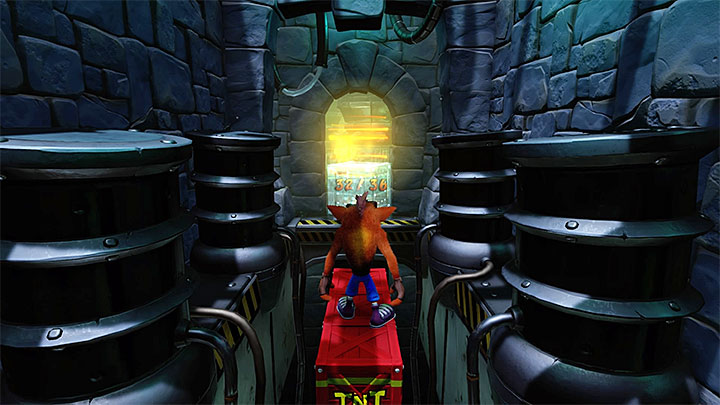
Between you and the portal that ends this level there is only one room with traps. Approach the electrified poles and wait for a good moment to jump on one of the TNT chests presented in the picture. Don't use the Spin attack and don't try to bounce off because a countdown will start when you land on a new chest. Run to the exit and wait for the explosion. You can now go through the portal.
- Crash Bandicoot N. Sane Trilogy Game Guide
- Crash Bandicoot N. Sane Trilogy: Levels and Bosses
- Crash Bandicoot N. Sane Trilogy: Levels
- Crash Bandicoot N. Sane Trilogy: Crash Bandicoot - Cortex Island
- Crash Bandicoot N. Sane Trilogy: Crash Bandicoot - Cortex Island - Island description
- Crash Bandicoot N. Sane Trilogy: Heavy Machinery
- Crash Bandicoot N. Sane Trilogy: Cortex Power
- Crash Bandicoot N. Sane Trilogy: Generator Room
- Crash Bandicoot N. Sane Trilogy: Toxic Waste
- Crash Bandicoot N. Sane Trilogy: The High Road
- Crash Bandicoot N. Sane Trilogy: Slippery Climb
- Crash Bandicoot N. Sane Trilogy: Lights Out
- Crash Bandicoot N. Sane Trilogy: Fumbling in the Dark (secret stage)
- Crash Bandicoot N. Sane Trilogy: Jaws of Darkness
- Crash Bandicoot N. Sane Trilogy: Castle Machinery
- Crash Bandicoot N. Sane Trilogy: The Lab
- Crash Bandicoot N. Sane Trilogy: The Great Hall
- Crash Bandicoot N. Sane Trilogy: Crash Bandicoot - Cortex Island
- Crash Bandicoot N. Sane Trilogy: Levels
- Crash Bandicoot N. Sane Trilogy: Levels and Bosses
You are not permitted to copy any image, text or info from this page. This site is not associated with and/or endorsed by the developers and the publishers. All logos and images are copyrighted by their respective owners.
Copyright © 2000 - 2026 Webedia Polska SA for gamepressure.com, unofficial game guides, walkthroughs, secrets, game tips, maps & strategies for top games.
