Castlevania Lords of Shadow 2: Mission 1 - Bioquimek Corporation
Again, you start on the streets - look around yourself and try to destroy all the barrels, pallets and chests you will find, because you can find plenty of experience points and / or relics inside them. Additionally, some of them may drop artworks - they aren't necessary in any way (besides one achievement awarded after collecting all 400 of them), so if you aren't a trophy / achievement hunter you don't need to bother yourself with them.

Back to the mission - not far away from your starting location there is a gate (a marker on the map indicates the place), through which you have to go to continue on with the mission. Don't go there yet - instead, skip it and go up, to the end of the street and turn left. In a small shrine you will find your first collectible - Memorial. Collect it and go through previously skipped gate.
After getting inside, you will be informed about your new ability - Shadow Daggers - which you must use to open another gate. Follow the instructions on the screen, to throw a dagger at the indicated spot, which should open the passage. After getting through it, turn around to your right and notice a box behind metal bars - this is another type of collectible, called Pain Box, which hold one of the Gems that you can find in the game. You cannot collect it yet, as you lack the required skill.

You will run into the first stealth section in the game - you must slip past the guard, as you cannot engage him directly in combat. To the right side from your entry point, you will find a Shadow Portal - activate it to use another one of your skills. Dracula will take the form of a rat, which should allow you to get to some places undetected.
Change yourself into a rat, get past the guard (ignore destroyable items in the room, as you cannot attack in this form) and return to your Dracula form by the second Shadow Portal (you can find it to the left of the corridor that the guard came from). After you do this, your next objective it to take control over the guard by using the ability of Possession - get close to him from behind and follow the onscreen instructions. After seizing control over the Golgoth Guard close in to the door that he came from and use the mechanism on the right side to open them.

After returning to your Dracula form, clear out all the junk in the room (barrels, chests, etc) and go through the recently opened passage and activate the switch, to get past the next blockade. Another stealth fragment awaits you and you will be given a new skill - Bat Swarm.
Use the newly acquired ability on a patrolling guard - it will stun him for a few seconds and attract the attention of the other Golgoth Guard. When they are distracted, climb up the ladder where the "static" guard was and jump on the pipe on your left - you need proper timing, because electricity flows through the pipe every few seconds and getting hit by it will alarm the guards.
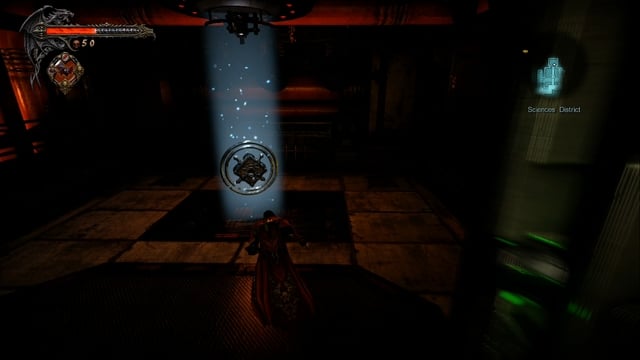
After the cutscene, climb down the ladder opposite your current position and pay attention to the guard marching below you. Wait until he exposes his back to you and jump down, to take control over him. Afterwards, open the metal door (he was patrolling near them) and activate the Pain Box to collect a Life Gem. Get out of the small room and climb up the ladder to get back to the place from where you jumped a second ago.
Go through the metal footbridge in the direction of the marker on the map and ignore two collectibles near you, because you won't be able to collect them at this moment - you will have to return to this place later when you have unlocked necessary skills. Now a short cutscene will commence and you will change the scenery.

After regaining control over your character, collect the Soldier Diary from a fallen soldier on your right. The corridor behind you is inaccessible to you at the moment - again, you lack the necessary skill to go there. Turn back, pass the soldier's corpse and continue onward until you get to a statue with a glowing heart - you can use it to regenerate your health to full if you need it.
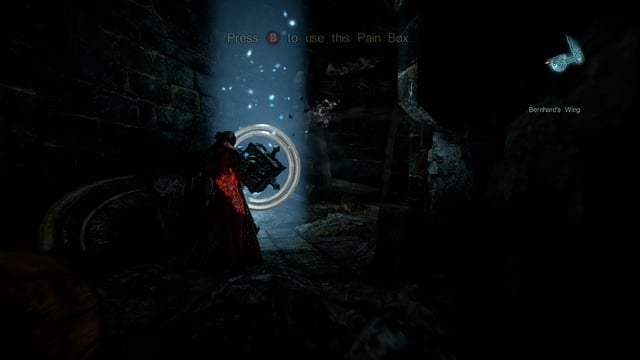
Next, climb up the remains of the stairs on your left to get to another Pain Box with a Life Gem inside. Collect the treasure and climb up using the footholds marked by the bats. An information about a button responsible for showing you the possible course of climbing should be displayed for you now - remember and use it every time as you climb something, because it can (and will) reveal a whole lot of secret passages, which you wouldn't normally notice. Soon, you should get to yet another Pain Box, also containing a Life Gem.
After collecting both Gems, jump down and go on the stairs to the left of the healing statue and climb the wall there. After a short cutscene go in the only possible direction - ahead - until you get to a lever which controls the gate to the next area. The mechanism is jammed - you will have to use your Shadow Daggers to get rid of blood blocking it.

After entering a spacious room with chandeliers hanging under the roof, jump down and collect another Life Gem from a Pain Box. Afterwards, get back to the place you just jumped from (a foothold leading upwards is located below the tunnel you came from) and jump on the first chandelier. To get to the next one, you have to give the momentum to the one you are standing on - to do this you have to run from one end to the other (if you want to go forward you have to move back and forth) and jump at the right moment. After getting to the second chandelier, don't jump on the next in front of you - instead, turn around to your right. Right in front of you should see a second Pain Box - use the chandelier in front of you to get to the treasure. After collecting a Life Gem, get back to the "chandelier crossing" turn right and get to the balcony on the other side.

Follow Trevor until you get to another climbing part. Jump to the other side and run down the stairs, where you will find a Soldier Diary. Standing by the soldier's corpse, climb up and jump to the other side by using the hanging platform. There are two collectibles here - one on your current level and one hidden below you - but you lack the required skill to collect them. Go back to the place where you found your diary and go up the stairs to activate a cutscene.
After regaining control over your character, you will have to escape, because the floor is falling apart. Run ahead, jumping between footholds (remember about the button displaying the possible climbing route) until you escape from the death trap. You will retrieve your second weapon - Void Sword - and face a decently challenging boss.
Boss - Stone Golem

This boss fight, especially compared to the one with the Paladin, who you encountered earlier, is more difficult because you won't be having an unlimited supply of Void and Chaos Magic anymore (and you won't have Chaos Magic at all). Because of that, you will deal less damage and you won't be able to heal yourself all the time.
This fight introduces a new mechanism, called Combat Focus. With it, you can regenerate your supply of Void and Chaos Magic - when the focus bar becomes full, your attack will "drop" Blood Orbs from the enemies you strike. This Blood Orbs can be absorbed by you (by pressing a specific button) to replenish either or both of your Magic. The bar is filled by attacking enemies and is emptied whenever you are hit or you use any other skill or weapon than Shadow Whip (you can read more about it in the Tips section of this guide). You must master this mechanism as soon as possible, as being able to use your Void and Chaos Magic is crucial - without them, some foes you encounter in the future will be a pain in the ass to deal with.
The fight itself is divided into two stages - in the first, the boss doesn't have any special attacks or abilities, moves slowly and most of this attacks are very easy to block. When you empty the first bar of his health, you will have to activate a short QTE sequence, after which the fight will go into the second stage.
Here, the Golem gains an access to a considerable arsenal of moves (besides normal, melee attacks), such as:
- Attacking by using his right arm, which can extend and hit you from quite a distance - try to avoid this attack by jumping sideways.
- Freezing fist attack - to set yourself free, you will have to vigorously press the indicated button.
- Attack by an energy beam launched from the Golem's mouth.
The most important aspect of the second phase of this battle is the fact, that the boss is almost invincible - you can only attack him in the places marked by blood (mostly abdomen area), which makes aerial combat practically the only way to damage him. Jump into the air, attack a few times and jump back, to avoid getting hit, which will allow you to build your focus bar and replenish your Void Magic. Use Hit & Run tactics throughout the whole second phase, and when his life bar is almost empty, you will have to finish another QTE sequence, after which the fight will end.
After the encounter, collect the Primordial Gem from the boss' remains (the location will be marked with a large X on your map).
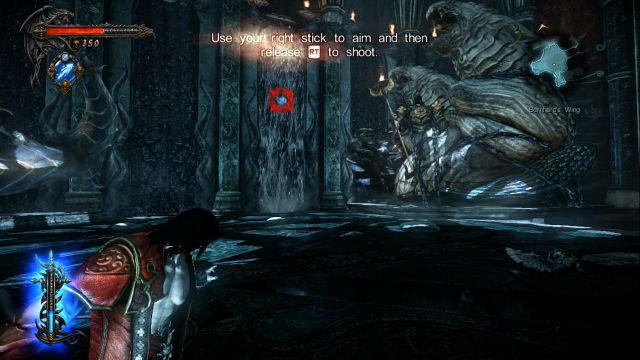
You will be awarded with another skill - Void Projections - allowing you to freeze (or slow, depending on their size) most enemies. The main application of this skill is, however, the ability to freezer waterfalls, which will allow you to climb them - this requires a small amount of Void Magic. As your Void Magic capacity is empty now, go to a small room to the south from the waterfall. You will find a Magic Font there, which allows you to replenish your Magic (both Void and Chaos) indefinitely. Refill it, feed on the statue's heart and get back to the waterfall. Follow the on-screen directions and use Void Projections to freeze it and finally climb it up.

Soon after getting to the top, look around and note the large wooden box on your right - destroy it to unlock a hidden passage. Inside you will find your first relic, and if you follow the corridor you will reach a mechanism hidden in the wall. To operate it you will need a Dungeon Key, which you don't have at the moment. Ignore it and go further into the tunnel, until you get to another climbing sequence. Get to the other side of the passage by using numerous footholds and chandeliers until you reach a Pain Box - a Void Gem is hidden inside. Collect the treasure and get all the way back, to the place where you found your relic.
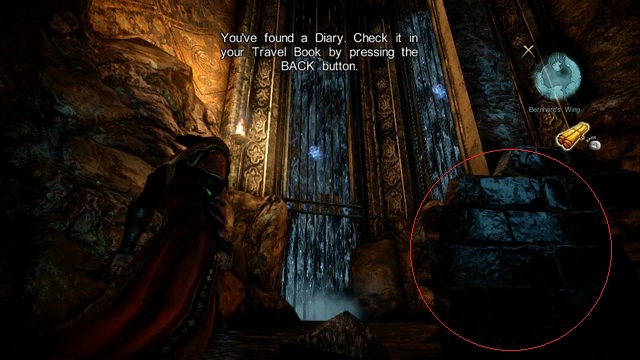
Get through a misty corridor to a room with two waterfalls. Get closer to them and collect a Soldier Diary from the corpse lying opposite the waterfalls, hidden behind a pillar. Freeze the waterfalls and climb them up, until you get to a small, round room with a destroyed wall - inside a Pain Box with a Life Gem awaits you. Collect it, jump down, and climb up the wooden scaffolding near the entrance to the misty corridor you came from.

After getting to the top, turn to the left, jump over the gap and continue along the right wall - after a while you will reach another Pain Box with a Void Gem. After collecting it return to the area you ended up after climbing the scaffolding and go to the right, towards the marker on the map, until you activate a cutscene.

You will face a group of annoying and rather dangerous enemies. Dishonored Vampires can teleport in a random place (mostly near your vicinity), are moderate when it comes to speed or power and they have one nasty, unblockable attack - after getting hit by it, a QTE sequence will initiate and you will have to mash an indicated button rapidly to set yourself free. The required button changes each few seconds and the attack itself deals high amount of damage. It is therefore crucial to avoid getting hit by it (a red flash will signal this attack) and, in case of getting grabbed, try to get out of it as fast as possible. The best tactic against this enemy is aerial combat - knock vampires in the air to prevent them from using their teleport or grab.

After this wearing encounter another cutscene will be initiated and Trevor will give you the White Wolf Medallion. With this item you can summon a wolf, activating the medallion in a designated place (something like an altar, which you should have in front of you). The wolf will then simply guide you to the other timeline - you can use this to travel between "modern" and "medieval" areas (you can read more about White Wolf Medallion in the "Additional Equipment" section of this guide).
Activate the medallion and climb the pillar to the west of altar. However, don't go forward after the wolf - instead, go to the left, jump over the gap and continue along the wall until you reach another Pain Box with a Void Gem inside. On the other side of the room you can see another collectible - but like before, you lack a necessary skill to pick it up. Follow the wolf and go into the tunnel.
After getting to the other side, jump down - you can find an altar leading back to the place you just came from (ignore it) and a Magic Font, to replenish your powers. After doing so, jump down again to initiate another cutscene and get ready for a short fight. You are back exactly in the place where Trevor "took" you from to the castle, just after the second stealth part. There's no point in going back to the place where two Golgoth Guards were (now the place is empty), because you can't pick any of collectibles present there.

The gate leading to the marker on the map is closed - you have to freeze the small waterfall to your right and climb it to get to the other side. Afterwards, pay attention to a ventilation shaft from which an air current can be seen. Freeze it, using Void Projections again and use a nearby Shadow Portal to get into your rat form - use it to get to the ventilation. Be swift, because the ice won't hold for a long time.
Get through the yellow-marked grid and go in the direction of the marker, jumping over the burning surface. After getting to the part with electricity all over the place, use the narrow passage to get to the other side safely. After getting to a crossing, go to the right, to collect experience - further part is blocked, so now you have to go back and enter the left tunnel.

After leaving the ventilation don't change your appearance yet - instead, go through the next grid (the entrance is highlighted in yellow, as always). At the end of the tunnel you will find a cable - you have to bite it. There's a bouncing cable in your way - go past it when it's not moving (wait for a bit to understand its patterns) and is harmless and bite the cable. It will lure out a technician, who will come to fix the problem with the power. Leave the tunnel now, get to your Dracula form and use the Bat Swarm ability on the Golgoth Guard to distract him - after doing so, possess the technician, open the gate by using the switch on the other side of the corridor and move through the passage.
After getting to the other side, a short cutscene will initiate and you will face a new enemy - Possessed Citizen. They are basically cannon fodder - they aren't especially fast, strong or agile and they lack any distinct attacks. Get rid of them and prepare for another boss fight.
Boss - Raisa Volkova
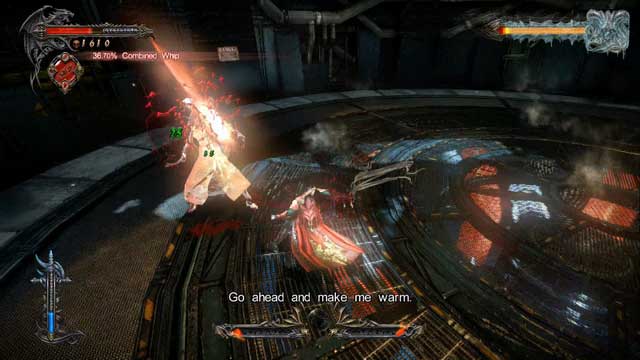
At the beginning of the fight, you will have to use Void Projections to slow Raisa down, because she moves way too fast for you to be able to do anything. When she finally stops flying like a mad(wo)man, the encounter will become fairly easy.
Besides standard attacks, which you can easily block, Raisa uses:
- Few variants of attacks using the electricity - she will inform you about her intention of using one of them by saying "Let's make this more exciting!", after which she will jump into the middle of the arena to attack. The best method of defense is simply mobility - be in motion all the time and don't stand on top of balls of electricity appearing in random places, because after a few seconds they will explode, dealing damage.
- A grab - from time to time Raisa will try to pull you to herself. If she manages to hit you with this attack, you will just have to press a button at the right moment to set yourself free from her grip.
- Impossible to block melee attack - when you will be attacking her in melee range, she will use one of her unblockable attacks, which you must dodge. They are indicated by a red flash, so you shouldn't have any trouble to get away in time.
Every now and then Raisa will call some backup in the form of foes you recently fought against - it's an ideal moment for you to refill your supply of Void Magic and/or heal yourself, if you are wounded. There's a possibility that Raisa will start doing her charge attack again (the same as she done at the beginning of the encounter) - you have to freeze her again with your Void Projections. After a short while the fight should be over. A series of cutscenes will now commence - after regaining control, go towards the tall door to initiate another cutscene with Trevor and get transported to the castle again.
- Castlevania: Lords of Shadow 2 Game Guide & Walkthrough
- Castlevania Lords of Shadow 2: Game Guide
- Castlevania Lords of Shadow 2: The Main Campaign - walkthrough
- Castlevania Lords of Shadow 2: Prologue - Castle Siege
- Castlevania Lords of Shadow 2: Mission 1 - Bioquimek Corporation
- Castlevania Lords of Shadow 2: Mission 2 - The Three Gorgons
- Castlevania Lords of Shadow 2: Mission 3 - The Antidote
- Mission 4 - Next Stop: Castlevania
- Castlevania Lords of Shadow 2: Mission 5 - The Blood Curse
- Castlevania Lords of Shadow 2: Mission 6 - The Antidote II
- Castlevania Lords of Shadow 2: Mission 7 - Pieces of a Mirror
- Castlevania Lords of Shadow 2: Mission 8 - The Hooded Man
- Castlevania Lords of Shadow 2: Mission 9 - The Second Acolyte
- Castlevania Lords of Shadow 2: Mission 10 - The Mirror of Fate
- Castlevania Lords of Shadow 2: Mission 11 - Revelations
- Castlevania Lords of Shadow 2: The Main Campaign - walkthrough
- Castlevania Lords of Shadow 2: Game Guide
You are not permitted to copy any image, text or info from this page. This site is not associated with and/or endorsed by the developers and the publishers. All logos and images are copyrighted by their respective owners.
Copyright © 2000 - 2026 Webedia Polska SA for gamepressure.com, unofficial game guides, walkthroughs, secrets, game tips, maps & strategies for top games.
