Battlefleet Gothic Armada: Chapter 4 - 12th Black Crusade
In this chapter, you will be able to enter an alliance and ultimately prevent the threat of Eldars and Orks. Also, you will fight off Chaos fleet.
- Turn 19: Lukitar - Sector Quinrox Sound
- Turn 20: Negotiations
- Turn 21: Confront the Captain
- Turn 23:Distress Signal
- Turn 24: The Trap
- Turn 24: Mark the Beast
- Turn 24: The Hunt
- Turn 26: The Planet Killer
- Turn 29: The Battle of Gethsemane
Turn 19: Lukitar - Sector Quinrox Sound
Protect space station against Chaos fleet.
Mission type: Space Station Assault
Ally: Imperial Navy
Opponent: Chaos fleet - Blackstone Fortress IV
Player's ships: Warship + Battle cruiser + Cruiser
Your main opponent in this mission is the Empire's Flying fortress. The fortress has been seized by Chaos that are trying to break into one of the Empire's systems this way. You have to stop the fortress at all costs, before it reaches the space station.
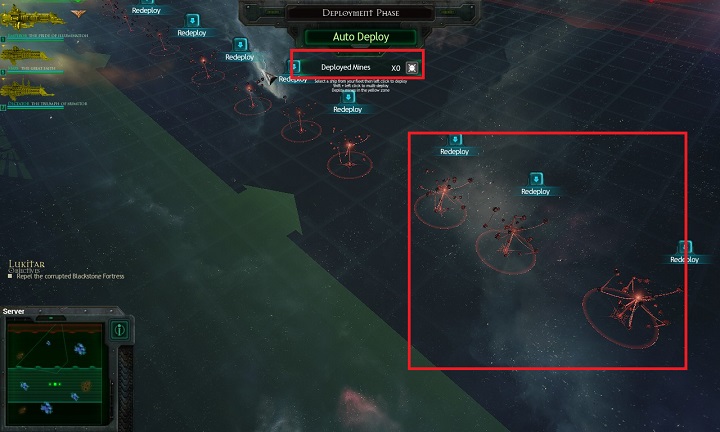
Before you deploy your units at the beginning of the mission note that another option appear, underneath the deployment button. During this mission, in a predetermined area, you will be able to deploy mines that can be helpful in withholding the enemy. Deploy the mines along the entire field, as close to each other as possible. They do not stop enemy units and they will go past the mines easily, but they can be helpful for depleting shields of the enemy units.
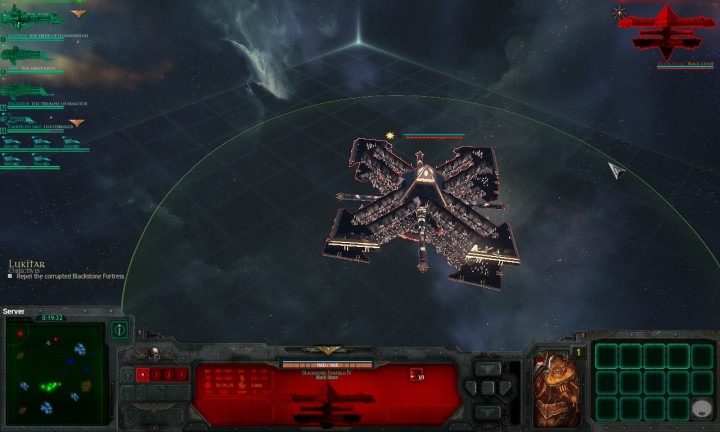
The fortress appears at the very beginning of the mission and it will slowly progress towards the space station. It is very slow, which is why you have relatively much time to eliminate it before it reaches its target. Allied units will be of much help because they will be distracting smaller units. Thanks to this, you can turn to the main threat.
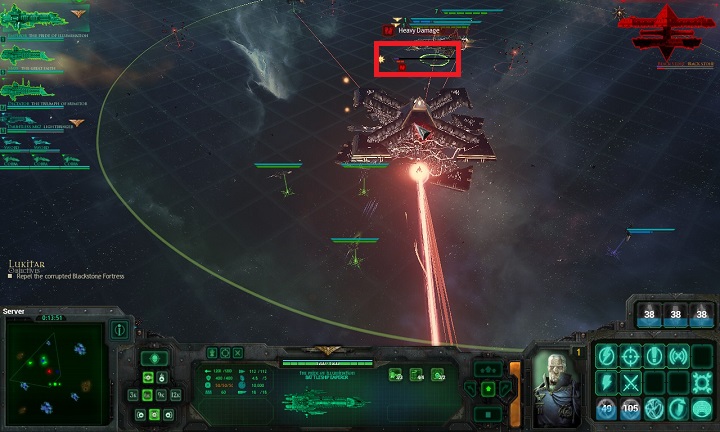
In spite of its spectacular size and it firepower, the fortress is not too much of a challenge for the allied forces. Remember to cast bombs before it. It should be noted that the fortress keeps moving along straight line for the whole time, towards the space station, starting with the location in which it appears for the first time. There is no way for the fortress to steer around the mines, which should make things easier. Try to fight over medium distance and let the allied units take the majority of damage. After it has been stopped, the fortress will leave the battlefield with a warp jump.
Key skills:
Icon | Name and description |
| Disruption Bomb A long range weapon. At the moment of the blast, it removes shields of all targets within range. |
| Plasma Bomb A long range weapon. At the moment of explosion, it deals 100 points of damage, to unit within range, while ignoring enemy shields. The explosion destroys enemy bombs within range. |
| Stasis Bomb A long range weapon. At the moment of explosion, all units within range will be slowed down. |
| Lock On! Increases effectiveness of attack by 20% and increases chances of critical hit by 100%. Duration: 45 seconds Cooldown: 120 seconds Affiliation: Deck |
| Boarding Assault It can be used only within the range of 90° on each side of the ship. The squad can deal critical damage aboard the ship which depends on the value of the ship. Number of boarding actions during each mission depends on ship's tonnage. Range: 2,500 units Cooldown: 90 seconds Number of actions: depends on ship's tonnage Affiliation: Hull |
Turn 20: Negotiations
You can start this mission only if you express your consent to the alliance between the Empire and Eldars.
Help Eldars destroy the Ork fleet.
Mission type: Cruiser Clash
Ally: Eldar fleet
Opponent: Ork fleet
Player's ships: Heaviest assortment possible
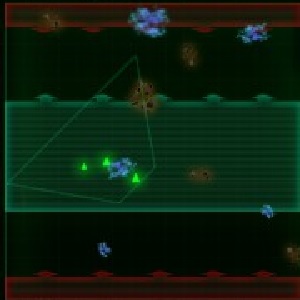
Note the deployment of units of the individual factions in the battlefield. Along with allied forces, you will be fighting on two fronts at the same time. It is best to thrust forward, full speed, at the beginning of the mission, in the same direction as your allies. Focusing all firepower will allow you to destroy the ships before the attack on the other front takes place.
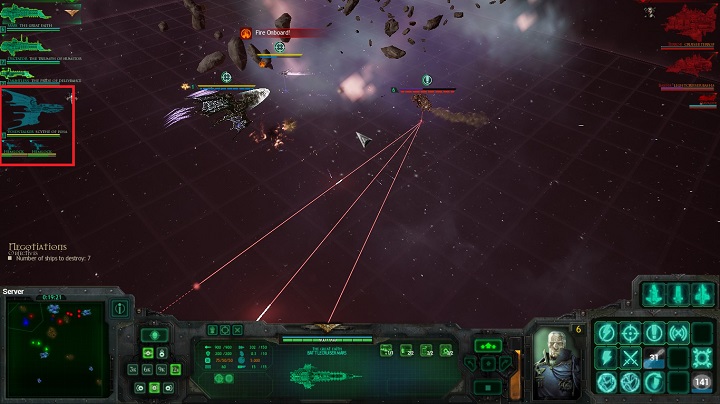
The above screenshot presents deployment of the allied units. Eldars provided a small number of ships and their units are especially vulnerable to Ork attacks. Try to reinforce them in battle, to the extent possible, because the ships will be weakened to the point, at which you will be al alone in the battlefield, after a short time. You should be able to do well using big ships. Remember to use boarding actions and special units.
Key skills:
Icon | Name and description |
| Stasis Bomb A long range weapon. At the moment of explosion, all units within range will be slowed down. |
| Lock On! Increases effectiveness of attack by 20% and increases chances of critical hit by 100%. Duration: 45 seconds Cooldown: 120 seconds Affiliation: Deck |
| Boarding Assault It can be used only within the range of 90° on each side of the ship. The squad can deal critical damage aboard the ship which depends on the value of the ship. Number of boarding actions during each mission depends on ship's tonnage. Range: 2,500 units Cooldown: 90 seconds Number of actions: depends on ship's tonnage Affiliation: Hull |
Turn 21: Confront the Captain
You can start this mission only if you express your consent to the alliance between the Empire and Eldars.
Determine loyalties of one of the Imperial soldiers and destroy him, if necessary.
Mission type: Assassination
Ally: Eldar fleet
Opponent: The Empire
Player's ships: Heaviest assortment possible
During this mission, you will have to travel to the neighboring system with Eldars. This is where the potential traitor has been detected. Eldar ships will participate in the battle.
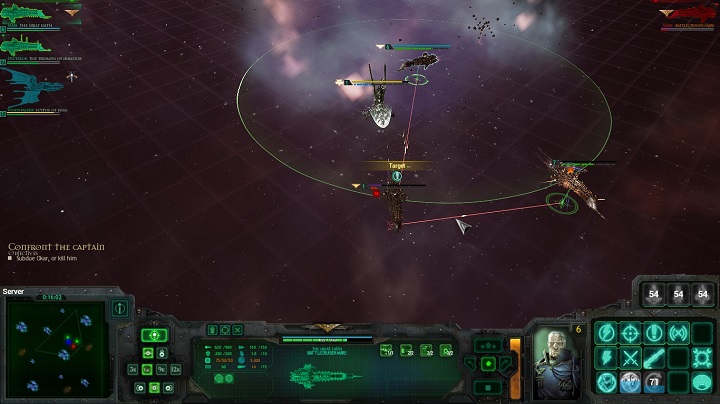
Take a look at the above screenshot. The traitor's position has been marked. The objective of the mission is to destroy rebel ships, so pick the heaviest assortment of ships possible. The traitor's ship is a battle cruiser, so if you pick support ships for this mission, they can be quickly destroyed. Heavy, upgraded units will ensure you with victory.
Key skills:
Icon | Name and description |
| Lightning Strike Teleports elite squad onto the board of the enemy ship. The squad can deal critical damage, while aboard the ship, depending on the ship's value. You cannot use this skill against a ship with shields on. Range: 5,000 units Cooldown: 90 seconds Affiliation: Generator |
| Boarding Assault It can be used only within the range of 90° on each side of the ship. The squad can deal critical damage aboard the ship which depends on the value of the ship. Number of boarding actions during each mission depends on ship's tonnage. Range: 2,500 units Cooldown: 90 seconds Number of actions: depends on ship's tonnage Affiliation: Hull |
| Lock On! Increases effectiveness of attack by 20% and increases chances of critical hit by 100%. Duration: 45 seconds Cooldown: 120 seconds Affiliation: Deck |
Turn 23:Distress Signal
You can start this mission only if you express your consent to the alliance between the Empire and Eldars.
Help defend the Eldar portal from the destroyer.
Mission type: Cruiser Clash
Ally: Eldar fleet
Opponent: Chaos fleet
Player's ships: Heaviest assortment possible
This mission is a mixture of ship battle and planet defense. On one hand, you gave to destroy as many enemy units as possible, and you cannot let the key enemy ship reach specific positions, on the other.
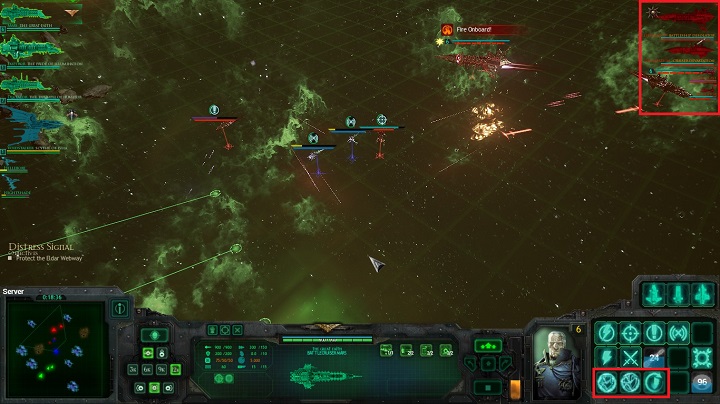
Note the situation presented in the above screenshot. Chaos fleet sends mainly heavy units to battle. Therefore, some time will pass before the allied forces will be able to destroy them. Surround enemy ships and do not cease fire up until the main ship comes up.
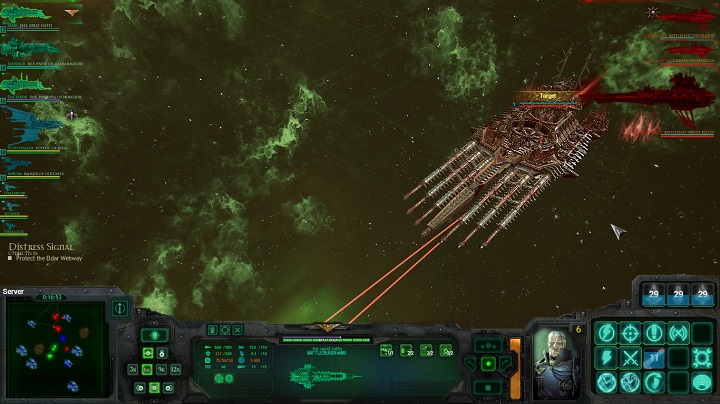
It is best that you focus your entire firepower on the enemy destroyer as soon as it appears. Your objective is to defend positions or to destroy the ship, before it reaches the point from which it can destroy the Eldar portal. Allied forces should soon be able to destroy the rest of the Chaos ships and join you. Use the entire artillery at your disposal, deploy bombs and do not stop exchanging fire. The opponent has high integrity, but it moves very slowly, so you should be able to stop it without major problems. Additionally, the ship does not use its main weapon in this mission.
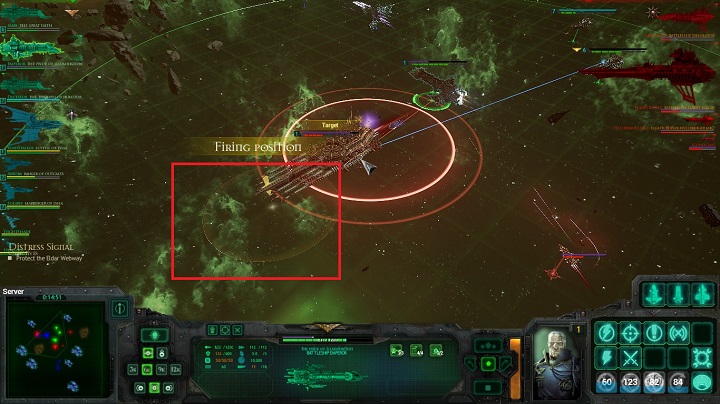
After you reach the marked area, the ship will start to load its main weapon. Do not allow this to happen. Deploy bombs in its way to decrease integrity and to stop it. The unit is so big and so heavy that it will not even try to steer around them.

After it receives critical damage, the unit will leave the battlefield. You will not be able to stop it, in any way, so cease fire as soon as the dialogue window pops up. Note that after you have dealt sufficiently high damage, the field marking the firing position disappeared. The victory is yours.
After the end of the battle, you will see a cutscene of the event of entering alliance between the Empire and Eldars. From now on, marker of threat posed by Eldars disappears completely, and so do side missions against them.
Key skills:
Icon | Name and description |
| Disruption Bomb A long range weapon. At the moment of the blast, it removes shields of all targets within range. |
| Plasma Bomb A long range weapon. At the moment of explosion, it deals 100 points of damage, to unit within range, while ignoring enemy shields. The explosion destroys enemy bombs within range. |
| Stasis Bomb A long range weapon. At the moment of explosion, all units within range will be slowed down. |
| Lock On! Increases effectiveness of attack by 20% and increases chances of critical hit by 100%. Duration: 45 seconds Cooldown: 120 seconds Affiliation: Deck |
| Boarding Assault It can be used only within the range of 90° on each side of the ship. The squad can deal critical damage aboard the ship which depends on the value of the ship. Number of boarding actions during each mission depends on ship's tonnage. Range: 2,500 units Cooldown: 90 seconds Number of actions: depends on ship's tonnage Affiliation: Hull |
Turn 24: The Trap
This mission resembles a side mission, but its marking will prevent you from missing it.
Retrieve data on the location of the main ship of the Ork fleet.
Mission type: Data Recovery
Opponent: Ork fleet
Player's ships: Heaviest assortment possible
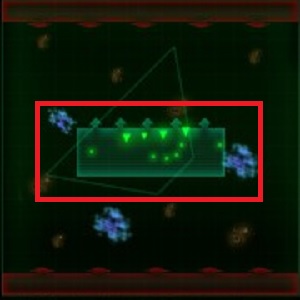
Note deployment of your fleet. You start the mission already surrounded by the enemy units. The aim of your position is to lure specific enemy ship, from which to steal data and escape.
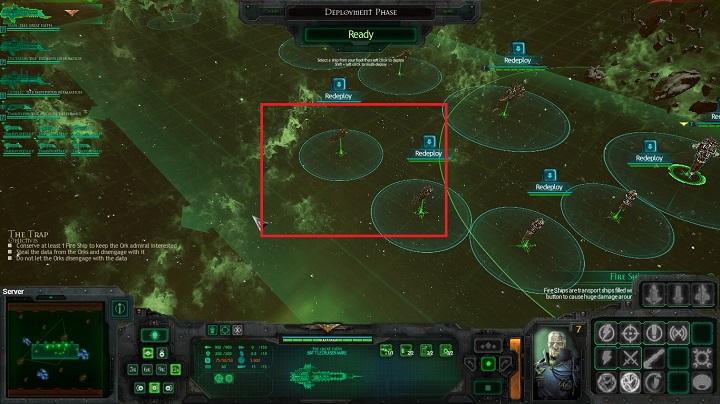
The important element here is the presence of the bait ships in your fleet. Orks would not risk losing important data but they will gladly seize an Imperial transport. It should be noted that cargo ships are filled with explosives that you an detonate after you get close to the enemy ship. To maintain Ork interest in the ship, you have to keep one ship active, up until moment that you steal the data. Losing bait ships result in the Ork ship's escape from the battlefield and you will fail the mission.
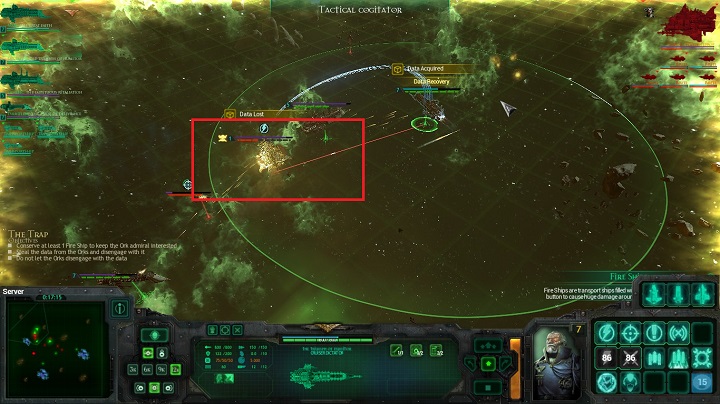
Scatter baits all around the map and see the Ork ship pursuit them. At the same time, they leave the flagship alone, which makes it an easier target. Steal the data that you will require time before warp jump is ready to use. If you steal the data too soon, the enemy will be able to retrieve it from you before the jump becomes available. Keep two line ships next to each other, to be able to recover the data if you lose it.
Key skills:
Icon | Name and description |
| Lightning Strike Teleports elite squad onto the board of the enemy ship. The squad can deal critical damage, while aboard the ship, depending on the ship's value. You cannot use this skill against a ship with shields on. Range: 5,000 units Cooldown: 90 seconds Affiliation: Generator |
| Boarding Assault It can be used only within the range of 90° on each side of the ship. The squad can deal critical damage aboard the ship which depends on the value of the ship. Number of boarding actions during each mission depends on ship's tonnage. Range: 2,500 units Cooldown: 90 seconds Number of actions: depends on ship's tonnage Affiliation: Hull |
| Lock On! Increases effectiveness of attack by 20% and increases chances of critical hit by 100%. Duration: 45 seconds Cooldown: 120 seconds Affiliation: Deck |
Turn 24: Mark the Beast
This mission resembles a side mission, but its marking will prevent you from missing it.
Plant a transmitter on the Ork ship and let it flee.
Mission type: Data Recovery
Opponent: Ork fleet
Player's ships: Heaviest assortment possible
This mission resembles the previous one, but it is much easier when it comes to management and tactics.
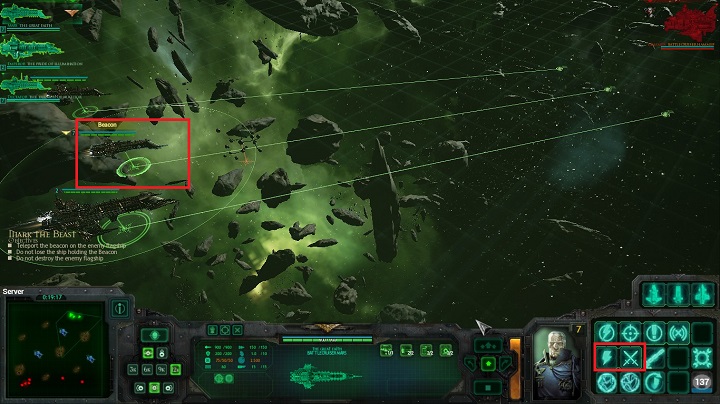
The transmitter will be placed on one of your ships. You cannot let the ship with the transmitter be destroyed. Your objective is to plant the transmitter aboard the enemy unit and let it flee from the battlefield.
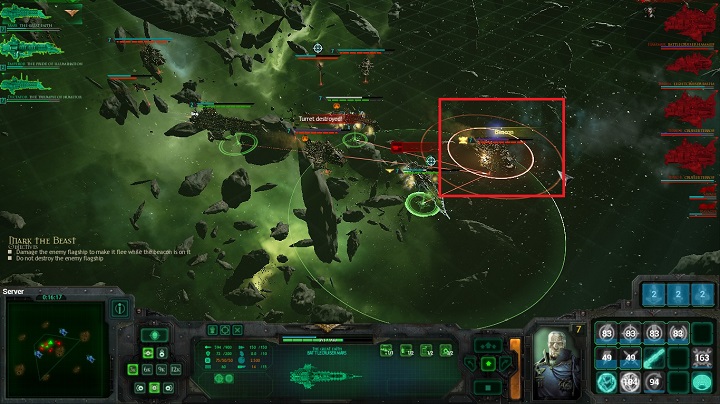
First of all, you have to destroy shield resources. You an do this by deploying bombs, or by conducting fire using conventional weapons. As soon as the shield gauge goes violet, command the ship with the transmitter to the enemy ship and use boarding action to plant it there. Now, all you have to do is make the enemy ship flee.
You will be surrounded by the overwhelming enemy forces, but you should not bother about them too much. Focus all your fire on the key ship and keep destroying it, up until the moment it wants to flee. Remember to select all of your units then and issue an order to transfer fire over to another ship. You must not destroy the ship.
You complete the mission as soon as the enemy ship leaves the battlefield.
Key skills:
Icon | Name and description |
| Lightning Strike Teleports elite squad onto the board of the enemy ship. The squad can deal critical damage, while aboard the ship, depending on the ship's value. You cannot use this skill against a ship with shields on. Range: 5,000 units Cooldown: 90 seconds Affiliation: Generator |
| Boarding Assault It can be used only within the range of 90° on each side of the ship. The squad can deal critical damage aboard the ship which depends on the value of the ship. Number of boarding actions during each mission depends on ship's tonnage. Range: 2,500 units Cooldown: 90 seconds Number of actions: depends on ship's tonnage Affiliation: Hull |
| Disruption Bomb A long range weapon. At the moment of the blast, it removes shields of all targets within range. |
Turn 24: The Hunt
This mission resembles a side mission, but its marking will prevent you from missing it.
Destroy the main ship of the Ork fleet.
Mission type: Cruiser Clash
Opponent: Ork fleet
Ally: Imperial Navy
Player's ships: Heaviest assortment possible
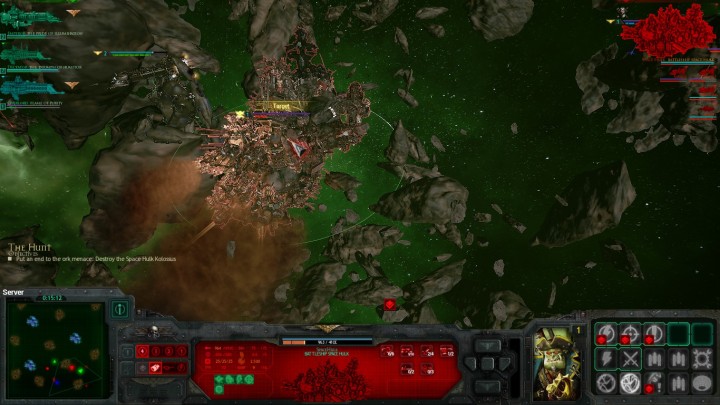
The above screenshot presents your objective. You have to destroy the flying fortress.
You can use all of your bombs, full artillery fire, torpedoes and conventional weapons to achieve that. Select the heaviest units with best equipment for this mission. The enemy ship's firepower is overwhelming and many of your, and the ally's, ships will be destroyed in the course. Remember that you should not approach to the collision distance, no matter what. The unit is large and it will try to ram into you. Continue conducting fire and pay no attention to the ships you lose. After it receives critical damage, the ship will be destroyed.
Key skills:
Icon | Name and description |
| Lightning Strike Teleports elite squad onto the board of the enemy ship. The squad can deal critical damage, while aboard the ship, depending on the ship's value. You cannot use this skill against a ship with shields on. Range: 5,000 units Cooldown: 90 seconds Affiliation: Generator |
| Boarding Assault It can be used only within the range of 90° on each side of the ship. The squad can deal critical damage aboard the ship which depends on the value of the ship. Number of boarding actions during each mission depends on ship's tonnage. Range: 2,500 units Cooldown: 90 seconds Number of actions: depends on ship's tonnage Affiliation: Hull |
| Disruption Bomb A long range weapon. At the moment of the blast, it removes shields of all targets within range. |
| Stasis Bomb A long range weapon. At the moment of explosion, all units within range will be slowed down. |
| Lock On! Increases effectiveness of attack by 20% and increases chances of critical hit by 100%. Duration: 45 seconds Cooldown: 120 seconds Affiliation: Deck |
| Plasma Bomb A long range weapon. At the moment of explosion, it deals 100 points of damage, to unit within range, while ignoring enemy shields. The explosion destroys enemy bombs within range. |
| Emergency Repairs Ship's integrity gauge will regenerate by 2 pts per second, for 45 seconds. All fires on the ship are automatically extinguished. Range: On self Duration: 45 seconds Repairs: 2 pts per second Cooldown: 180 seconds Affiliation: Hull |
If you win this battle, you will learn that the enemy fleet has been completely crushed, after the mission ends. From then on, missions connected with the Ork threat will no longer be available.
Turn 26: The Planet Killer
Destroy the main unit of the Chaos fleet.
Mission type: Assassination
Opponent: Chaos fleet
Player's ships: Heaviest assortment possible.
This mission is relatively difficult. The object of the mission has very heavy arms and it will use it. Select the best of your ships but do not hope that the majority of them will survive.
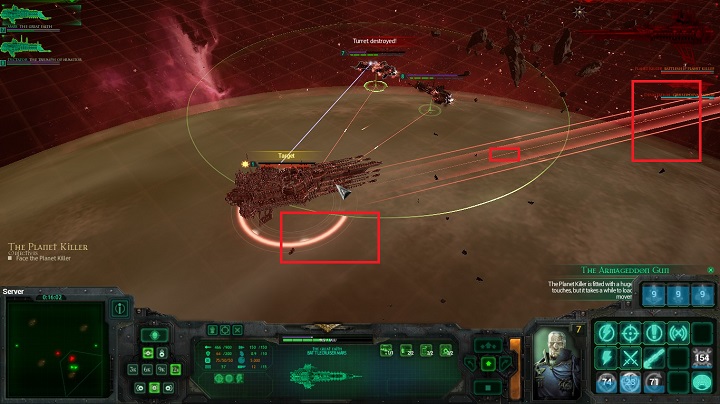
Look at the above screenshot. It provides you with information on the main aspects of using the Armageddon cannon. The ship will target your units, which is why you have to keep a close eye on its actions. The ship will discharge the cannon every several minutes, but the powerful cannons on the sides of the ship will not allow you to gain edge.
While the cannon is being used, you have to pay attention to three things. The targeted cannon leaves a marker that marks the trajectory of the energy beam. In the center of the marker, there appears a transparent field that will expand, starting with the center of the marker, to its rims. At this point, above the enemy ship, there appears a circle. When both the circle and the field are filled, the cannon is discharged.
Remember to use tactical mode as often as possible and do not abuse your combustion. The shots from the ship are accurate and loading time of the cannon is relatively short. You gave to make all of your units leave the line of fire before the weapon is fully charged. A single direct hit into your ship destroys it, regardless of whether it is a support ship or a warship.

Remember that the objective of the enemy here is to destroy your fleet. This means that he will be targeting you for the whole time, with his cannon. Be careful here and keep using the available offensive options. Remember about emergency repairs, or else you will not hold in the battlefield for too long. If you manage to avoid all of the laser shots, you will deal enough damage to make the enemy ship flee the battlefield and complete the mission.
Key skills:
Icon | Name and description |
| Lightning Strike Teleports elite squad onto the board of the enemy ship. The squad can deal critical damage, while aboard the ship, depending on the ship's value. You cannot use this skill against a ship with shields on. Range: 5,000 units Cooldown: 90 seconds Affiliation: Generator |
| Boarding Assault It can be used only within the range of 90° on each side of the ship. The squad can deal critical damage aboard the ship which depends on the value of the ship. Number of boarding actions during each mission depends on ship's tonnage. Range: 2,500 units Cooldown: 90 seconds Number of actions: depends on ship's tonnage Affiliation: Hull |
| Disruption Bomb A long range weapon. At the moment of the blast, it removes shields of all targets within range. |
| Stasis Bomb A long range weapon. At the moment of explosion, all units within range will be slowed down. |
| Lock On! Increases effectiveness of attack by 20% and increases chances of critical hit by 100%. Duration: 45 seconds Cooldown: 120 seconds Affiliation: Deck |
| Plasma Bomb A long range weapon. At the moment of explosion, it deals 100 points of damage, to unit within range, while ignoring enemy shields. The explosion destroys enemy bombs within range. |
| Emergency Repairs Ship's integrity bar will be regenerated Ship's integrity gauge will regenerate by 2 pts per second, for 45 seconds. All fires on the ship are automatically extinguished. Range: On self Duration: 45 seconds Repairs: 2 pts per second Cooldown: 180 seconds Affiliation: Hull |
Turn 29: The Battle of Gethsemane
Destroy the fleet of the Chaos fleet.
Mission type: Cruiser Clash
Ally: Imperial Navy
Opponent: Chaos fleet
Player's ships: Heaviest assortment possible.
One point should be raised, in connection with this mission. If you have not destroyed all of the detected Nemesis so far, you will have to face them all in this mission. For additional information on Nemesis, see further in this guide. The best thing to do is to load the game again and complete missions available in the previous turn.
Together with allied forces of Admiral Ravensburg, you will face the most dangerous ships of the Chaos fleet during the twelfth crusade. The ships will be deployed in two turns. After you defeat the first wave, you will have to battle with following ones. Select the heaviest units available to you to match your opponent when it comes to firepower.
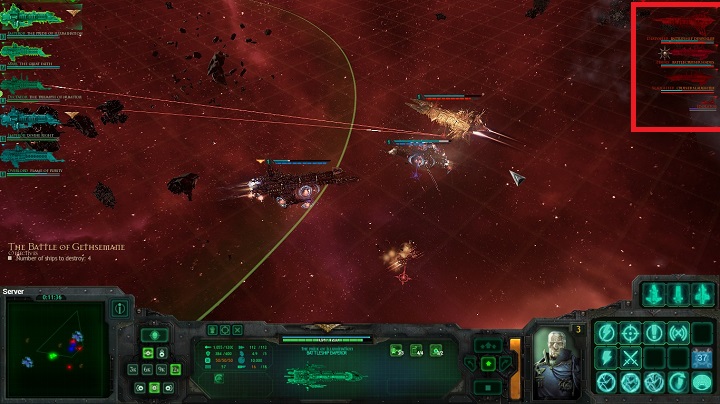
Note the deployment of the enemy units shown in the above screenshot. Chaos fleet deploys the strongest of its units, because what is at stake here is success in the crusade. Always focus on the largest of the units. Ravensburg's forces will be very helpful and they will destroy many ships, which is why it is important that you always follow flagships.
Ensure good shape of your units, because you have to defeat two waves to succeed. Also, remember to perform emergency repairs, replenish your shields and use boarding actions. Focus high damage on the strongest of units and you will emerge successful.
Key skills:
Icon | Name and description |
| Lightning Strike Teleports elite squad onto the board of the enemy ship. The squad can deal critical damage, while aboard the ship, depending on the ship's value. You cannot use this skill against a ship with shields on. Range: 5,000 units Cooldown: 90 seconds Affiliation: Generator |
| Boarding Assault It can be used only within the range of 90° on each side of the ship. The squad can deal critical damage aboard the ship which depends on the value of the ship. Number of boarding actions during each mission depends on ship's tonnage. Range: 2,500 units Cooldown: 90 seconds Number of actions: depends on ship's tonnage Affiliation: Hull |
| Disruption Bomb A long range weapon. At the moment of the blast, it removes shields of all targets within range. |
| Stasis Bomb A long range weapon. At the moment of explosion, all units within range will be slowed down. |
| Lock On! Increases effectiveness of attack by 20% and increases chances of critical hit by 100%. Duration: 45 seconds Cooldown: 120 seconds Affiliation: Deck |
| Plasma Bomb A long range weapon. At the moment of explosion, it deals 100 points of damage, to unit within range, while ignoring enemy shields. The explosion destroys enemy bombs within range. |
| Emergency Repairs Ship's integrity gauge will regenerate by 2 pts per second, for 45 seconds. All fires on the ship are automatically extinguished. Range: On self Duration: 45 seconds Repairs: 2 pts per second Cooldown: 180 seconds Affiliation: Hull |
- Battlefleet Gothic: Armada Game Guide
- Battlefleet Gothic Armada: Game Guide
- Battlefleet Gothic Armada: Campaign
- Battlefleet Gothic Armada: Basics
- Battlefleet Gothic Armada: Prologue - Omens of Darkness
- Battlefleet Gothic Armada: Chapter 1 - The Hand of Darkness
- Battlefleet Gothic Armada: Chapter 2 - The Eye of Night
- Battlefleet Gothic Armada: Chapter 3 - Surprise Attack
- Battlefleet Gothic Armada: Chapter 4 - 12th Black Crusade
- Battlefleet Gothic Armada: Chapter 5 - The Empire Resurgent
- Battlefleet Gothic Armada: Special missions
- Battlefleet Gothic Armada: Side missions
- Battlefleet Gothic Armada: Campaign
- Battlefleet Gothic Armada: Game Guide
You are not permitted to copy any image, text or info from this page. This site is not associated with and/or endorsed by the developers and the publishers. All logos and images are copyrighted by their respective owners.
Copyright © 2000 - 2026 Webedia Polska SA for gamepressure.com, unofficial game guides, walkthroughs, secrets, game tips, maps & strategies for top games.


