Battlefleet Gothic Armada: Chapter 1 - The Hand of Darkness
After the first chapter of the game starts, the game will allow more freedom to you, over the battle. Also, you are free to complete side missions provided in the storyline. Remember that you do not have to win each and every battle to complete the campaign, but it is a good idea to load the game sometimes, to replay a mission, just for the sake of avoiding consequences of your abandonment later into the game.
- Turn 4: Seize the Plans -Bhein Morr Sector
- Turn 5: Holding on to Hand - Sector Orar
- Turn 6: Resistance - Sector Orar
- Turn 7: Trouble with the Eldar - Sector Cyclops Cluster
Turn 4: Seize the Plans -Bhein Morr Sector
Recover data from the fleet of Chaos.
Mission type: Data Recovery
Opponent: Chaos fleet
Opponent's strength: 4
Class of ships: Light cruiser + 3 Support ships
Player's ships: 2 x Light cruiser + 2 x Sword Frigate
The most important thing of fleet formation, when it comes to data recovery missions, is selecting at least two units in the Light cruiser class or higher. These units can take Lightning Strike order that is key to the success of this type of missions. You can add two support ships to the heavy ships, but you are not going to need them too much for this mission.
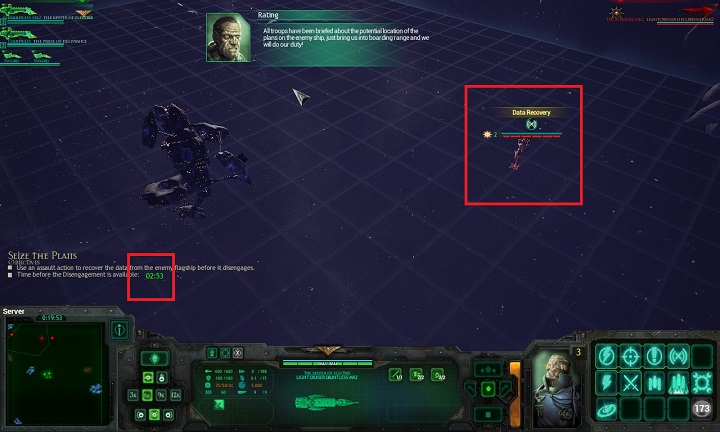
The game will make things a little bit easier for you and it reveals the position of the key ship, right after the beginning of the mission. While deploying your ships, cluster your forces in one spot. The most important issue is that your big ships do remain close to each other and to the enemy, at the same time. The above screenshot provides the ship that you have to lock on. You steal data using Lightning Strike order. Refrain from using both this order and the order to board the ship, until the enemy's attempt to escape the battlefield. The screenshot also provides you with the mission's clock. After specified time elapses, the enemy ship will attempt escaping with the data.
Approach the ship during the first minute of the mission and keep within short distance. You can ignore all of the other ships completely. They will do no harm to you. It is important to the success of the mission that you destroy enemy shields before time elapses. Keep firing, therefore.
It may prove helpful to focus your fire on generators of the enemy ship. Still, even if you deal general damage only, the mission should be no challenge to you.
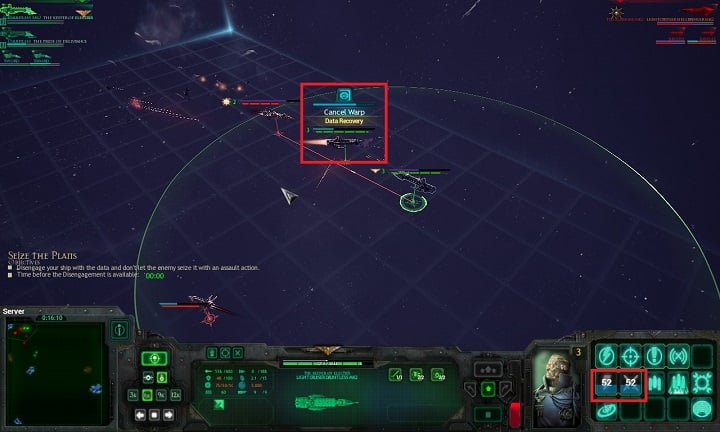
To complete the mission, you have to steal data and escape from the battlefield. Keep close to the enemy and remember that performing a boarding action also activates cooldown of Lightning Strike. At the moment, at which the enemy ship starts loading up warp jump, you have to use that skill. The ship will lose data and warp jump loading is interrupted. In such situation, you have to have another cruiser ready nearby, which you use to steal the data again and starts charging the jump. All of the orders that would allow the opponent to recover the data will be inactive, for the duration of the cooldown. Therefore, you are bound to succeed.
Key skills:
Icon | Name and description |
| Lightning Strike Teleports elite squad onto the board of the enemy ship. The squad can deal critical damage, while aboard the ship, depending on the ship's value. You cannot use this skill against a ship with shields on. Range: 5,000 units Cooldown: 90 seconds Affiliation: Generator |
| Boarding Assault It can be used only within the range of 90° on each side of the ship. The squad can deal critical damage aboard the ship which depends on the value of the ship. Number of boarding actions during each mission depends on ship's tonnage. Range: 2,500 units Cooldown: 90 seconds Number of actions: depends on ship's tonnage Affiliation: Hull |
| Warp Jump It brings the ship to a complete halt and loads the jump for 15 seconds. After the 15 seconds elapse, the ship leaves the battlefield. On cooldown at the beginning of the battle. Range: On self delay: 15 seconds Cooldown: 180 seconds Affiliation: Generator |
| Disruption Bomb - A long range weapon. At the moment of the blast, it removes shields of all targets within range. |
Turn 5: Holding on to Hand - Sector Orar
Defend space stations that prevent Chaos fleet from accessing the rest of the system.
Mission type: Breakthrough
Opponent: Chaos fleet
Opponent's strength: 2
Class of ships: 2 x Light cruiser
Player's ships: Light cruiser + 5 x Cobra Destroyer
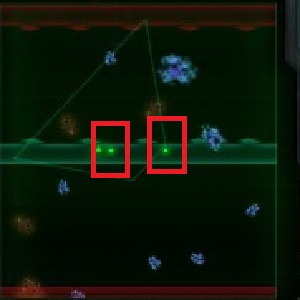
The minimap marks locations of space stations that you have to defend. Note that your fleet's deployment zone is in the center of the map, directly by the stations. It is a good idea to use one bigger ship for this mission, as well as maximum amount of small maneuverable ships that can quickly surround the opponent. Chaos ships will center their fire on the stations, therefore your fighters should take little damage. It should be pointed out that only one of the two stations has to survive, in order for the mission to be successful, but it is a much better idea to retain both, for offensive purposes.
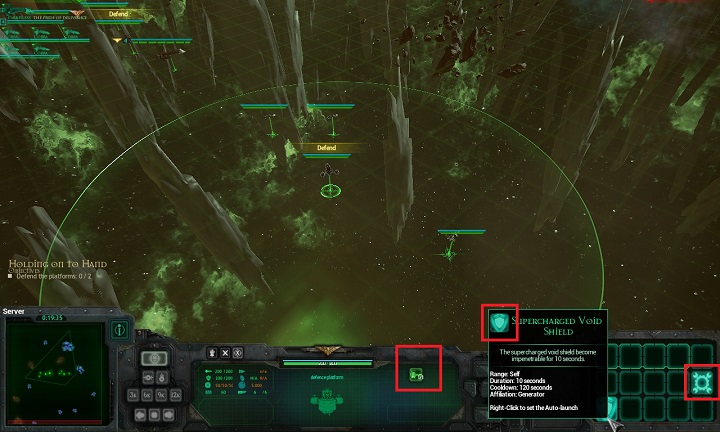
The stations have been fitted with small turrets that will not damage the bigger of the ships, but they do well against support units. Note the elements marked in the above screenshot. As a part of station maintenance, you can perform emergency repairs and use additional shields. It is especially useful when you want to perform repairs and an enemy ship is conducting fire. Duration of the shield is 10 seconds, so it should absorbs two salvos from the enemy cannons.

The best way to deal with the situation is to deploy two of your ships halfway between the two stations. Set them into automatic engagement thanks to which they start exchanging fire with the enemy as soon as possible, before they reach a station. Chaos ships will attack at a long distance, which is why you have to make sure that you respond with fire early enough.
The mission ends when you destroy the enemy ships or they escape from the battlefield. After initial engagement, try to center your forces on attacking a single target at a time, thanks to which you can limit your losses in terms of stations. Also, remember to use the tactical mode frequently and perform repairs in the stations only when integrity drops below 70% of the maximum value.
To max out on your profits, you can interrupt the escape of the enemy ship. Keep in mind that warp jump load time is shorter in the case of Chaos ships. Keep close to the enemy and you should succeed. In the worst case scenario, you will see the violet area shown in the above screenshot and you will be able to focus on the remaining units.
Key skills:
Icon | Name and description |
| Supercharged Void Shield The shield remains impenetrable for 10 seconds |
| Emergency Repairs Ship's integrity gauge will regenerate by 2 pts per second, for 45 seconds. All fires on the ship are automatically extinguished. Range: On self Duration: 45 seconds Repairs: 2 pts per second Cooldown: 180 seconds Affiliation: Hull |
| Stasis Bomb A long range weapon. The explosion slows down all units within range. |
Turn 6: Resistance - Sector Orar
Your mission is to defend cargo ships against Chaos fleet.
Mission type: Resistance
Opponent: Chaos fleet
Opponent's strength: Randomly generated
Class of ships: Ranging from Support to Cruisers
Player's ships: Cruiser + Support units
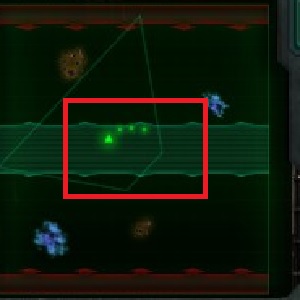
The above screenshot marks the area in which all of the operations will take place in this mission. The objective is to defend the damaged Inquisition ship. The deployment zone has been situated in the center of the map, which can be seen in the above screenshot. In this mission, enemy ships will be incoming from both sides of the map. Keep an eye on the minimap to respond with fire to the enemy actions.
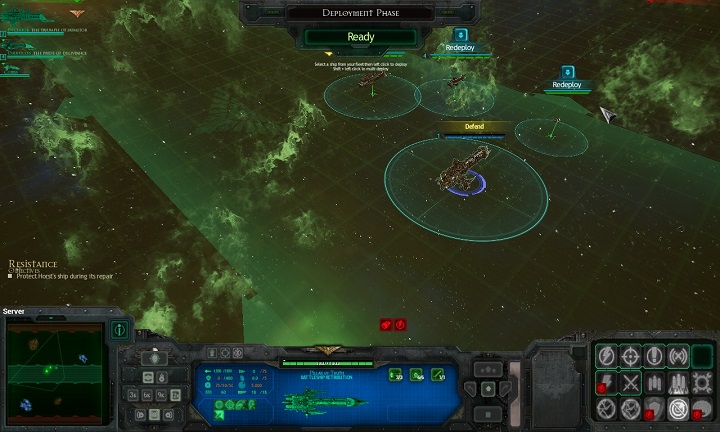
Tonnage of the enemy ships in this mission depends on the ships you pick. It is best to pick the maximum available number of support units and a light cruiser. The Inquisition ship does not move but it will conduct constant fire against the enemy units and deploy bombs. This is the heaviest class ship available in the game, so it will destroy enemy units in two shots.
Your objective here boils down to distracting the enemy and keep decreasing distance to the enemy, right after recognition. The range of the Inquisition ship is long, so it will provide you with proper support. You have to fight back two waves of the enemy ships.
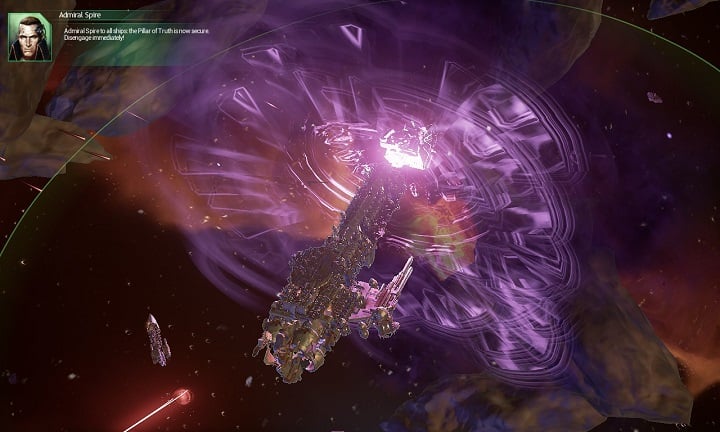
During the third wave, stake it all on one card and strike the enemy using combustion. Within a minute into the third wave the Inquisition ship leaves the battlefield. The mission ends.
Key skills:
Icon | Name and description |
| Disruption Bomb A long range weapon. At the moment of the blast, it removes shields of all targets within range. |
| Plasma Bomb A long range weapon. At the moment of explosion, it deals 100 points of damage, to unit within range, while ignoring enemy shields. The explosion destroys enemy bombs within range. |
| Stasis Bomb A long range weapon. At the moment of explosion, all units within range will be slowed down. |
Turn 7: Trouble with the Eldar - Sector Cyclops Cluster
Your objective here is to destroy an enemy ship. The ship cannot escape the battlefield. It has to explode for the mission to be completed.
Mission type: Assassination
Opponent: Eldar fleet
Opponent's strength: 3
Class of ships: Light cruiser + Support
Player's ships: 2 x Light cruiser + Support

Deploy your forces in one spot and group them. Set them into automatic engagement to ensure constant fire. In the above screenshot, the unit that the mission objective concerns, has been marked. The game makes things easier for you since the beginning of the mission, as it displays positions of the ship. Note that mission time has been limited. It is imperative that you shorten down the distance before the time elapses and destroy the engines of the enemy ship. You can completely ignore support ships.
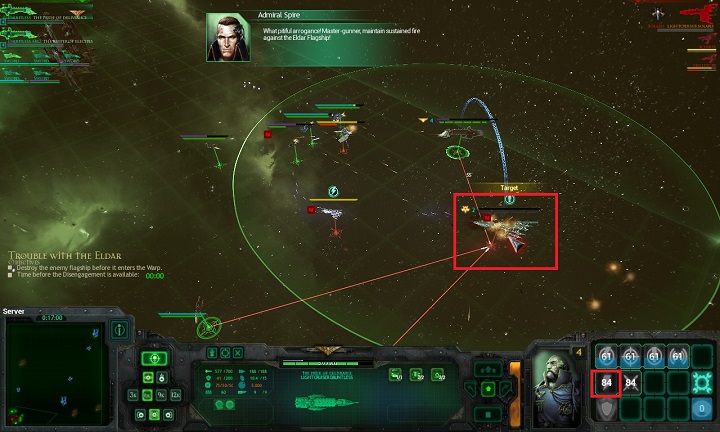
Damaging the engines will substantially limit the speed at which the ship moves. This is especially important while fighting the Eldar, because their shields rely on the speed at which the unit is moving. The immobilized ship becomes an easy target for your units. Wait for the flagship to start preparing for warp jump. You will receive message informing you of that. Enter the tactical mode at this point.
The above screenshot presents the Eldar ship shortly before the explosion. Without additional shield on, it is easy to interrupt its warp jump. Keep your ships within short distance of the ship. It does not take too long to prepare the jump, so it is better to interrupt it in the tactical mode. Keep two big ships ready, although a single use of Lightning Strike should do the job.
Key skills:
Icon | Name and description |
| Lightning Strike Teleports elite squad onto the board of the enemy ship. The squad can deal critical damage, while aboard the ship, depending on the ship's value. You cannot use this skill against a ship with shields on. Range: 5,000 units Cooldown: 90 seconds Affiliation: Generator |
| Boarding Assault It can be used only within the range of 90° on each side of the ship. The squad can deal critical damage aboard the ship which depends on the value of the ship. Number of boarding actions during each mission depends on ship's tonnage. Range: 2,500 units Cooldown: 90 seconds Number of actions: depends on ship's tonnage Affiliation: Hull |
- Battlefleet Gothic: Armada Game Guide
- Battlefleet Gothic Armada: Game Guide
- Battlefleet Gothic Armada: Campaign
- Battlefleet Gothic Armada: Basics
- Battlefleet Gothic Armada: Prologue - Omens of Darkness
- Battlefleet Gothic Armada: Chapter 1 - The Hand of Darkness
- Battlefleet Gothic Armada: Chapter 2 - The Eye of Night
- Battlefleet Gothic Armada: Chapter 3 - Surprise Attack
- Battlefleet Gothic Armada: Chapter 4 - 12th Black Crusade
- Battlefleet Gothic Armada: Chapter 5 - The Empire Resurgent
- Battlefleet Gothic Armada: Special missions
- Battlefleet Gothic Armada: Side missions
- Battlefleet Gothic Armada: Campaign
- Battlefleet Gothic Armada: Game Guide
You are not permitted to copy any image, text or info from this page. This site is not associated with and/or endorsed by the developers and the publishers. All logos and images are copyrighted by their respective owners.
Copyright © 2000 - 2026 Webedia Polska SA for gamepressure.com, unofficial game guides, walkthroughs, secrets, game tips, maps & strategies for top games.


